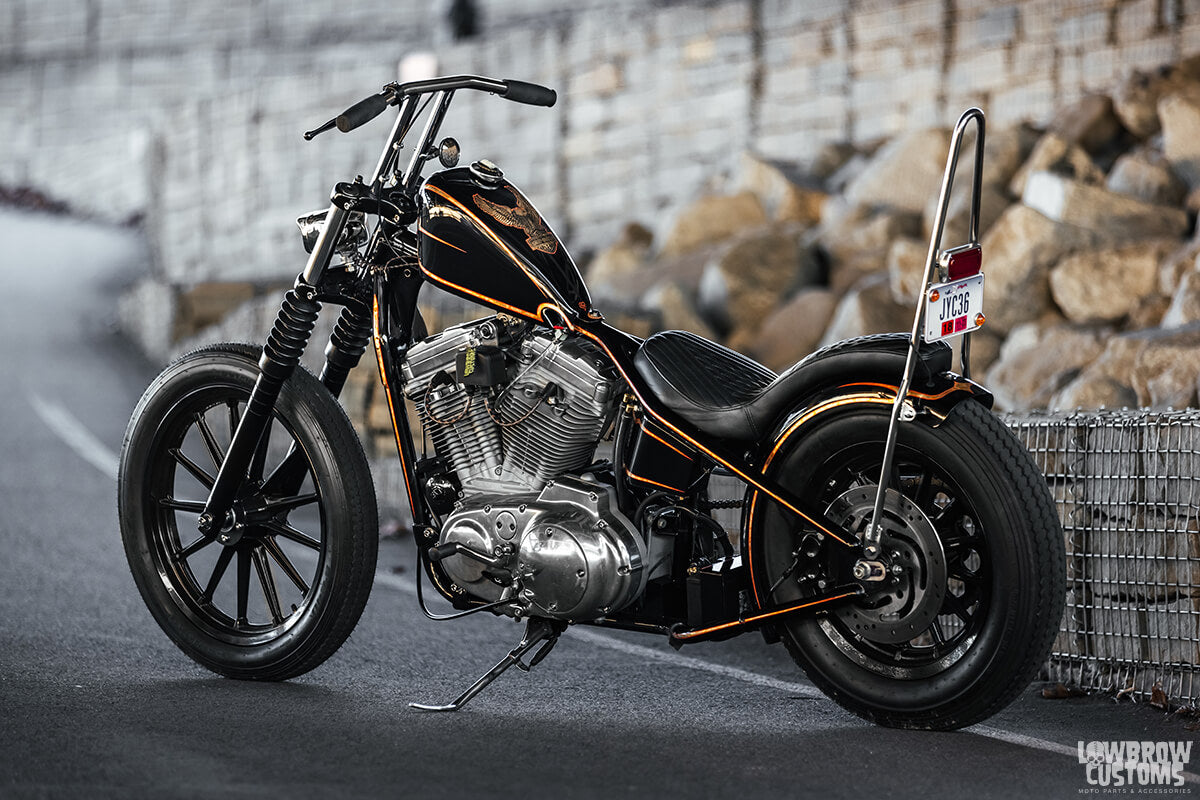
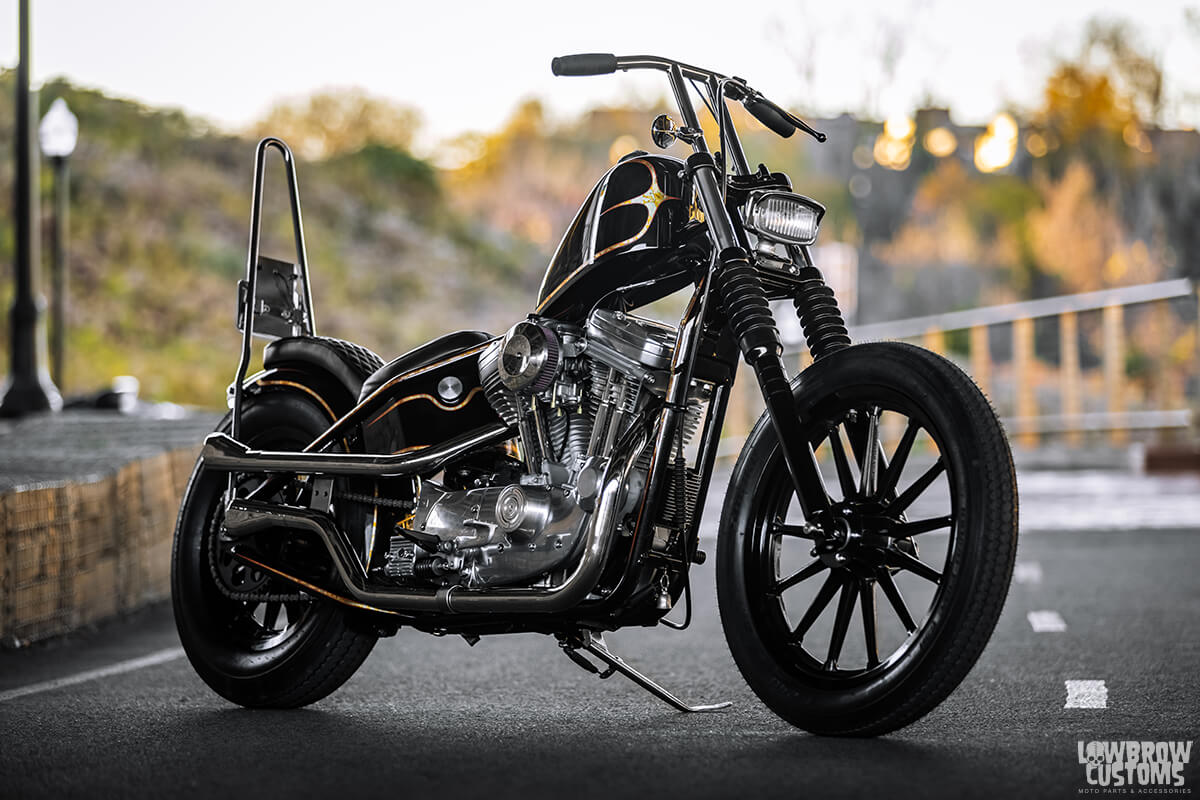
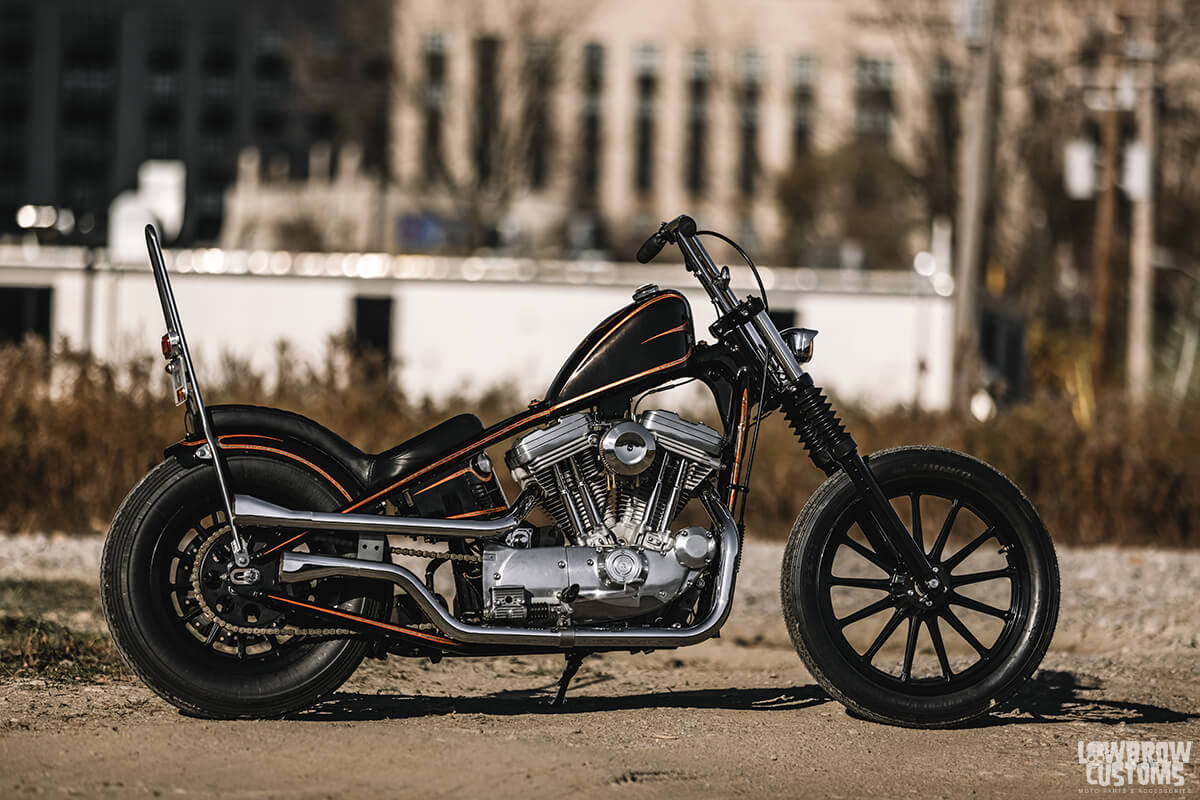
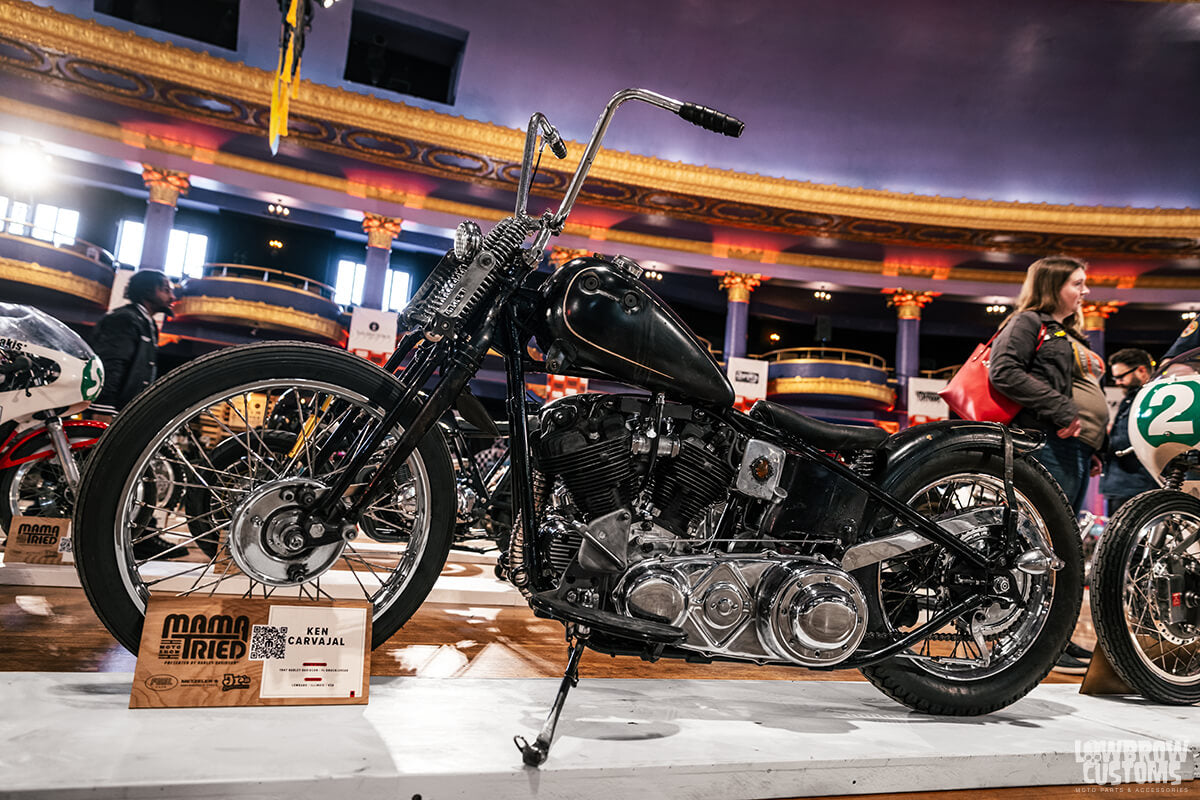
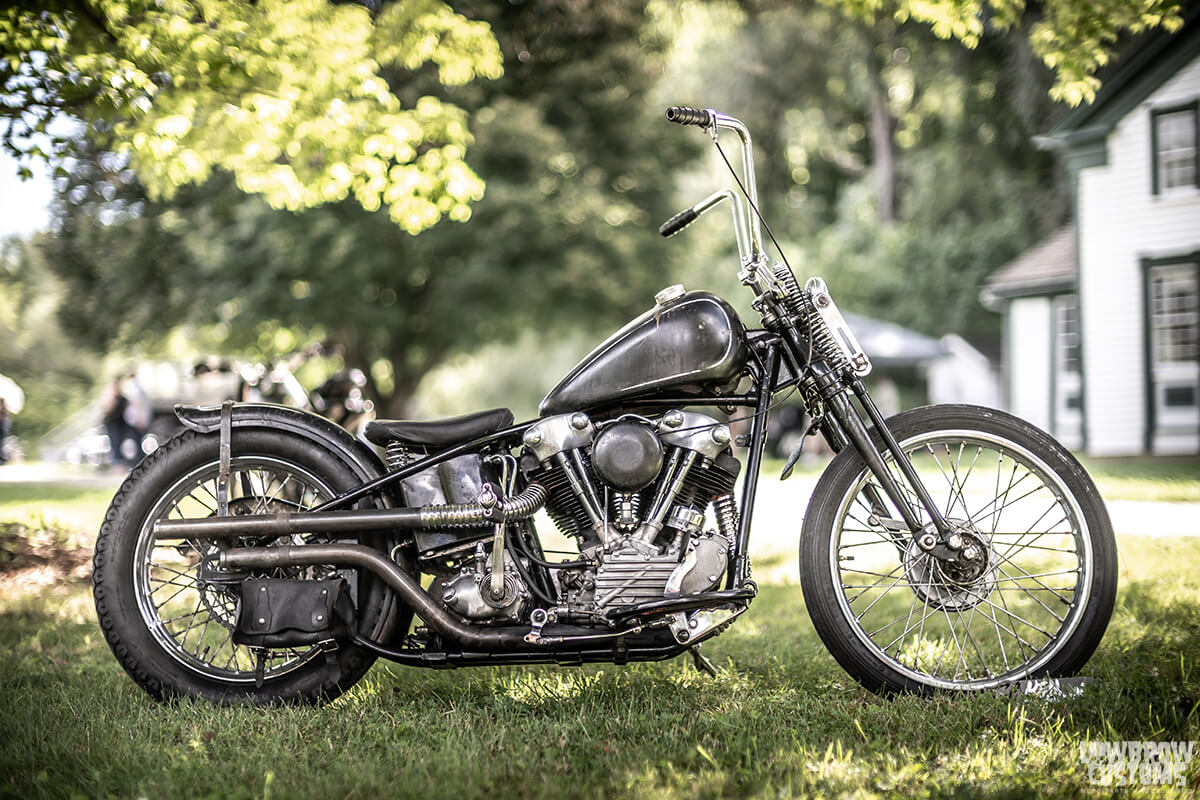
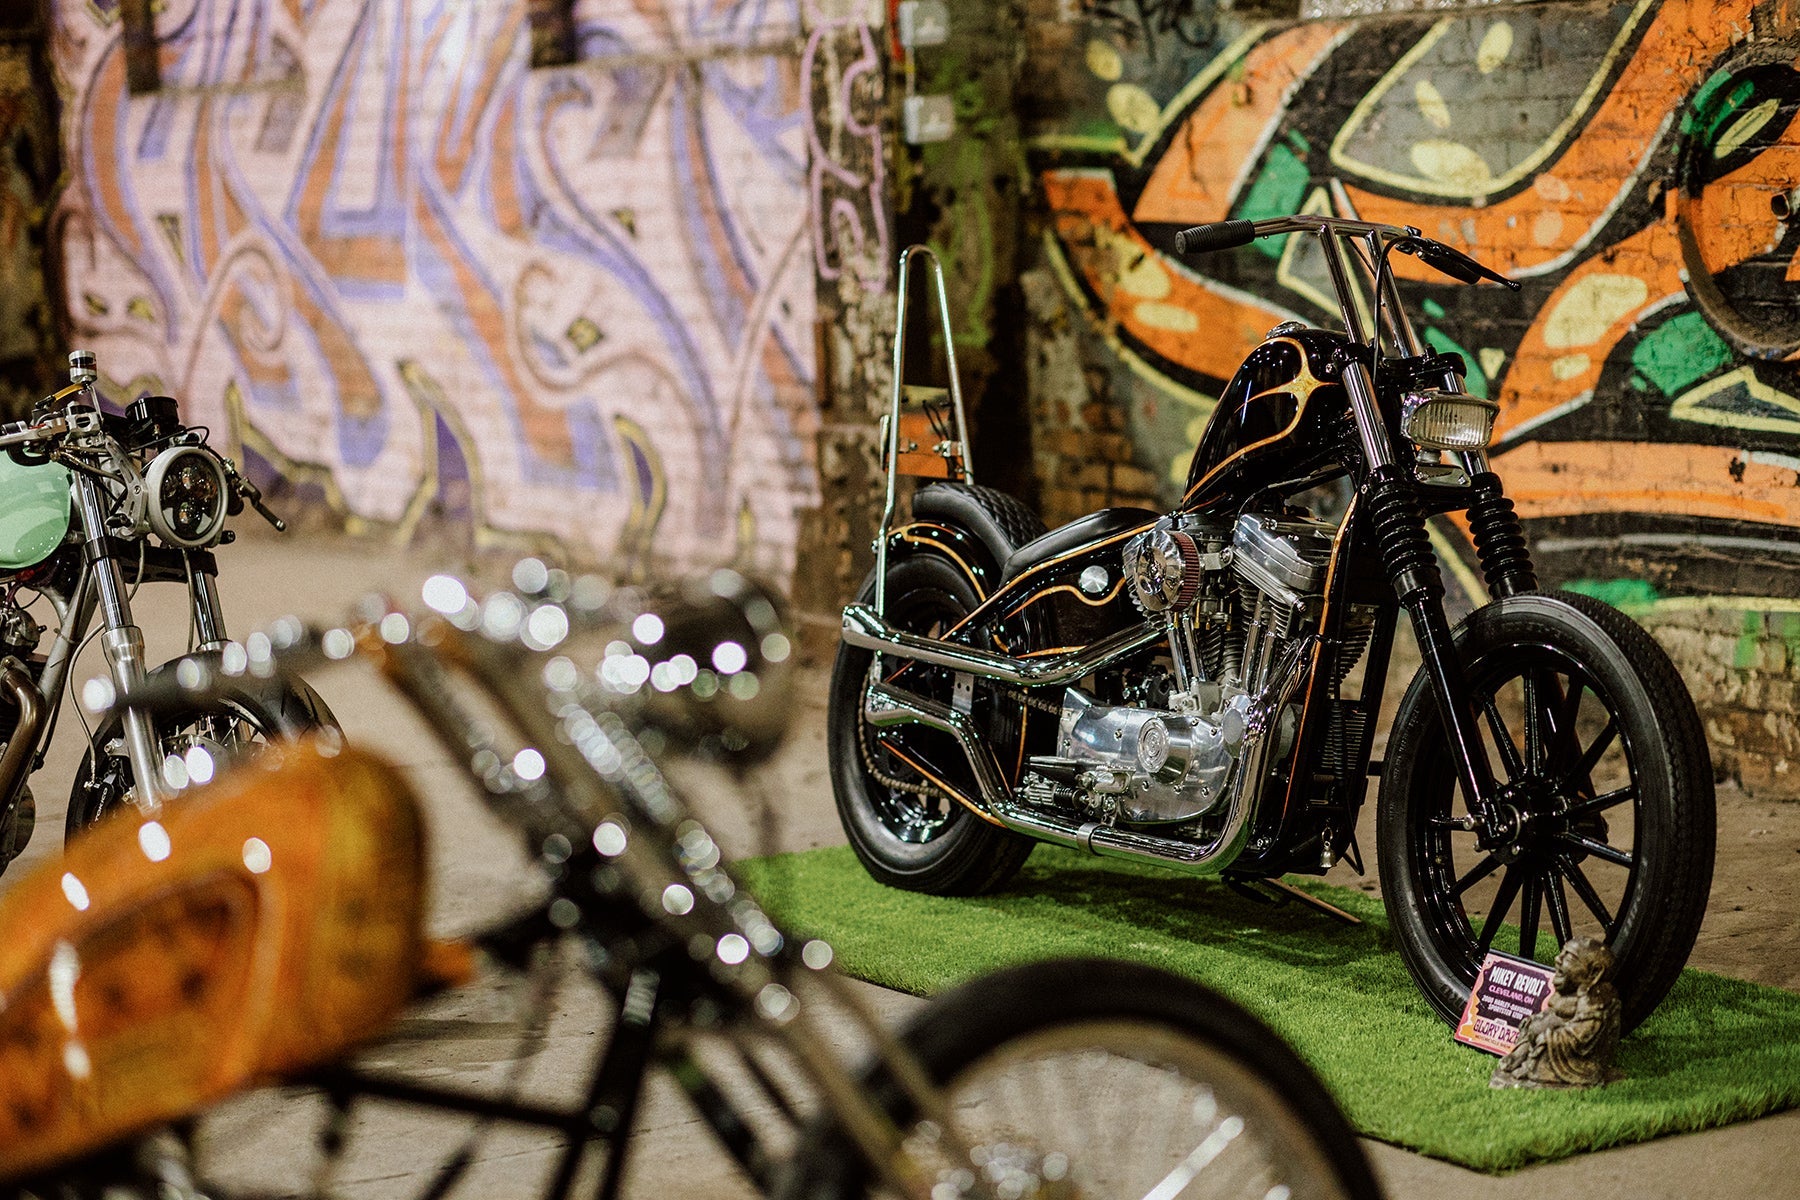
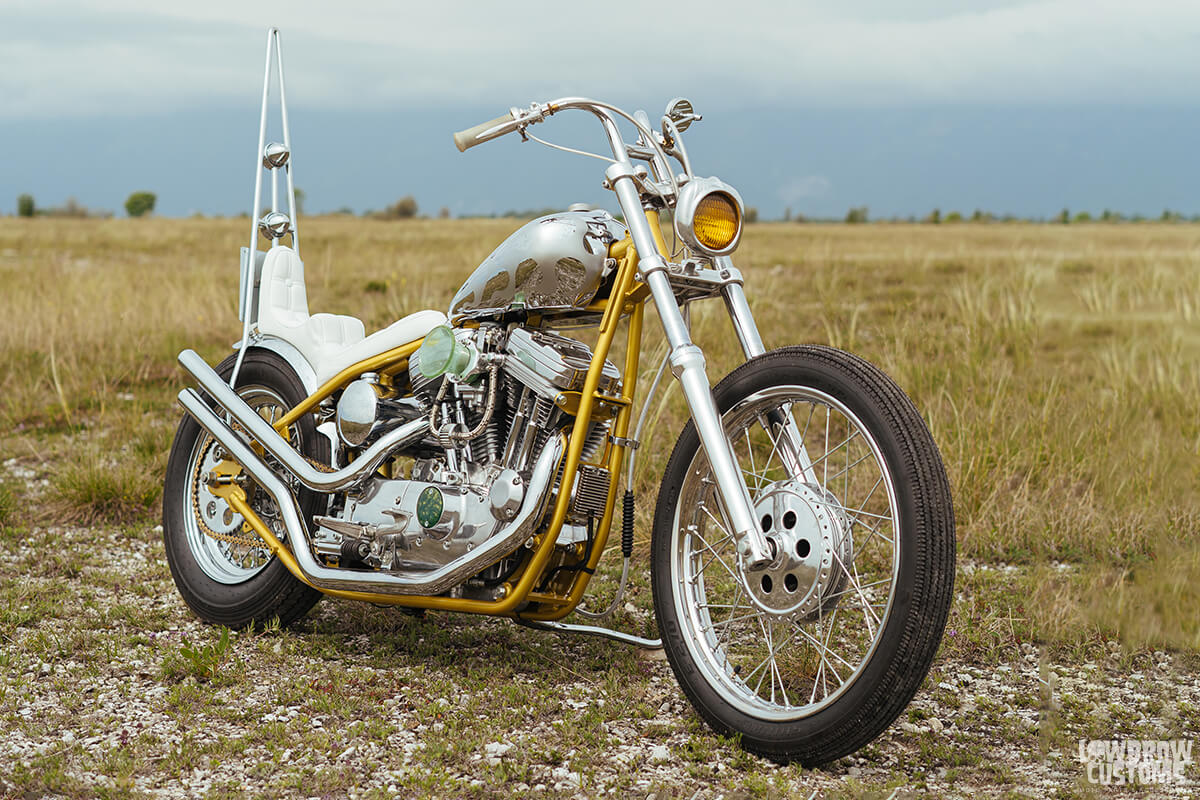
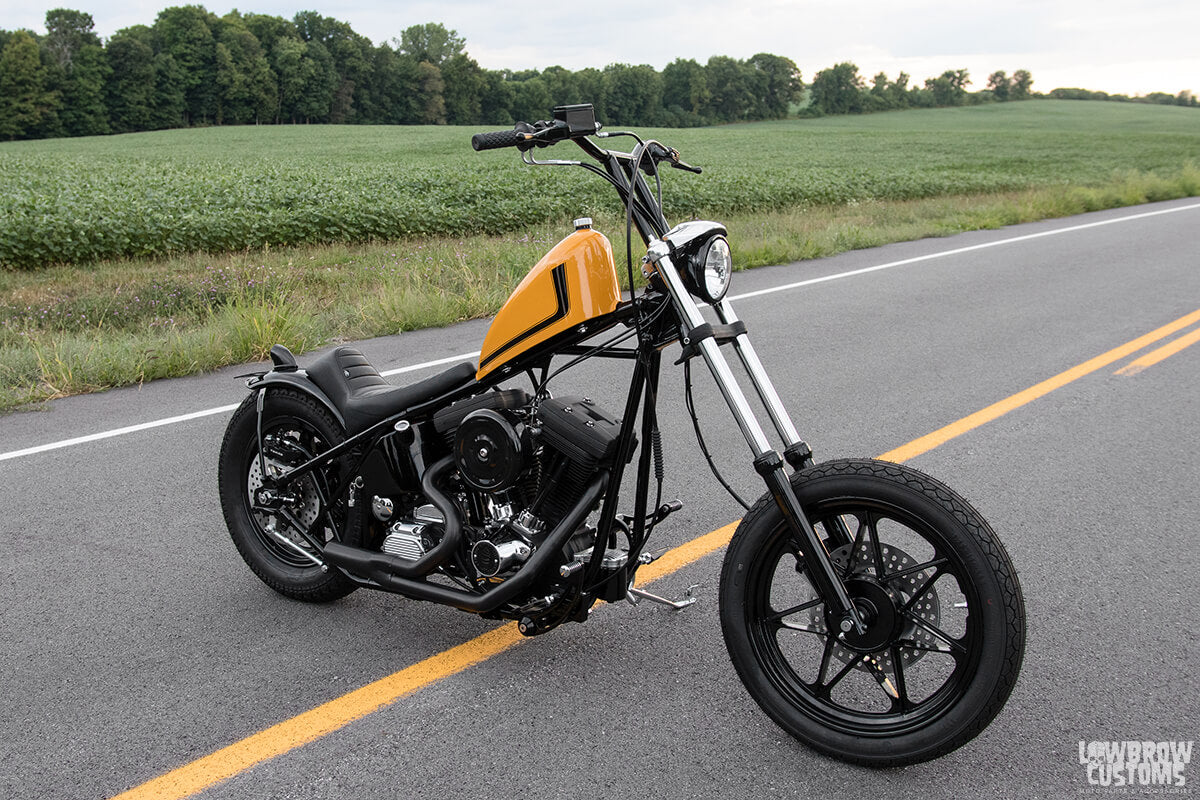
MIKEY REVOLT'S LATEST SPORTSTER CHOPPER BUILD
WHAT PARTS DID MIKEY USE TO BUILD THIS CUSTOM SPORTSTER?
Dig Mikey's Sportster chopper, and want to know exactly how he built such a good-lookin' machine with a killer stance? Well, you made it to the EXACT right place :)
You can find all the parts Mikey used to build his 2000 Sportster chopper right here.
BUYING A USED HARLEY SPORTSTER TO START WITH
In May of 2018, Gorgeous Greg and I took a very short van ride down the street from the shop to a really nice couple's house here in Brunswick, OH. They had a listing on the ole' craigslist for a gently used fully stock 2000 Harley-Davidson Sportster XL for a cool $3,500.
The bike had just over 5k miles on it and seemed like a promising candidate for becoming my new chopper project. The motor was extremely clean, and it had lots of chrome bits on it that I could pull off and resell.
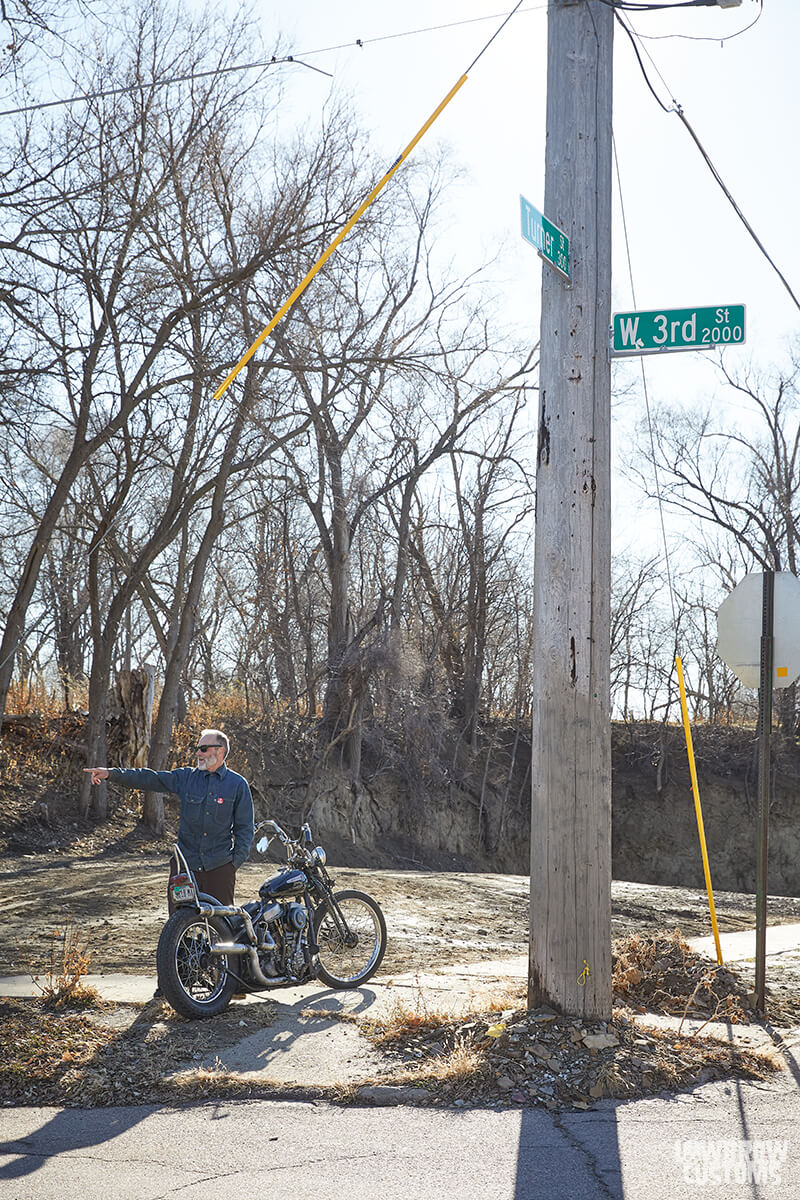
 Before shot of the 2000 Harley-Davidson Sportster, freshly purchased and in front of the shop.
Using what I recently learned from Todd on what to look for when buying a used Harley Sportster, I brought my cash, my questions and my business face. When we arrived Greg and I did a thorough investigation of the bike.
The ad said it was an 883 but much to my surprise when looking at the jugs it had a 1200 stamp on it. I asked the gentleman selling the bike if it had been converted to 1200 and he said, "Yeah, my brother in-law is a mechanic. He did the conversion on it so it would be a bit faster for the wife, but she just likes to ride on the back of mine. Hence why we are trying to sell it."
Everything was super clean and in way better shape then the previous 2 bikes I had looked at that week. Next came the negotiation where I failed miserably but still got a fair deal in my opinion. $3500 is a fair price but its always nice to get a little more off of any deal, if you can. I offered $3200 and the guy wouldn't budge, he said "I'll just keep it, $3500 is the number."
In the end I shook his hand and gave him his full asking price. It was just too clean of a motorcycle not to pay what he was asking. Greg and I loaded the bike up and took it the shop.
 Stripping the bike down was a lot of fun for me and I learned a lot about where everything was located and how it goes together.
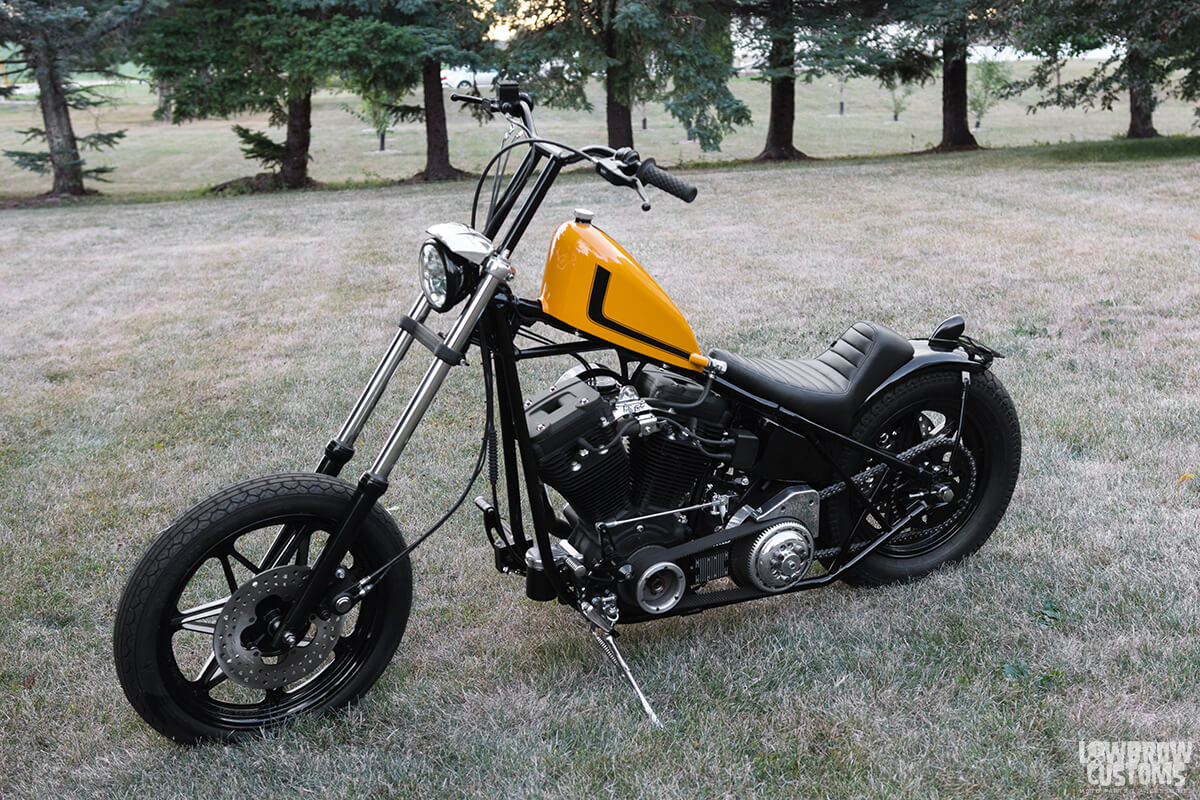
DESIGNING THE SPORTSTER HARDTAIL FRAME (AND MANY OTHER PARTS TO GO WITH IT)
The plan for the bike was to ride it stock for the summer and make sure it ran well, then strip it down and get the rolling chassis and motor over to The Gasbox for some extensive research and development. I think I rode it maybe a month and Jesse was getting eager to get his hands on it.
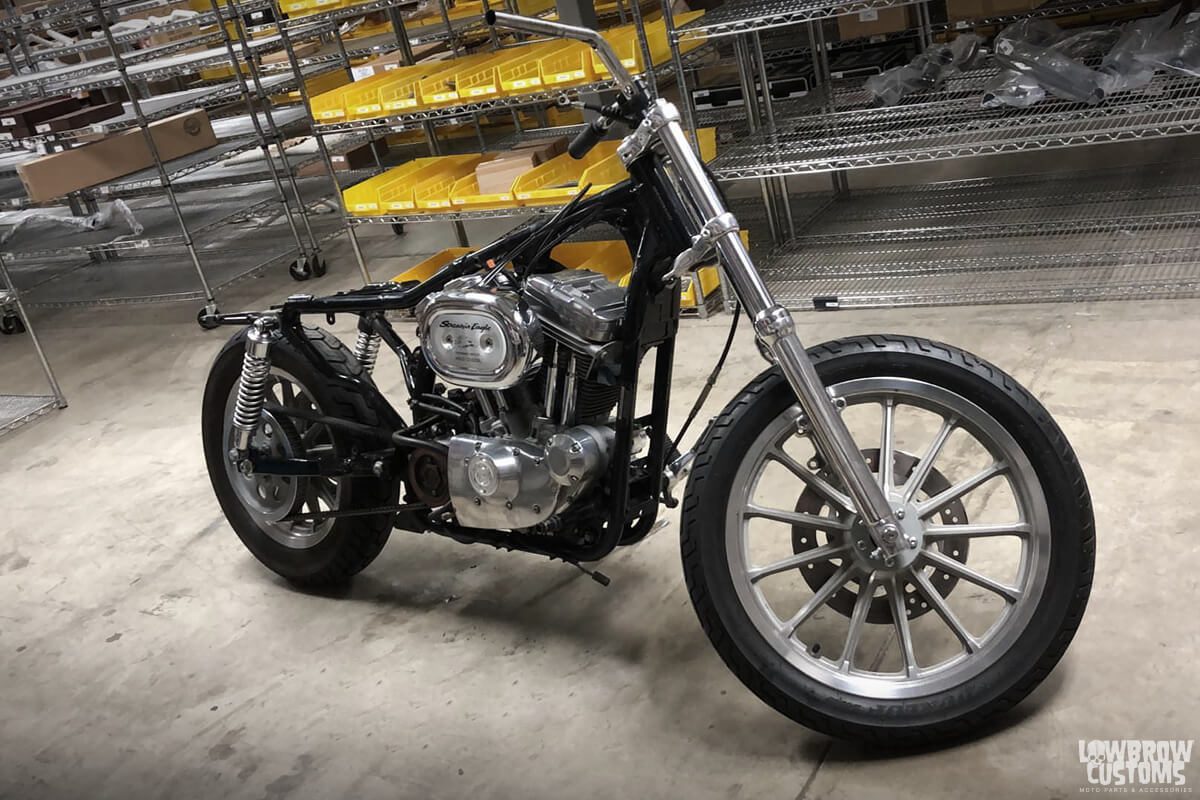
David Bird had retired around that time and there were no high quality hardtails being made on the market. Tyler and Jesse wanted to change that and needed the bike to develop Lowbrow's weld-on hardtail for 1986-2003 Harley Sportsters.
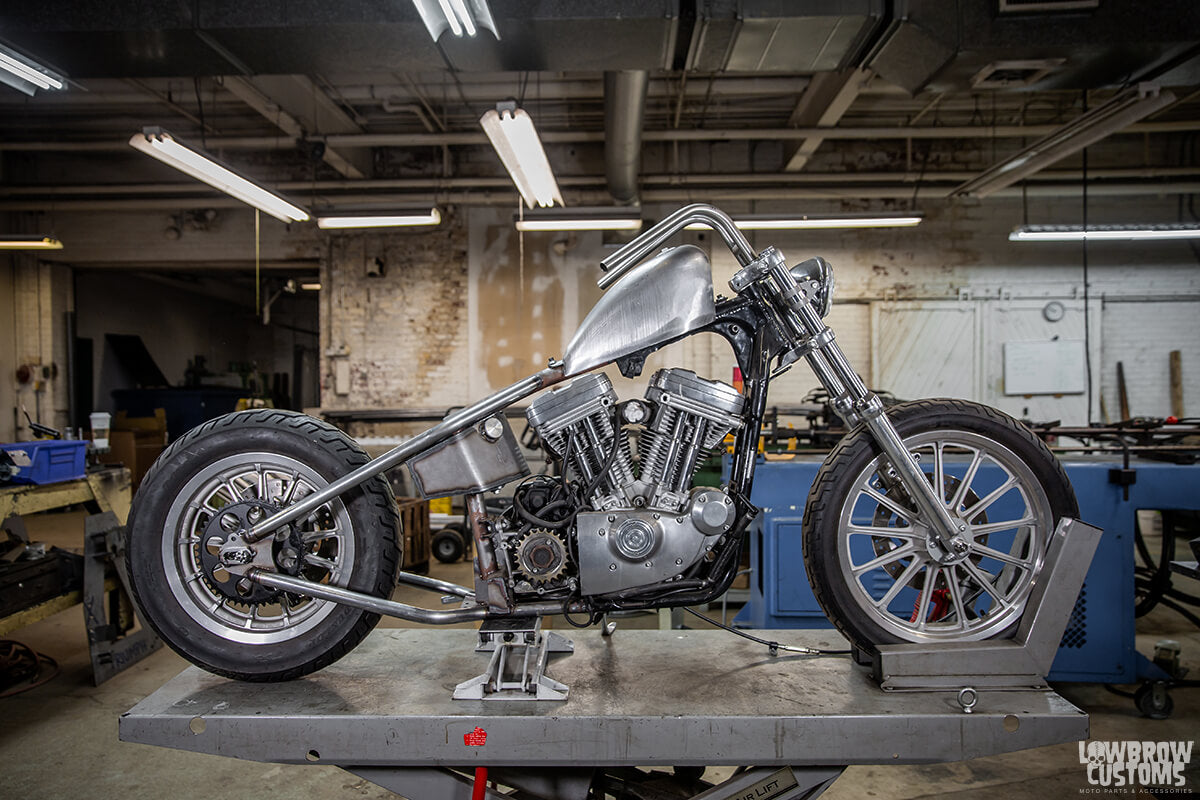
So, I stripped the bike down to the bones right after our Fuel Cleveland show that July and took it to The Gasbox. There, the bike became the guinea pig for the next 3 years making way for a slew of innovative parts, many oif which you can see on this motorcycle.
 In April 2019 the first Lowbrow Customs hardtail was born.
As I was saying the R&D work took almost 3 years. First came the hardtails within the first year, then slowly The Gasbox developed more and more parts off of my bike. It was cool to see the developments being made every time I stopped into The Gasbox, but yet at the same time I realized the bike wasn't getting anywhere closer to being a finished chopper.
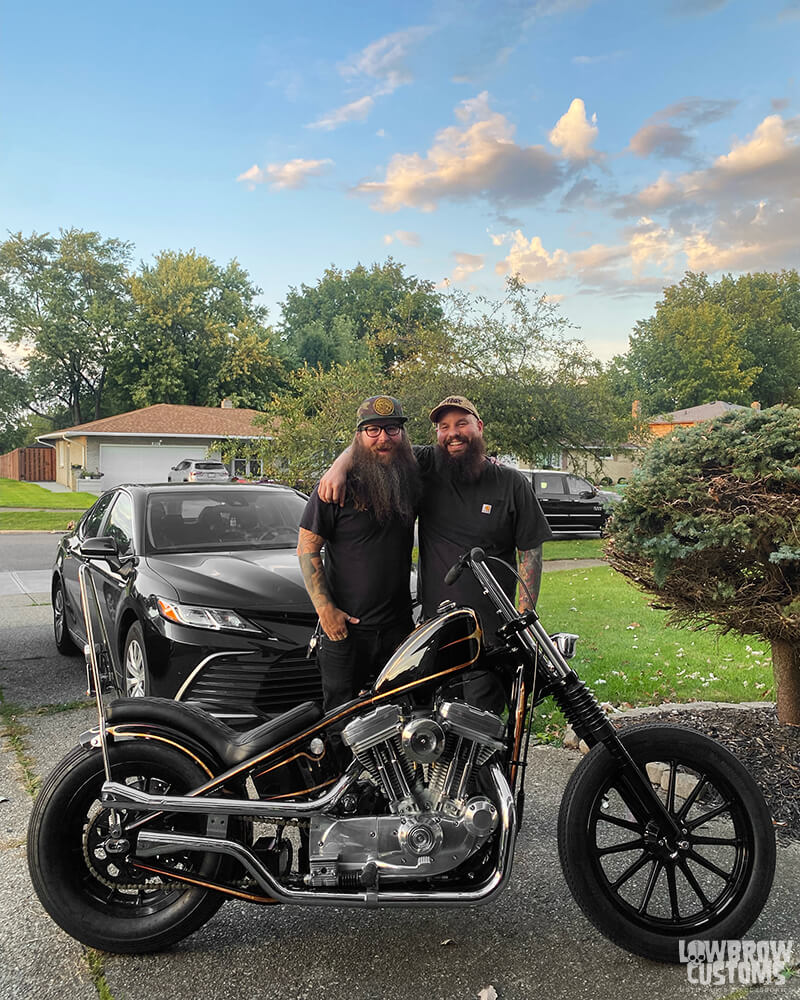
Life, work, projects, Fuel Cleveland shows, and the pandemic took a tole and I feared this project was never going to get done. Then one day in early 2021 Jesse called me up and said "Hey man, come get this thing, it's taking up space in the shop! The fab work is done, and now it's all on you now to finish the mock up, pull it a part, and do all the finishing details, paint, wire it etc."
 Lowbrow Customs first oil tank that fits perfectly with the hardtails.
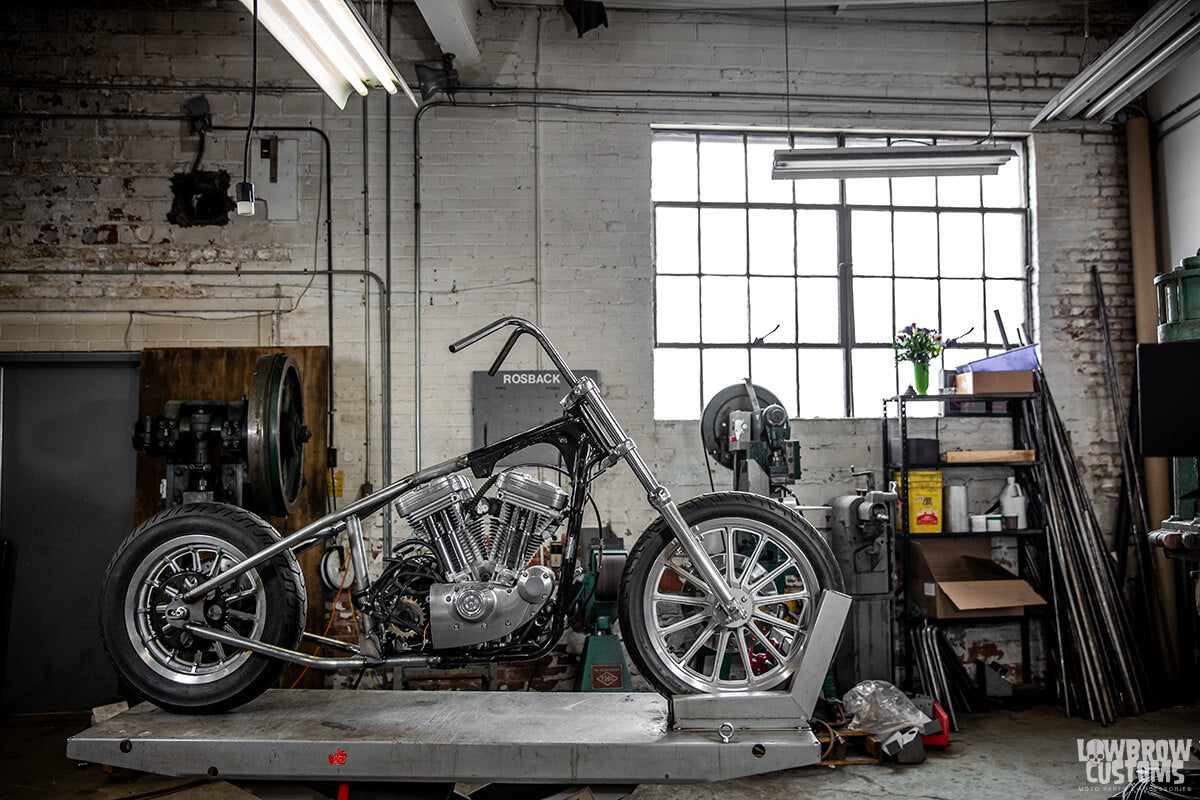
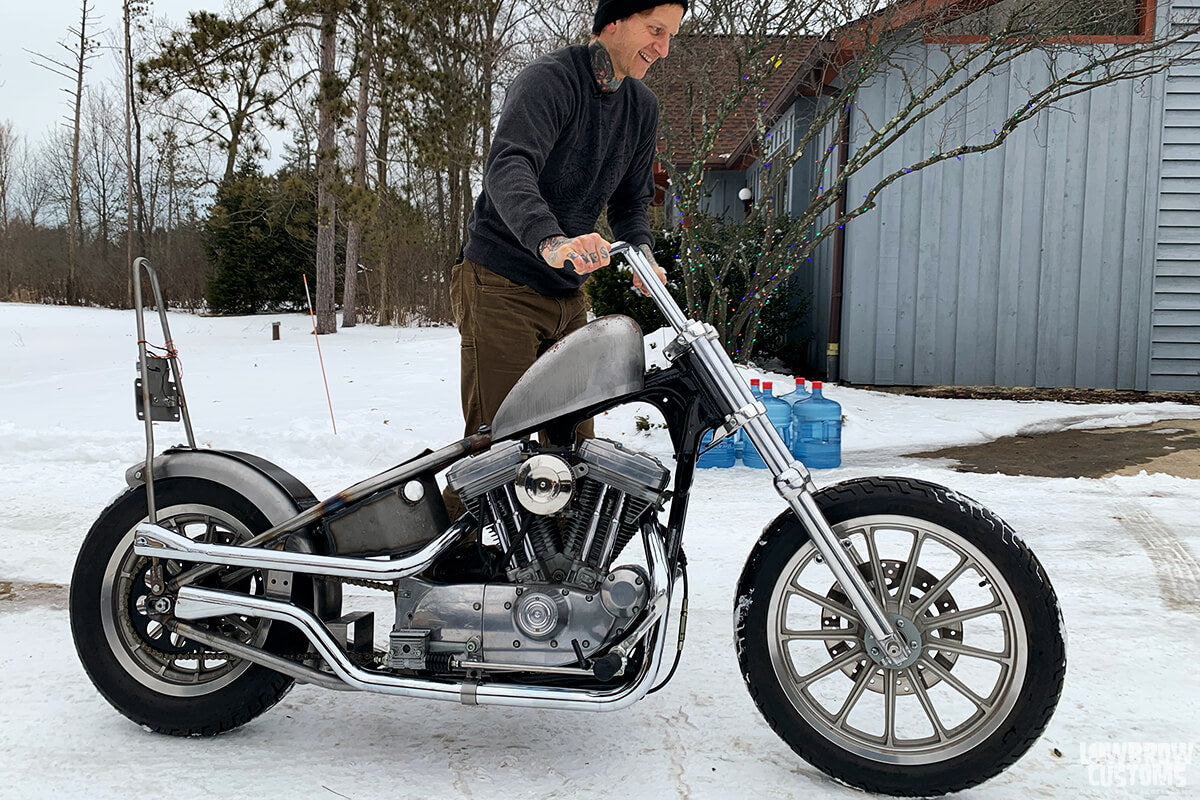 Feb. 2021 near the final mock up. At Tyler's house we filmed the 'I cut my bike in half, now what?' video
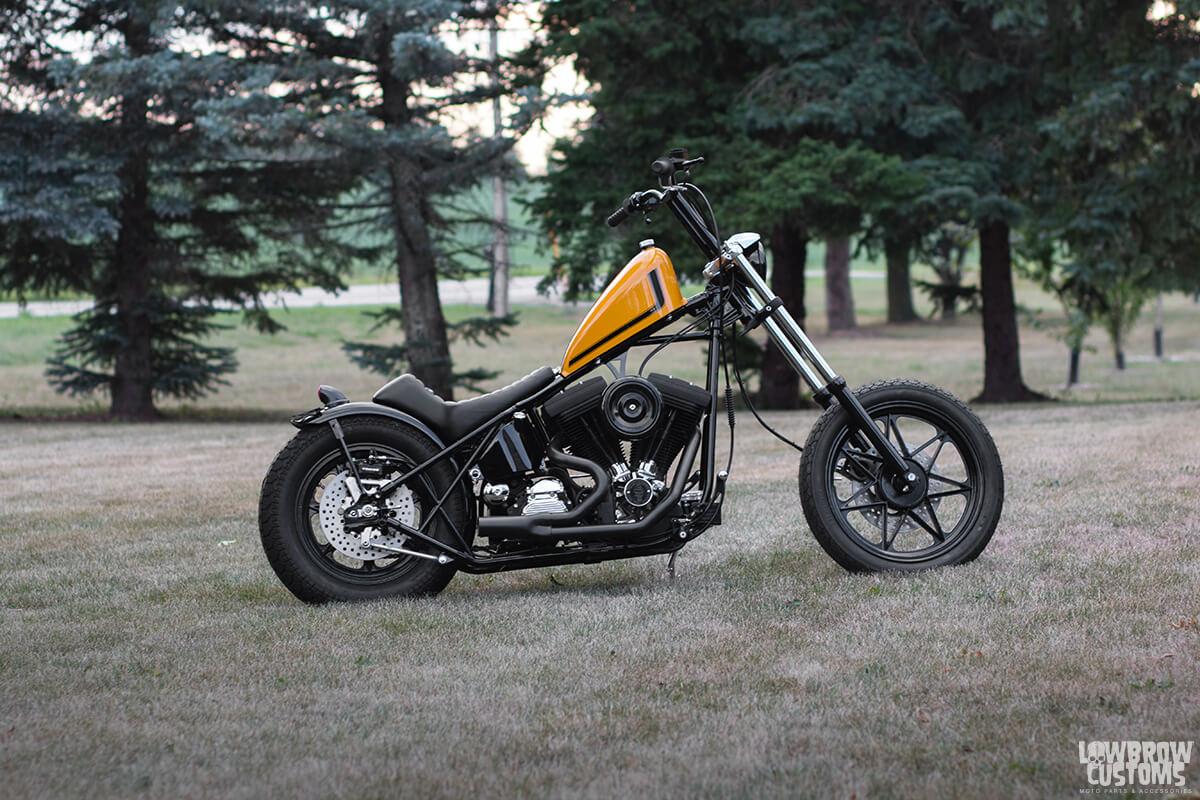
FINISHING DETAILS, AND UNUSUAL INSPIRATION FOR THE PAINT JOB
With the fabrication done it was time to figure out what I wanted to do for paint, the handlebars, the seat design, sissy bar, wheels, and all of the little odds and ends. In my opinion you can really make or break a bike with a few key things.
If the paint is bad, the bike is ruined, if the seat isn't done with taste, it can throw the bike off. If the tires and wheels aren't right, it can make the bike look ugly. So with all of that in mind I looked to some of my own photos of bikes I've taken in the wild, the good ole' internet, and some inner locked memories for so much needed inspiration.
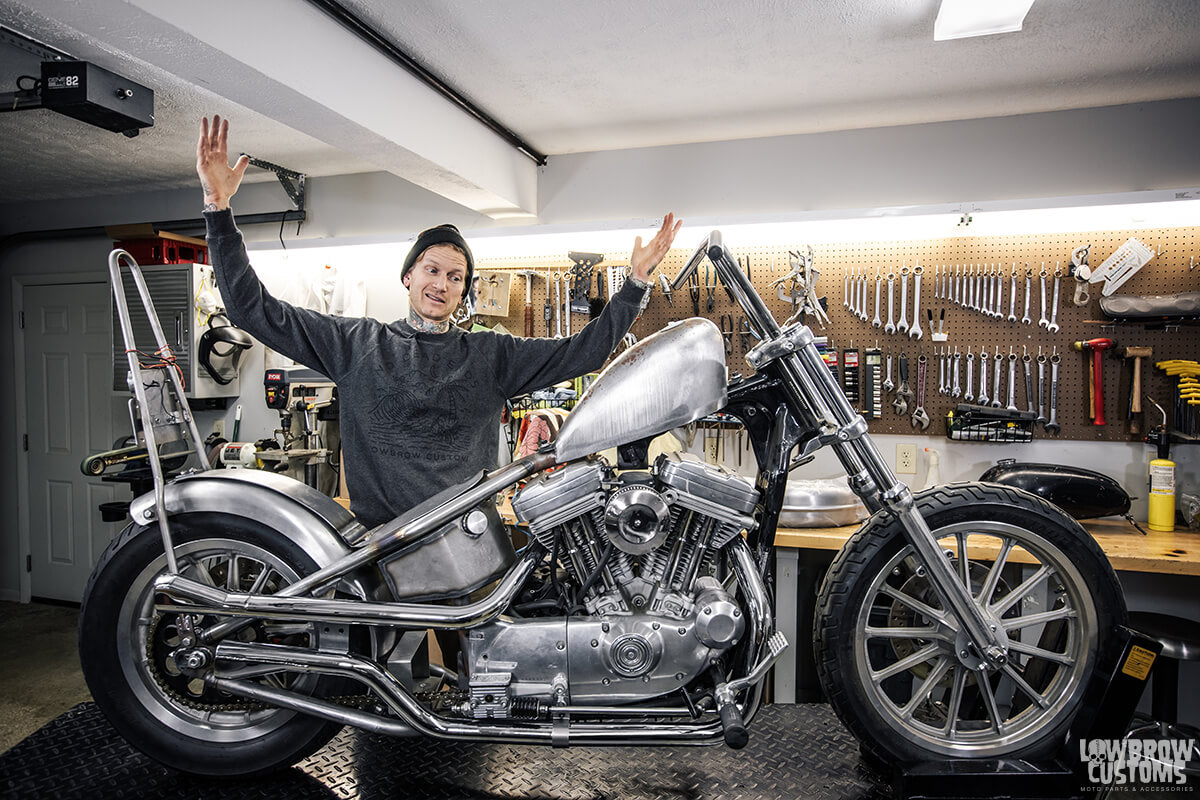 Tyler saying, "Now what"
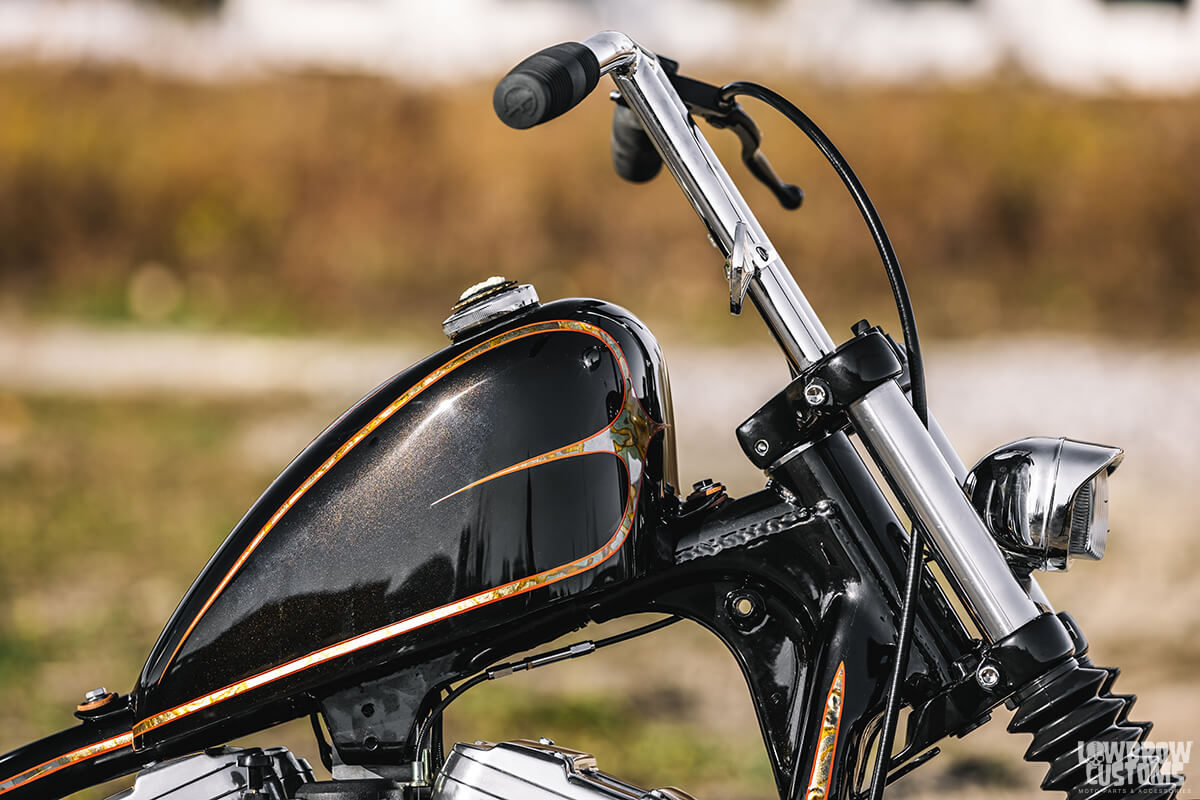
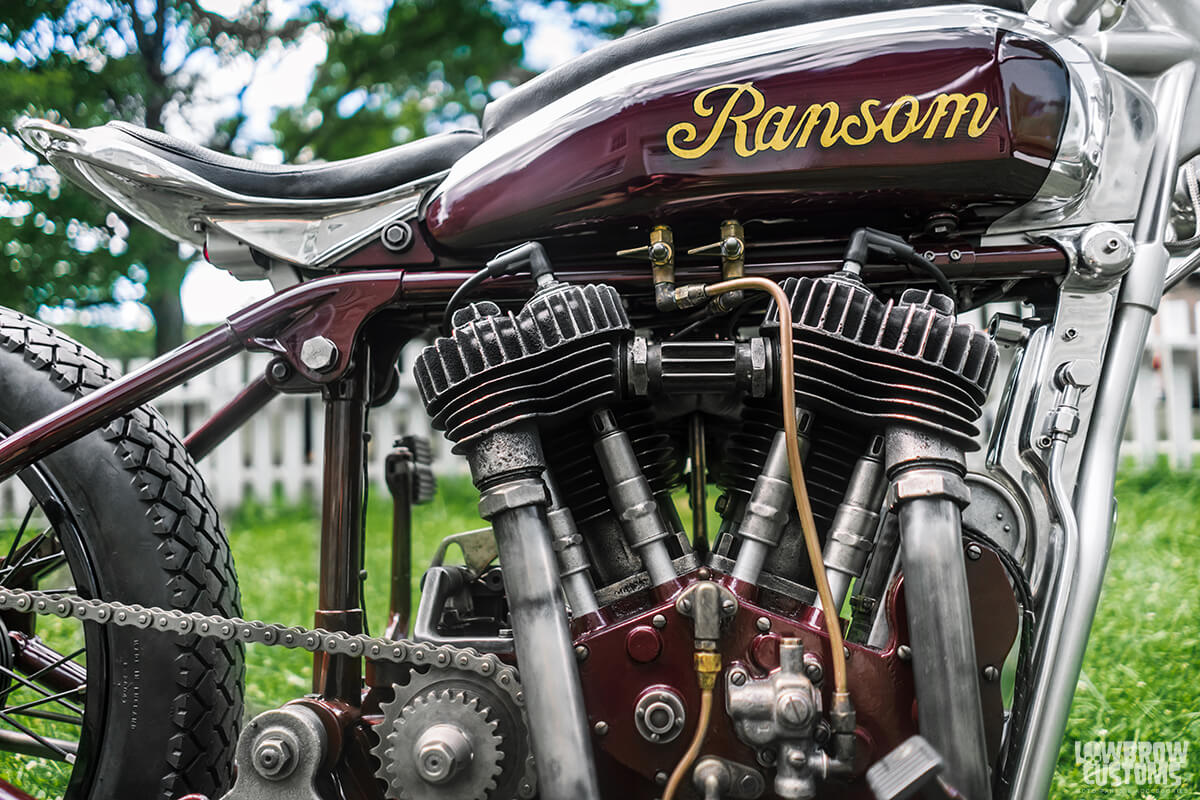
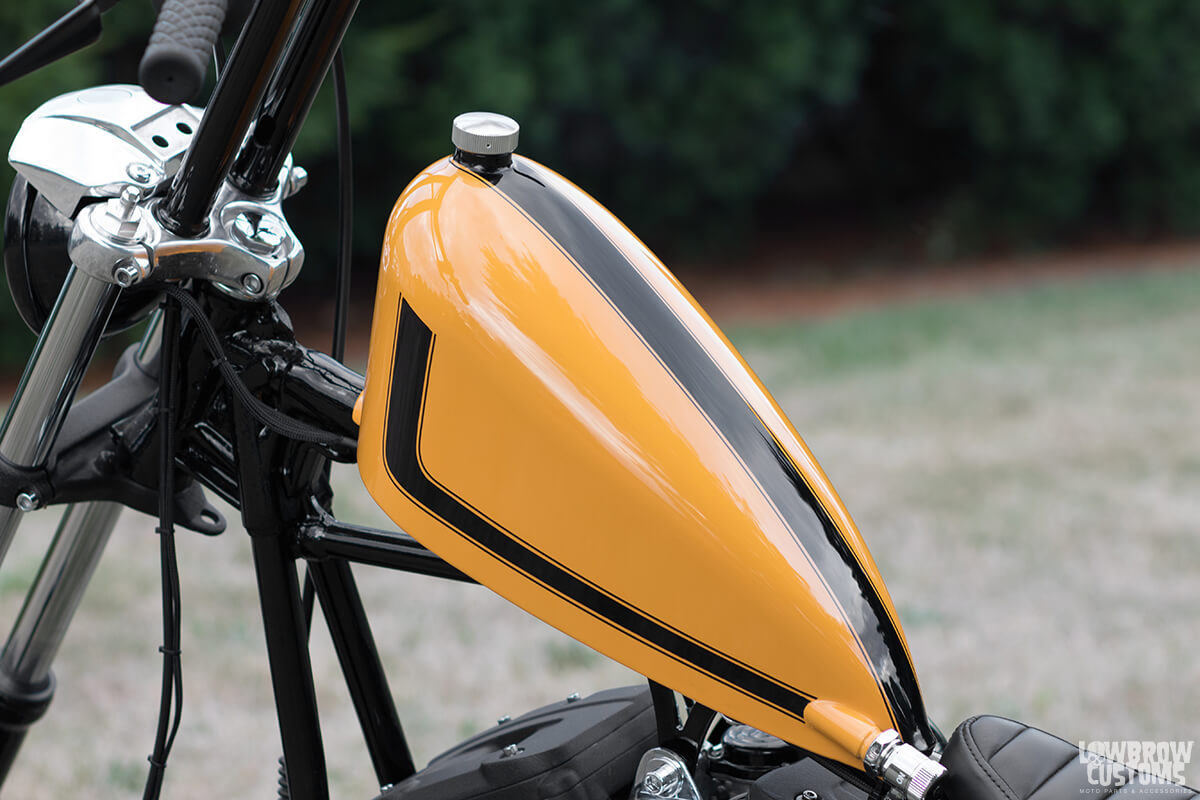
For the paint, I wanted my friend Joe Koenigsmark to handle it. He's a master in old hot rod techniques and I knew he could lay down the ideas in my head. I remember the first time I saw Warren Heirs' gold leafed Knucklehead at Hoodbush back in 2013.
It had my attention the minute my eyes laid on it and I knew right there and then that one day I would build a black and gold leafed chopper. I also had this distant memory in my head of a time when I was really little. My step dad Carl would smuggle H-D cigarettes by the cartons from South Carolina to Ohio, he would drag me and my mom along from the extremely long car ride. We would see some of his family down there and then he would load up the car and make our way back north.
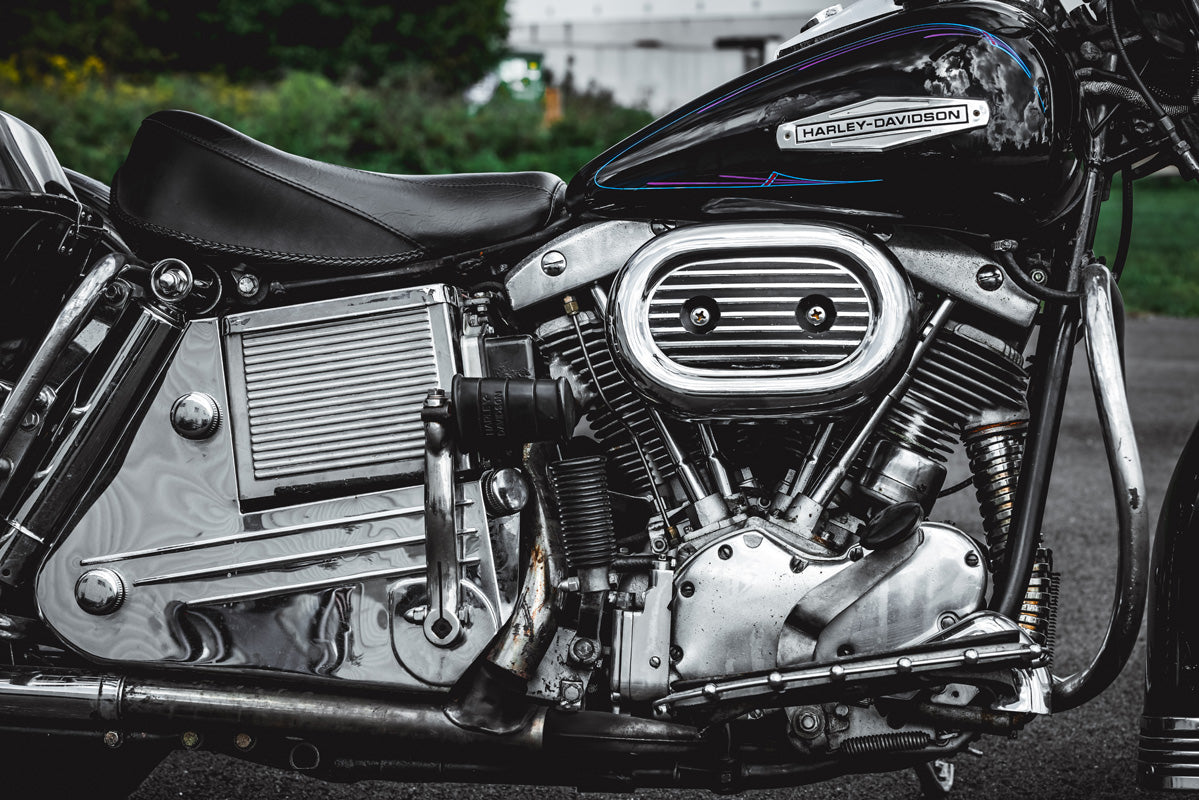
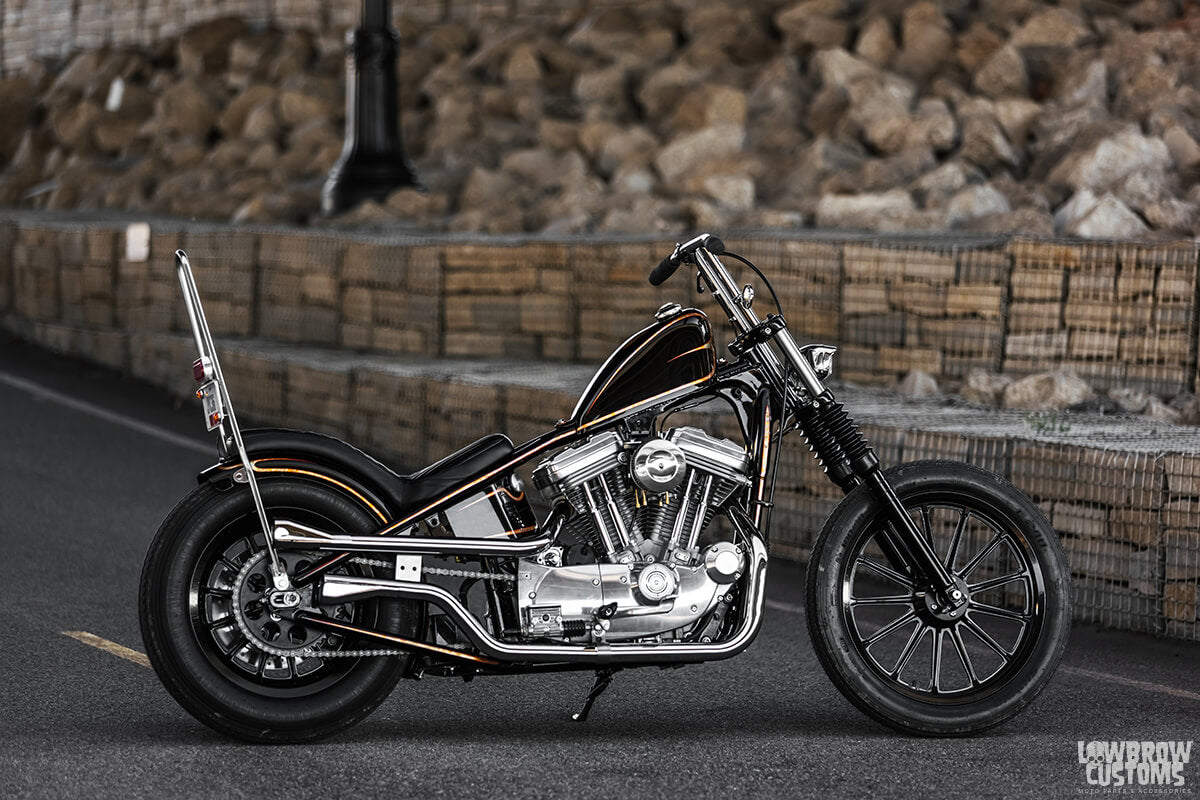 Joe's line work is incredible. I love the line that goes from the tip of the hardtail all the way up and through the tank continuously flowing, it's just beautiful.
When we got home he would sell those bad boys for triple. The guy would do anything to make a buck and help keep our family a float, for that aspect of him I will always be grateful for. Though this was highly illegal, he didn't give a shit and it just made me think he was such a bad ass.
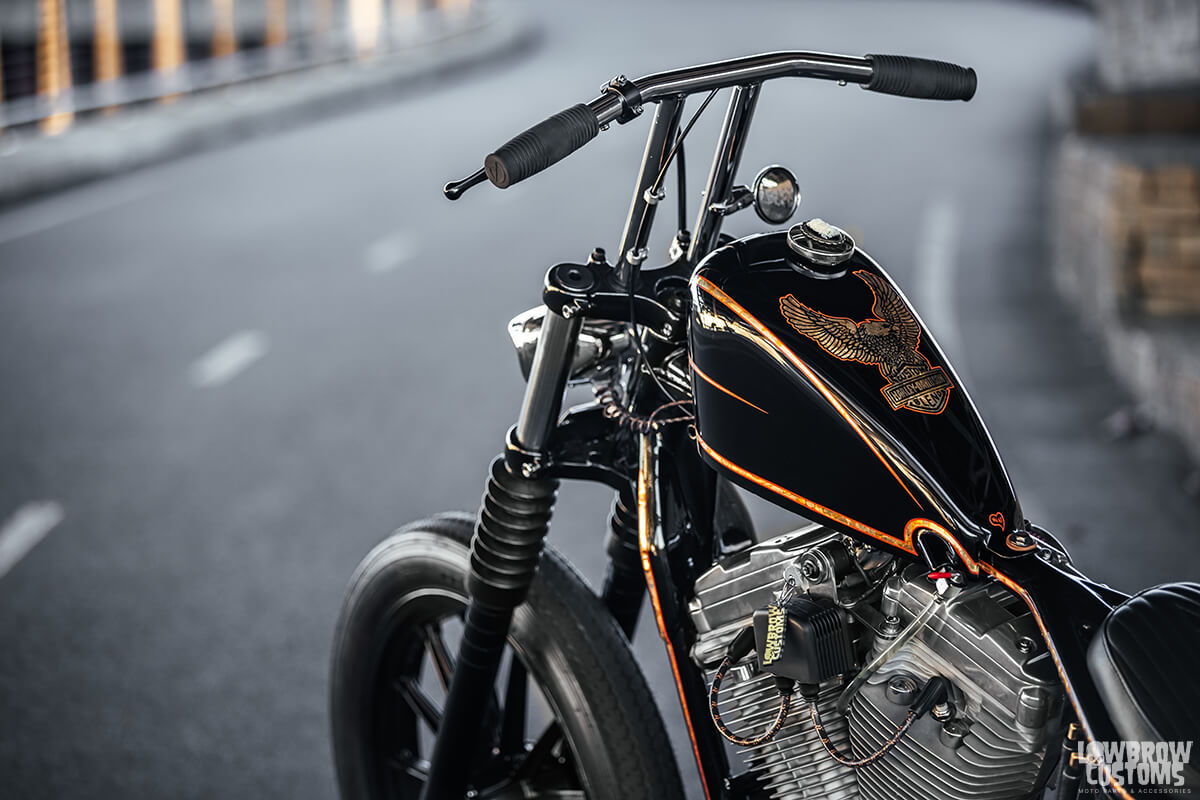
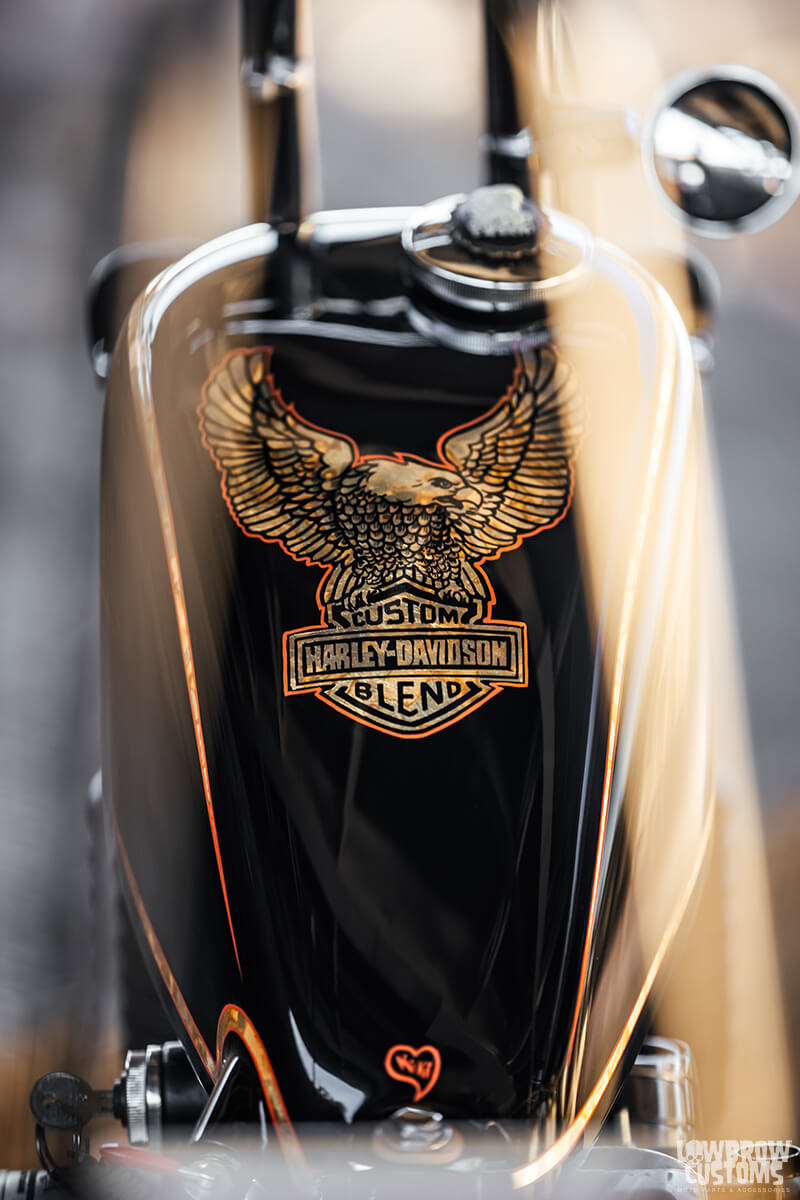
Well, it just so happened that those Harley cigarette packs he used to smuggle had a gold eagle emblem stamped on them. The lightbulb went off when I was thinking about the paint scheme of gold and black and I knew that had to be the design for the top of the tank.
 The old Harley-Davidson full flavor cigarette packs, what they used to look like. I remember them so vividly as a kid.
A gold leafed eagle, I even wanted to keep the funny bar and shield saying. "Harley-Davidson Custom Blend". My step dad Carl passed last year of stomach cancer at the young age of 52 and I figured this paint job could be a little tribute to him.
He loved motorcycles and but never could afford a Harley, so it felt fitting to do something and pay my respects in my own way on the tank of a Harley. Our relationship wasn't always the best, but there were some good times, and this was a memory I wanted to keep with me forever.
 Custom Blend, Harley-Davidson bar and shield was laid in gold leaf by Joe Koenigsmark and then Chris MacMahan from Aerographix laid the hand painted outlines on the top to form the eagle.
The custom paint took about a year for Joe to complete, if you are doing the math we are at year 4 on this ever ongoing project. Wild to think but, when I got the paint back I couldn't have been happier. I mean just look at the gold leaf and hand painted orange pinstripes that tie it all together. It's just a thing of pure fucking beauty and it brings a smile to my face every time I look at it.
Joe also surprised me with a couple hidden gems. One was a hand painted orange flying dinger by my seat post hole. It's hidden under the custom motorcycle seat. A pretty funny inside joke between Joe and I. At Bonneville he's always drawling dingers on Kyle, Tyler, and other people's bikes and taking photos of them while he's drawling them is hilarious.
 Lowbrow Customs Oil Tank for hardtail Sportsters sporting beautiful gold leaf detailing.
He also buried a tobacco brown metal flake deep into the black so when the sun hits it just right, the bike shimmers. Keeping true to the cigarette theme, I was beyond blown away by that intricate detail. The last surprise on the paint, Joe hand painted a small heart with my dog's nickname Kiki in it, near the bottom of my tank. She had passed just a couple days before I had planned to pick up the paint from Joe's Shop.
He said with a tear in his eye as he handed me the tank, "So she will always be riding with you." and then gave me a big hug. I'm not going to lie, I got pretty emotional, it was such a kind and thoughtful gesture. I'm truly grateful to have a friend like Joe in my life.
 Kioshi Mercedes aka Kiki, I miss her every day.
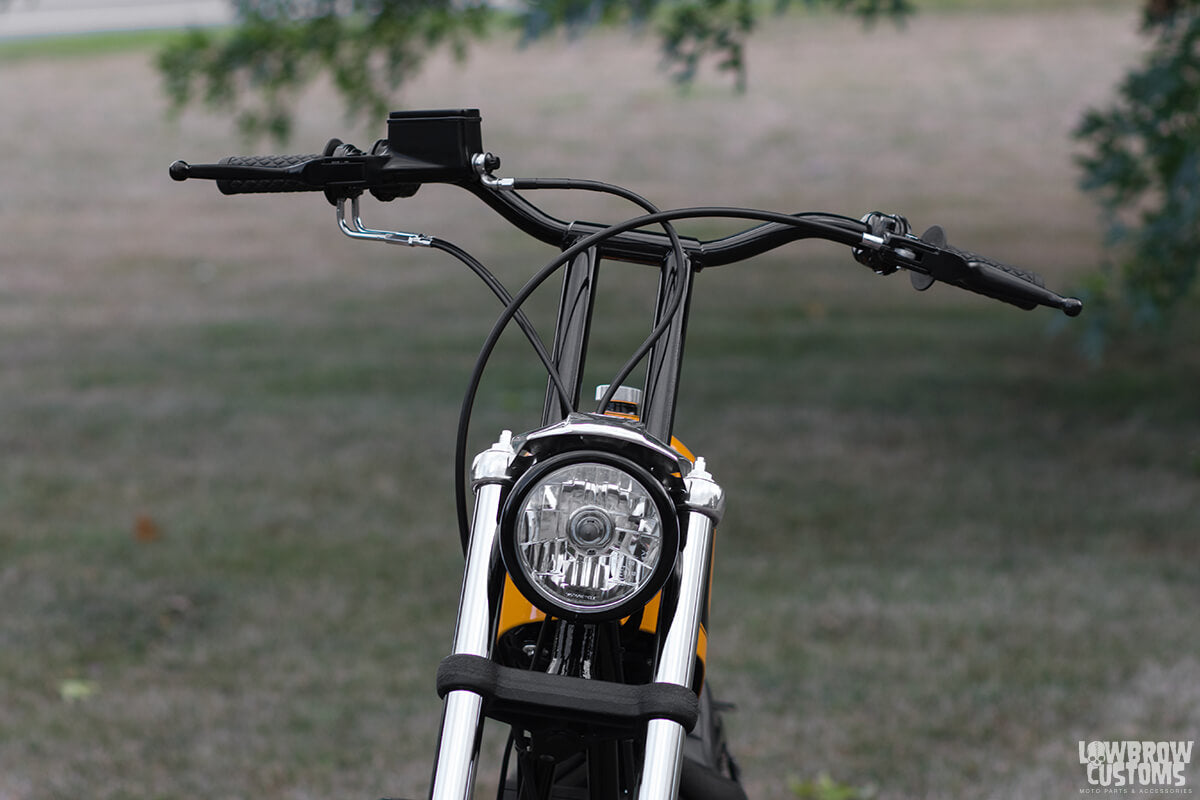
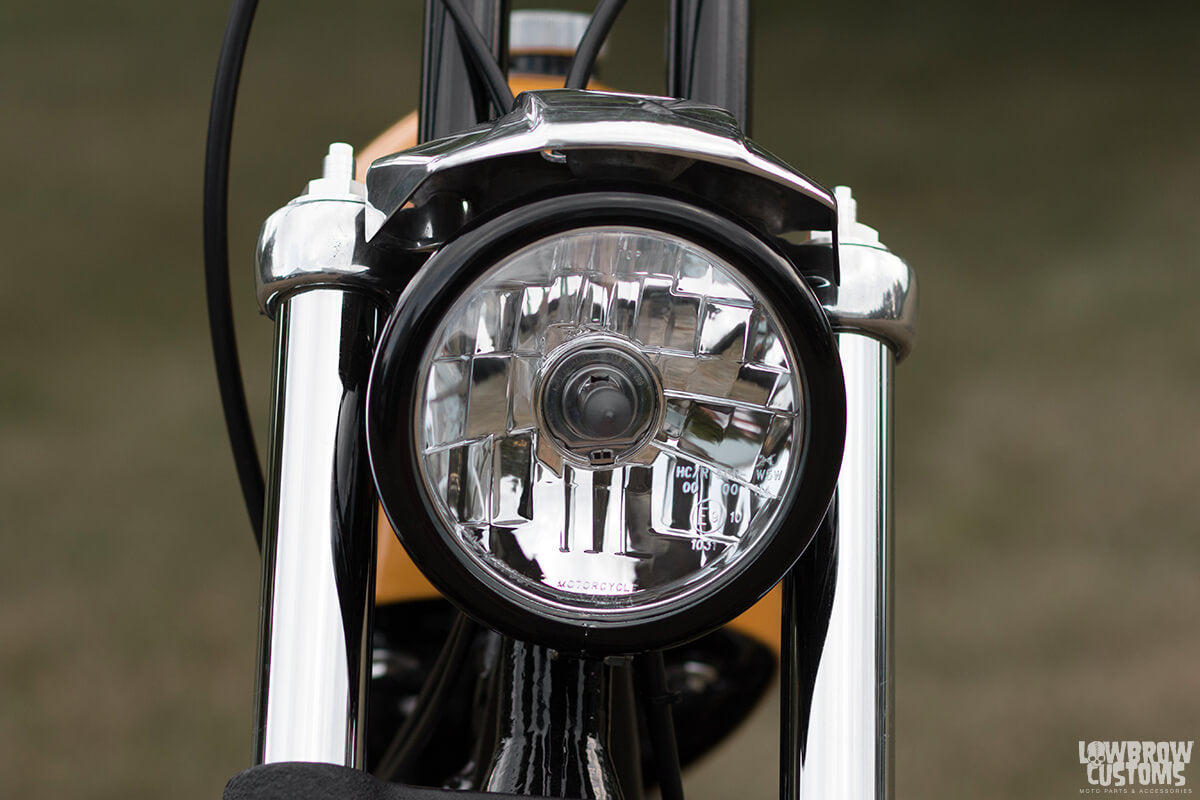
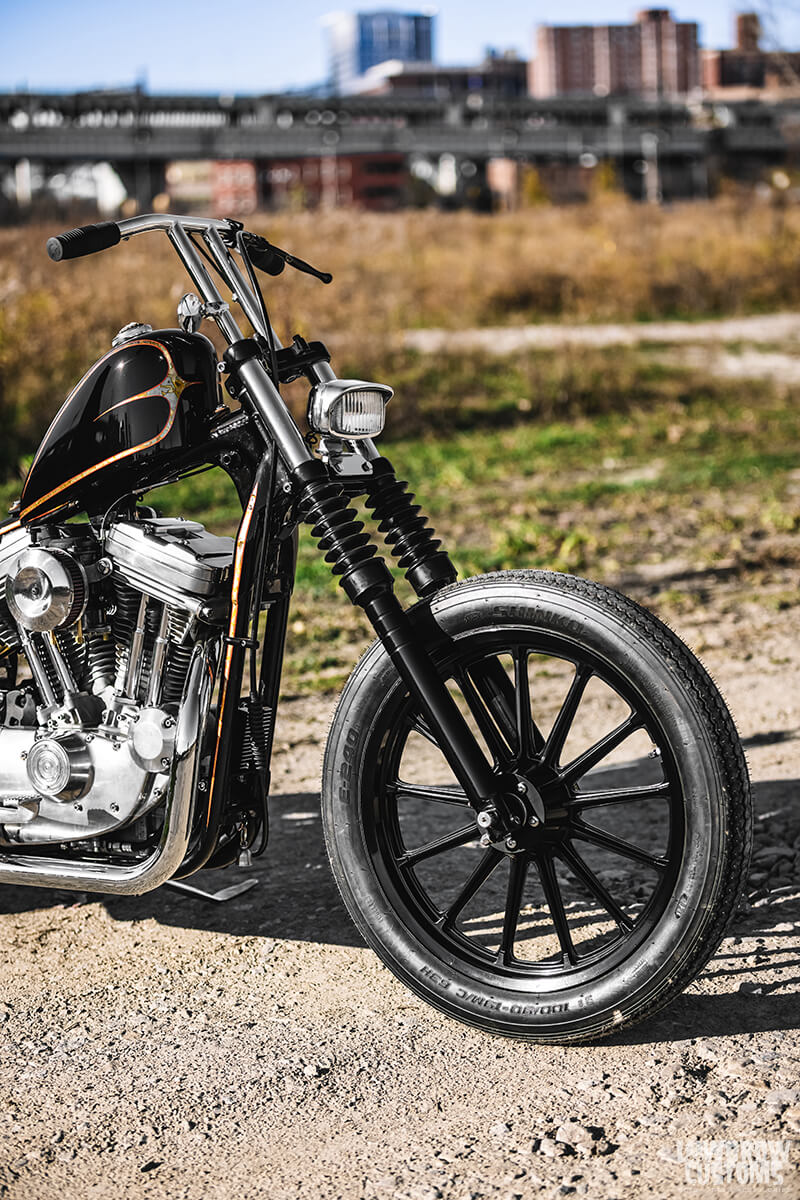
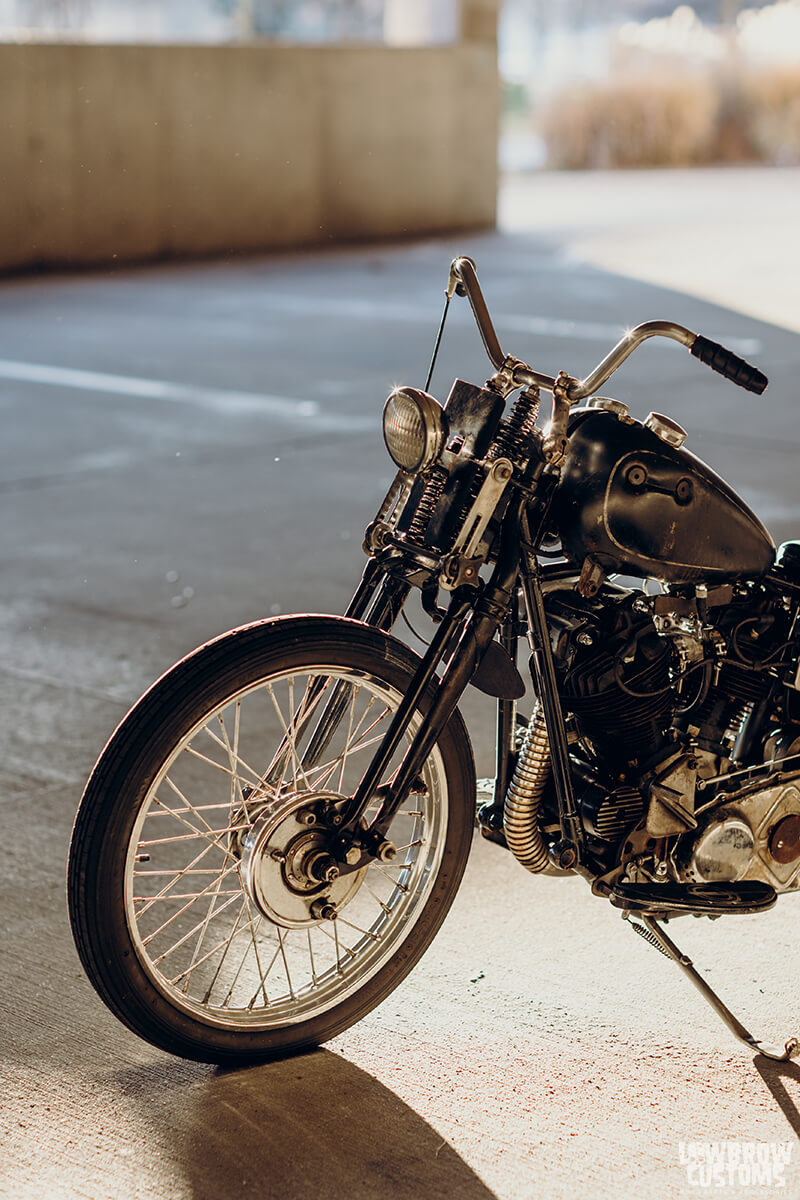
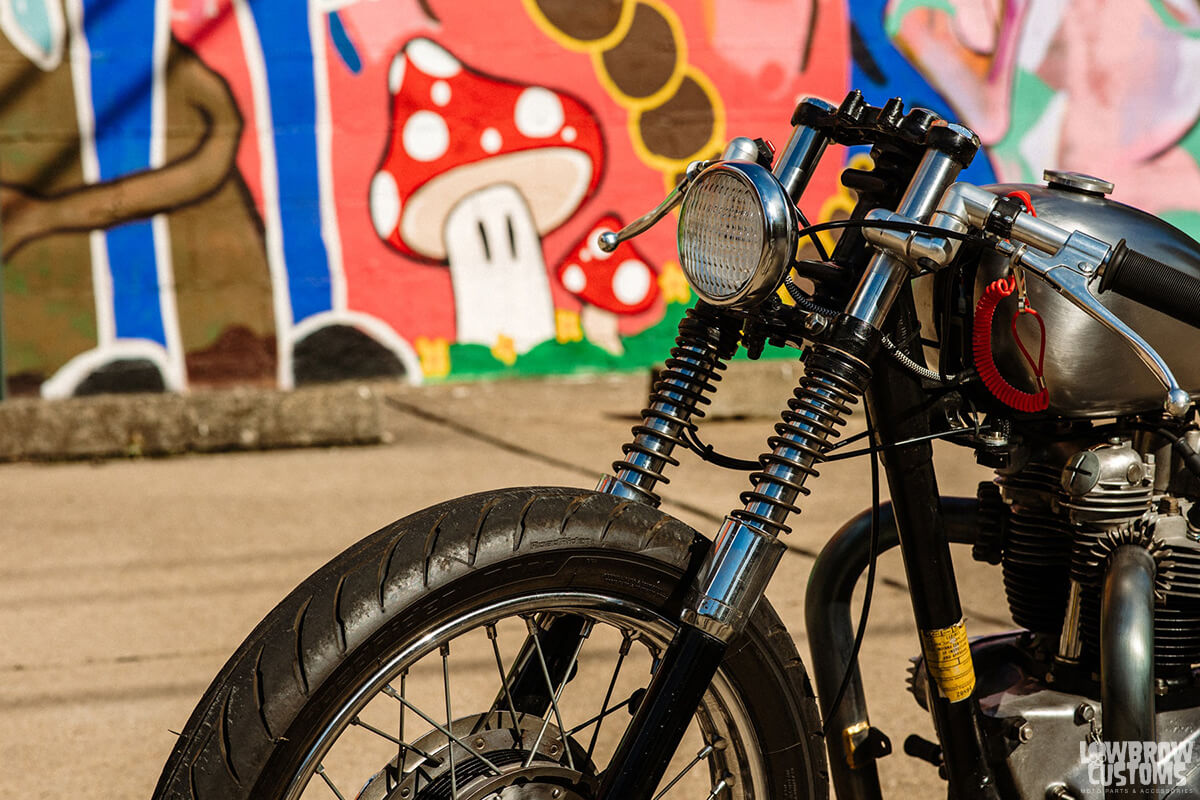
While the paint was going on I had to figure out another piece of the puzzle which was the front end. I knew I didn't want to run a front brake, well because choppers, duh. So, I ended up pulling my 39mm front end apart and sending my lowers off to my best friend Chris Drew in Buffalo. He shaved them down for me and did this killer 4 stripe design on the top of them. We just kept it simple.
I knew immediately when I saw them done they had to be powdercoated black. With that decision made, it would have been funny to keep the trees in their metal finish, so those were sent off to the powdercoater as well. Rubber boots always give off this tough guy look vibe on front ends, so I went with a pair of those too.
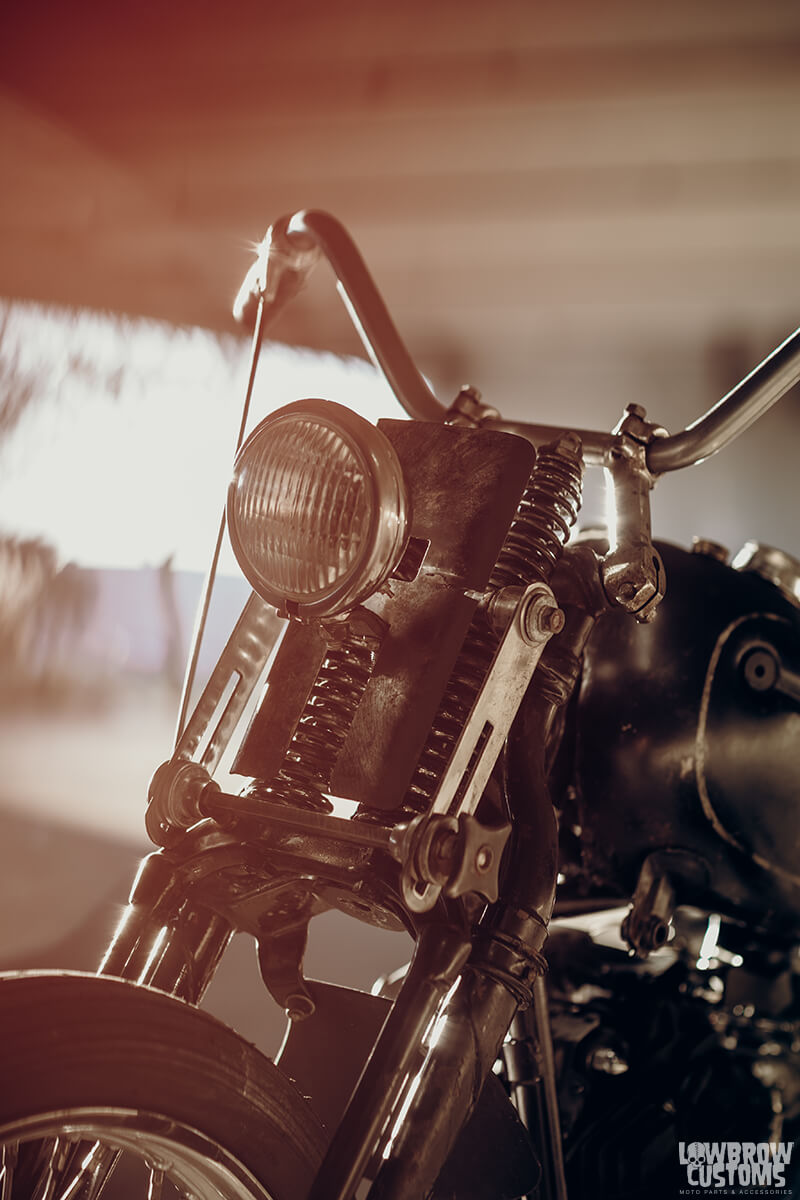
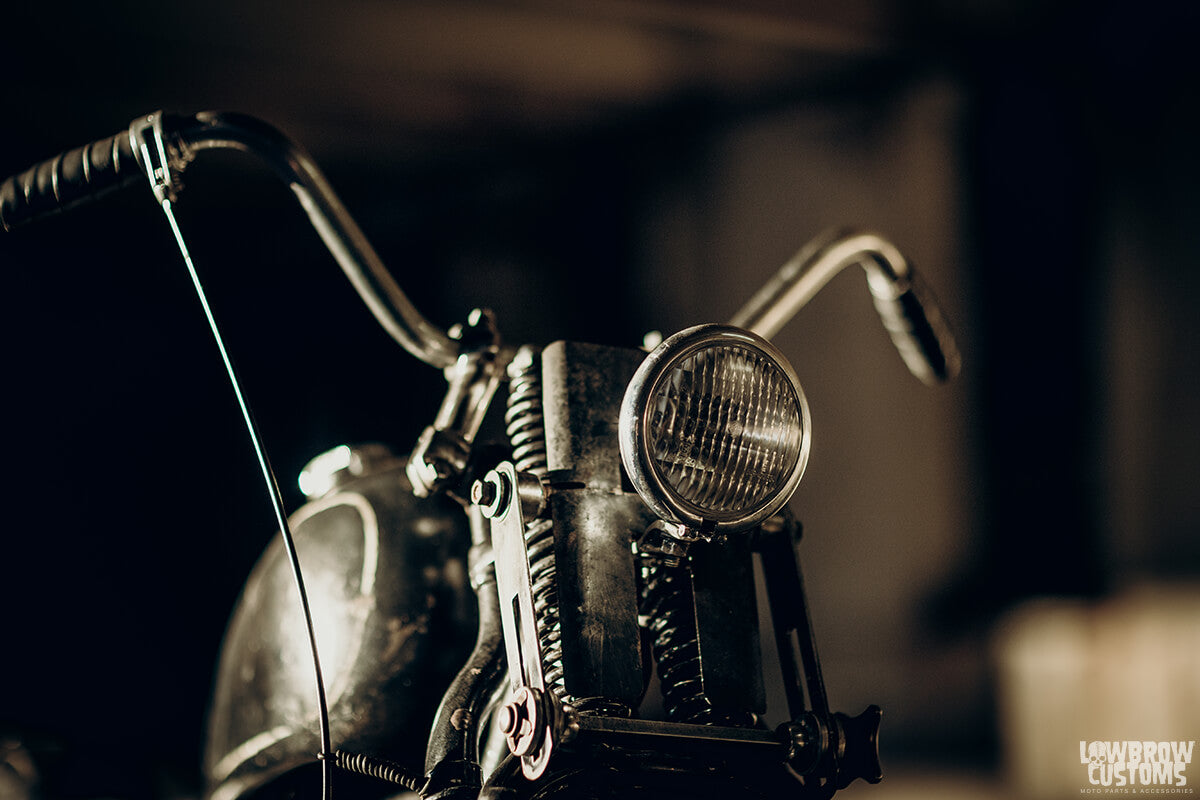
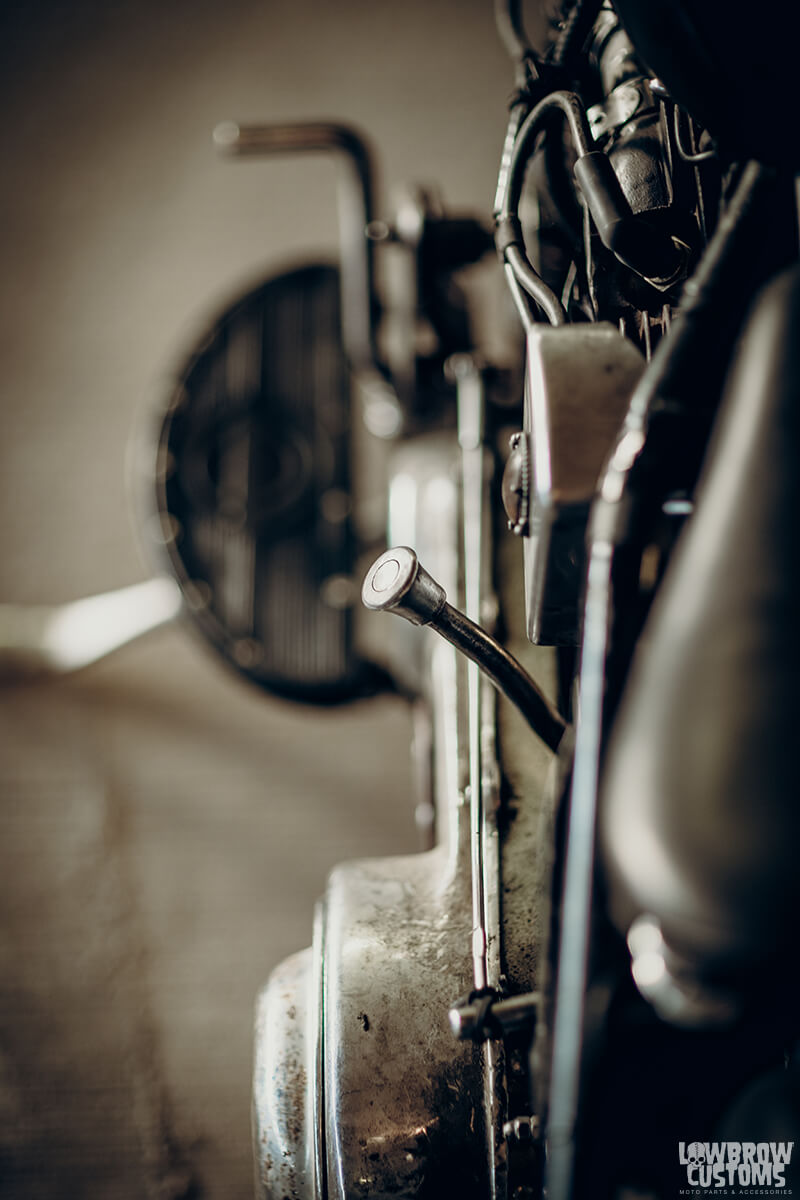
For the headlight, there was an old bates square boy from an old front end I bought off Tyler years ago that was just sitting in my garage waiting for this project. It was the perfect compliment to the front end once Fiorucci Fabrications made a one off mounting bracket for me.
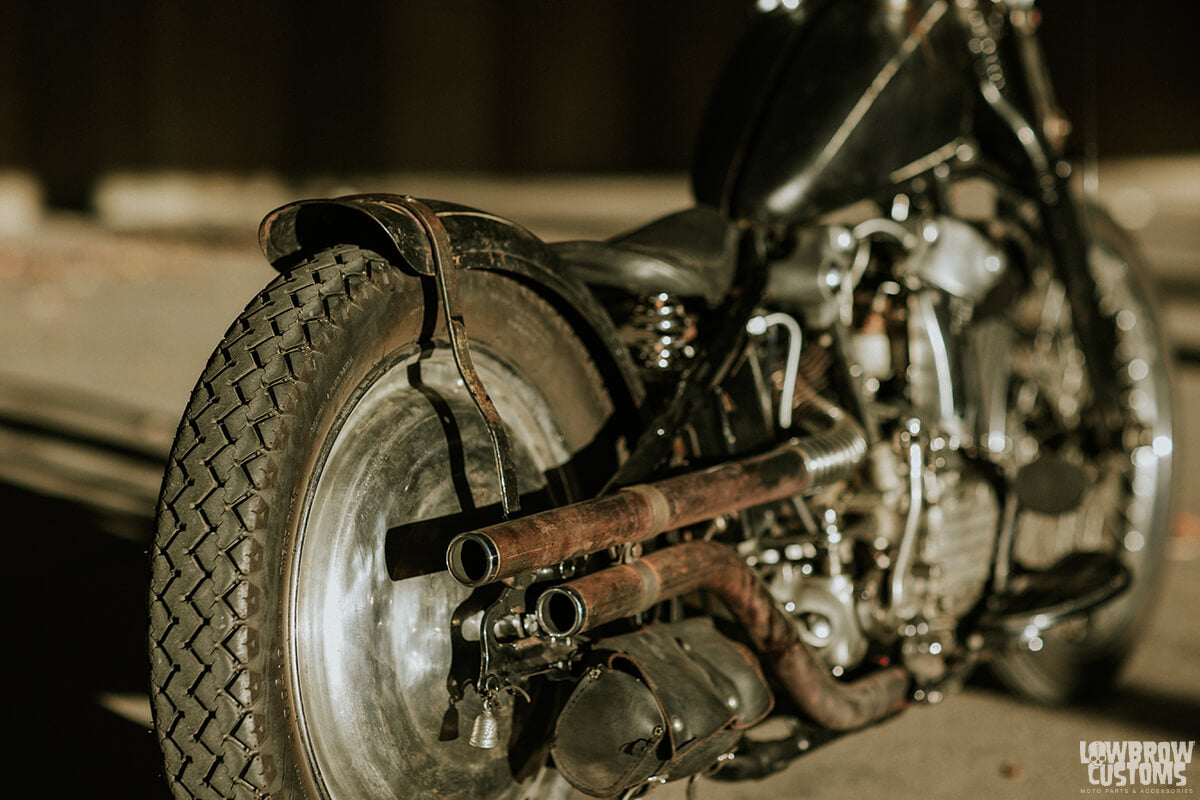
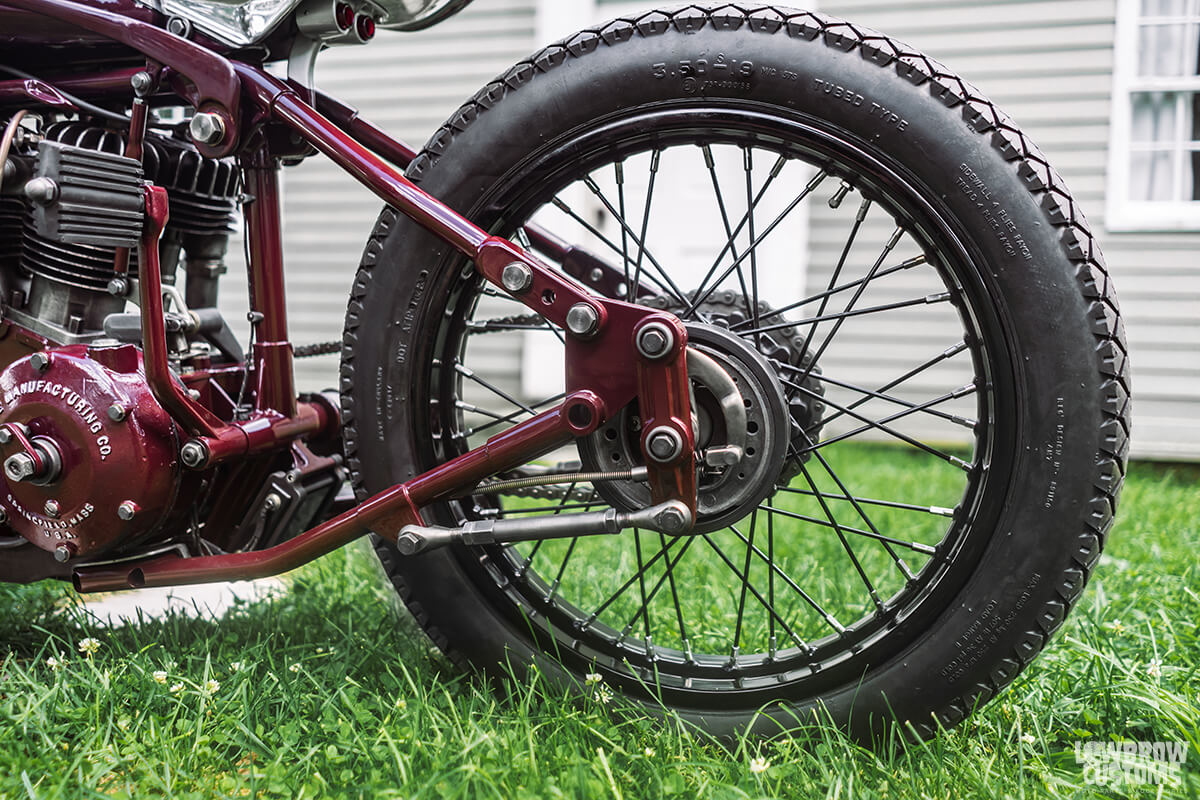
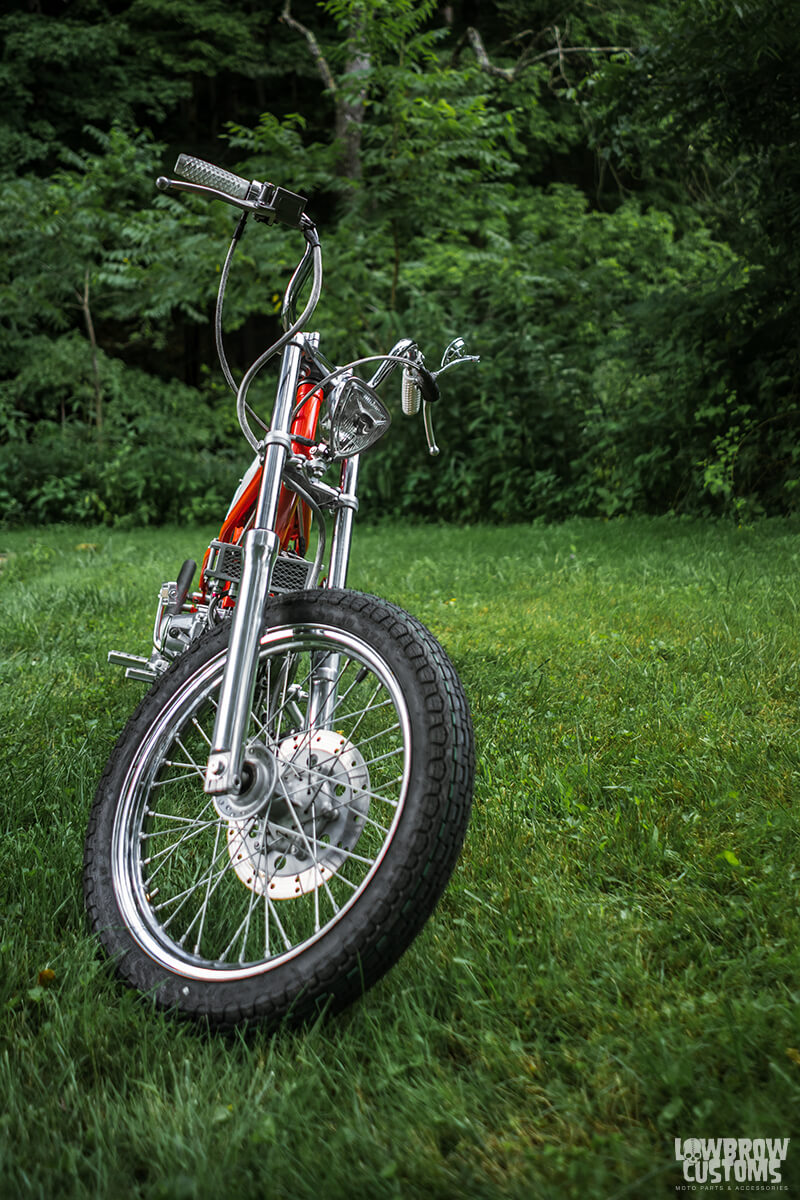
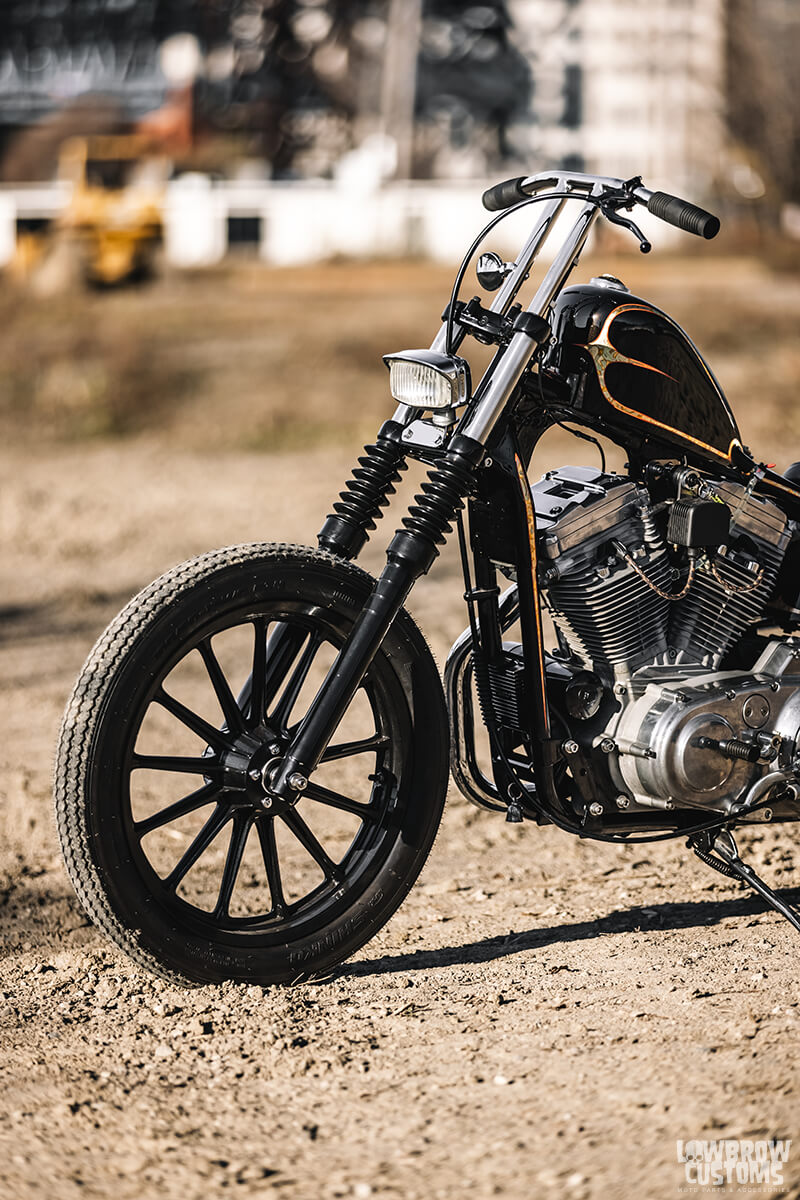 Front end has just the right amount of chrome and black mixed. 13 spoke mags look killer with no front brake.
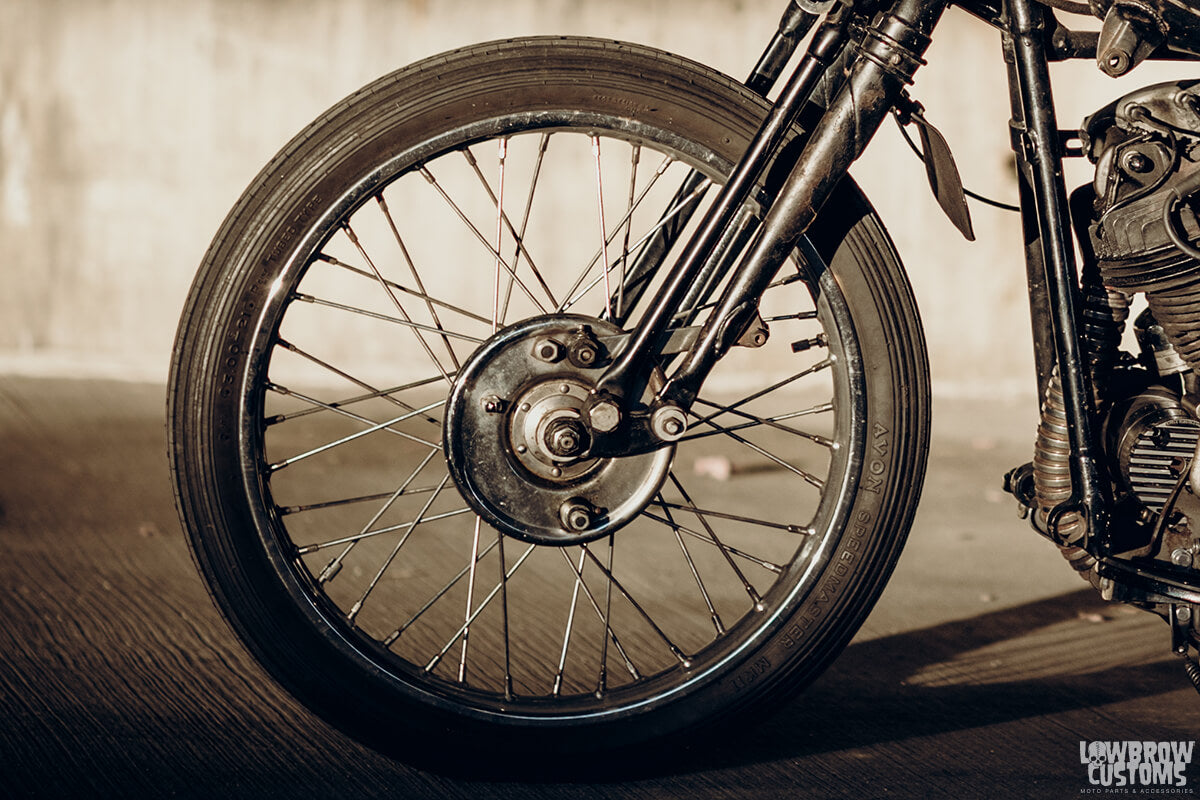
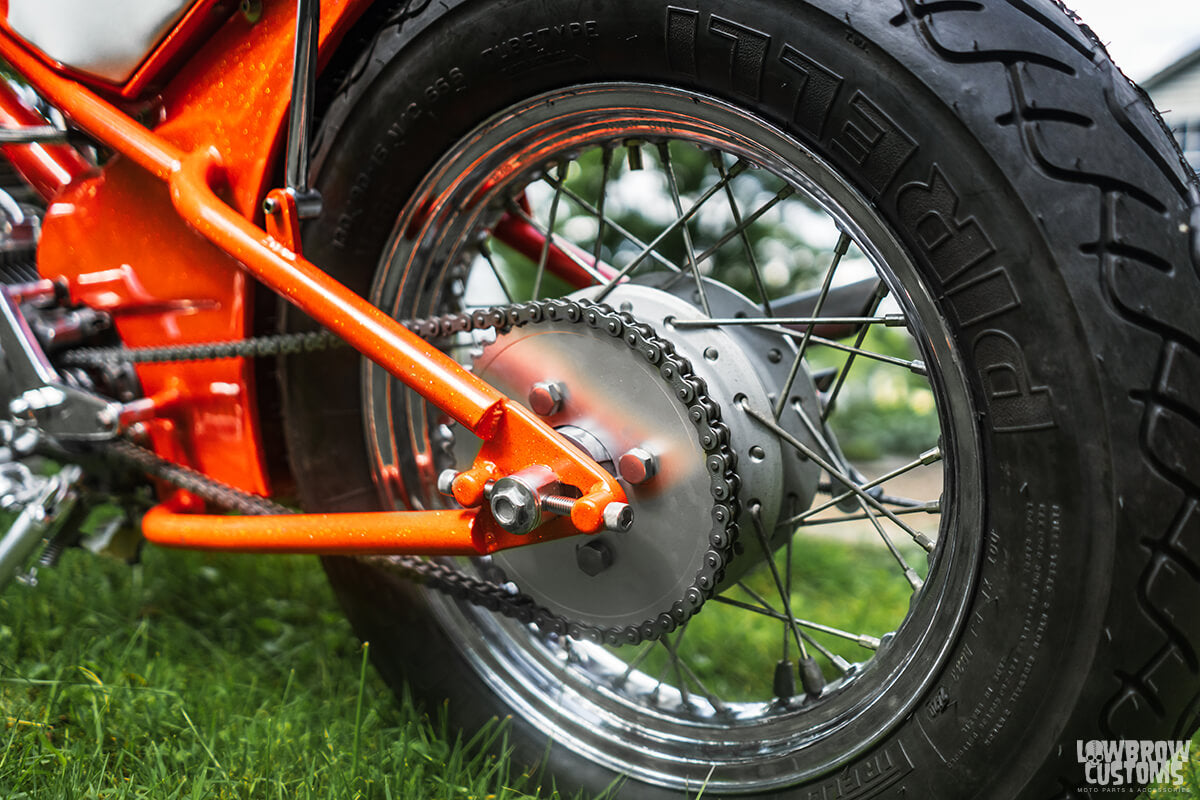
For the wheels I kept picturing black to match the paint and give the lucky 13 spoke mags a subtle pop. Those got sent off to the powdercoater as well. The one thing I learned very quickly from this build was, make sure your tires are the ones you are going to run before the fabrication process starts. I'll never make that mistake again.
It was a bitch finding vintage style tires that would fit this build that were as close to stock tire size, since that's what I had on there during fab. I ended up going with some Shinko Classic 240's, 19" on the front and a 16" on the rear. They are a bit squared off but give off that vintage aggressive look that really makes the bike look right in my opinion.
 13 Spoke stock mag wheels. Shinko Classic 240's 19" front, 16" on the rear.
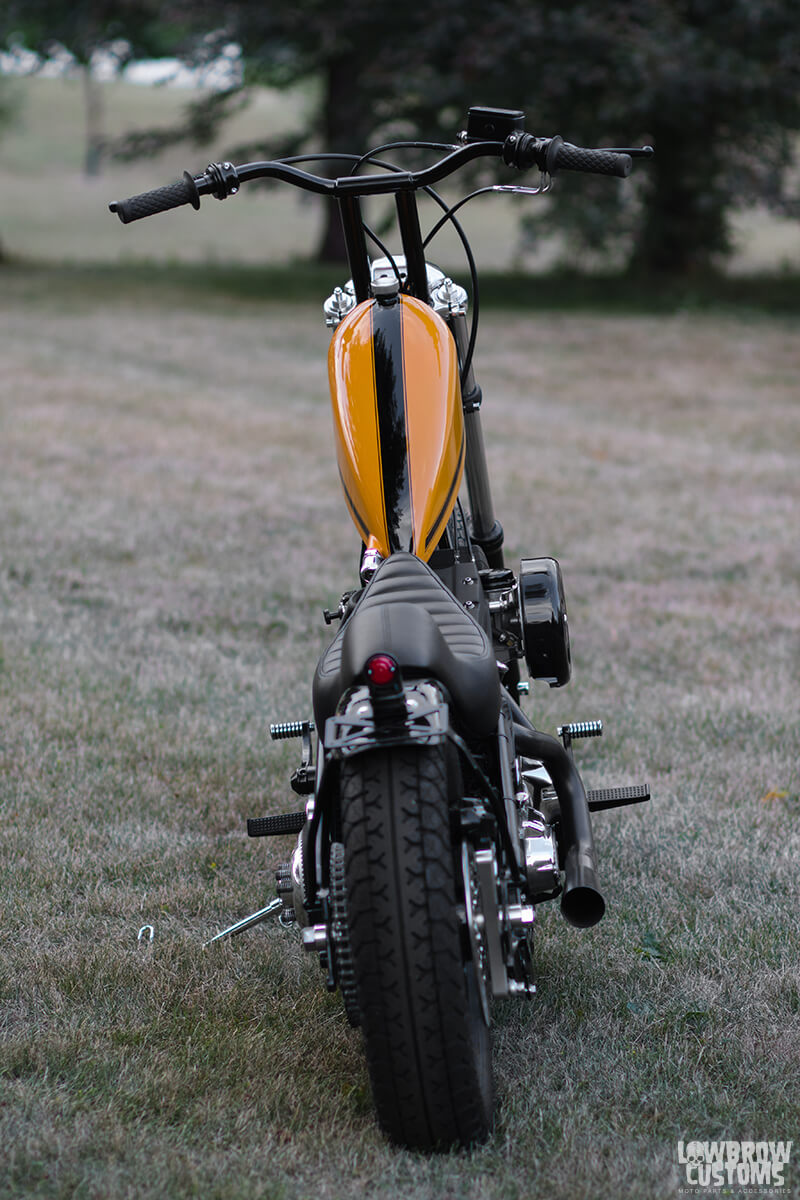
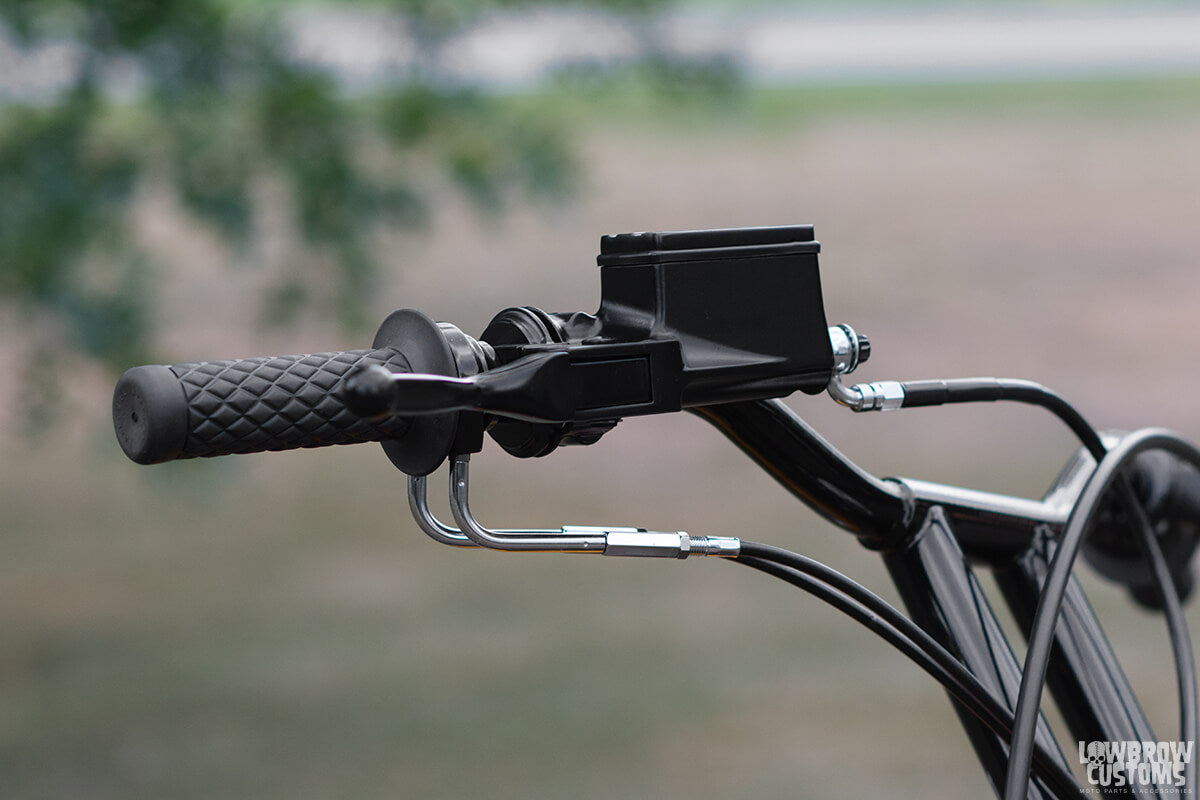
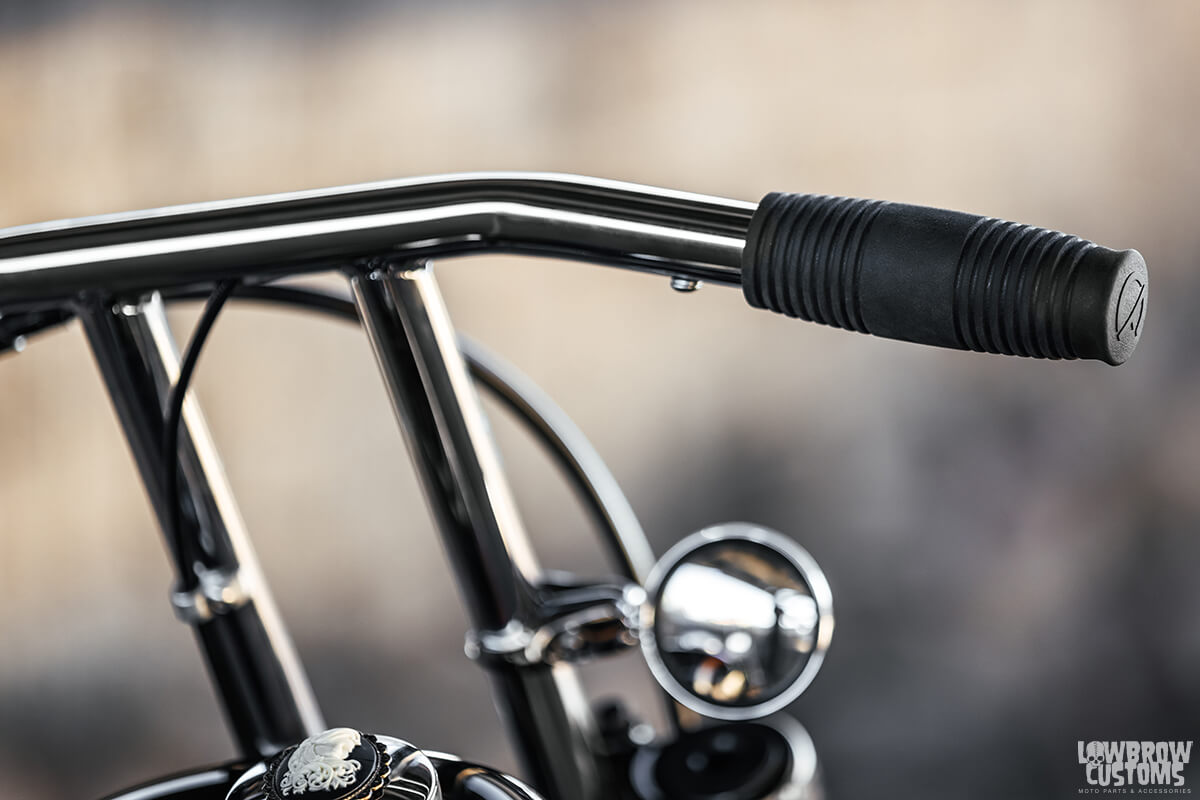
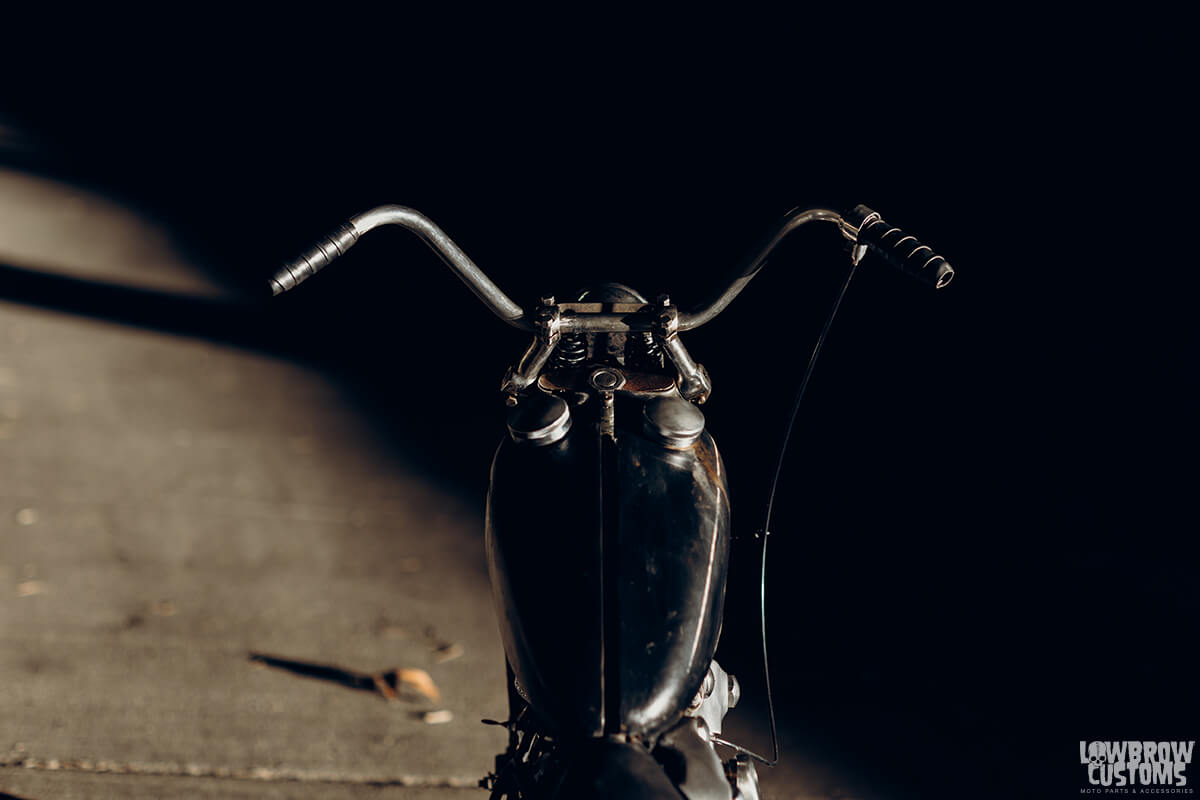
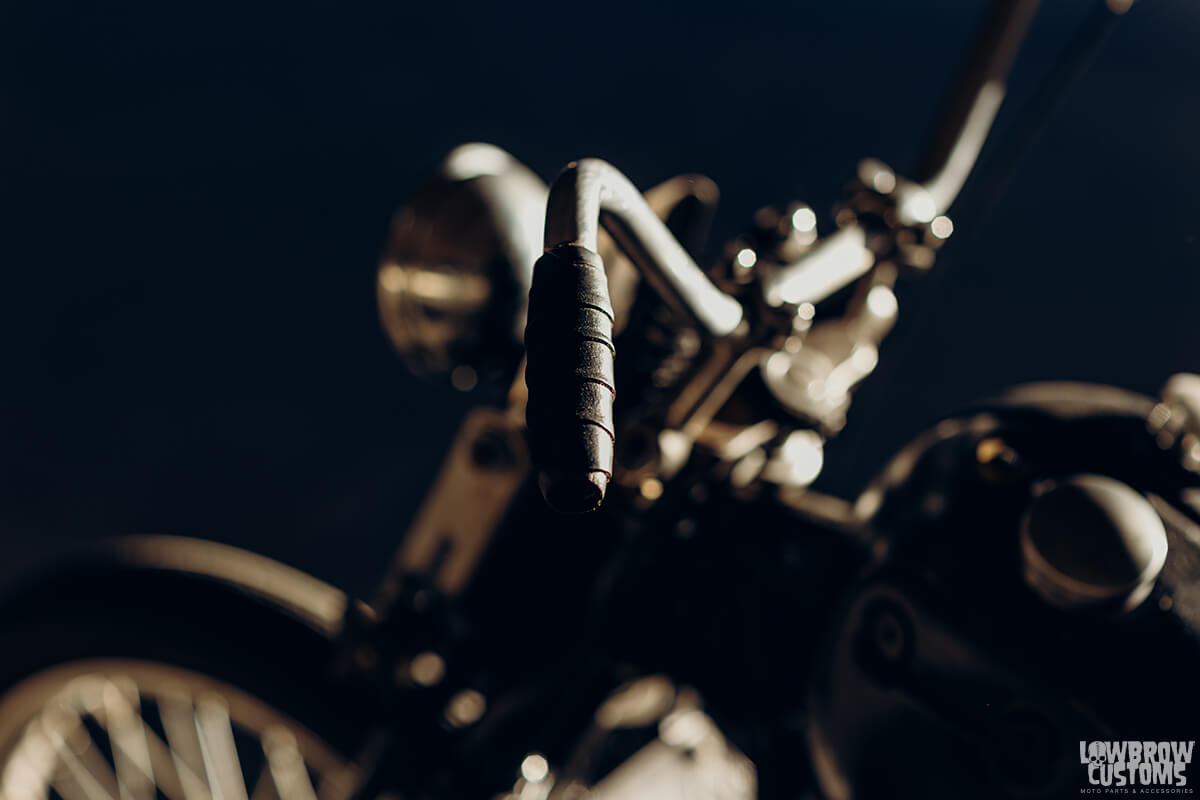
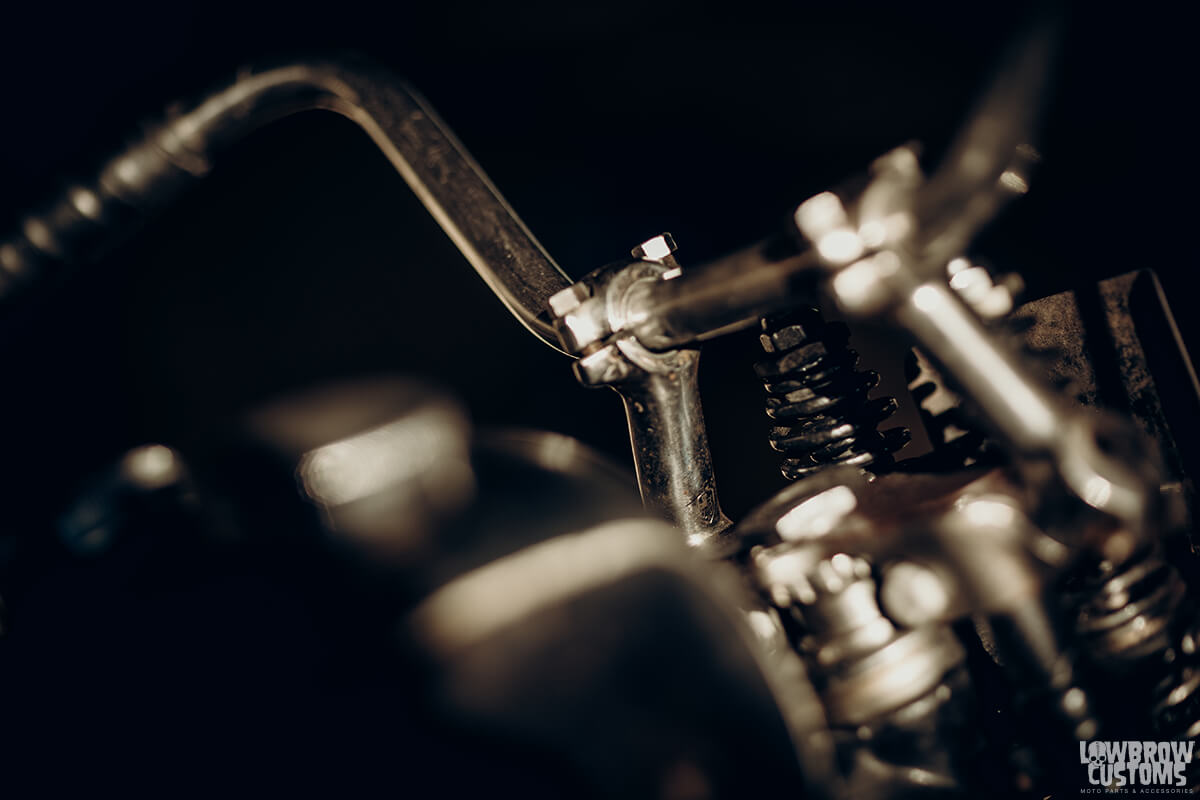
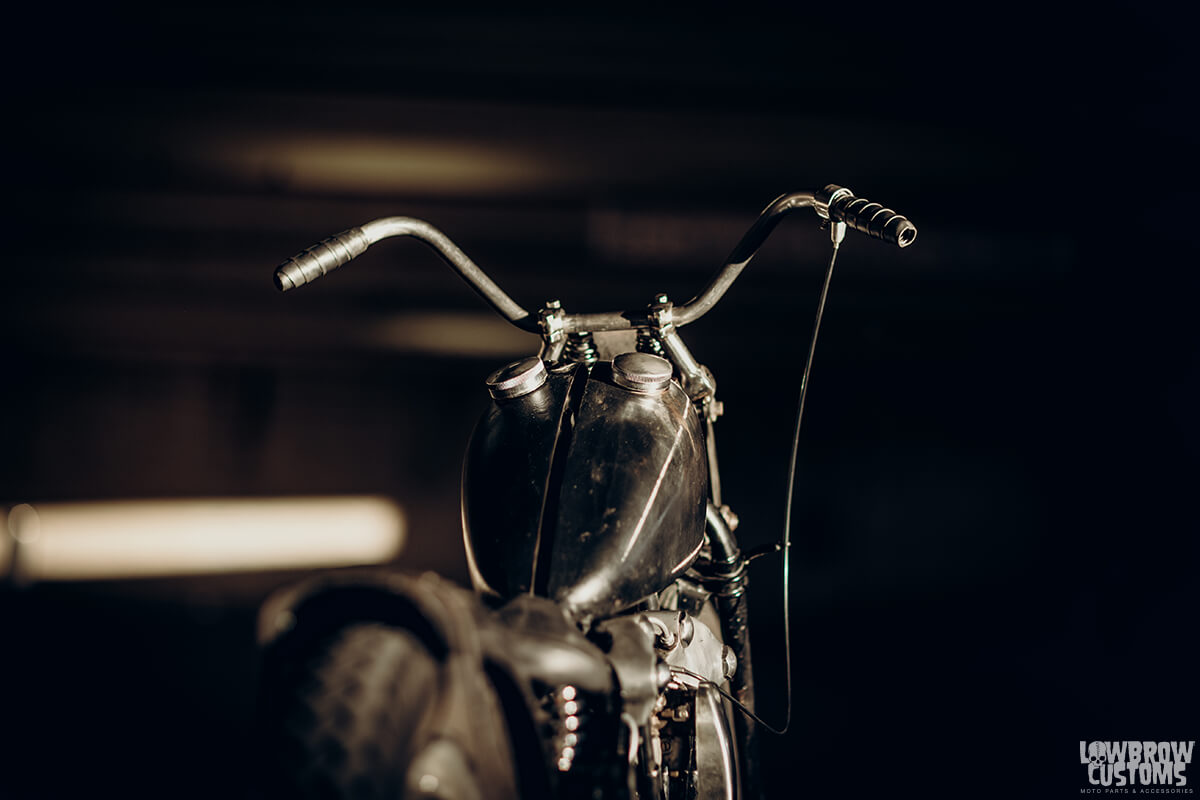
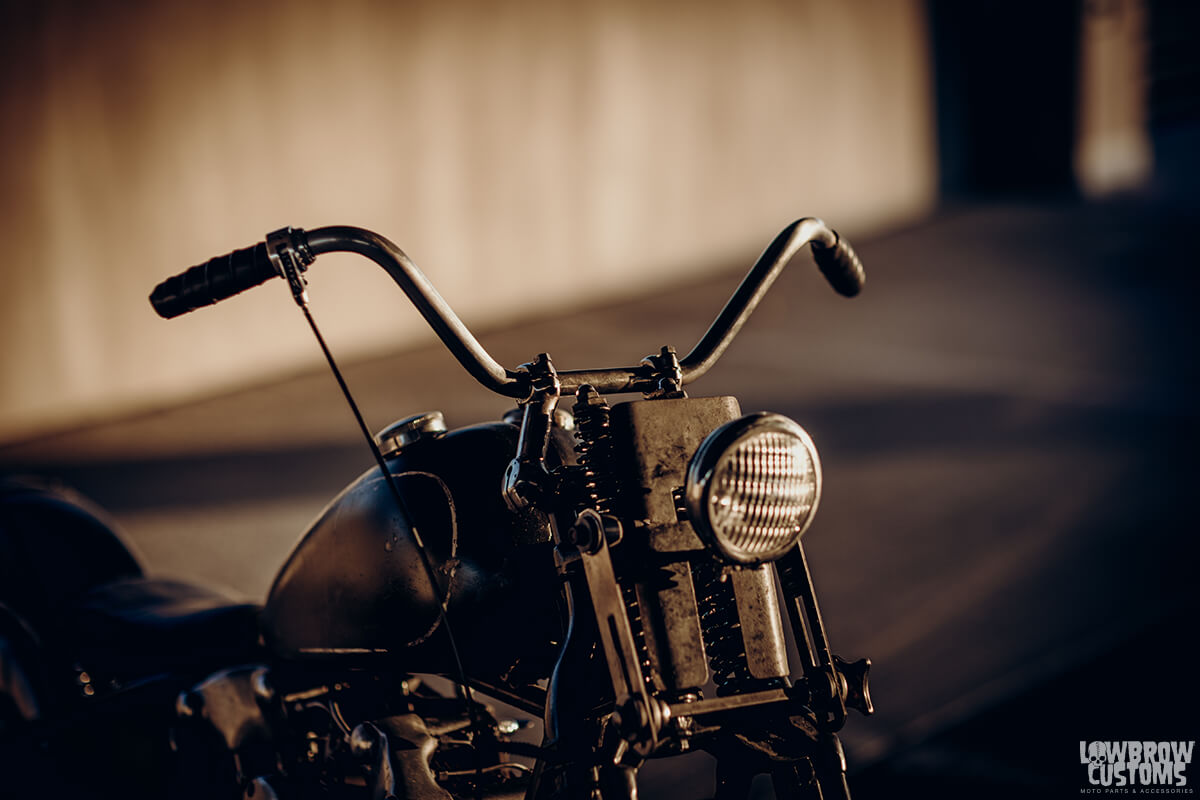
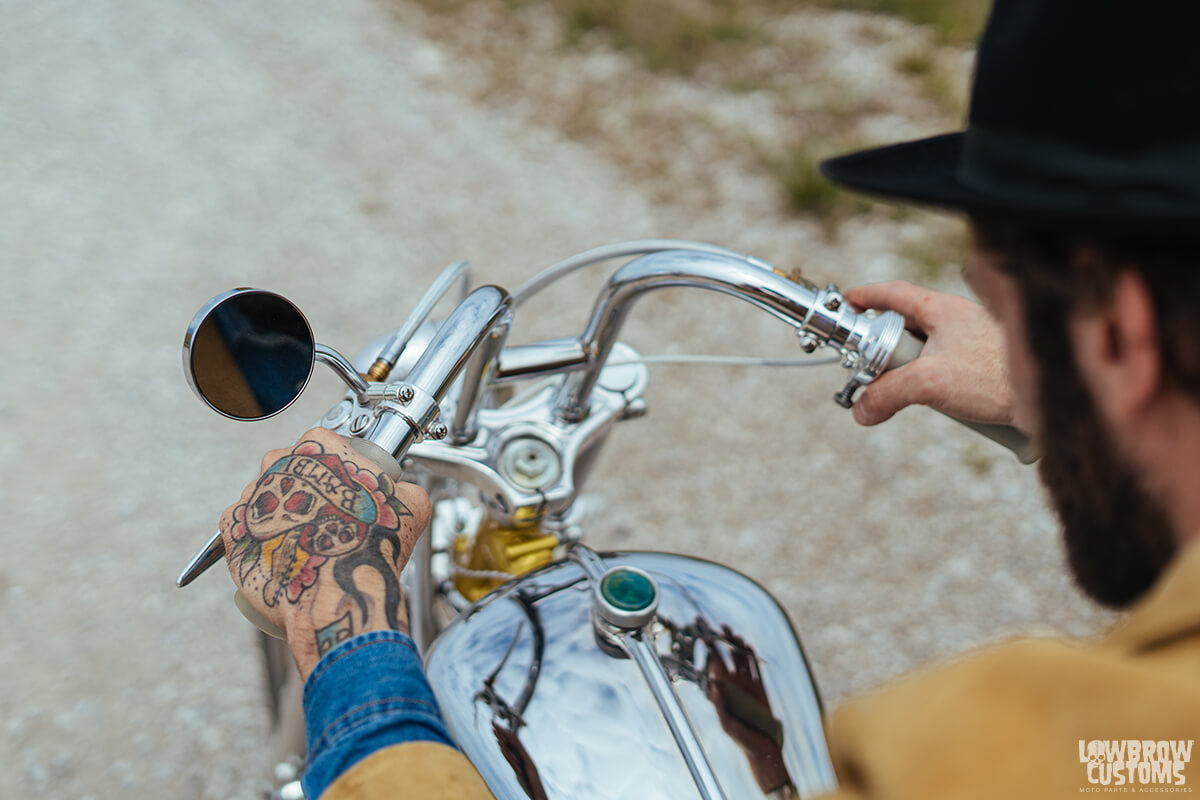
Ok, let's talk handlebars for a second. Initially I wanted to go with my gut and run Rabbit Ear handlebars. I've basically run those on every bike I've ever owned because they are comfy, but for this one something just said to me keep it tough. So after going back and forth, pulling bar after bar off the Lowbrow shelves to see which one spoke to me, our 10" T-bars took the win.
For the longest time I had this idea in my head to run clean bars and run a suicide shifter on my next bike, so the first plan of action was to run an internal throttle. I worked with my close friend Tim Fiorucci and we did a cool video showing us cutting down the set of T-bars and how to install a Kustom Tech internal throttle to use on this bike.
I still don't have a suicide shift for it though. I've been waiting on Pat from Led Sled to make me one of his killer mid control clutch set ups forever now. One day it'll go on here, but until then I ended up using a black Kustom Tech Clutch lever on the bars. With the internal throttle, it still gives a super clean look.
The Cole Foster signature grips are my all time favorite, so you know I had to run those. Tim also hooked me up with some Joker Machine throttle cable line re-locaters that I tapped and drilled into the back of the T-bars. A trick little part that really cleaned up the bars. Oh and the cherry on top of it all and still keeping the bars minimal was using a Pangea Speed 851 mirror. It's extremely small, keeps you legal, and it's actually functional.
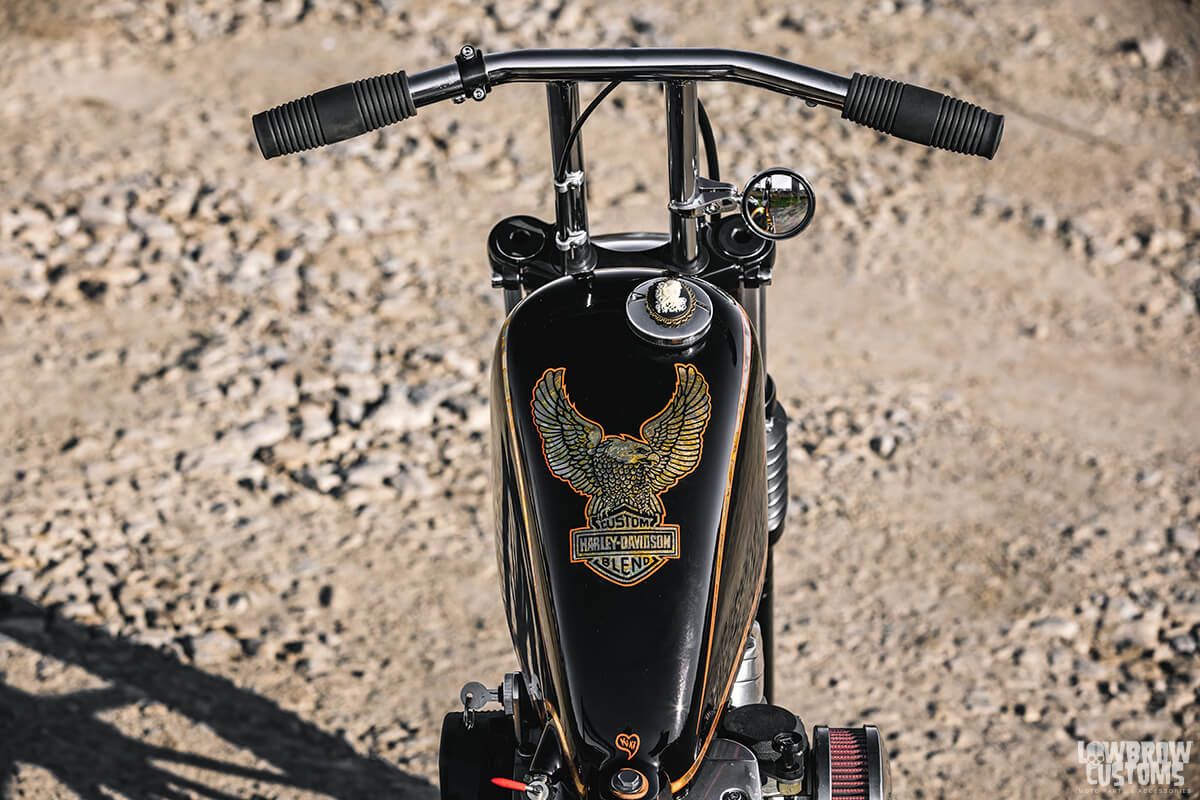 Lowbrow Customs 10" T-bars, Kustom Tech Internal throttle & clutch lever, Cole Foster grips, Joker machine throttle clamps, and Pangea Speed 851 Mirror.
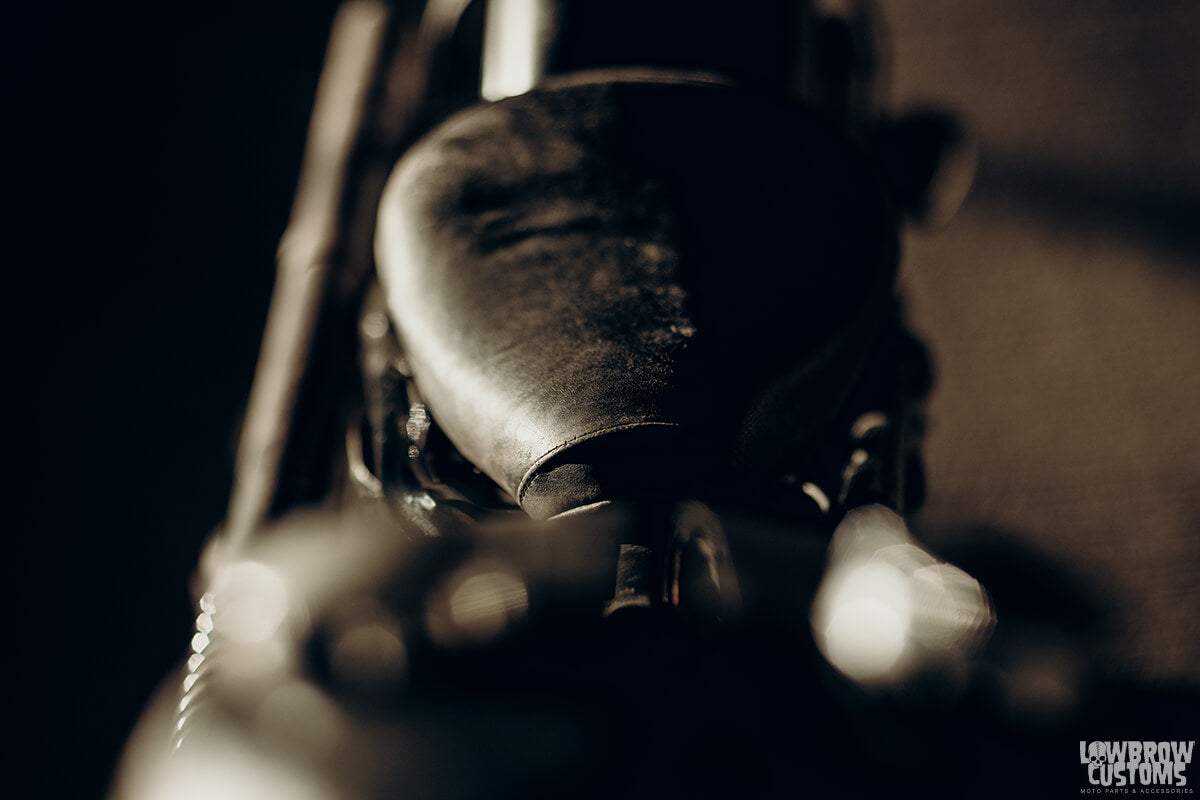
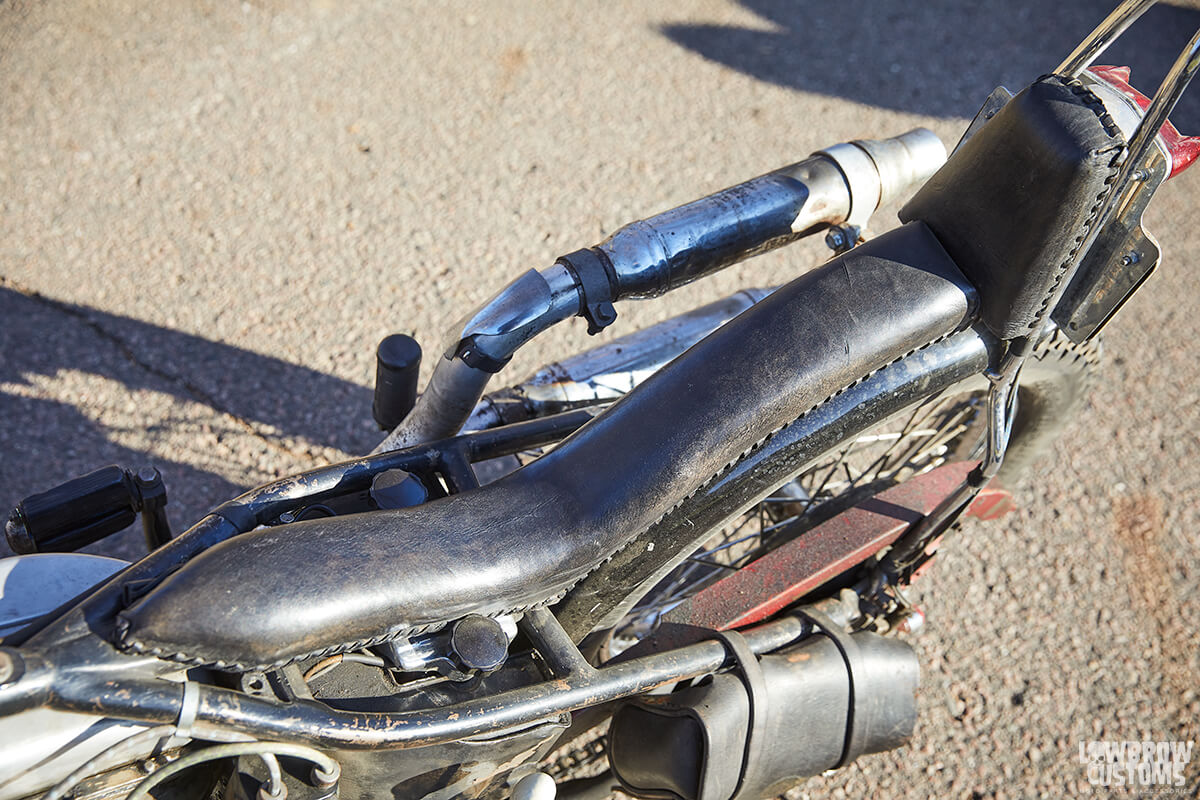
As I was saying earlier another big component for me that makes or breaks a bike's style is the seat and sissy bar. Ginger McCabe of New Church Moto is the only one I go to and who I trust 100% will kill it every time. She's the seat master, hands down.
With Jesse at The Gasbox developing the perfect cobra style seat pan for this hardtail frame fender combo, it made life easy sending it off to Ginger. We came up with together a half diamond half "V" style pleated design and I couldn't have asked for a better seat. Its functional, cool looking and fits the paint paint and flow so well.
 It's really comfy, seriously!
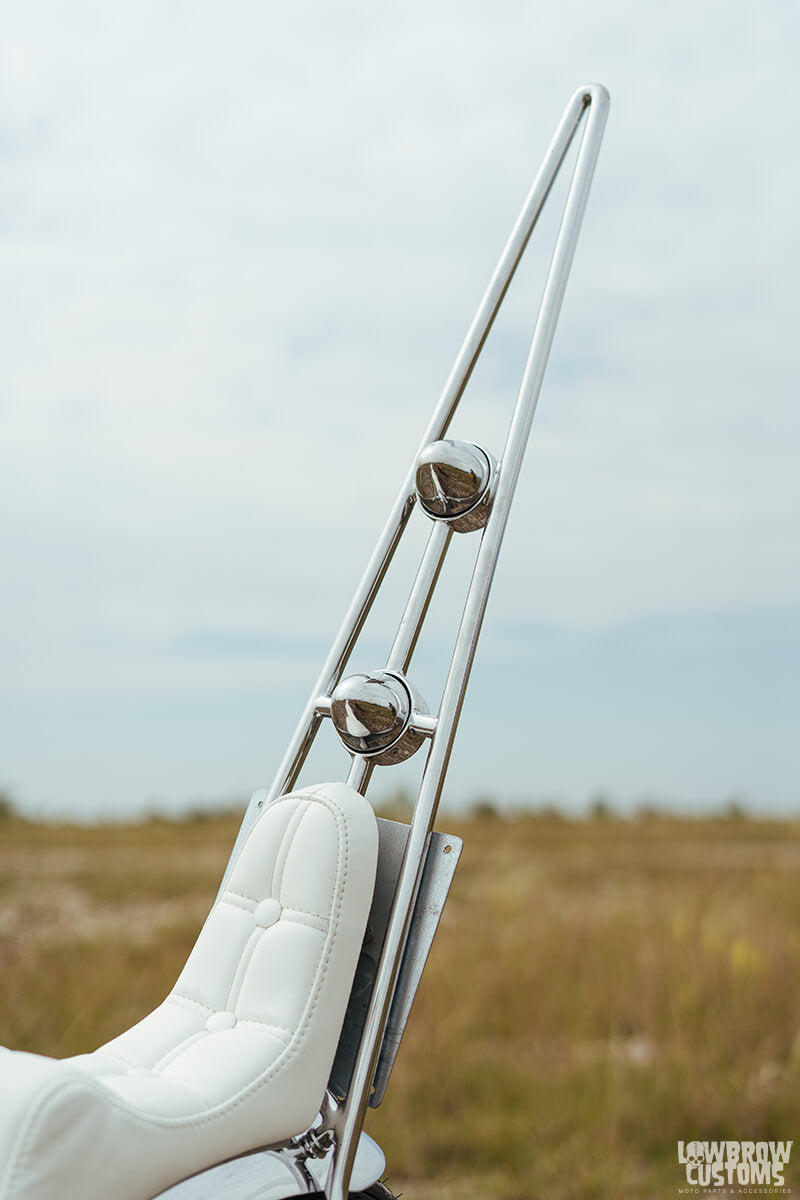
As for the sissy bar its like pulling teeth to convince Jesse a tall sissy bar is cool. I absolutely need one though for my camera gear and constant travel on my bikes. Eventually Jesse gave in and made me a stainless, round top, 36" tall sissy that fits the bike just right.
To make it legal and a bit safer then some of my other bikes I've owned, we slapped the Prism Supply Co. Box chopper light and their license plate bracket right in the middle of the sissy bar too. Extremely good visibility for traffic behind to see when stopping.
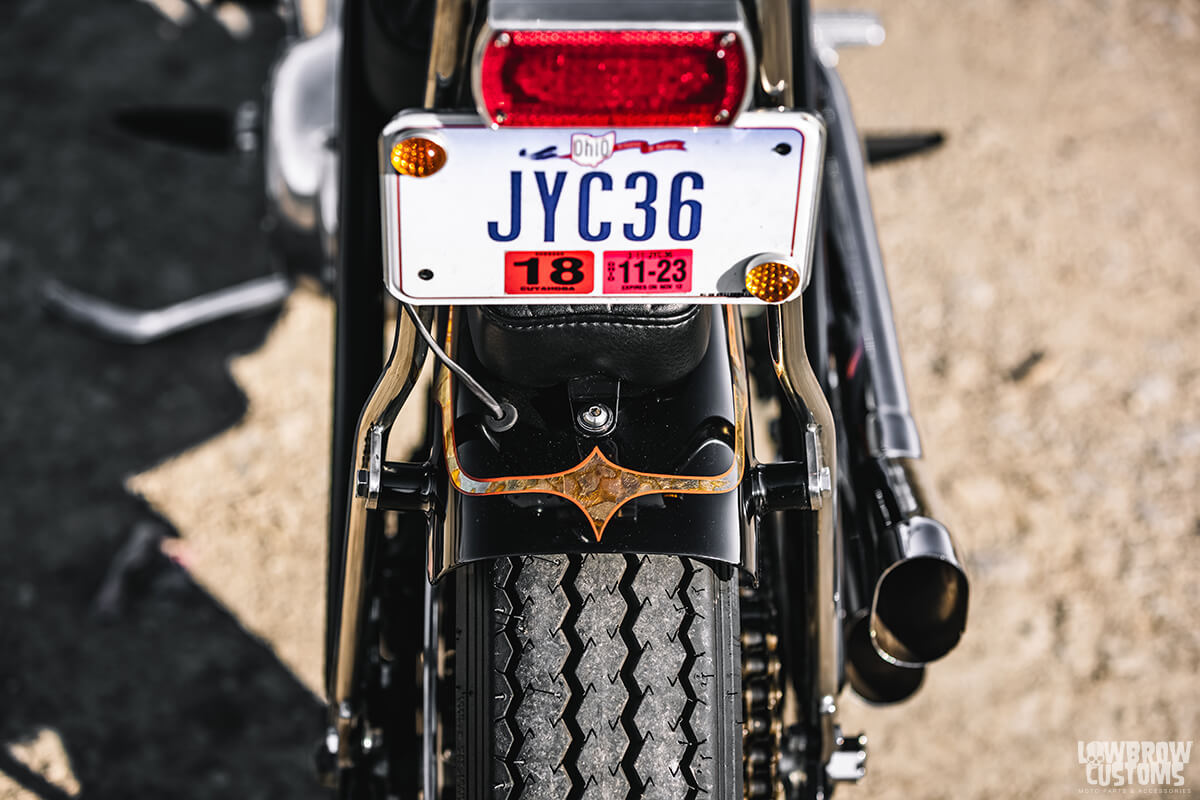
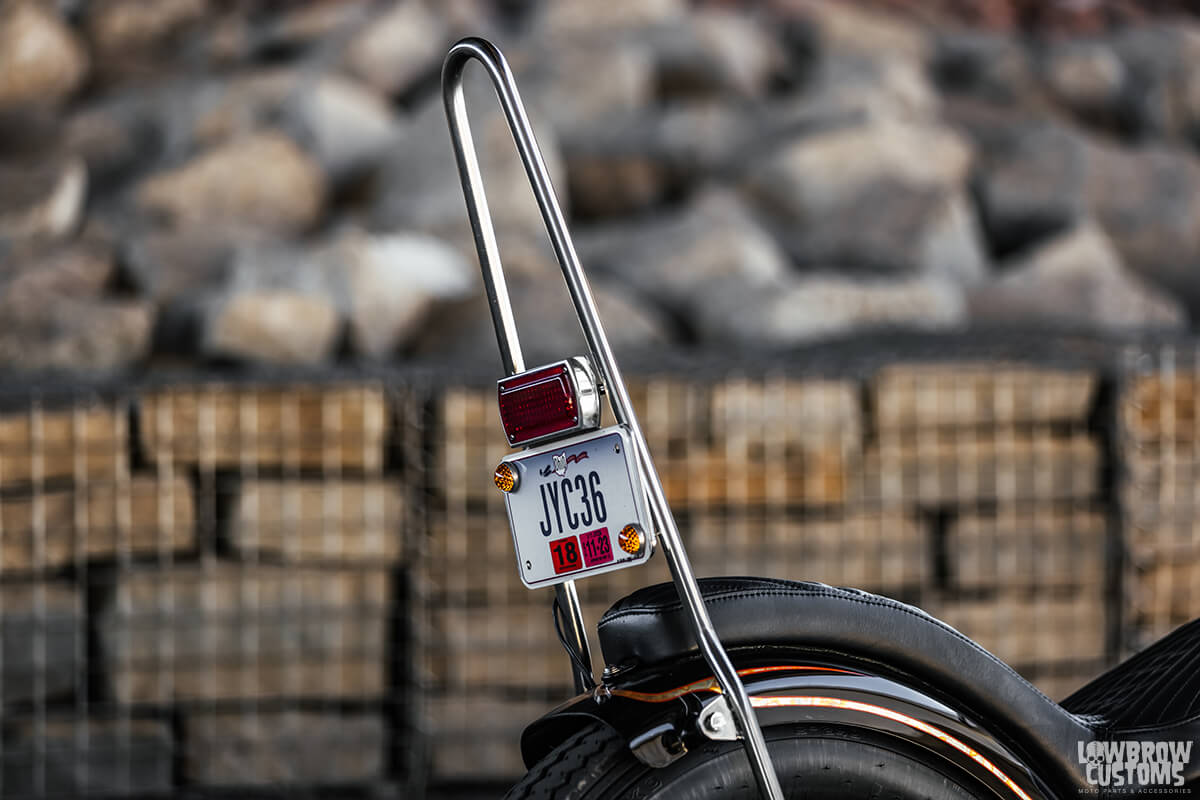 Custom stainless sissy bar by The Gasbox, Prism Supply Co Box chopper light and license plate bracket, and Red Fox orange reflectors.
A CAREFUL FINAL ASSEMBLY WITH THE NEWLY PAINTED FRAME AND TINS
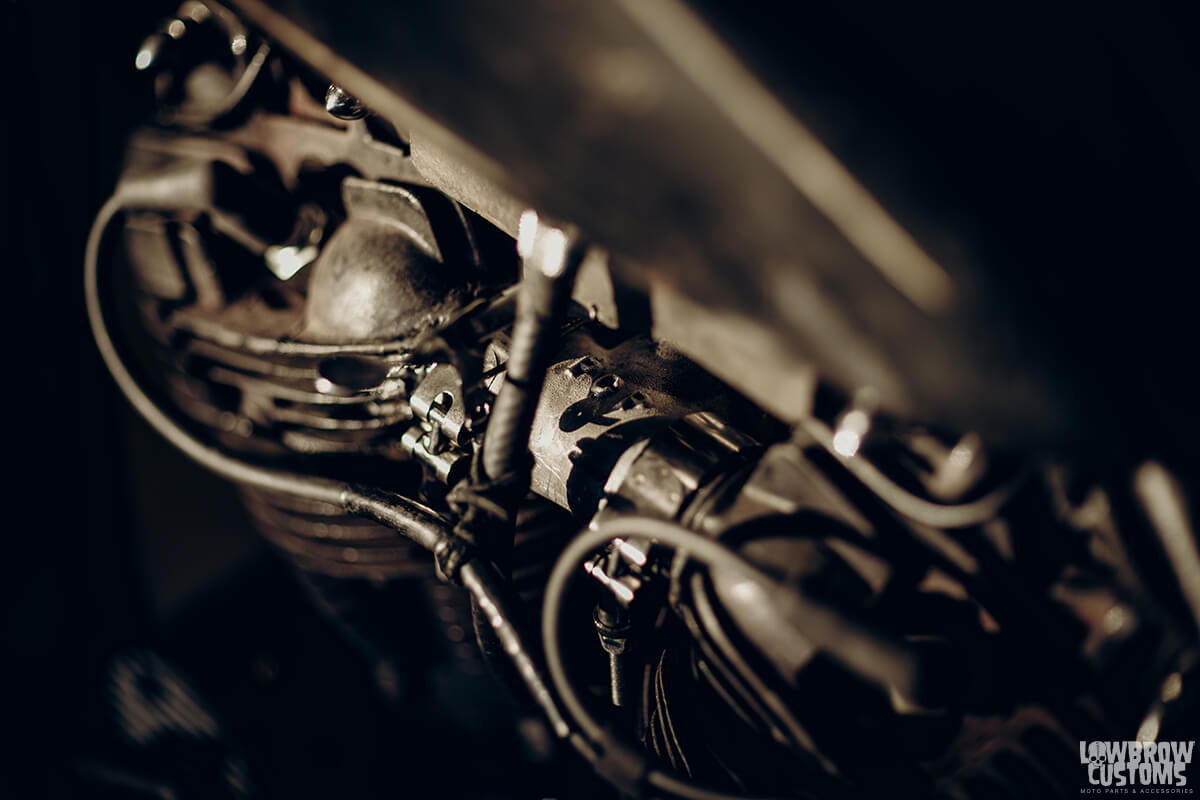
Once I had everything back from the powdercoater and polisher/chromer I started the final assembly on a few blankets laid down on the ground in the middle of my garage floor. One of my good friends Joe Banks came over and helped me carefully put the motor into the frame.
After we secured the motor we put the, front end together, then we installed the wheels and the kickstand so it could move freely in the garage and be able to be parked when not working on it. Putting the motor in the frame is definitely a two man job, I'm not sure how most people do it by themselves with out scratching the hell out of their paint.
Pro tip, lay the motor on it's right side on the ground and lay the frame over the motor from the top, it makes it so much easier than trying to lift the motor in the frame upright and will save your paint. Use lots of blue masking tape as well.
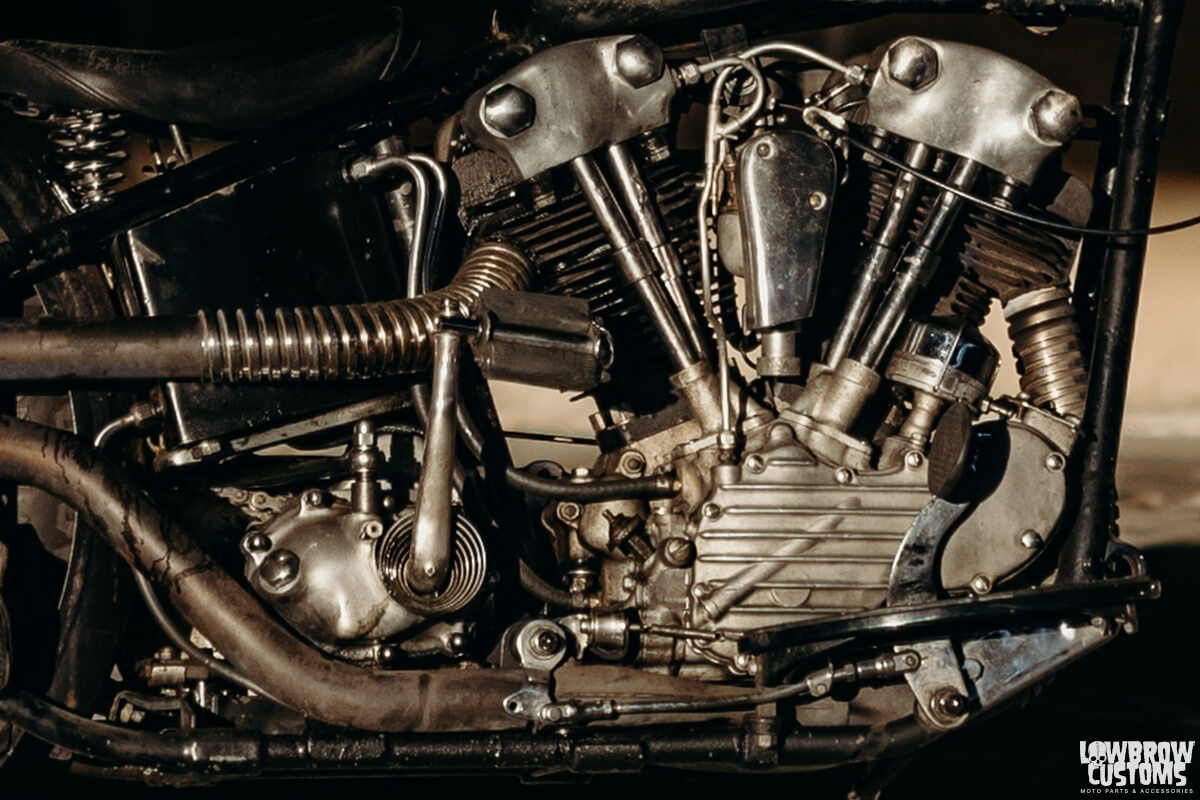
 OoooooLala that motor is shiny!
After a couple small hiccups and some broken fittings here and there I ended up getting most of the bike together with in a couple weeks before this year's Glory Daze show but it led to one problem left. Wiring, which I'm not gonna lie, I've never done before.
I called on the help of my Lowbrow co-worker andfriend Clayton Donofrio who's a wiring wizard. With a full Saturday we were able to make a custom wiring harness from scratch and hide almost all of the wires internally through the back bone of the frame. It looks so clean and I couldn't be more grateful for his help and guidance on the project. I would have been totally lost with out his help.
With the goal of firing it up and taking it to Glory Daze in Pittsburgh, I just made the deadline. The first time I fired it up, it ran on only one cylinder. Confused I looked at my wiring diagram and realized that my ignition was not the same as the diagram we had used to wire everything to and I must of had a wire crossed and or missing.
Luckily for me, Clayton left the elusive blue wire I needed right at the top of our custom made wire harness. After pulling the tank off, all we had to do was pull the wire a bit and the blue wire came out dancing out. We switched the colors needed shown on the correct diagram and it fired right up both cylinders.
I've never screamed a Todd type "WOOOO" so enthusiastically and loud until that day in my life. It was a huge feeling of accomplishment to get that bike running.
 She's super clean.
IF YOU BREAK SOMETHING, DON'T WORRY
This bike was a huge learning curve for me and a major accomplishment in my book. It not only taught me patience and new mechanical skills I've never had before but I think most importantly, it gave me the confidence in myself that I can work on these machines.
If you break something, don't worry it can be fixed, nothing is truly fucked. I learned how to problem solve, find solutions, be resourceful and also know that it's ok to ask for help to friends from time to time. I could go on forever and ever about this bike and the cool shit that is on it but I'm just going to end it here by thanking everyone who was involved with helping me on this build.
 Clayton and me after firing it up and it running correctly for the first time!
THANKS TO ALL MY FRIENDS WHO HELPED WITH THIS BUILD
A huge thank you to Tyler Malinky for the support and the parts to make this bike a reality.
Big thank you to Jesse Basset at The Gasbox for all the hard work on developing so many great parts on this bike for me and the fabrication.
Thank you to Tim Fiorucci for all the expert advise, time wasted on the phone talking about this dumb thing, fab work, and finishing touches.
Thanks to Joe Koenigsmark for the extremely well thought out paint job, it's worth every penny.
Thanks to Ginger McCabe for the incredible comfy seat for my tush.
Huge thank you to Mark at Colony Machine for all the shiny fasteners one man could ever ask for to make this bike look shiny and new.
Thanks to Chris Drew for the precision shave of my lower legs.
Big Thanks to Joe Banks for the muscle, hanging out, the help, jokes, and moral support.
Thanks to Clayton Donofrio for all the wiring help and guidance.
Thanks to Dan Dellostritto for all his advice and help over the face-times.
And last but certainly not least big thanks to my soul mate and wife Kat Arnold for being my rock, keeping me calm and sane, motivating me to finish this thing, and believing in me always.
- Words and Photos by: Mikey Revolt
You can also check out more photos and coverage of this bike in an up coming issue of Choppers Magazine.
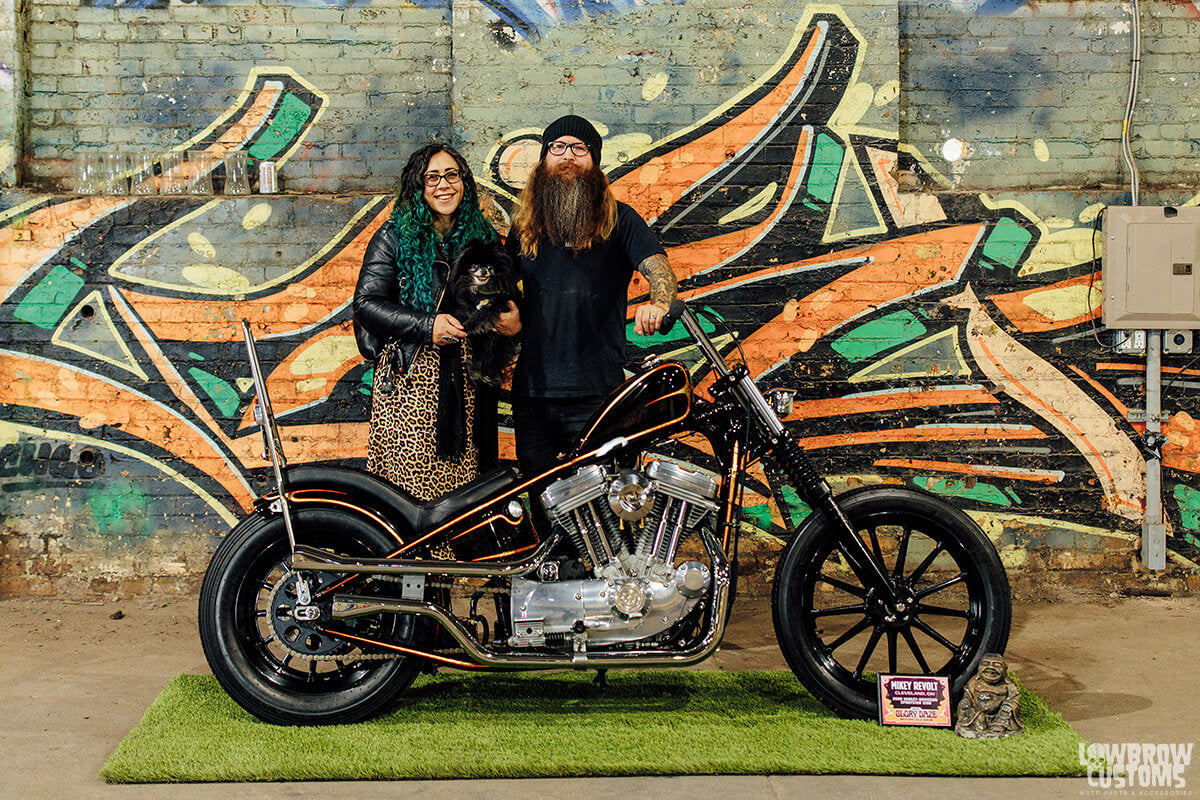 Kat, my Pomeranian Dante and me at Glory Daze. Photo by Alexa Diserio
TECH SHEET & MORE BUILD PHOTOS: MIKEY REVOLT'S SPORTSTER CHOPPER
General
Owner: Mikey Revolt
Year/Make/Model: 2000 Harley-Davidson XL
Fabrication: The Gasbox and Tim Fiorucci
Build Time: 4 and half years
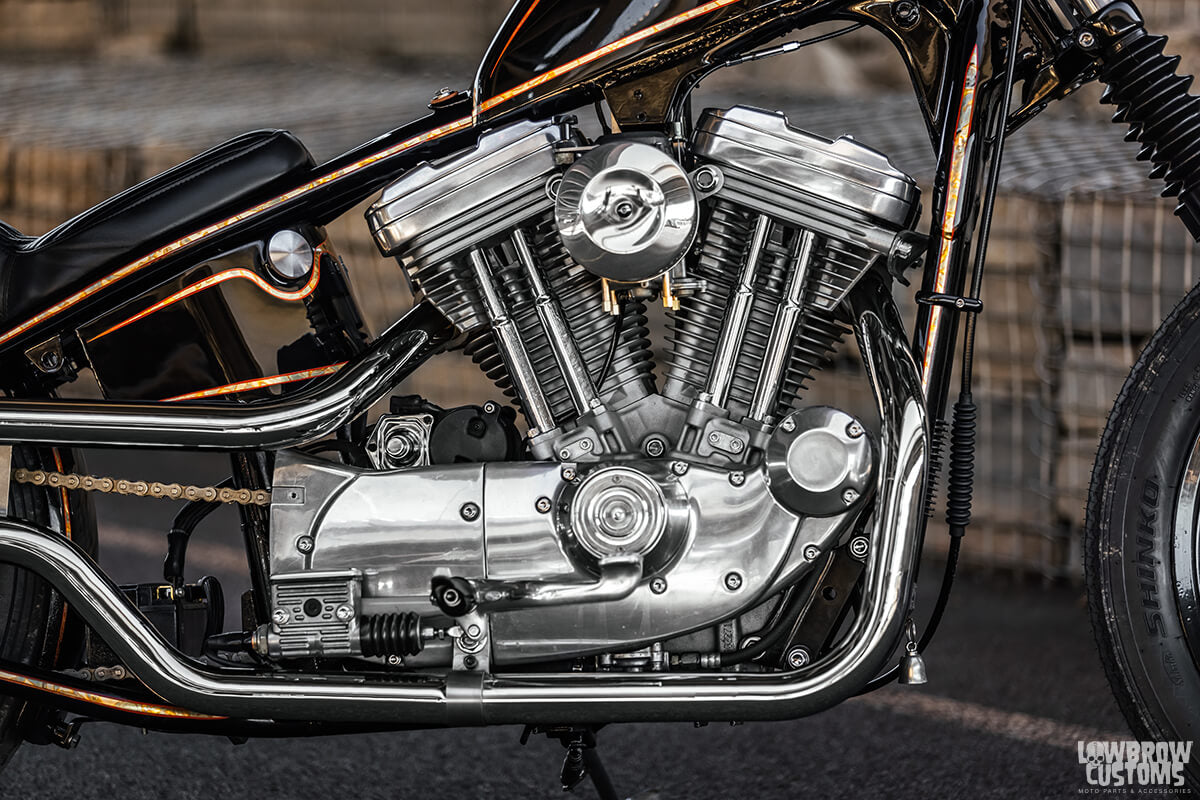
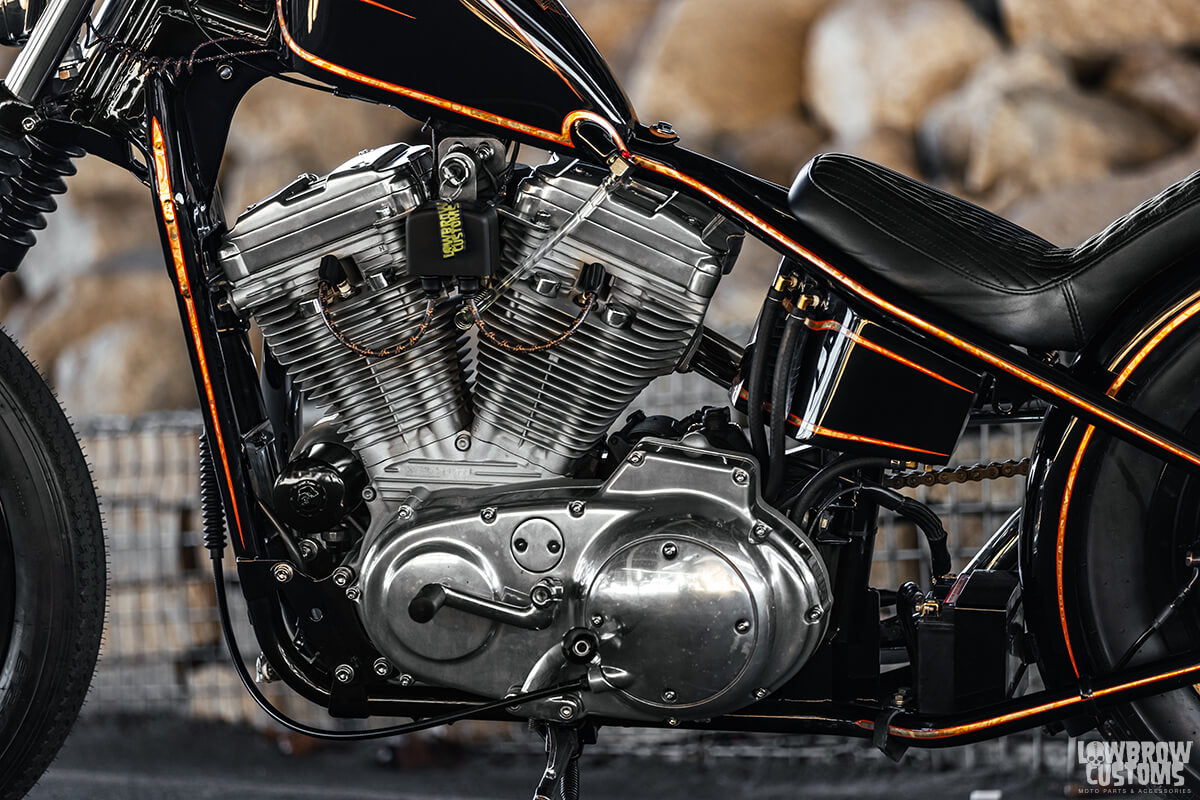
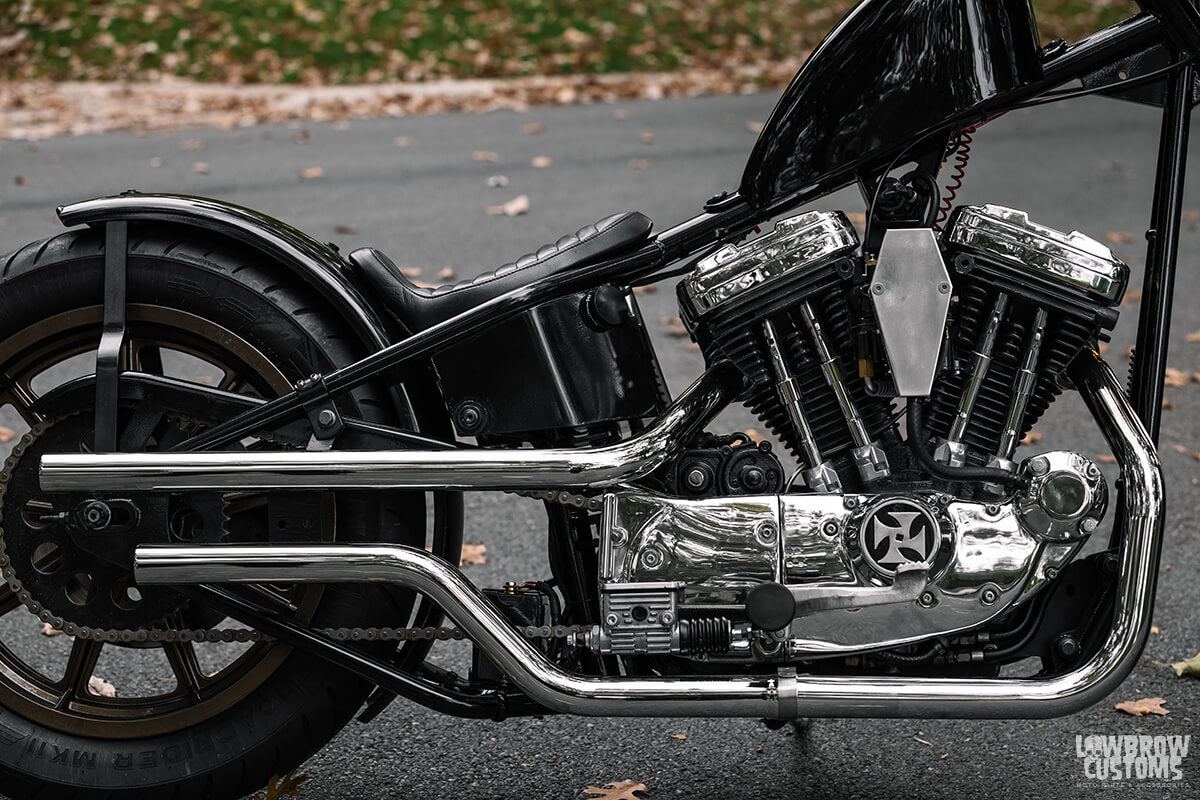
 1200 conversion kit, Gasbox 007 Air cleaner, Gasbox custom exhaust.
Engine
Year/Type/Size: 2000/ 883 HD XL Motor with 1200 conversion kit
Carburetor: CV Carb
Exhaust: Modified custom set of Gasbox upswept shotgun pipes and WRTT ends
Air Cleaner: Gasbox 007 stainless air cleaner
Frame is stock with a Lowbrow Customs Weld-on hardtail for 86-03 Harley-Davidson Sportsters
Frame
Year/Type: 2000 Stock with Lowbrow Customs Weld-on 86-03 Harley-Davidson Sportster Hardtail
Rake/Stretch: 0 Rake / 3" Stretch 1" Drop
 39mm, stock length, and cycle standard boots.
Front End
Type / Brand: Stock HD 39mm Showa
 19" 13 Spoke Mag front wheel, Shinko Classic 240 - 19 tire.
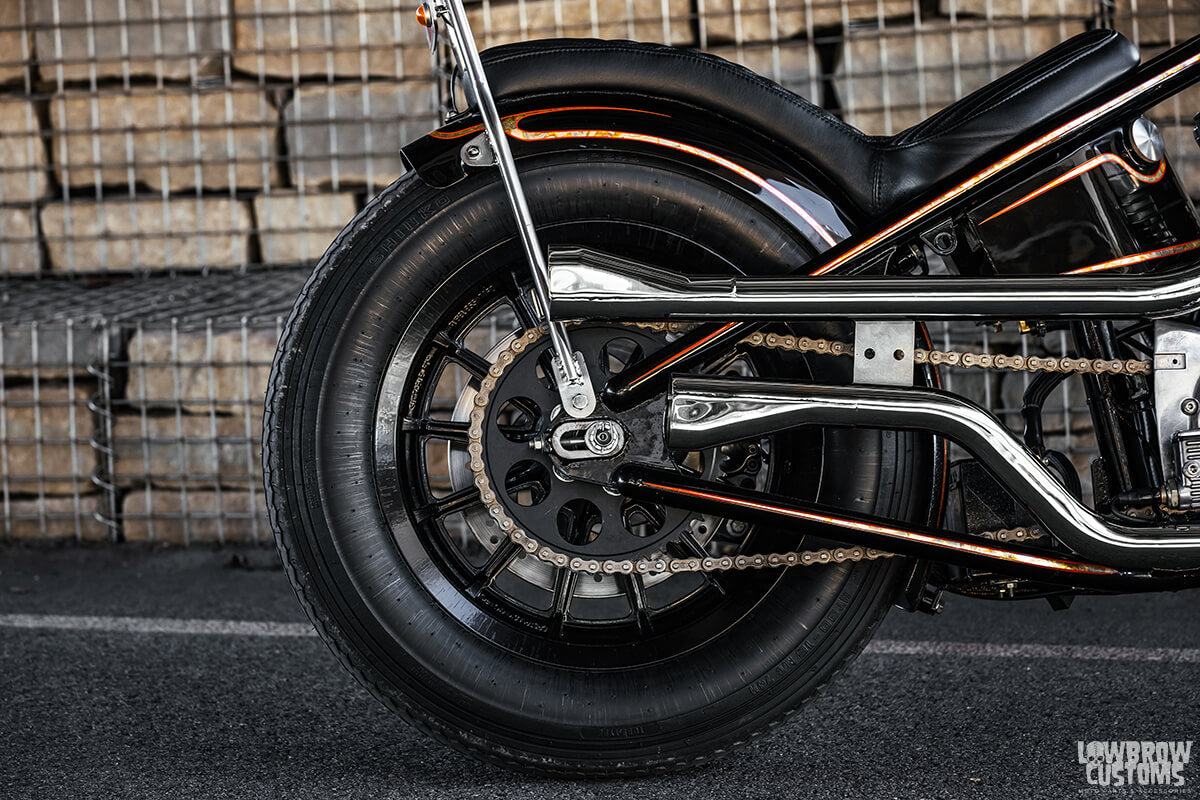 16" 13 spoke mag rear wheel, Shinko Classic 240 - 16" tire
Wheels
Front Size: 19" Stock 13 Spoke Mag - Tire: Shinko Classic 240
Rear Size: 16" Stock 13 Spoke Mag - Tire: Shinko Classic 240
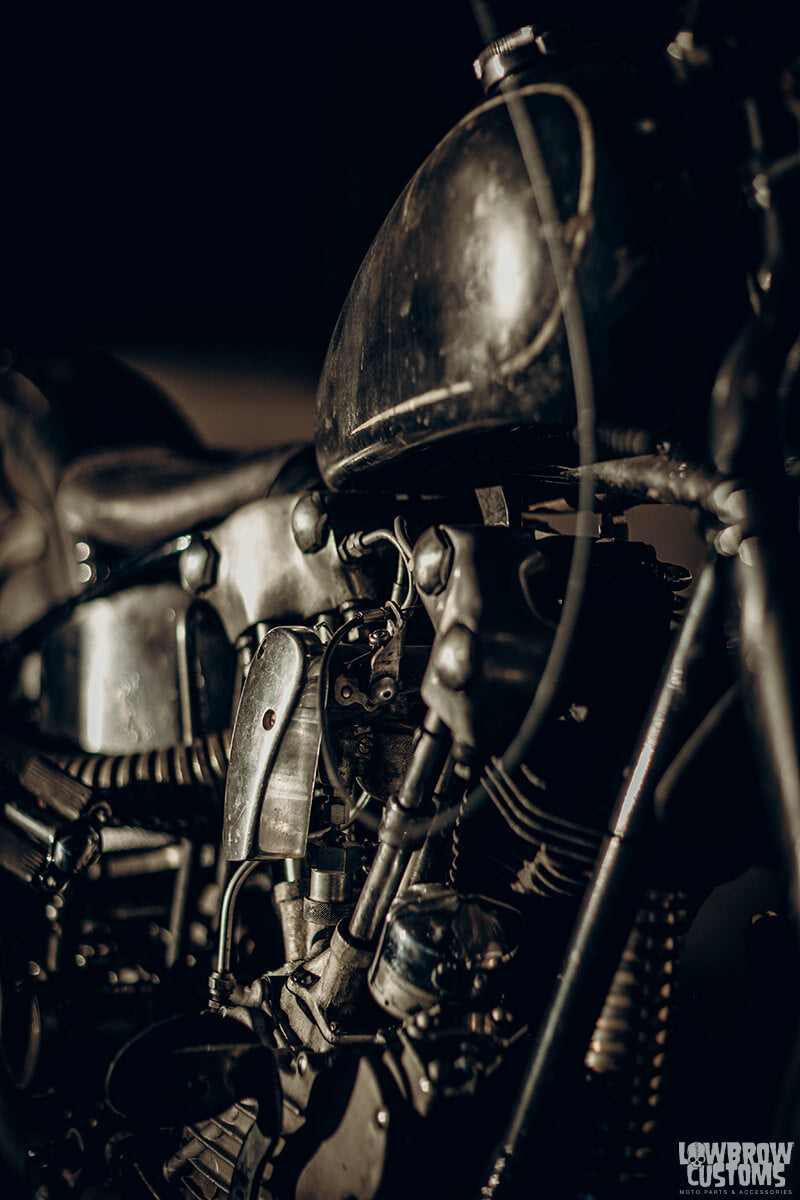
 You can see the tobacco brown flake thats buried in the black in this shot.
Finish/Paint
Paint by: Angel Dust Cycle Paint - Joe Koenigsmark and Chris MacMahan from Aerographix
Plating/Polishing: Custom Chrome in Cleveland
Powdercoating: Ace Powdercoating
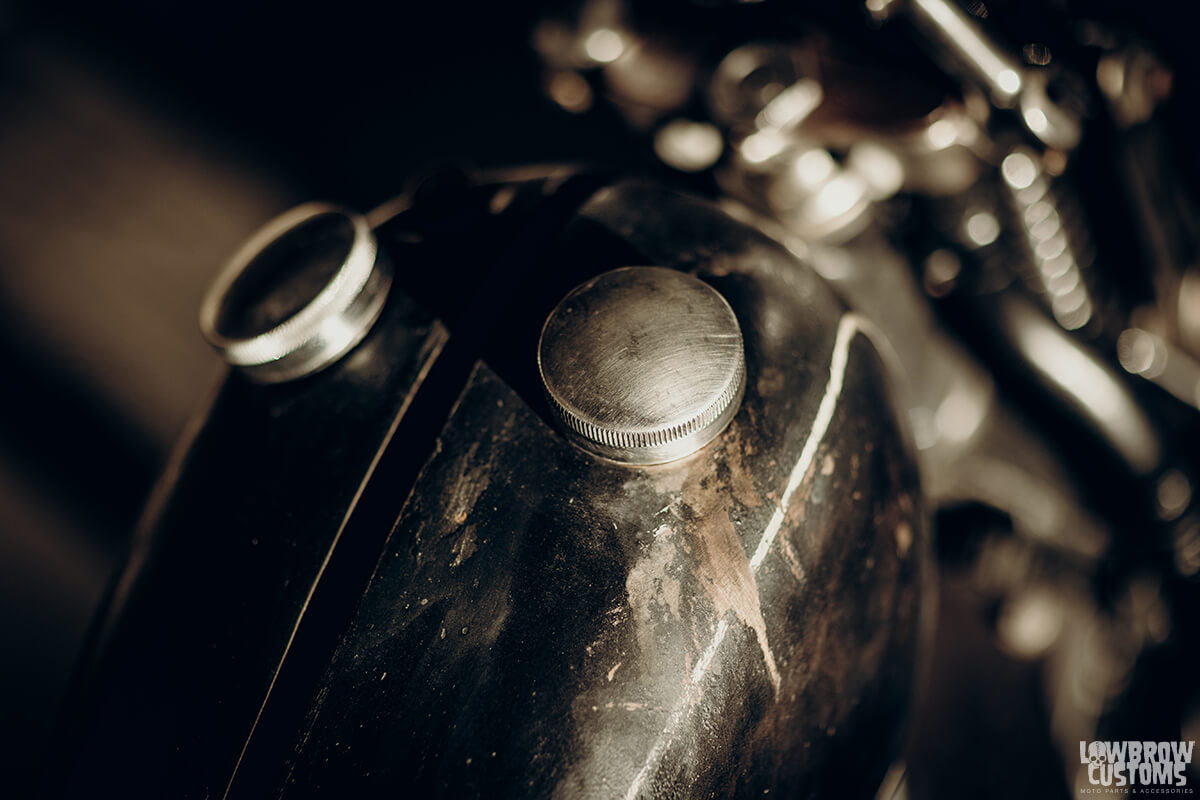
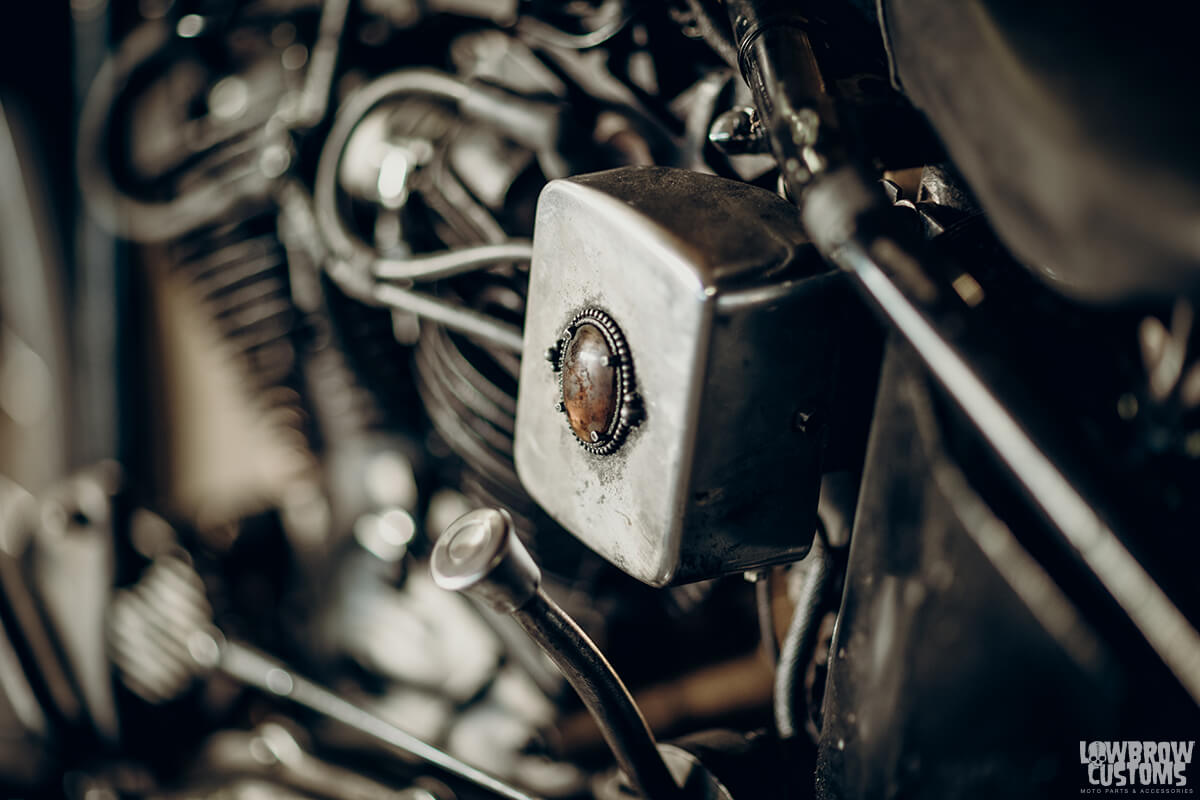
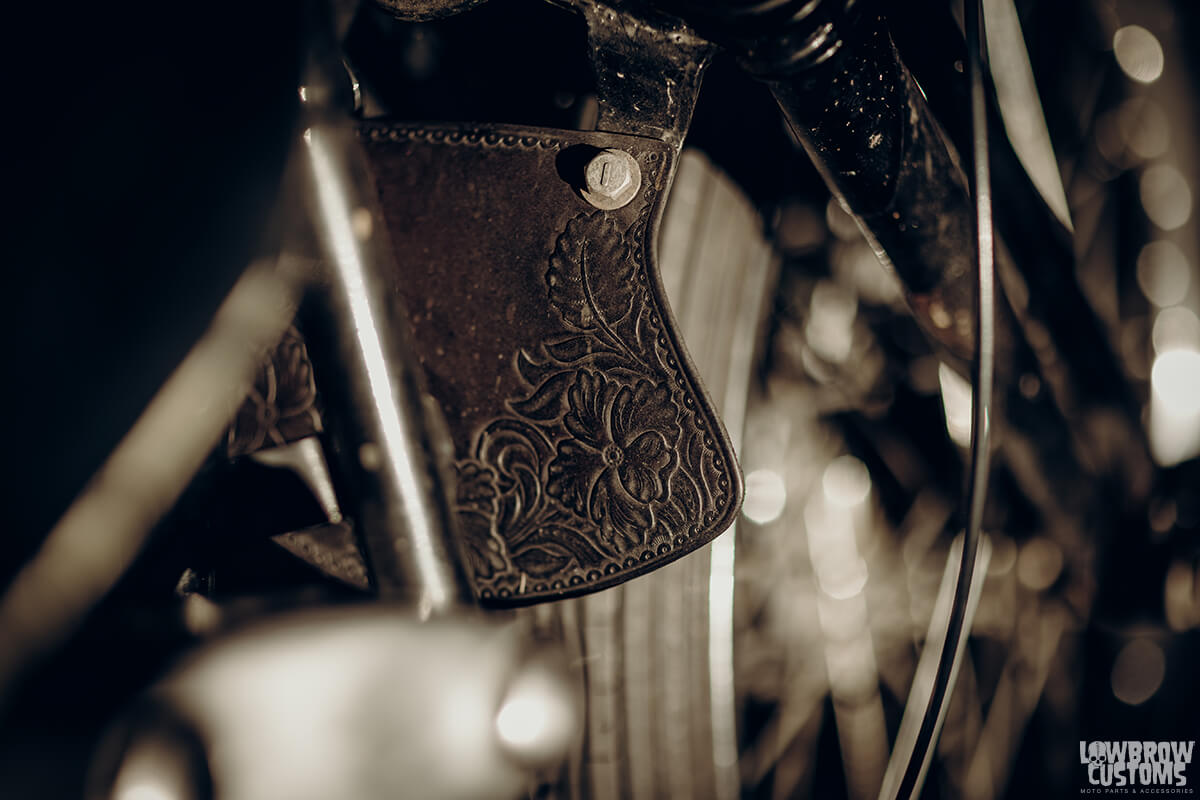
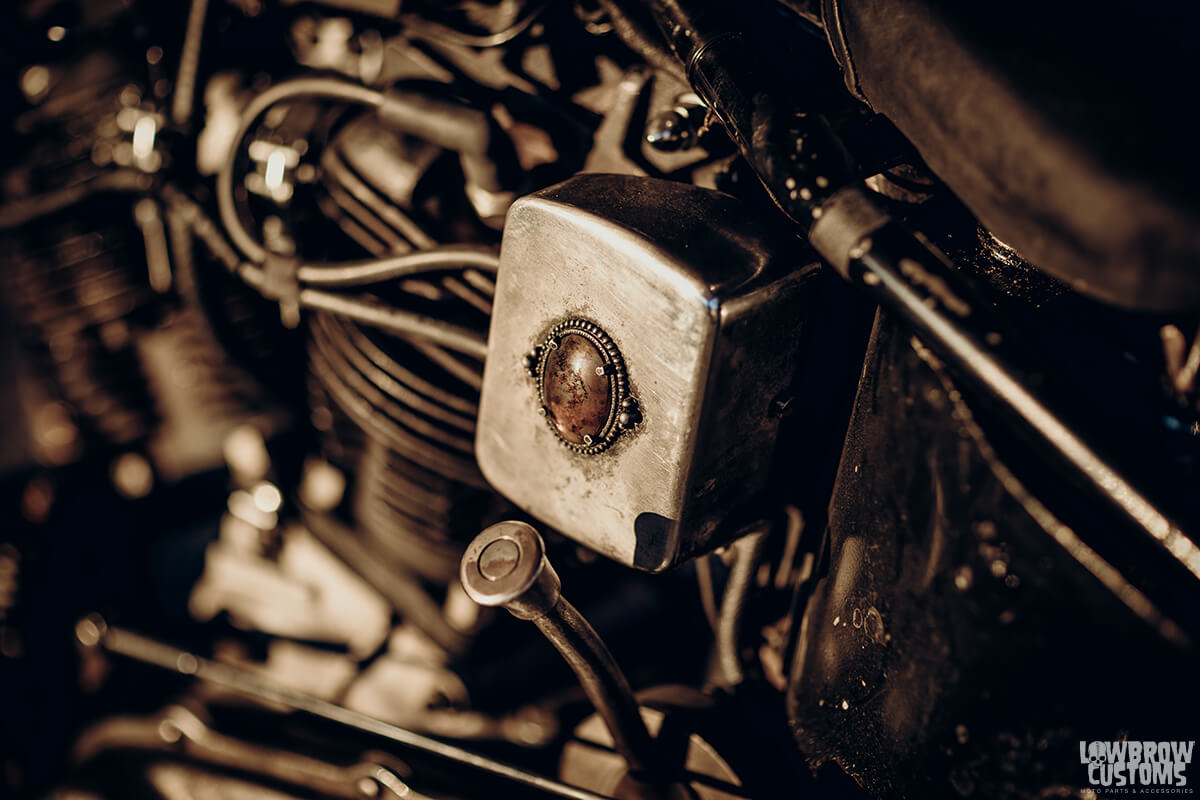
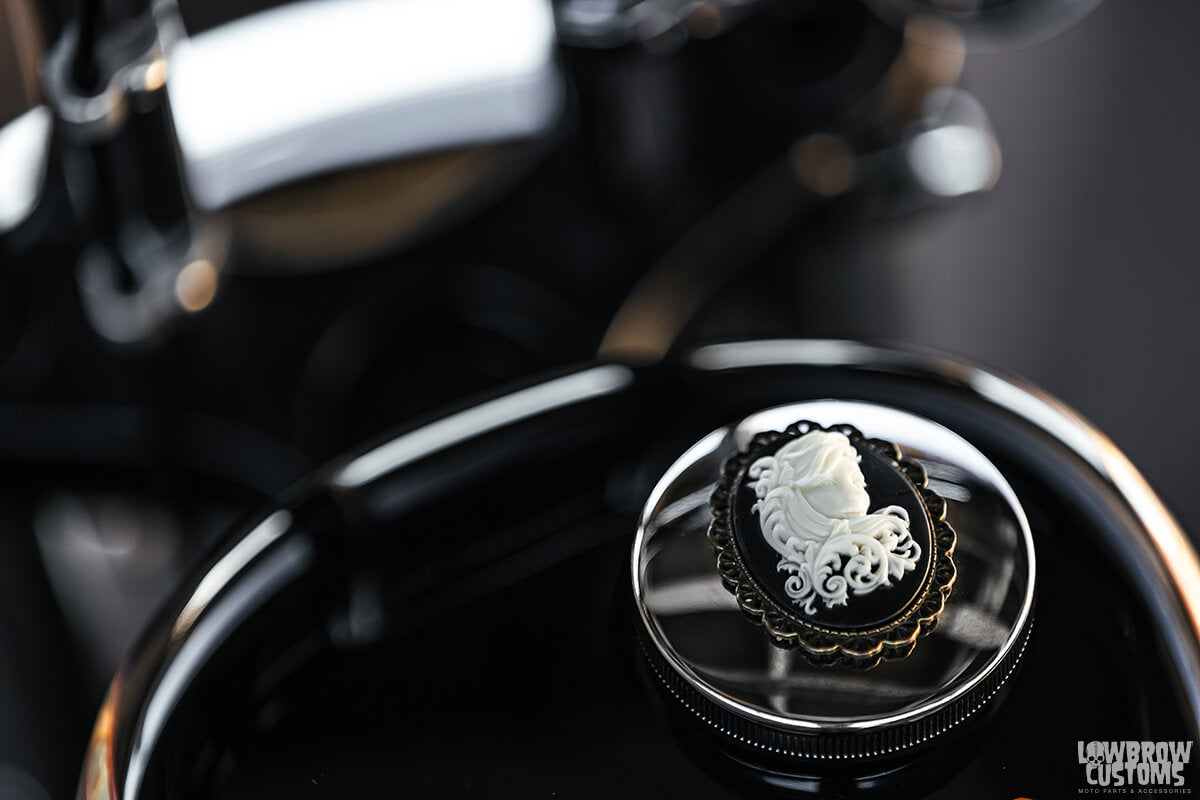 Cycle Standard gas cap with some customization. I found this broach in Tombstone, AZ at an antique store back in May of this year and cut the pin off with a Dremel. I then used good ole JB weld to secure it to the top of the cap.
Accessories
Front Fender: NOPE
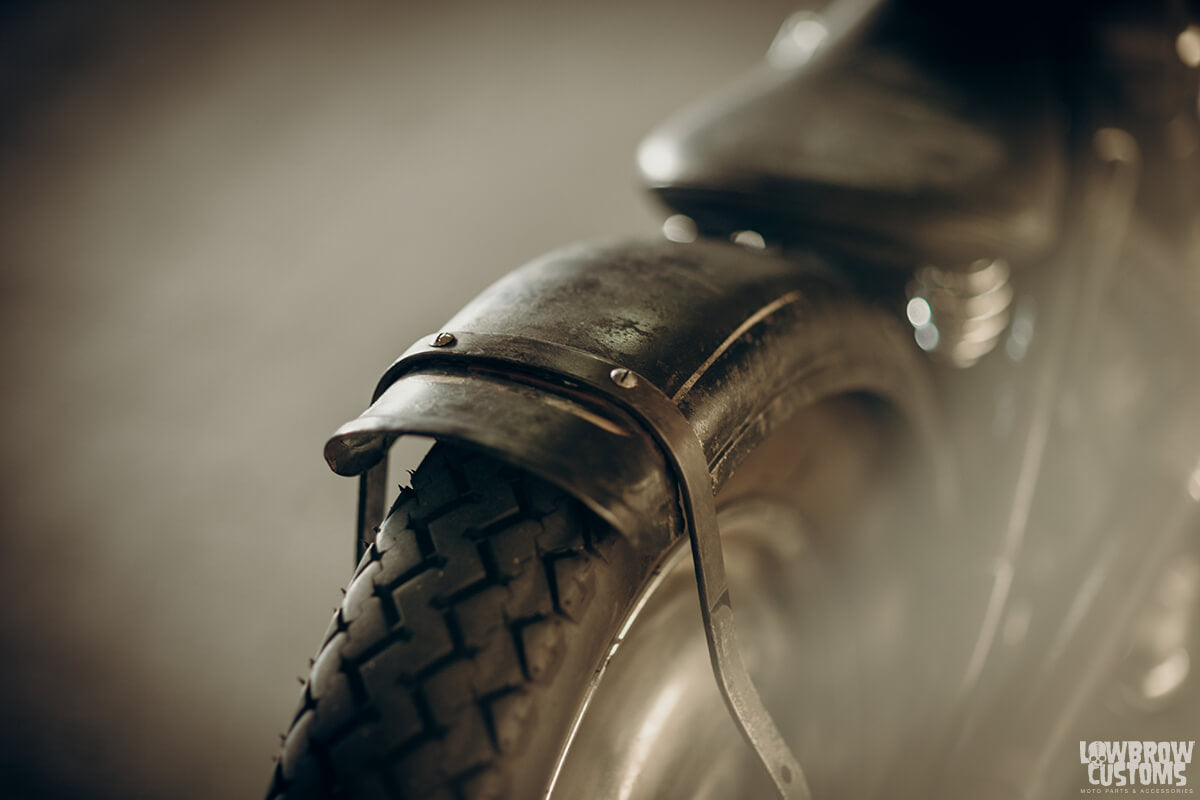
Rear Fender: Gasbox 16" Rear fender
Gas Tank: Lowbrow Customs Frisco Mount Sportster 2.1 Gallon Narrow Bayonet Filler
Handlebars: Lowbrow Customs 10" T-Bars
Grips: Lowbrow Customs Cole Foster Signature Grips 1"
Mirrors: Pangea Speed Shop 851 Mirror
Hand Controls: Kustom Tech Internal Throttle, Kustom Tech Clutch Lever
Foot Controls: Speed Merchant Foot pegs, stock controls
Headlight: vintage bates
Taillight: Prism Supply Co. Box Chopper light
Turn Signals: My Arms
License Mount: Prism Supply Co
Seat: Custom New Church Moto by Ginger McCabe
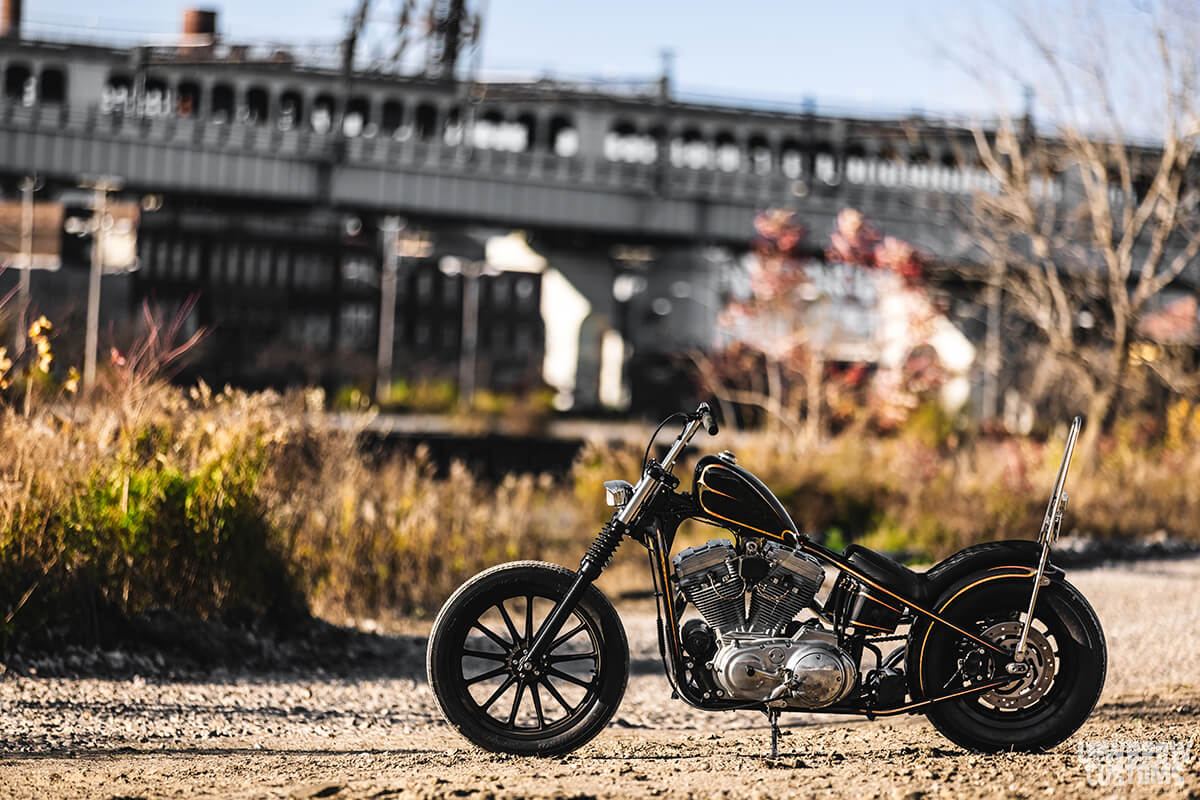
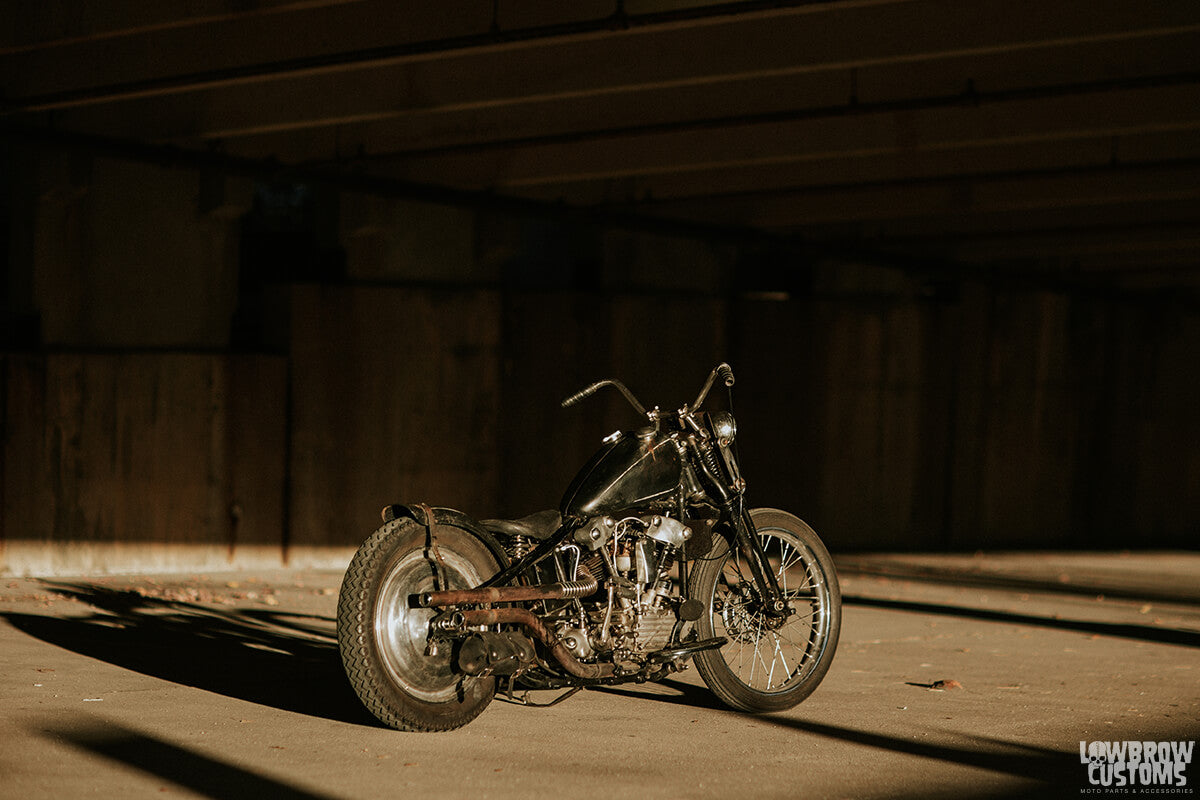
 The darker shots were shot under the I-90 bridge down in Tremont area, always love it down there.
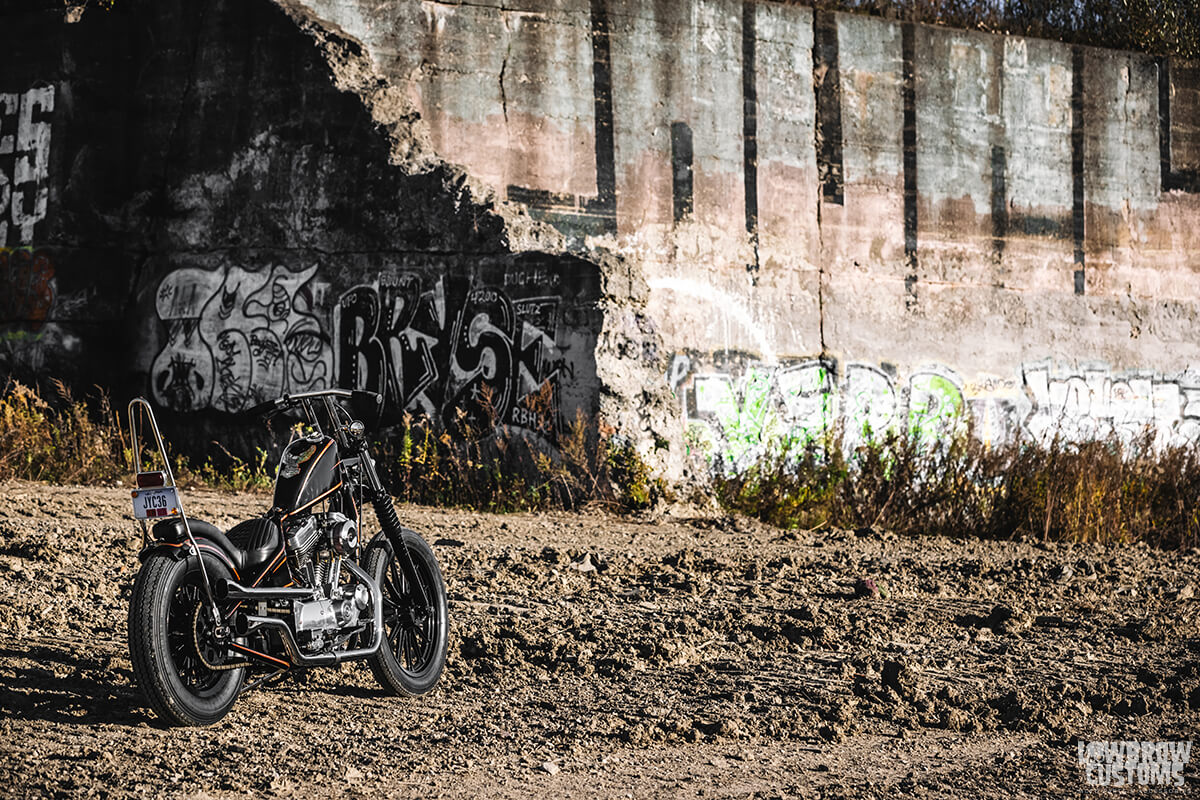
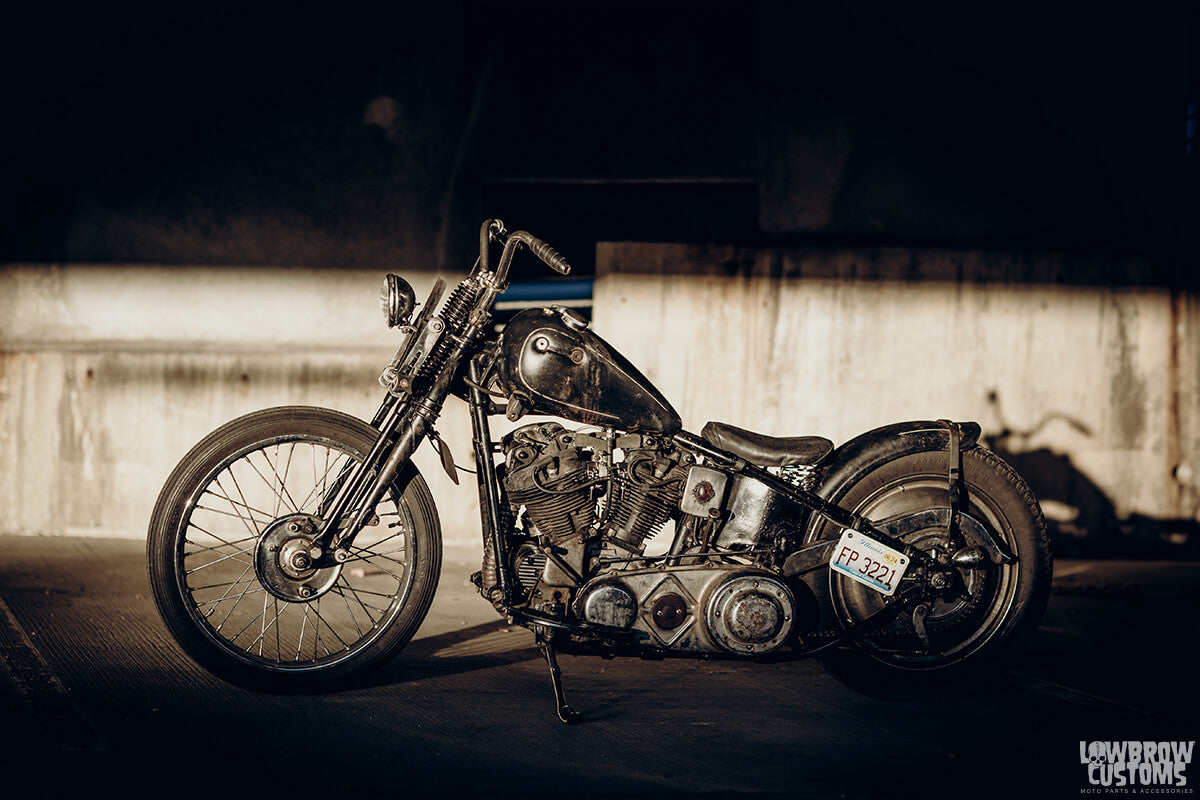
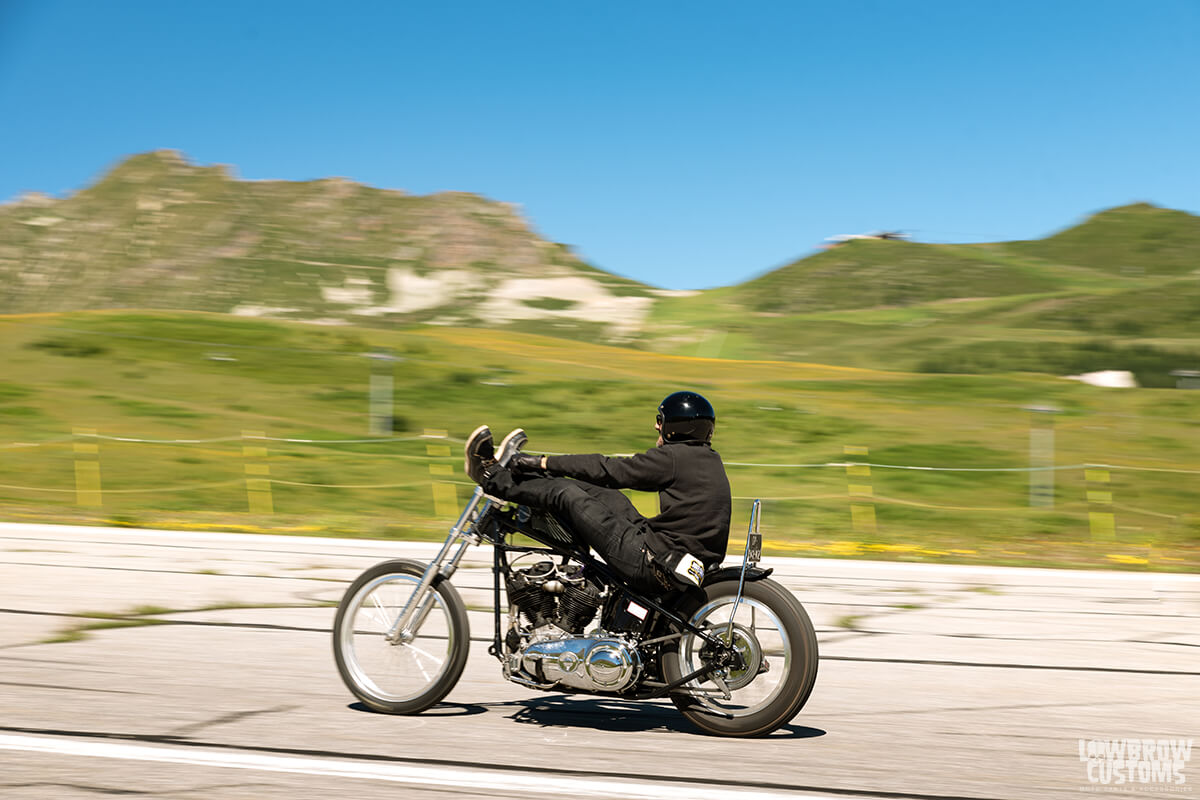
 This bike is super skinny, mean, and aggressive on the road. Lane Splitter fo sho.
 Big fan of the K&N oil filters with the ratchet end.
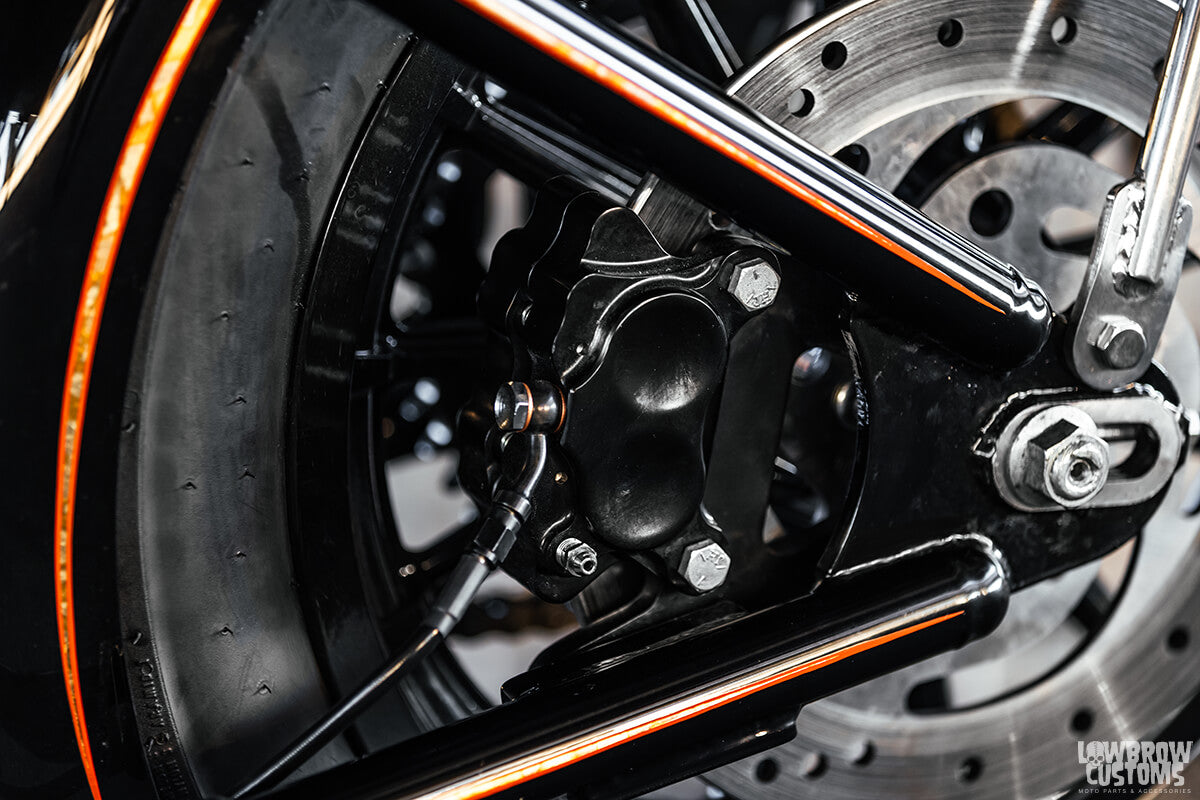 Lowbrow Customs Rear Caliper Bracket, Mid USA Caliper, and Goodridge Brake line / fittings.
 Lowbrow Customs Battery Box & Fender Mount with Gasbox Battery Box for YTZ Electric Start Batteries.
 That view doh.
 B-sides, I tried to keep the orange and black going with the wiring and spark plug wires.
 Cole Foster Grips on the Kustom Tech Internal Throttle.
 Custom Blend...
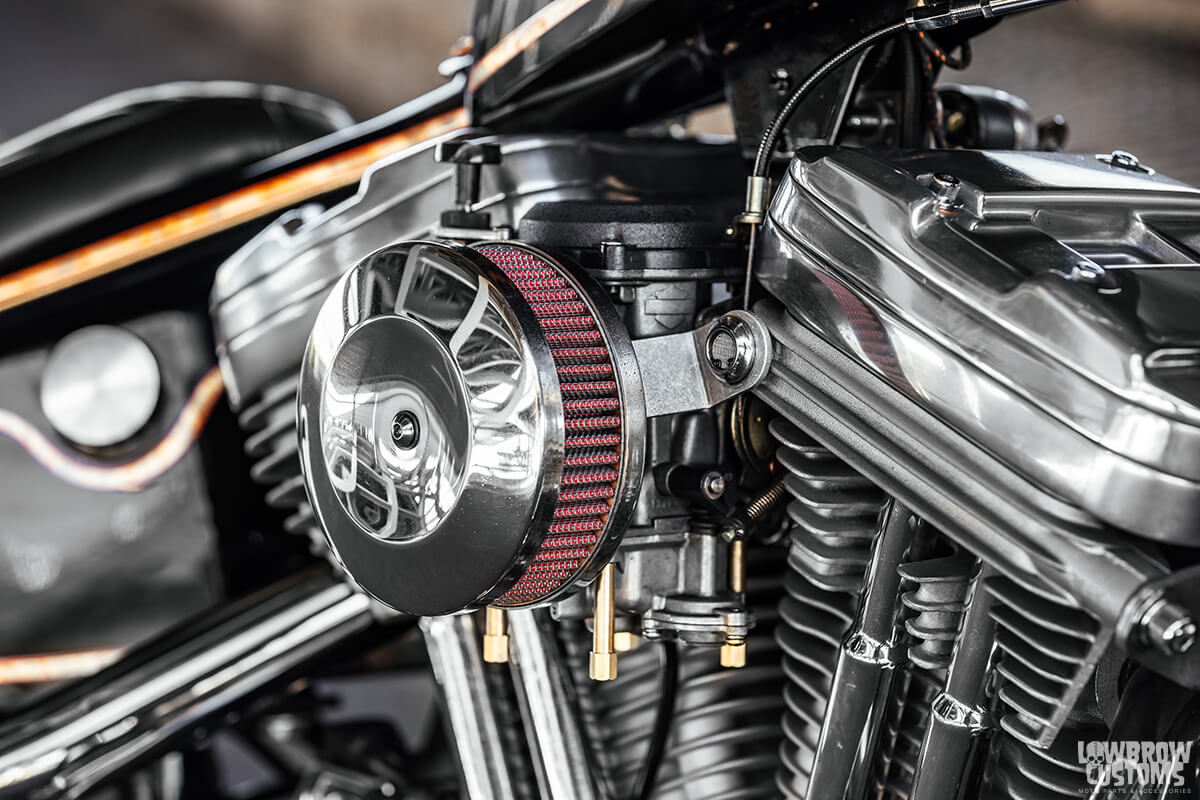 Gasbox 007 Air Cleaner, Lowbrow Custom Extended Float Bowl Screws and breather bolts.
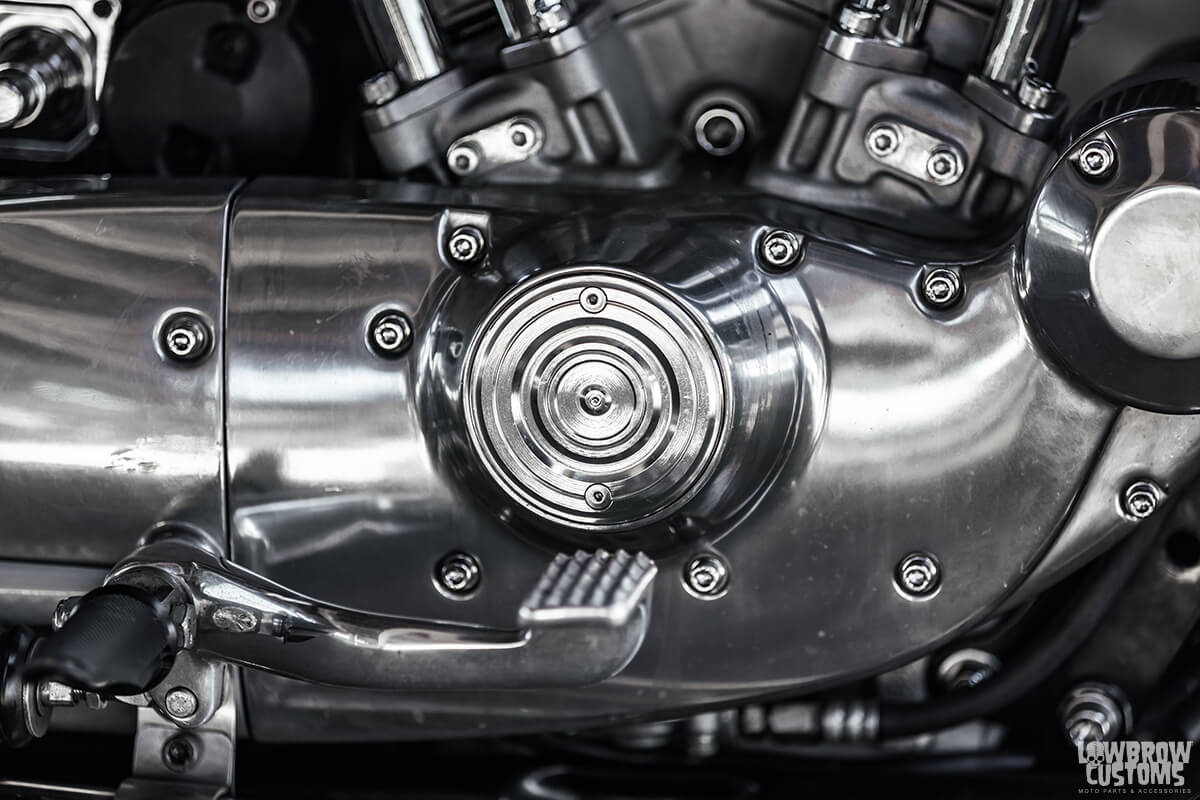 This points cover actually came with the bike when I bought it. Felt it should stay.
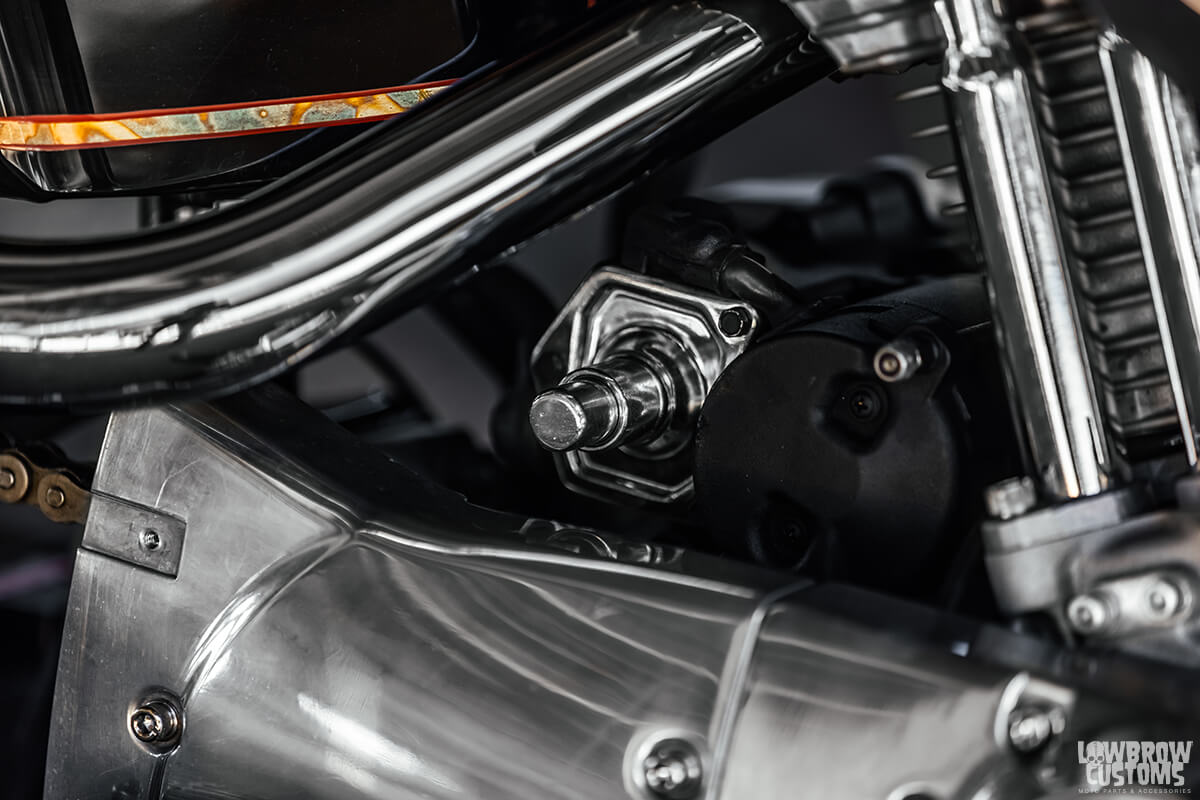 Incase the key switch faults, got a solenoid starter switch.
 Just a killer view.
 Choppers man, choppers
 Some really cool details Joe Koenigsmark laid down on the rear fender.
 Cleveland has such beautiful views.
 Crisp lines.
 Speed Merchant pegs.
 Thought this was pretty trick, little pig Q on the positive rapping around the negative wire for the headlight.
 another angle of that Pangea Speed 851 Mirror
 Lowbrow Customs 39mm low profile fork caps and Radius Steering Stem
 another view of the comfiest seat around.
 She's a ripper.
]]>

 Son with his wife and daughter, a family that rides together sticks together.
 1992 Sportster Chop by LNSPLTBLVD

 Classic lanesplitter look.
 1992 Harley-Davidson Sportster 883
 Stock 883 Motor, with custom handmade exhaust.
 Lowbrow Customs oil tank, Sullys Solo seat, Prism Supply Co. Bristol Air Cleaner and so much more.
 39mm stock front end with 21" wheel from Mid USA and a Firestone Classic Ribbed 121" Tire.
 Great look at the Lowbrow Customs Stingray Ribbed Fender mated with a Sully's Customs Solo Seat.
 Kustom Tech Hand controls, Mid USA Grips, Lowbrow Customs Super Narrow Frisco tank and 10" T-Bars.


 Check out that motor's patina
 18" rear wheel - Star hub with moon disks
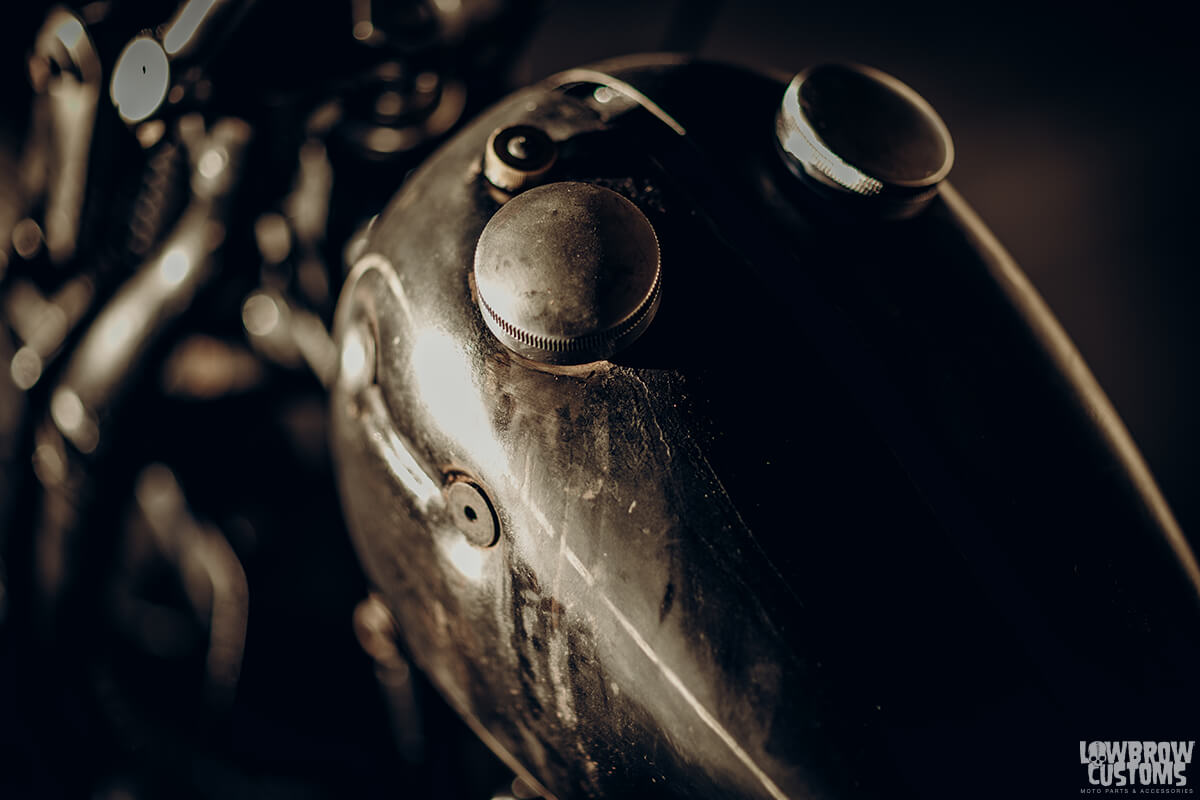


 Alessandro and his 1975 Moto-Guzzi T3 fully customized in 1986.
 Alessandro making custom tank for his 1975 Moto-Guzzi.
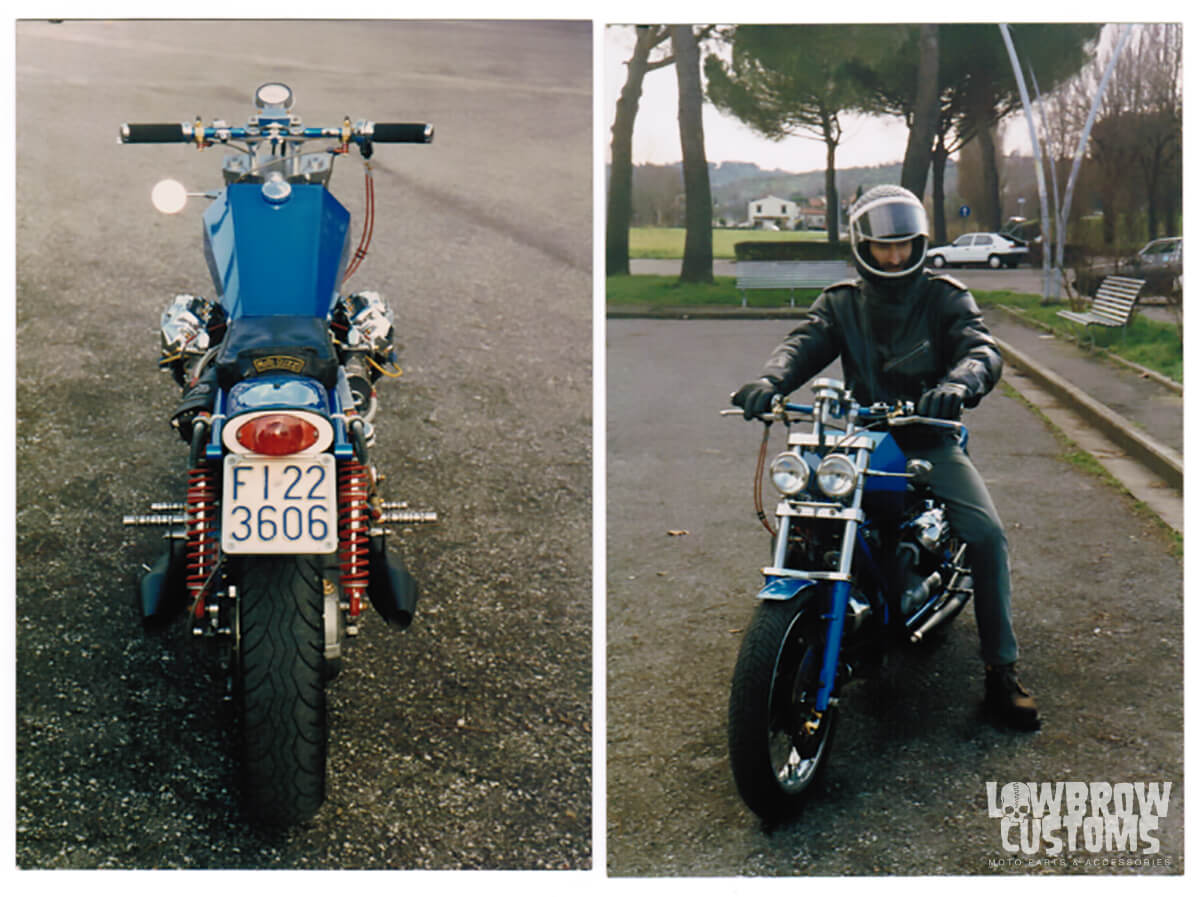 You can see a few early custom parts and stylings that represent Kustom Tech style today in this Moto-Guzzi.
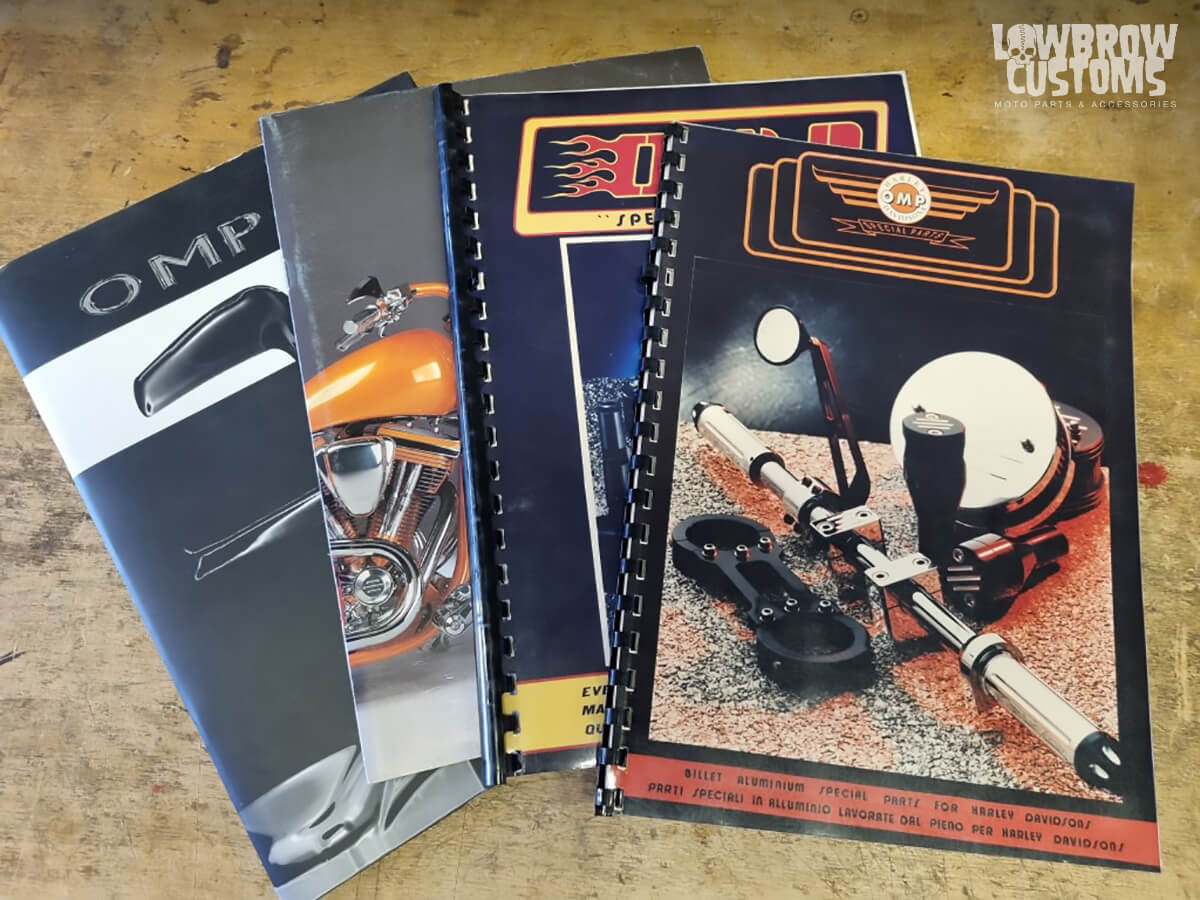 Some OG OMP catalogs!
  Prime example of Kustom Tech high quality parts and accessories
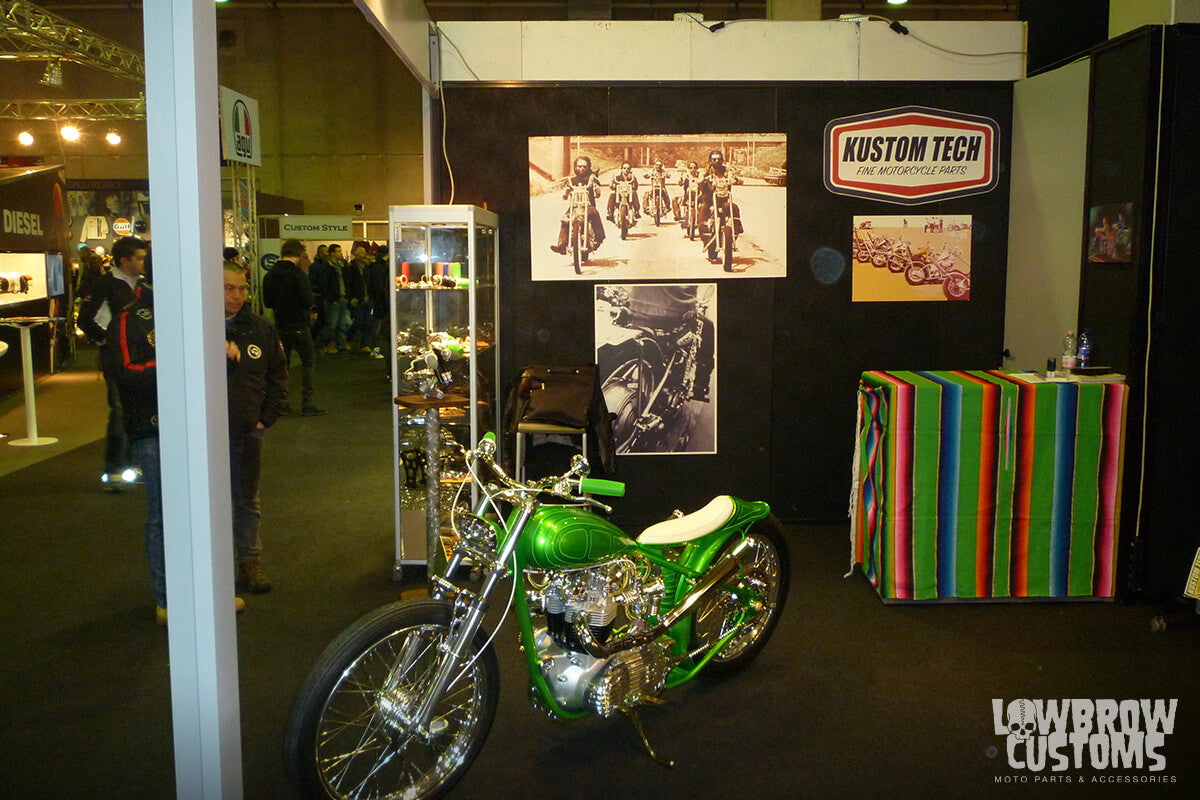 Kustom Tech set up at a show in Verona, Italy.
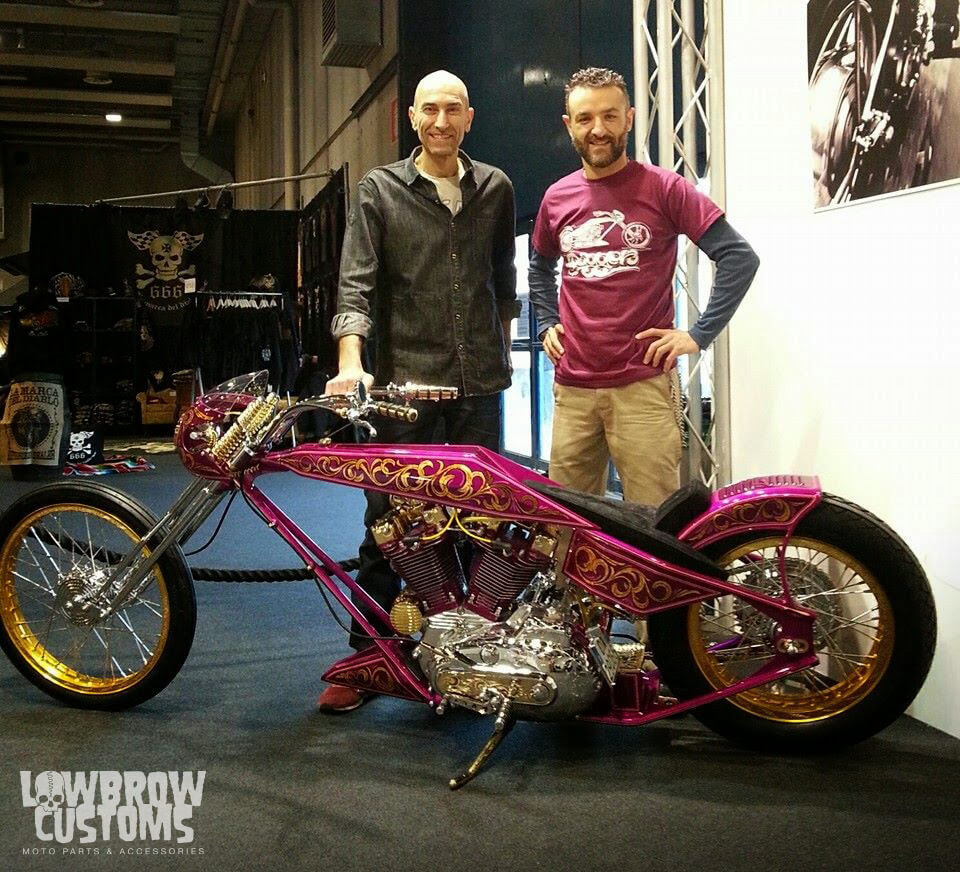 Here's Alesandro and a friend in Verona with his ironhead digger.
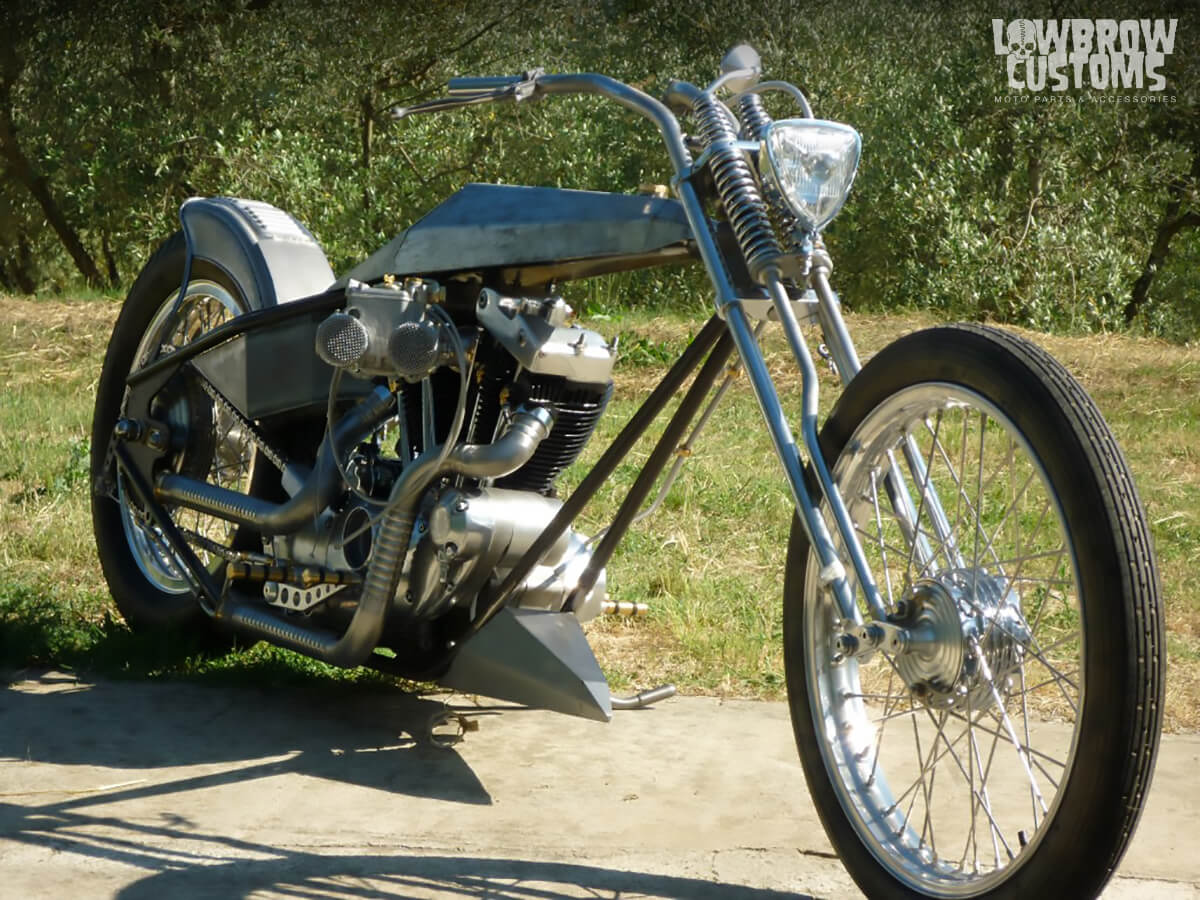 Mock up stages of the digger before paint. look at al the metal work. An incredible eye for detail.
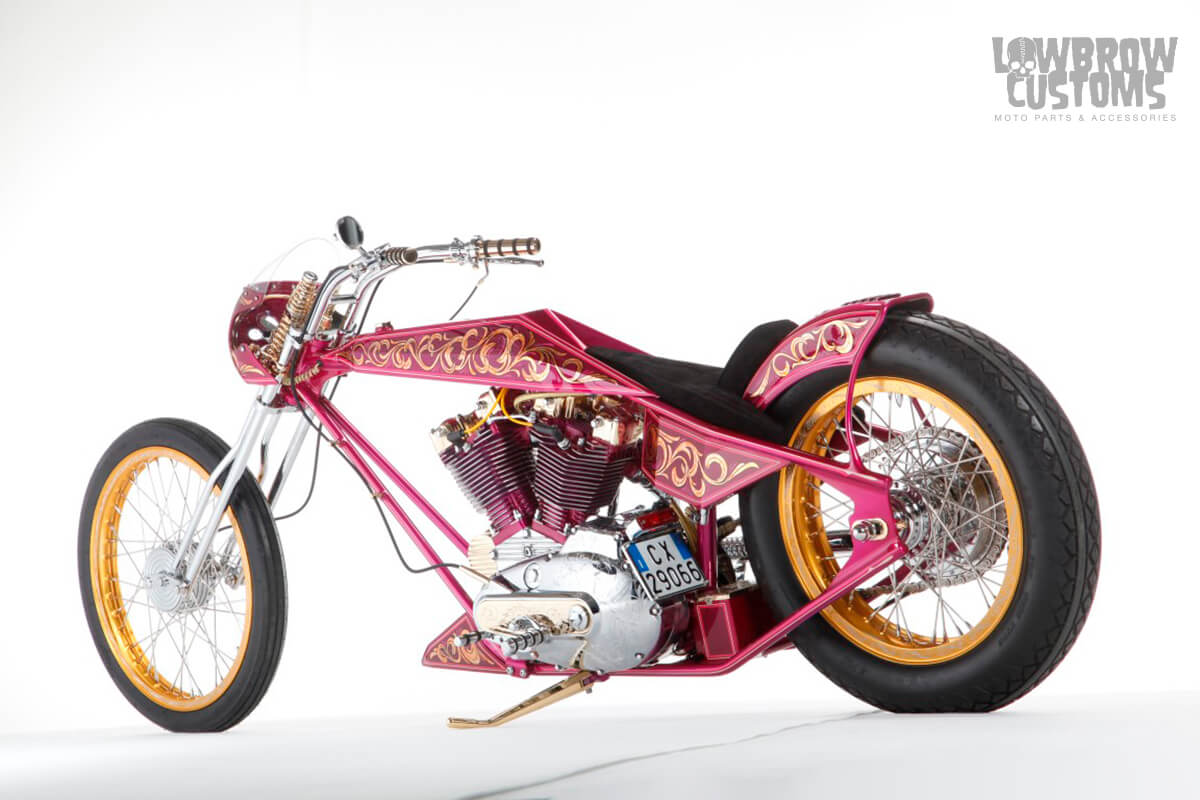 A really beautiful show bike that shows off Kustom Tech's parts and Alessandor's talents.
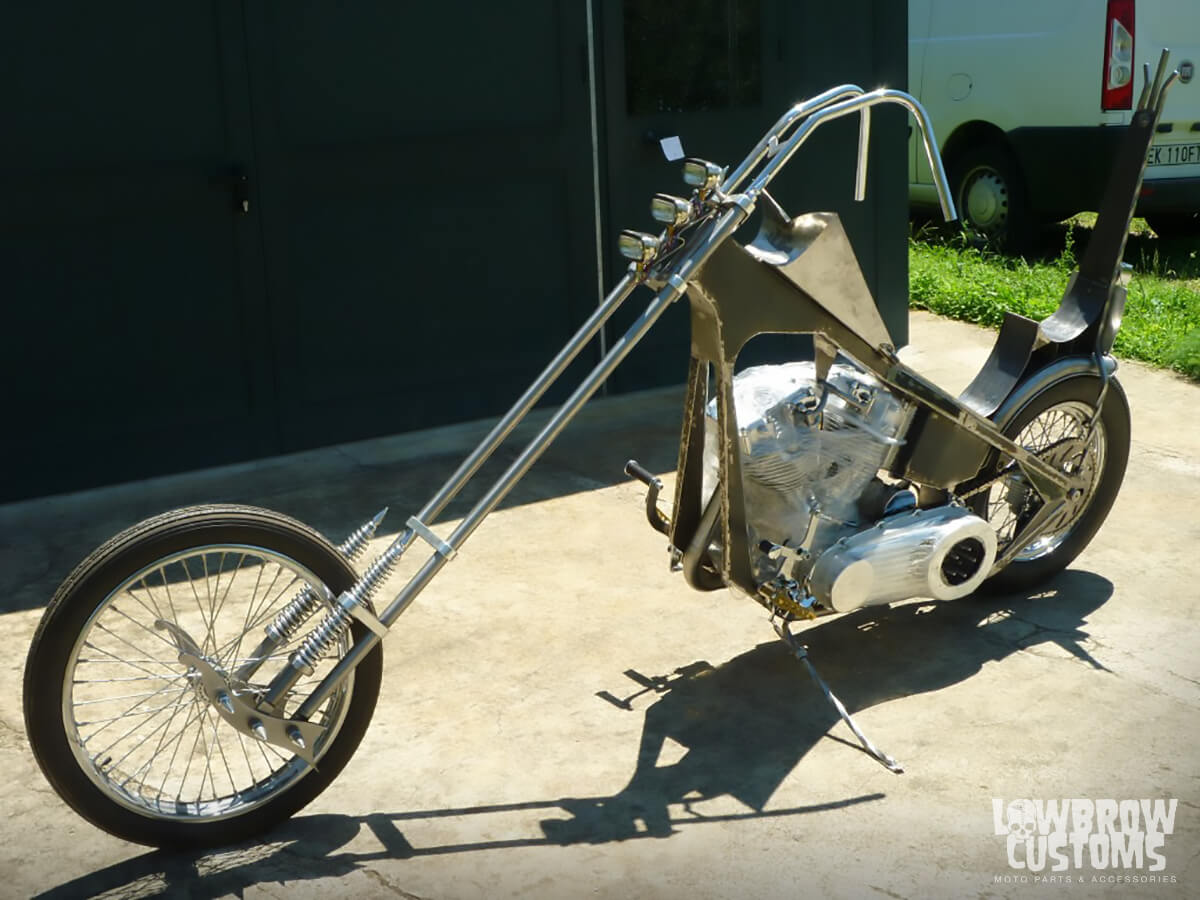 Mock up of a build Alessandro calls "Kosmik"
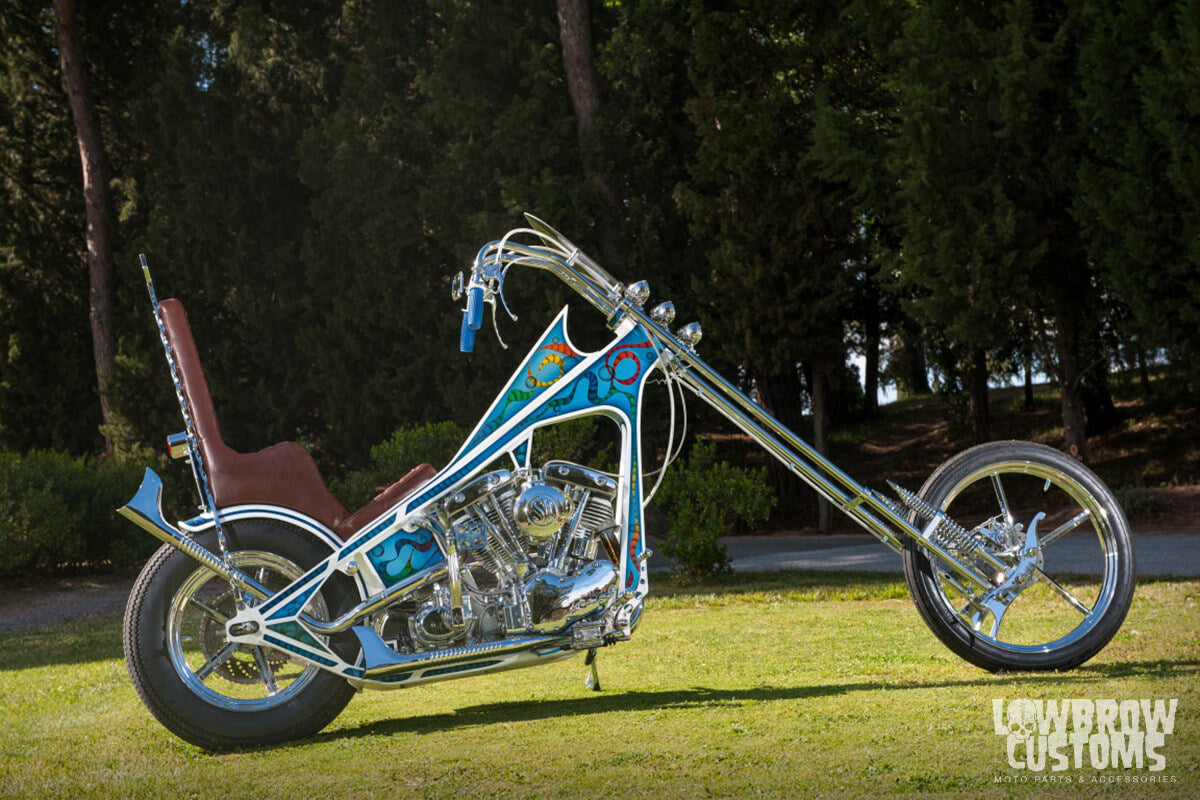 Expect nothing less than beauty and wild design. Look hard at "Kosmik", it has so many details.
 Mock up of incredible Triumph called "Peppermint".
 Nothing but perfection.
 different styles but yet you can tell the designs are from Alessandro.
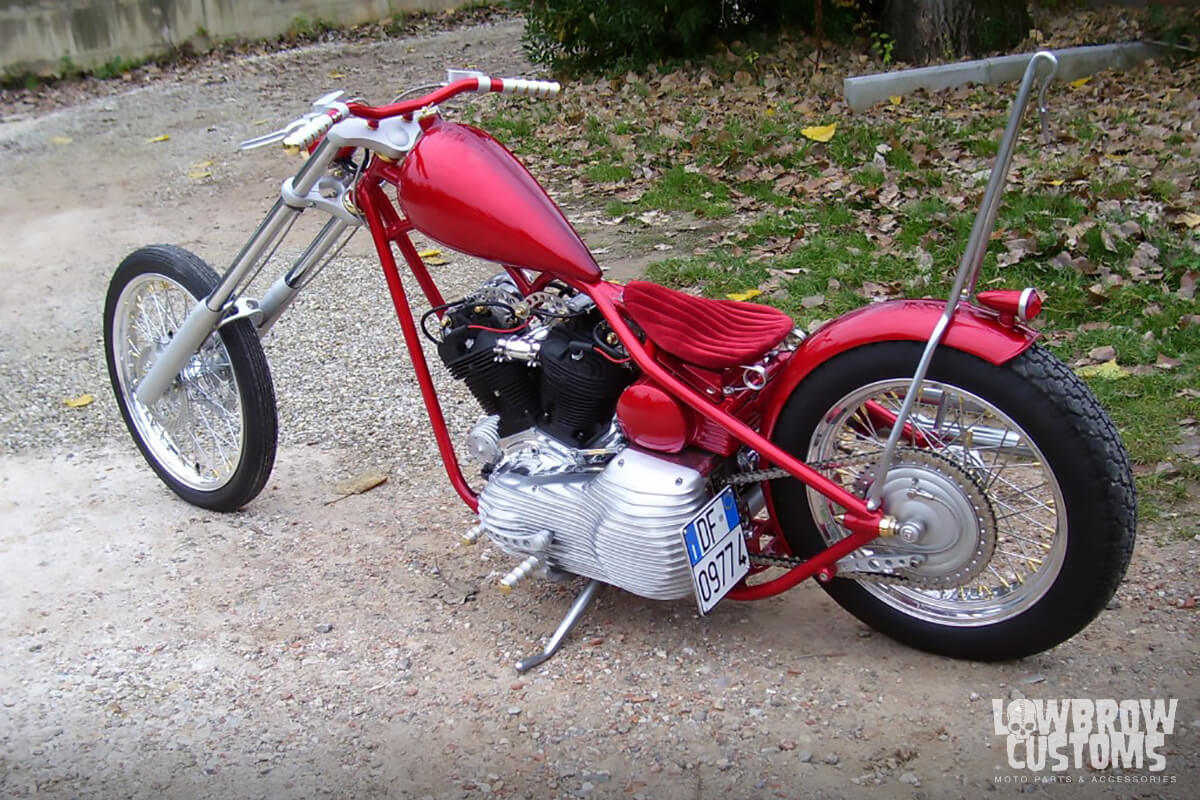 B side of the red knucklhead chopper
 Kustom Tech a intricate touch on design.
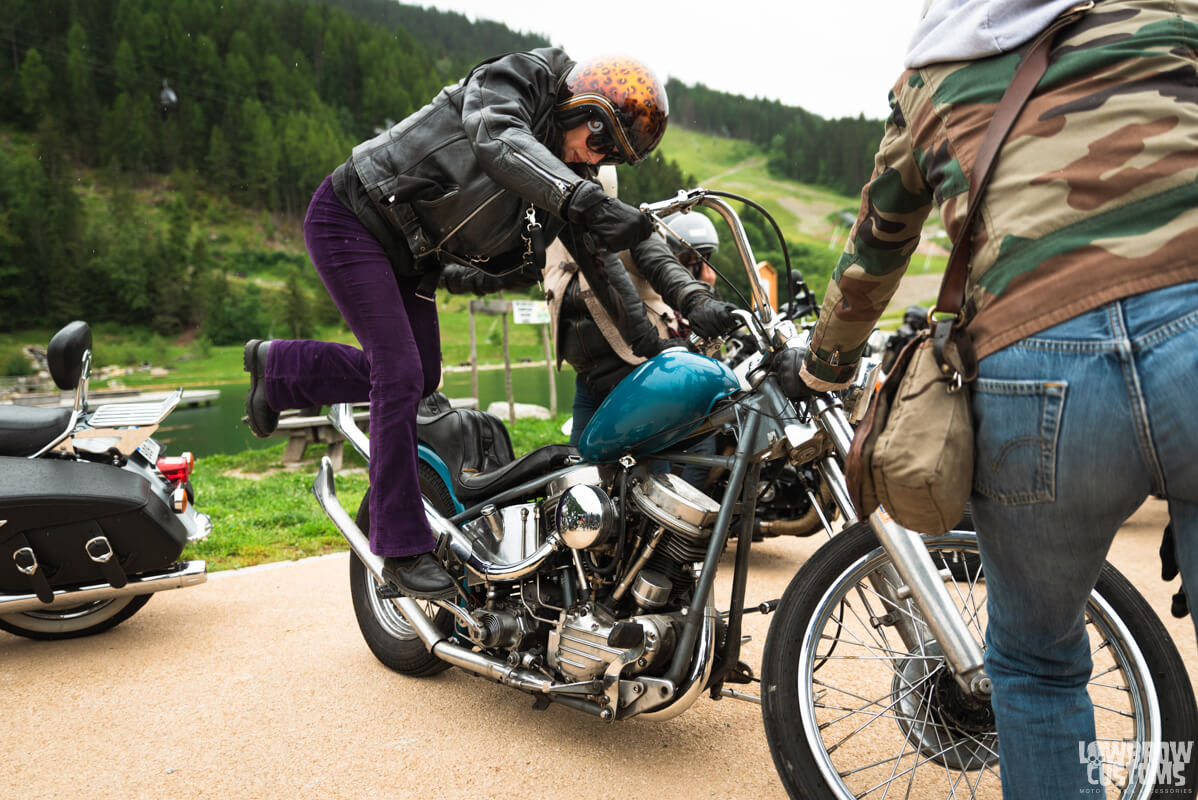
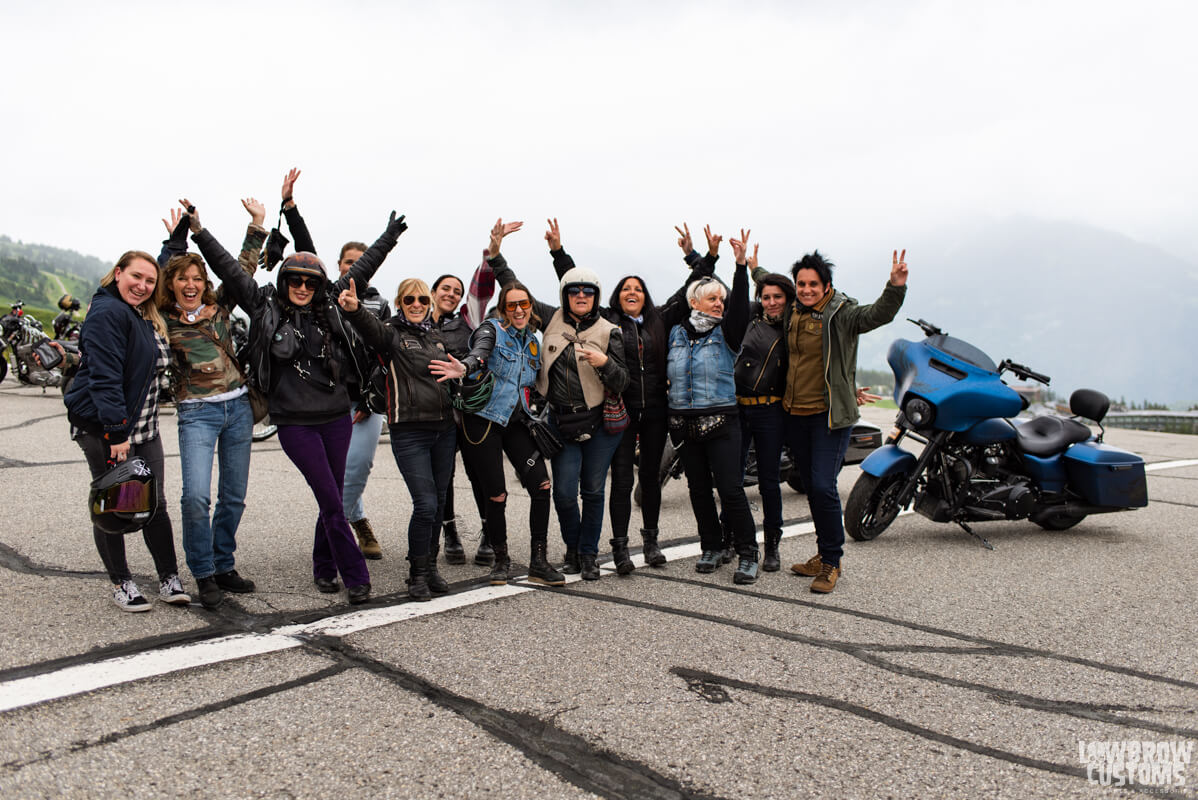
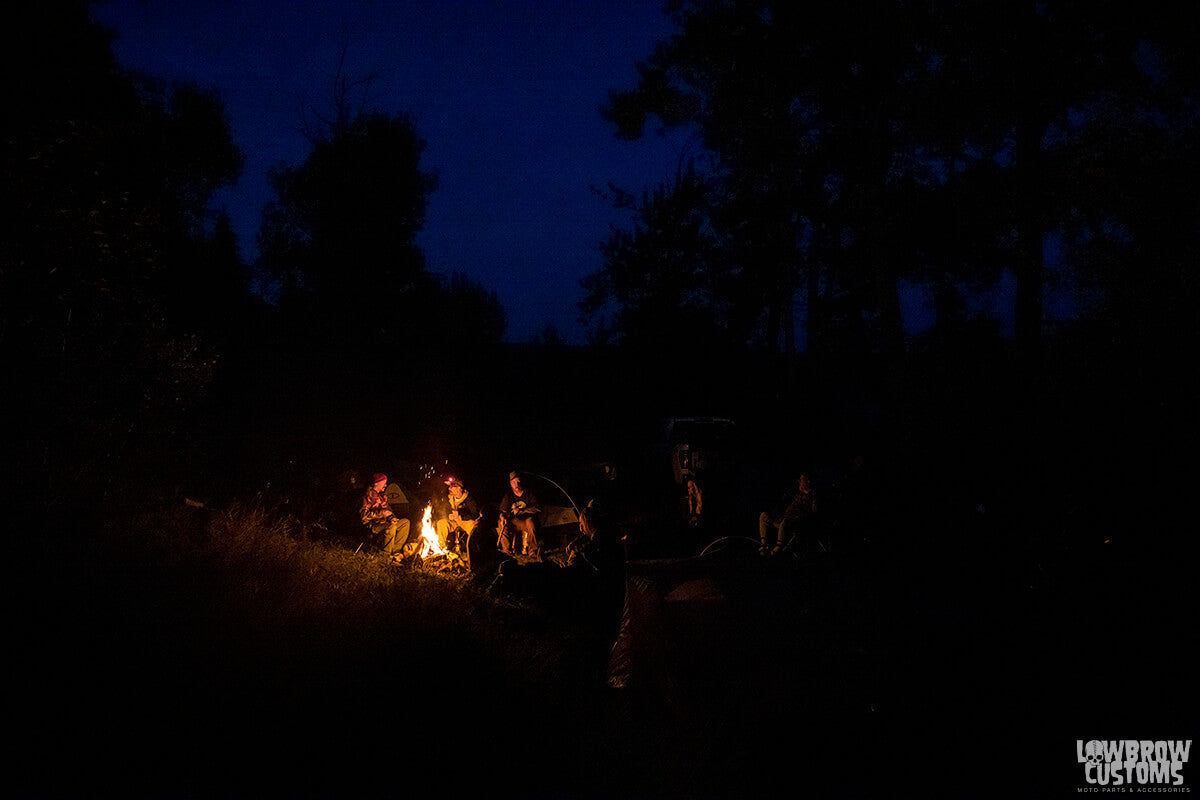
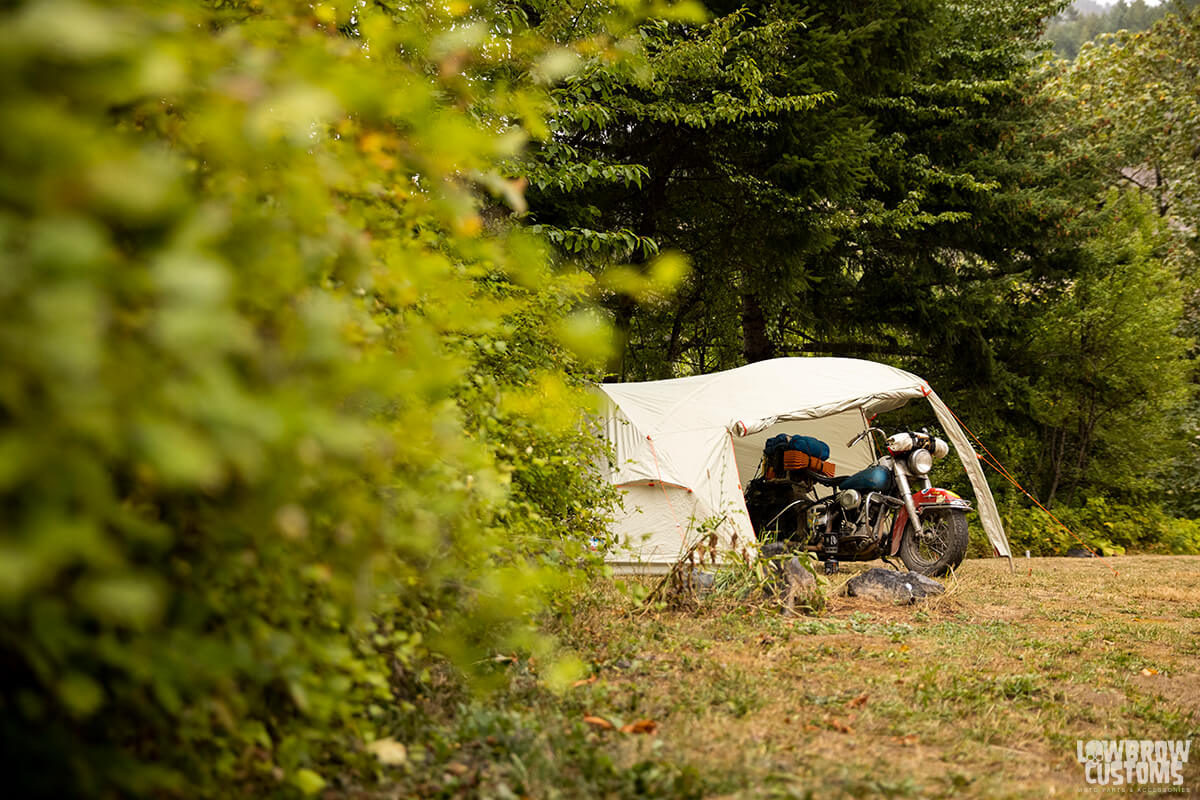
  Cold and wet morning run to the Catskills with Endjis and Julie.
 Julie wears full leathers when it's cold. Burrrr
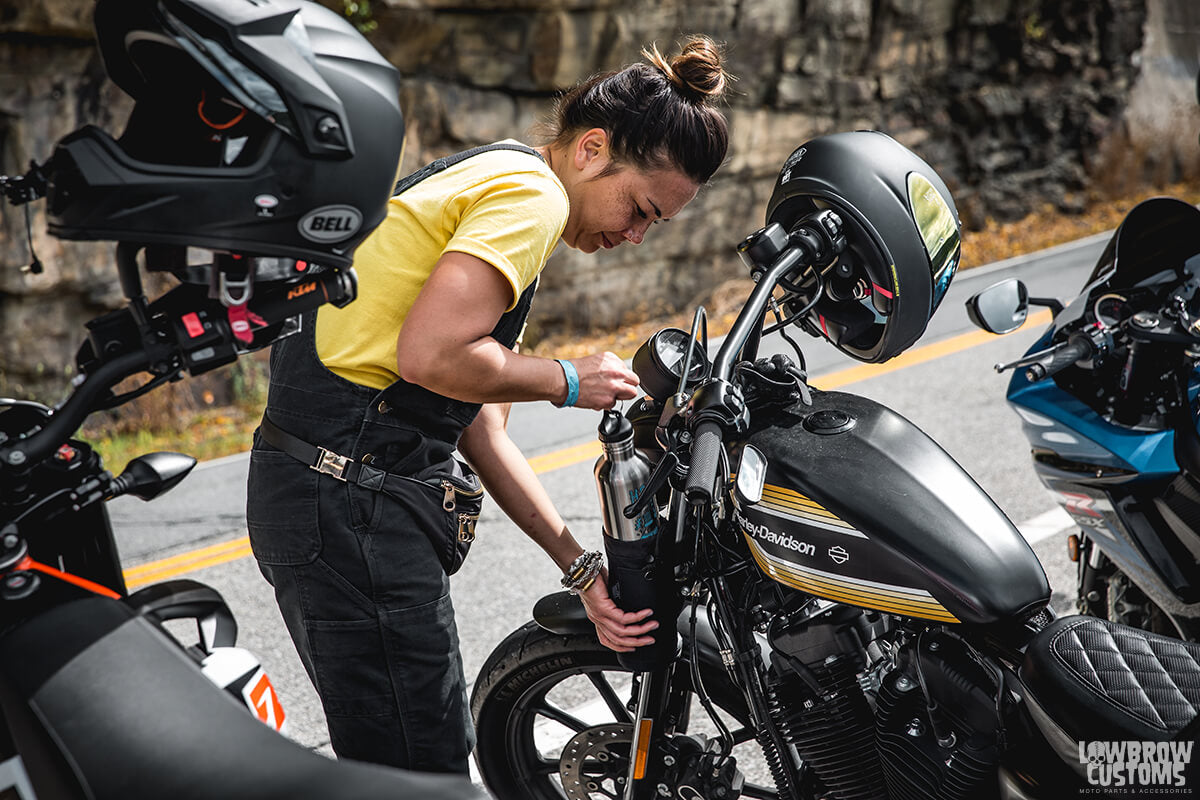 Jen after a long ride getting some water in her Lowbrow Customs Stay Hydrated water bottle out of her Carrier 2.0
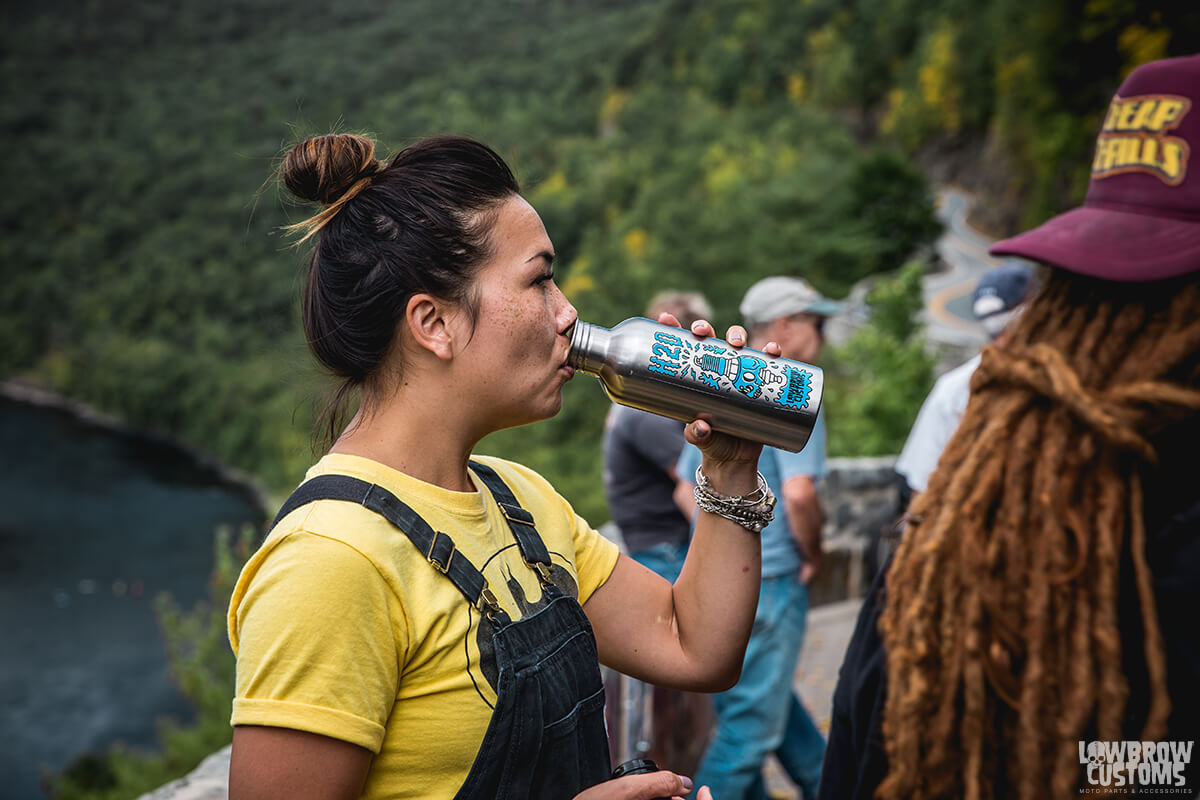 Stay hydrated people!
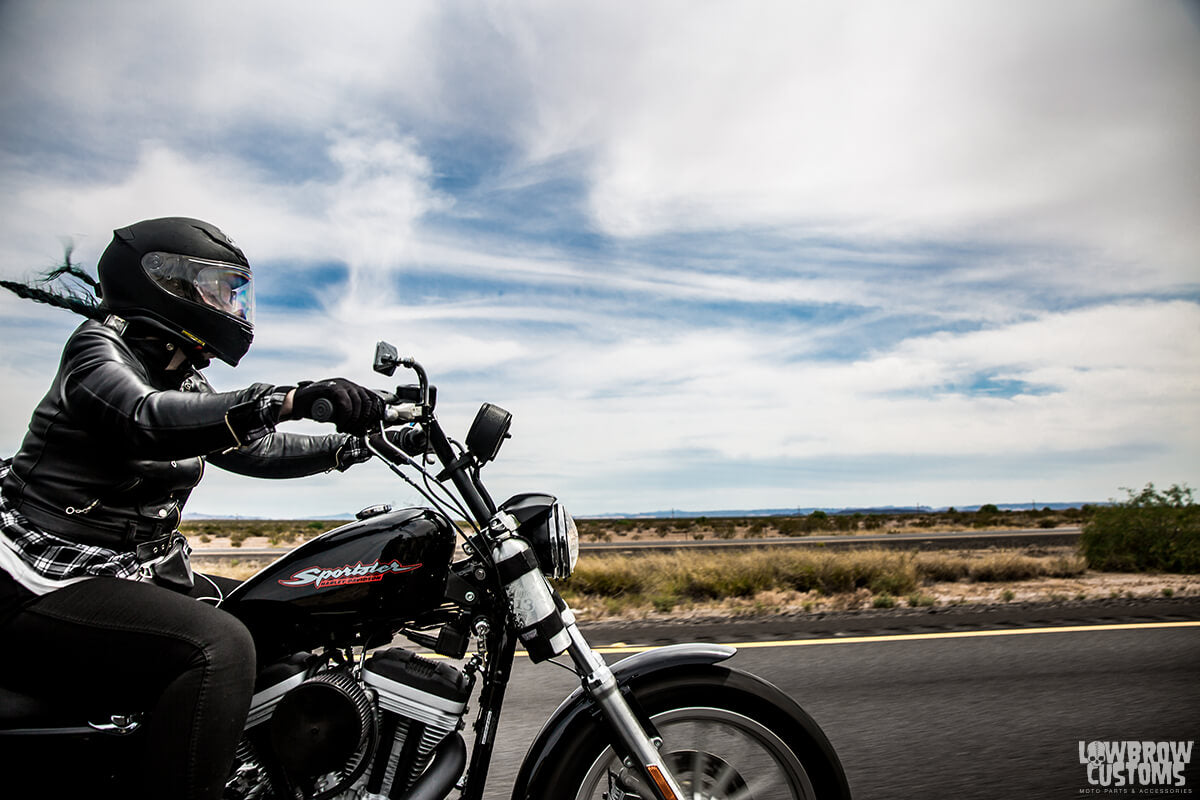 Kat is the queen of layers. She always wears a T-shirt, wool flannel and a jacket and if she gets too hot, she loses a layer.
 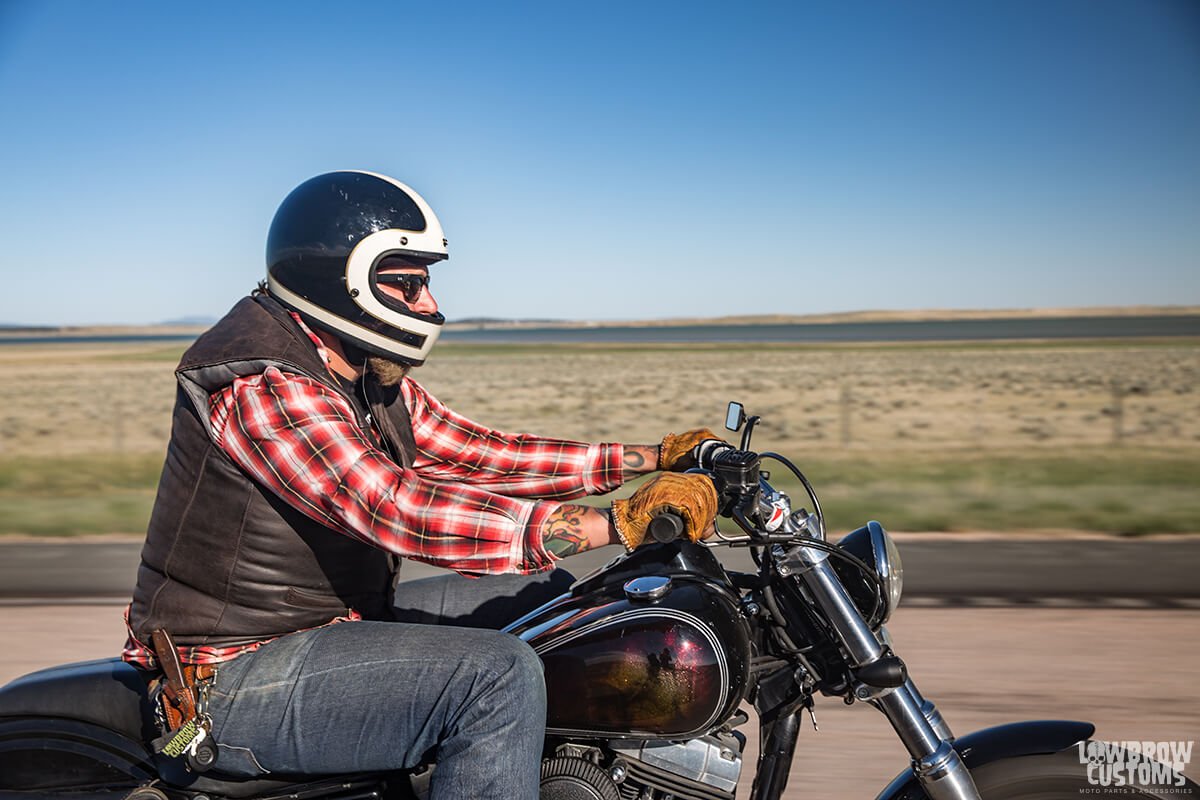 Kyles pretty darn good at layering up too.
 Andy rocking an undershirt long sleeve button up and a vest for comfort along with a bandana on his neck to keep the sun off it.
  Kickstands up at 8am or Bill will leave your ass.
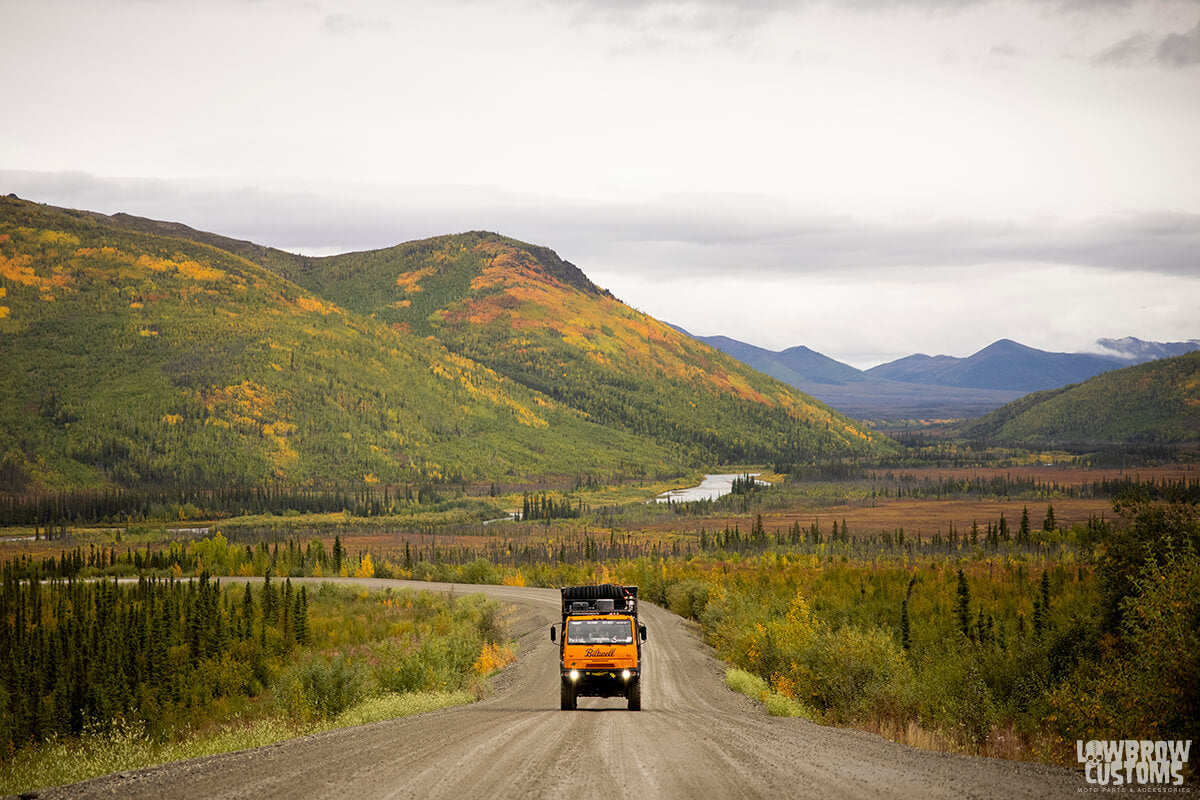
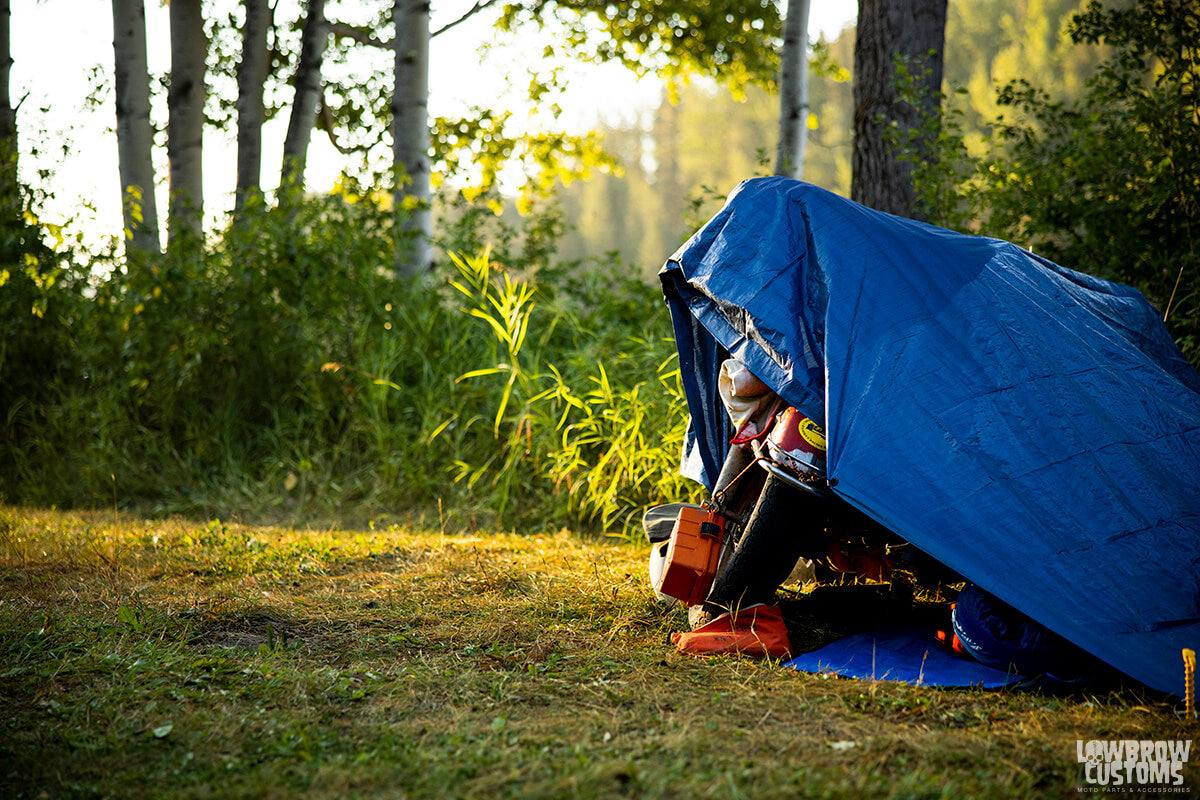
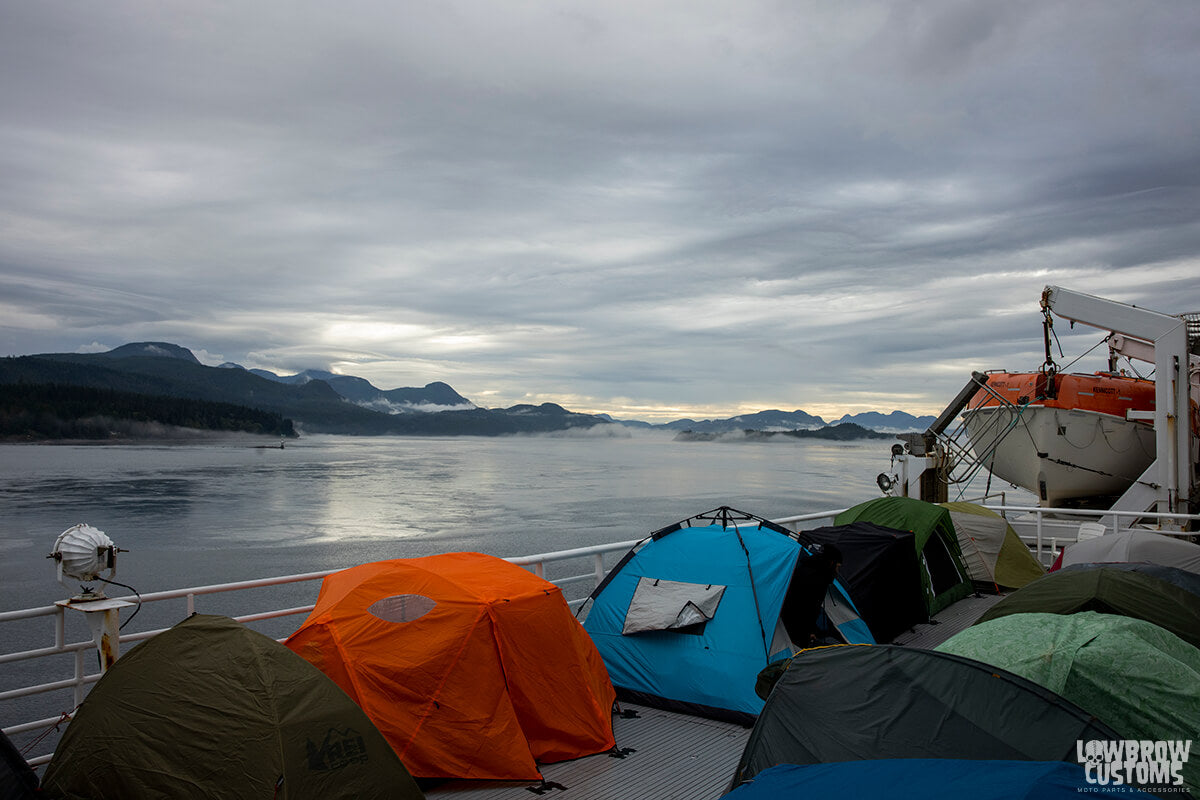
  7am coffee and bike packing.
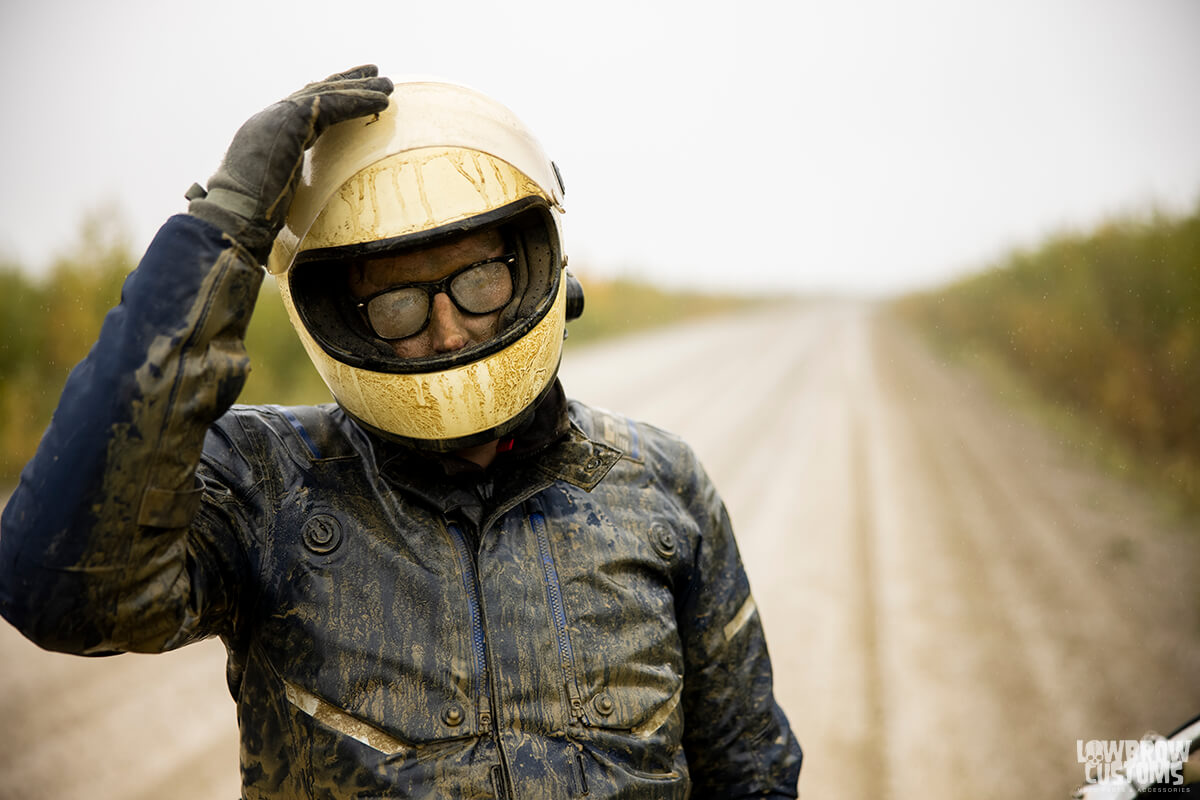
 Pro tip: On a super hot day, if the ice chests are open at a gas station, put your helmet in there for a few minutes and or your whole body... "I want to live in here" - Julia
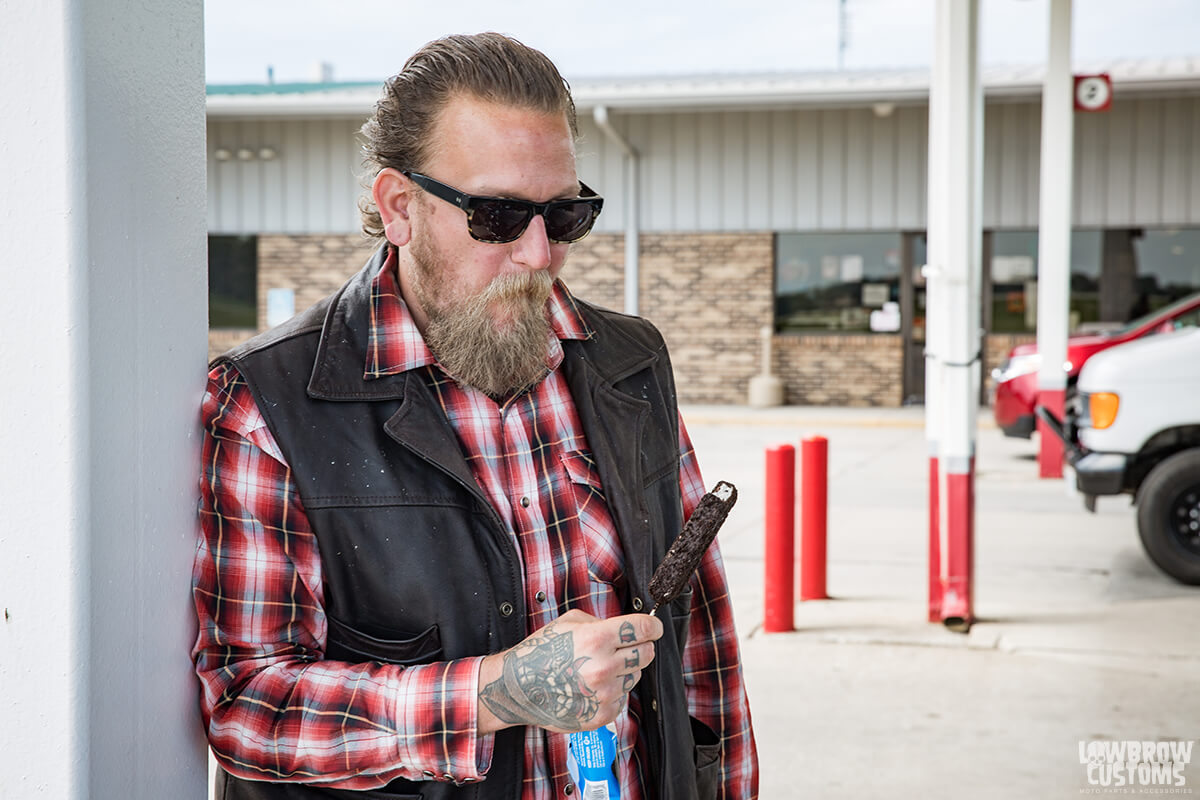 Ah, the best kind of break, an ice cream break. Kyle knows!
 What not to wear on your motorcycle adventure. Thanks Kyle for modeling.
 Flip flops on a motorcycle equal no bueno But hey least they are having fun.
 Get yourself a comfortable helmet for yourself. Tyler loves the
 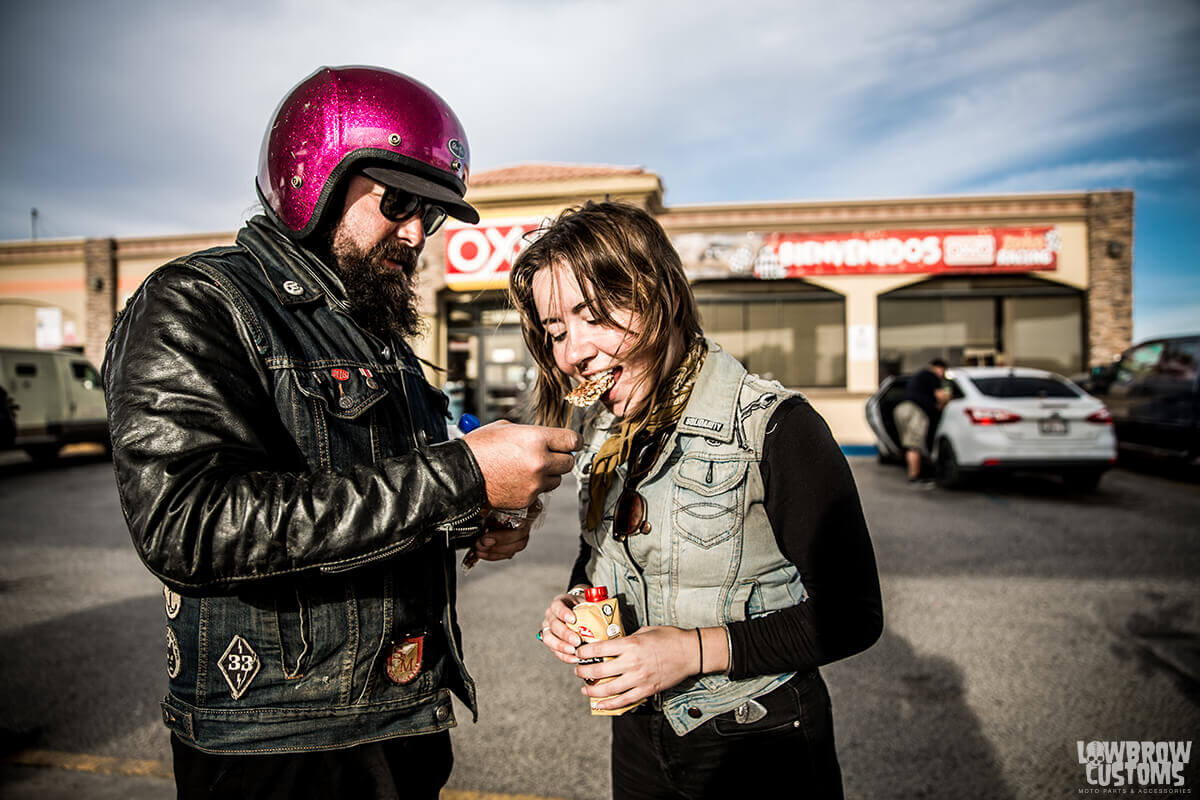 A 3/4 does allow you to wear a hat underneath, well some of them anyway.
 Julia rocking a Bell Bullet and Kyle with a Biltwell Gringo. Two polar opposites of helmets in comparison of comfort and noise levels but both full face helmets nonetheless.
 Pro Tip: Wet down a bandana with cold water and tie it to your head to cool off in the shade. Snake knows best!
 Tim has a really nice kevlar jacket lined with padding to protect him if something would ever happen and he went down.
 A leather jacket does protect from elements, road debris and help protect your body if you were to go down.
 Waxed canvas pants help with the rain.
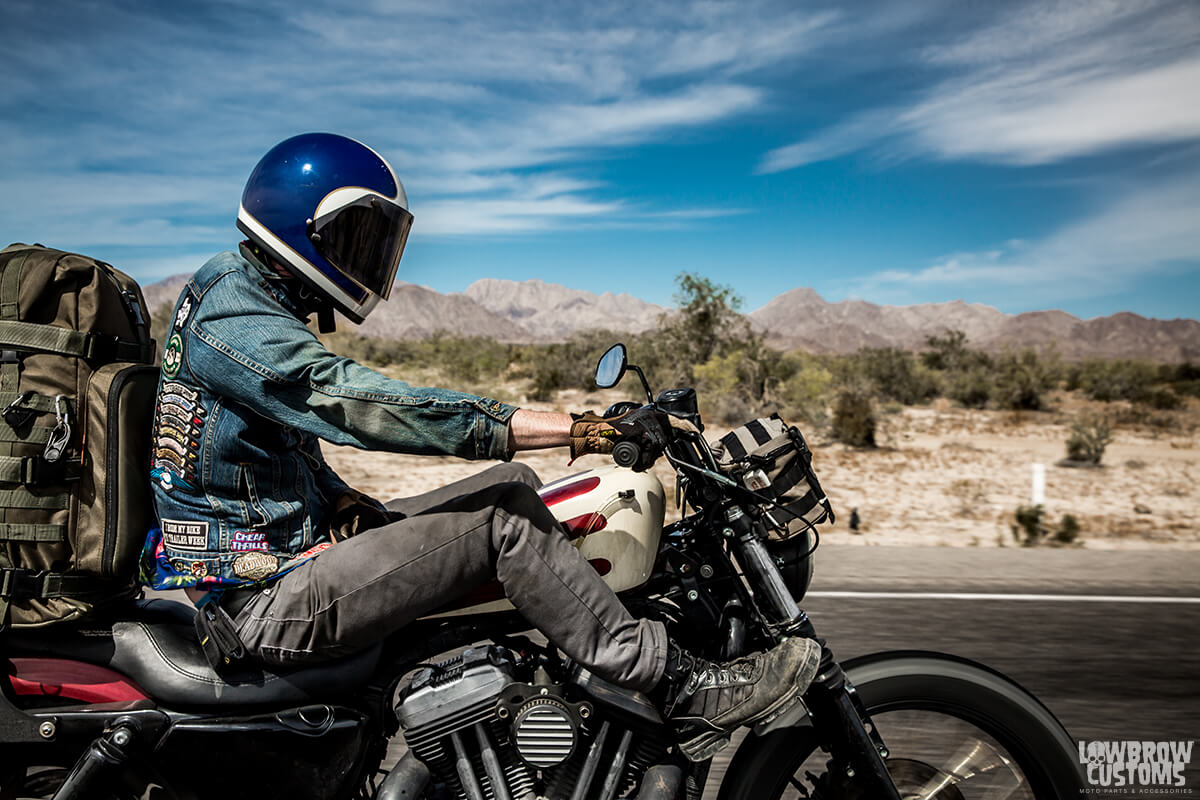 Tyler 1.0 with some high top boots with venting.
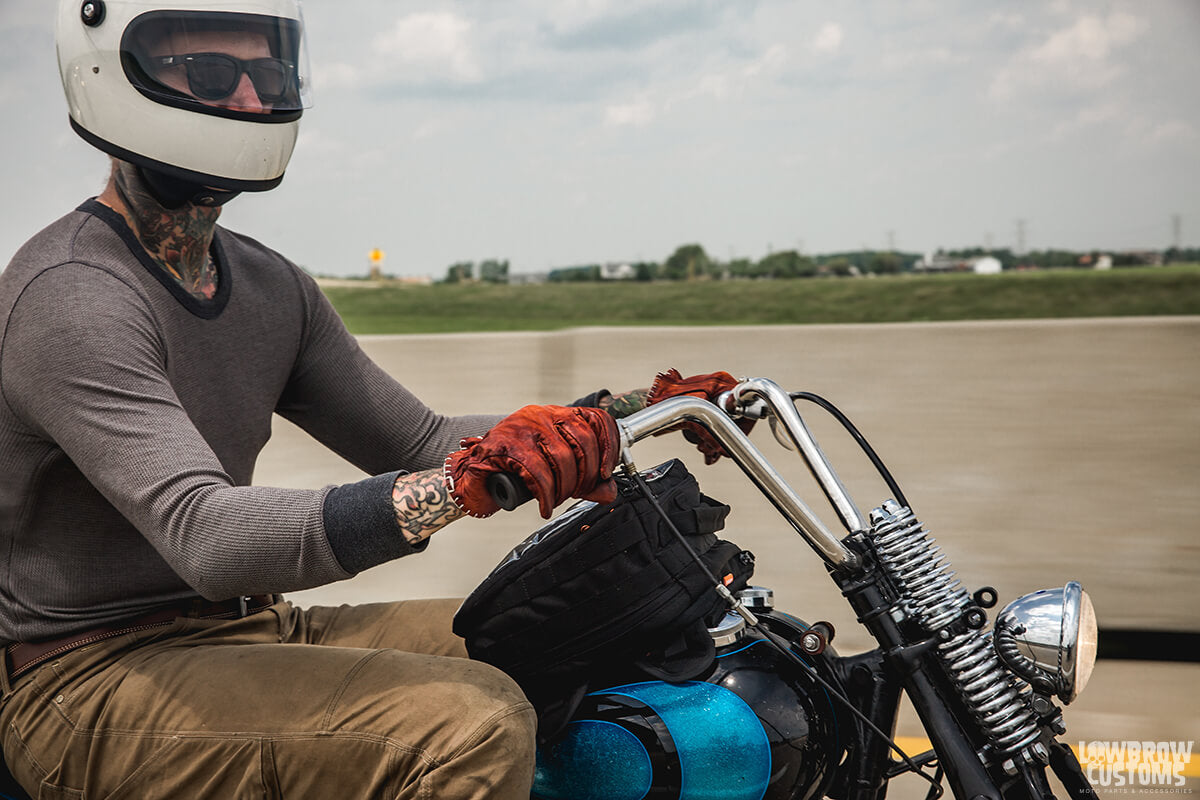 Tyler rocking some MotoStuka shanks, these gloves are good all year around.
 A nice pair of gloves can dampen the shake of the motorcycle, keep your hands clean and also safe if something were to go down.
 Wearing sunglasses with Virginia Cagney
 Pretty sure Jay Cagney has some glasses on underneath that bubble shield.

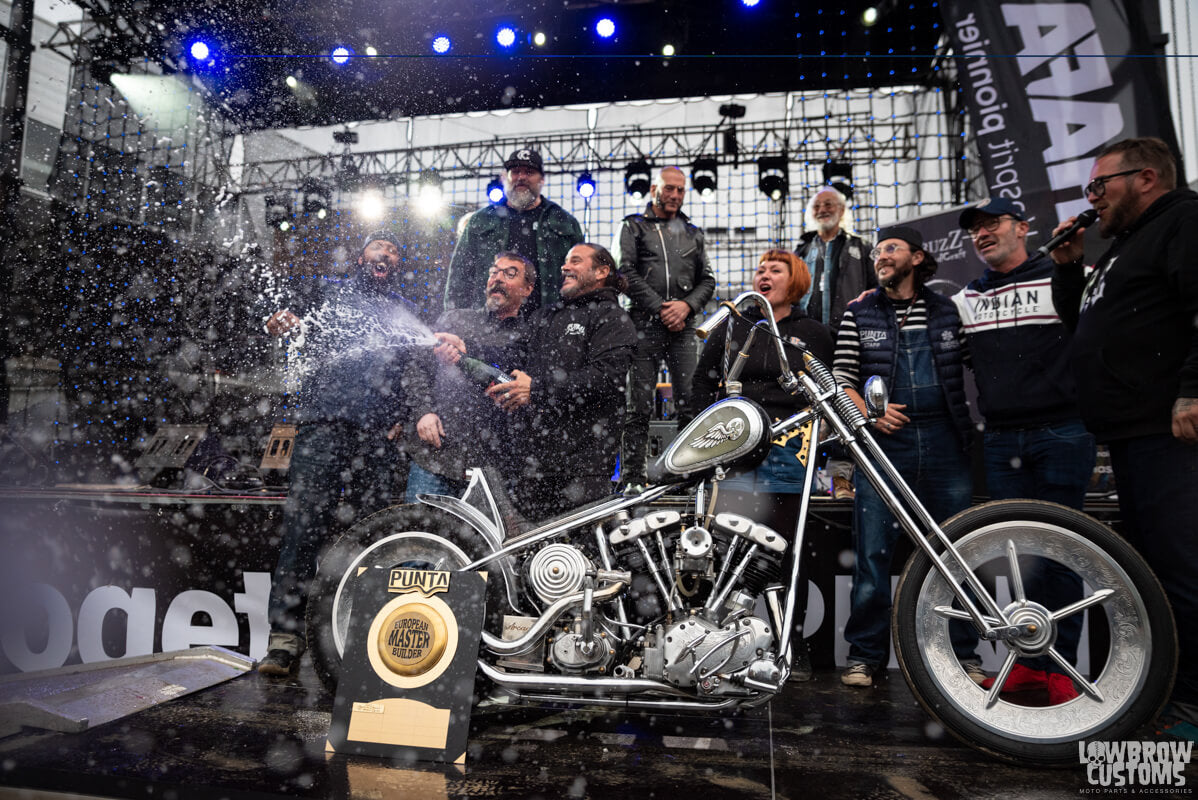 Winner winner!
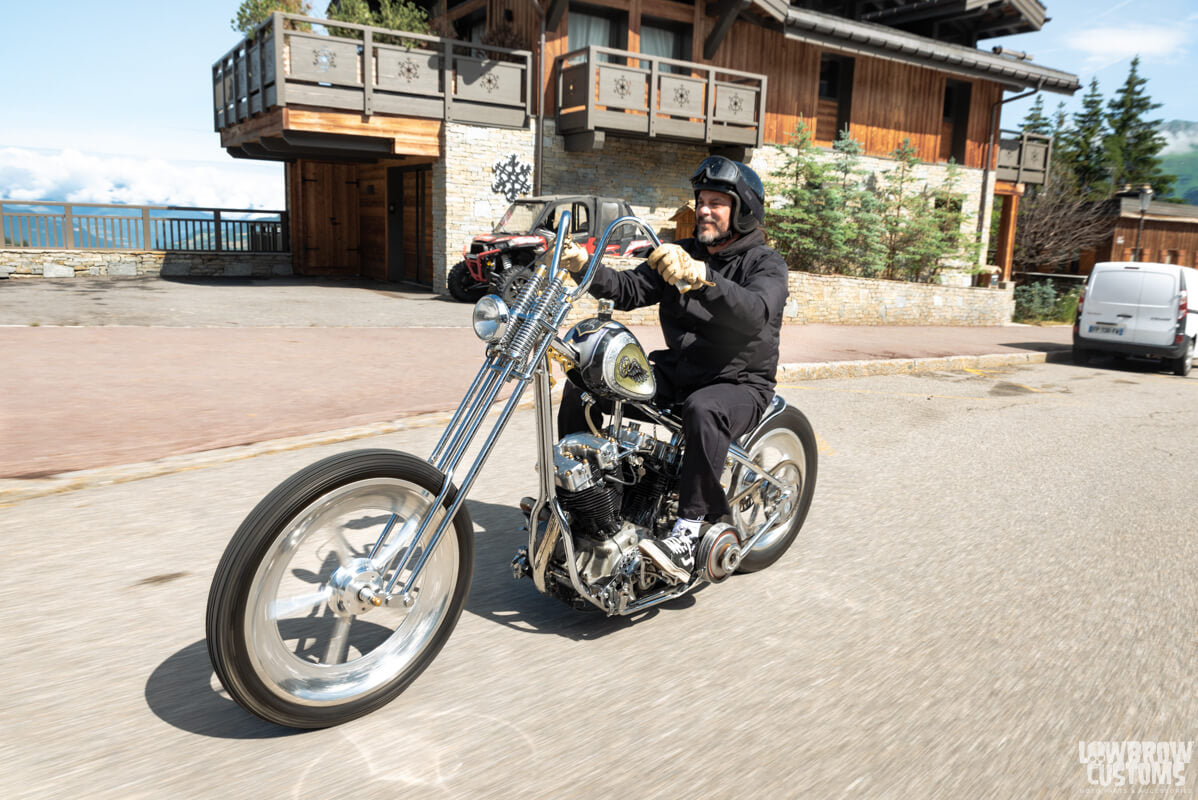 Rollin on a show winner.
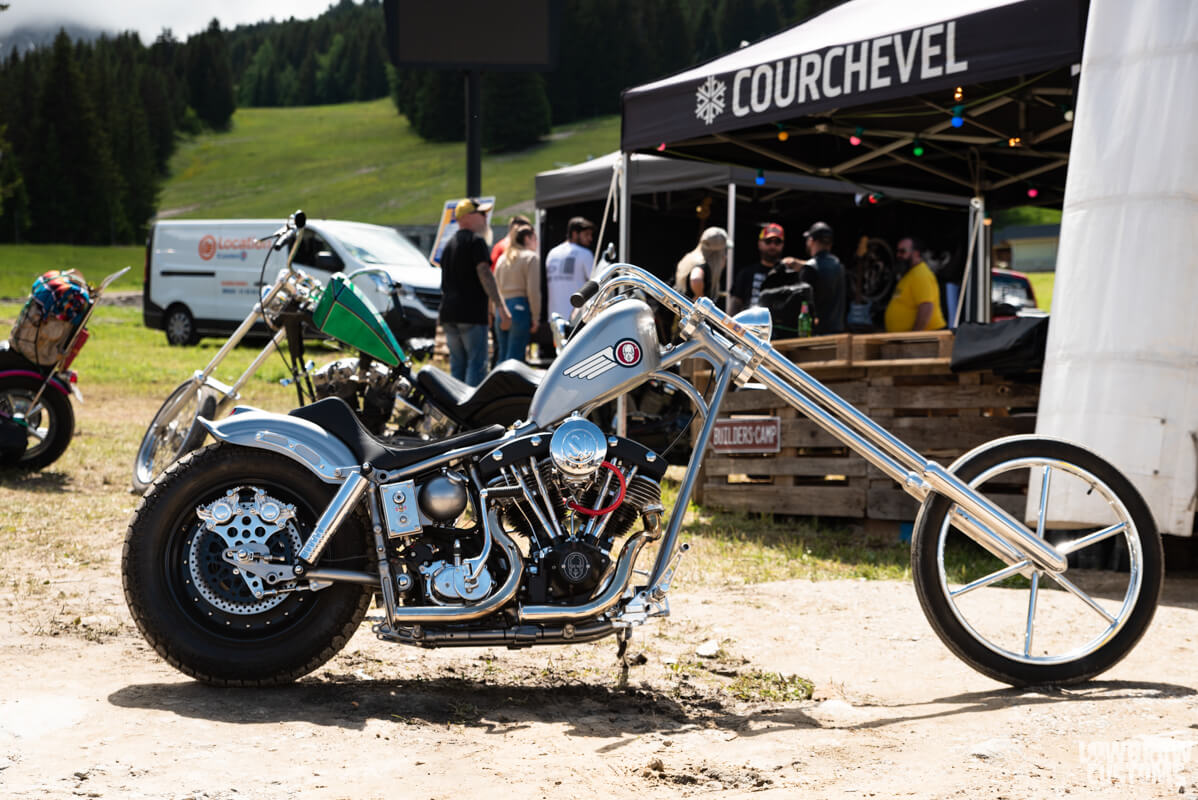
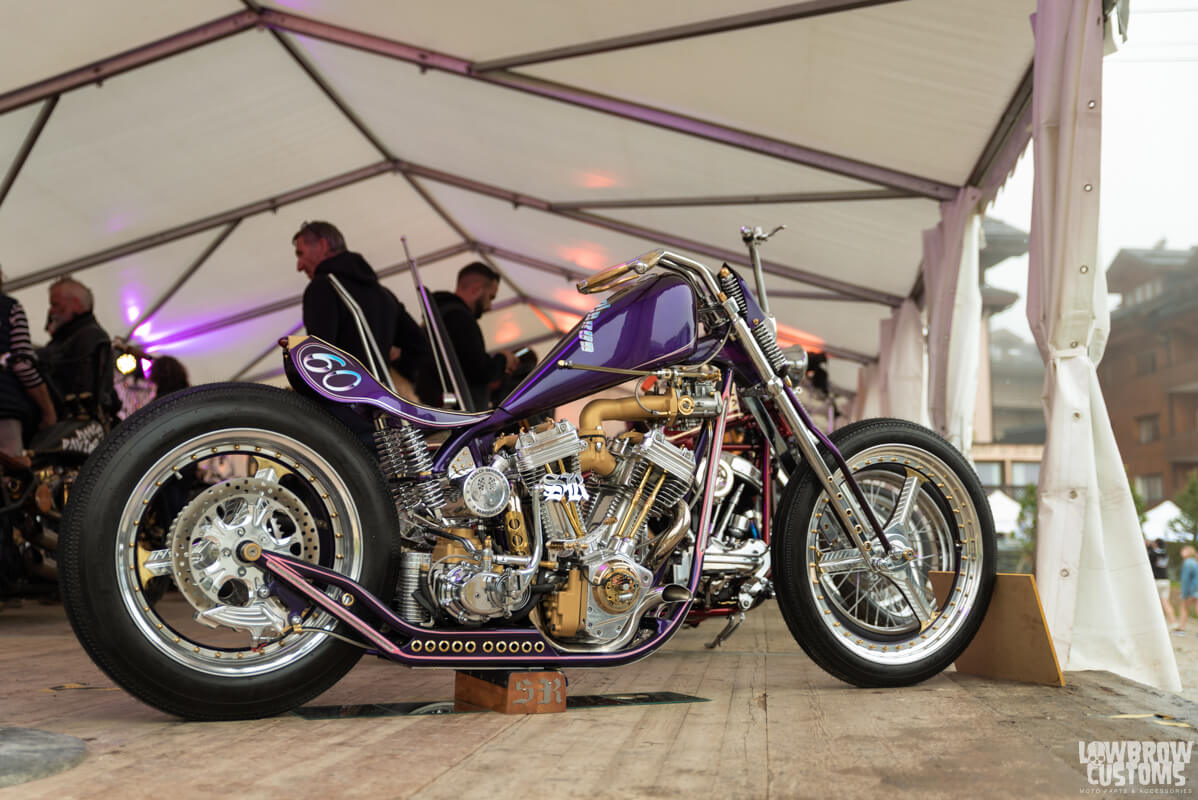
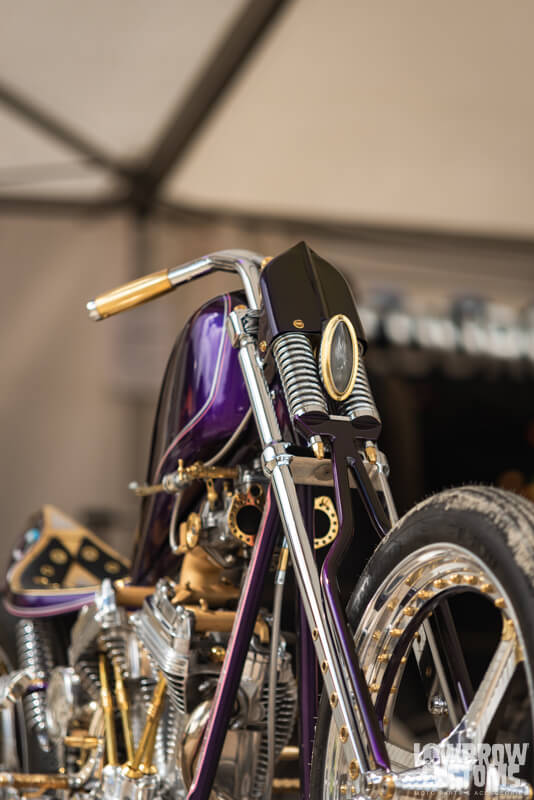
 Purple Haze
 Best Paint.
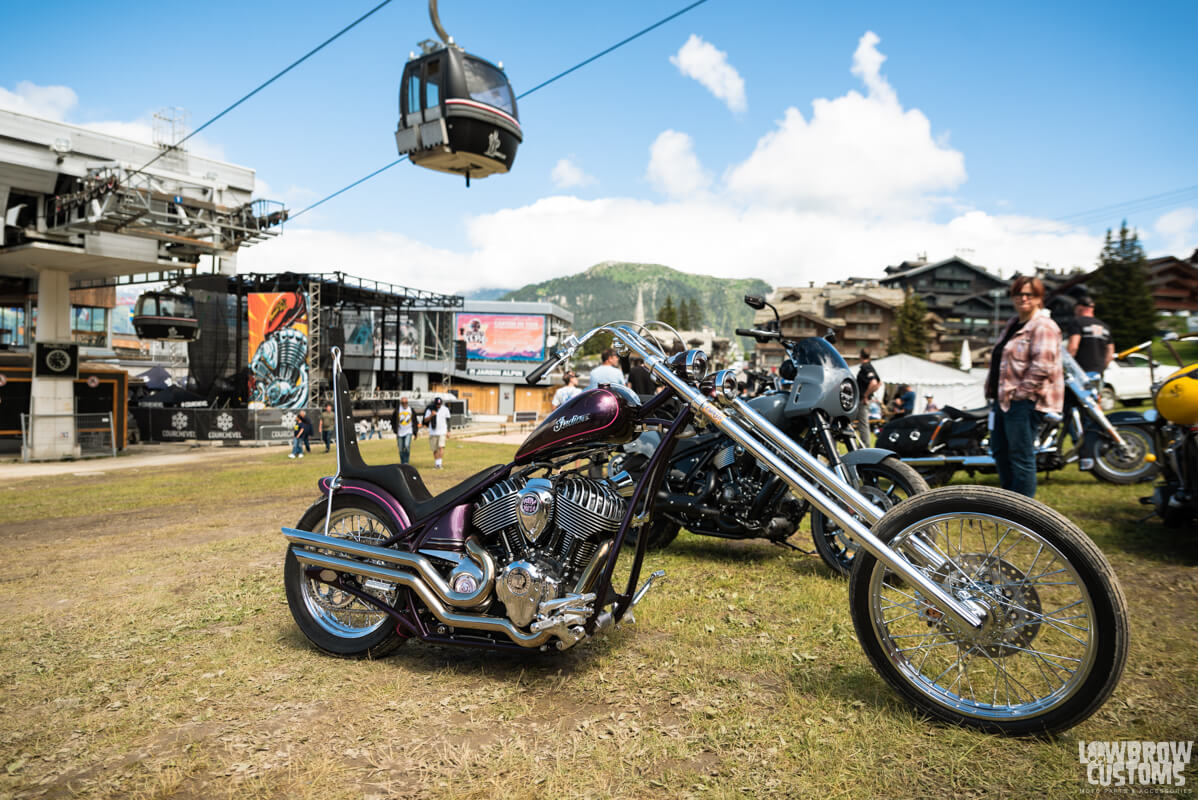
 Best Chopper


 1997 XL Harley-Davidson 1200 Sportster
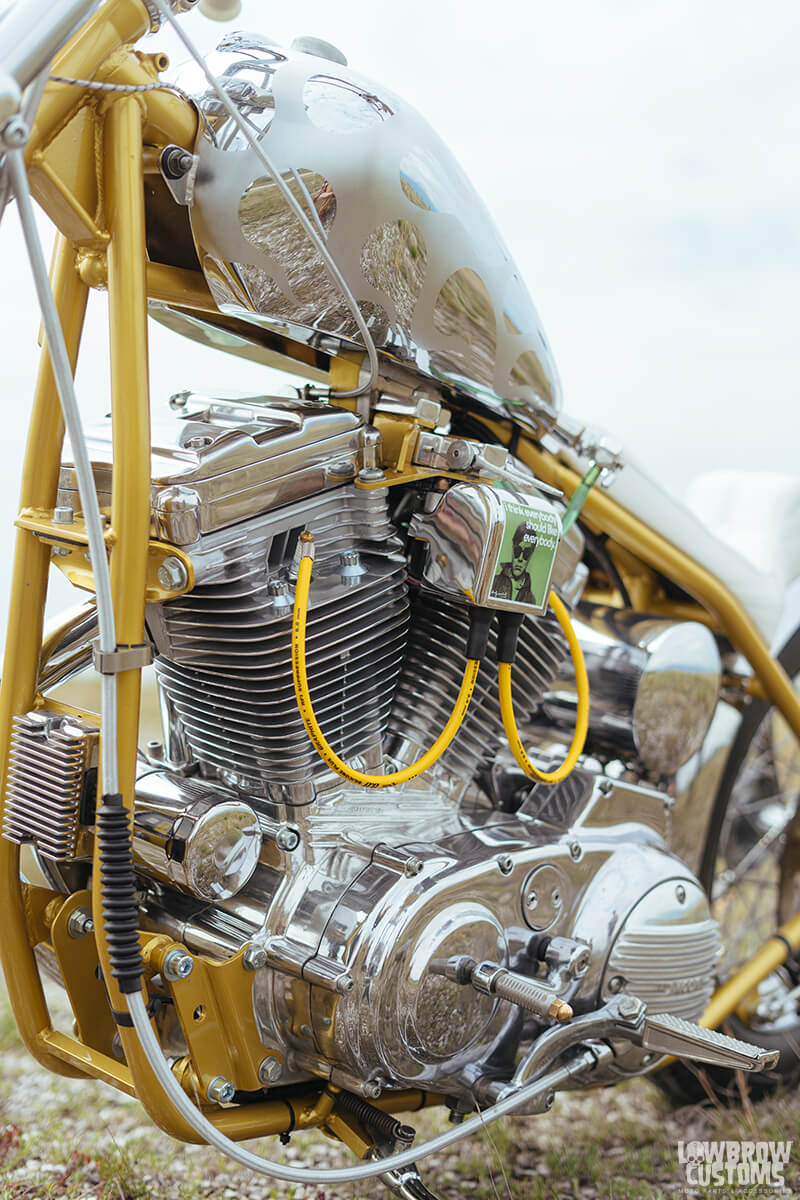 b-side - You could eat of this motor.
 Custom full frame.
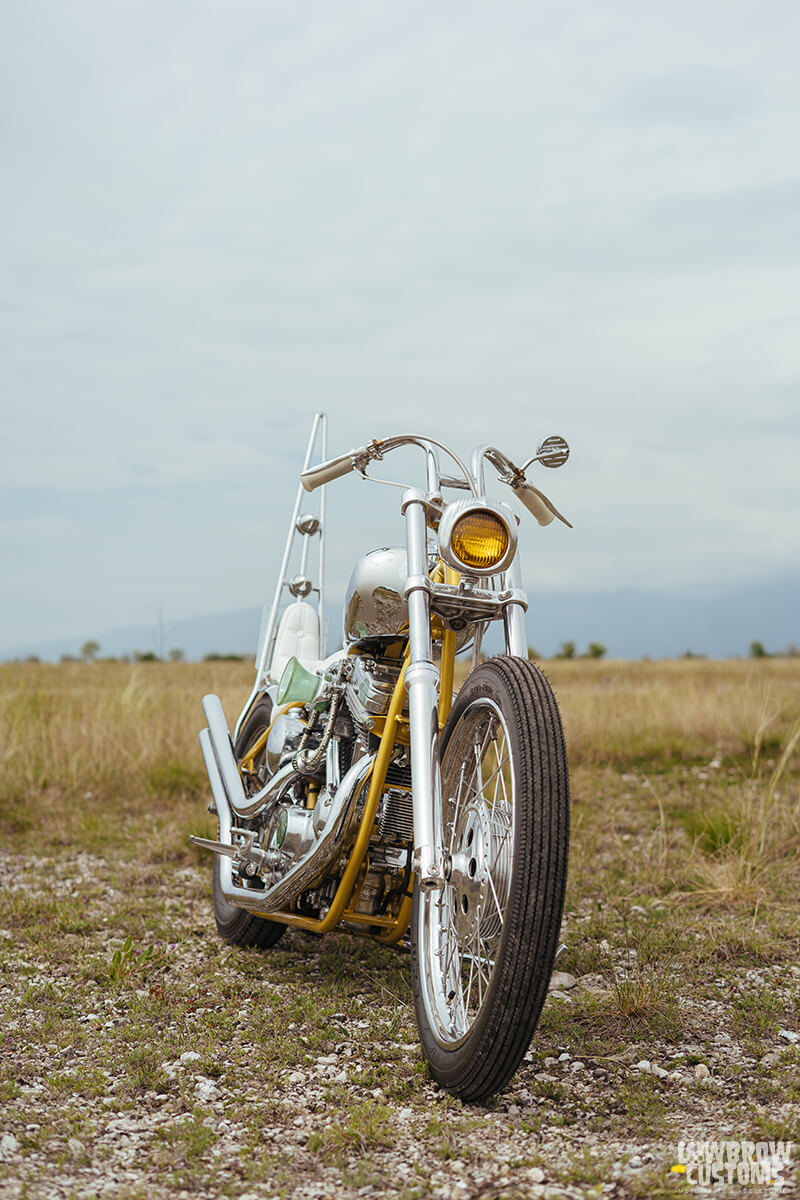 2 over front end with shaved lowers.
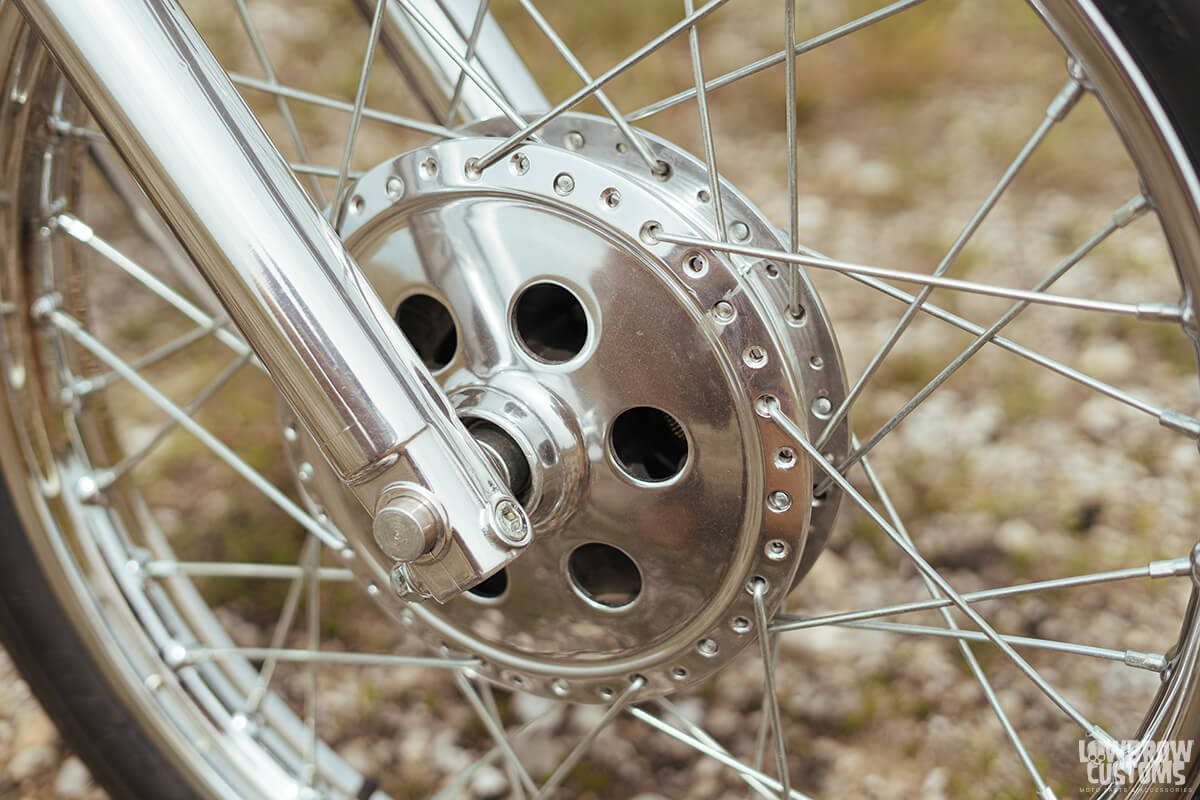 21" front wheel.
 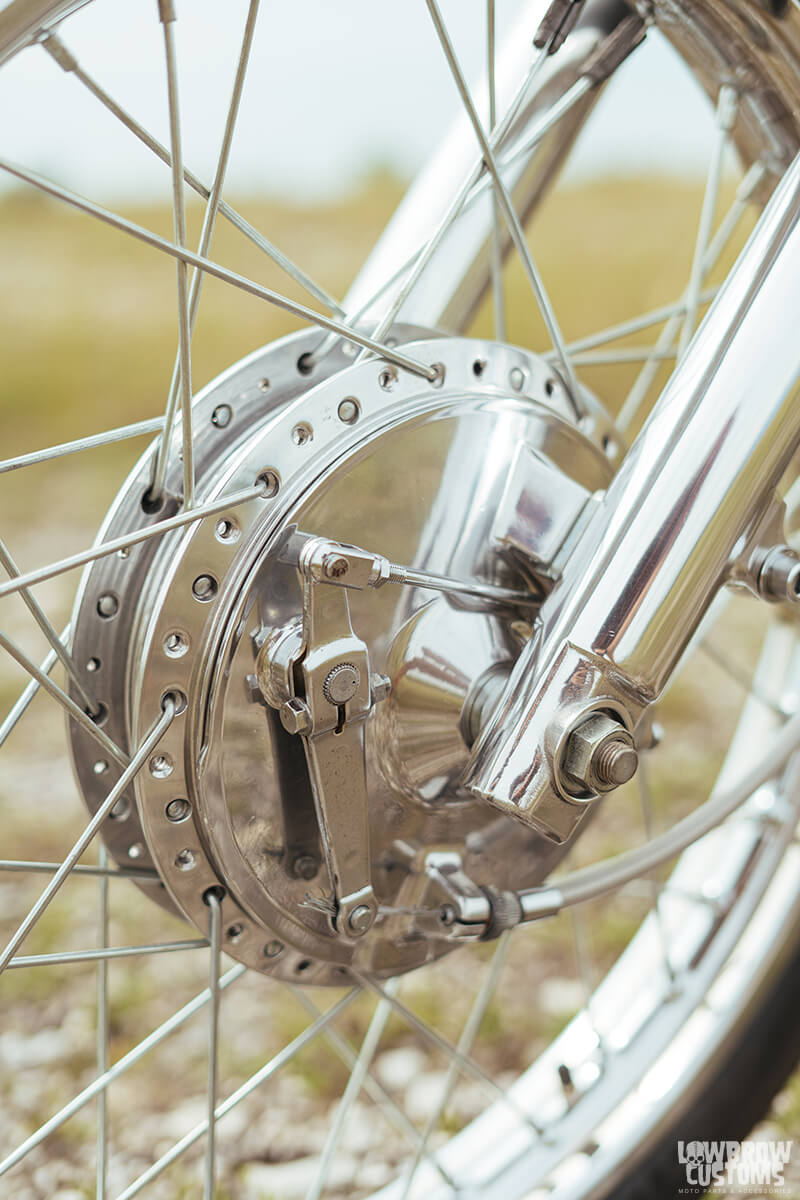 Yamaha XS650 drum brake done beautifully.
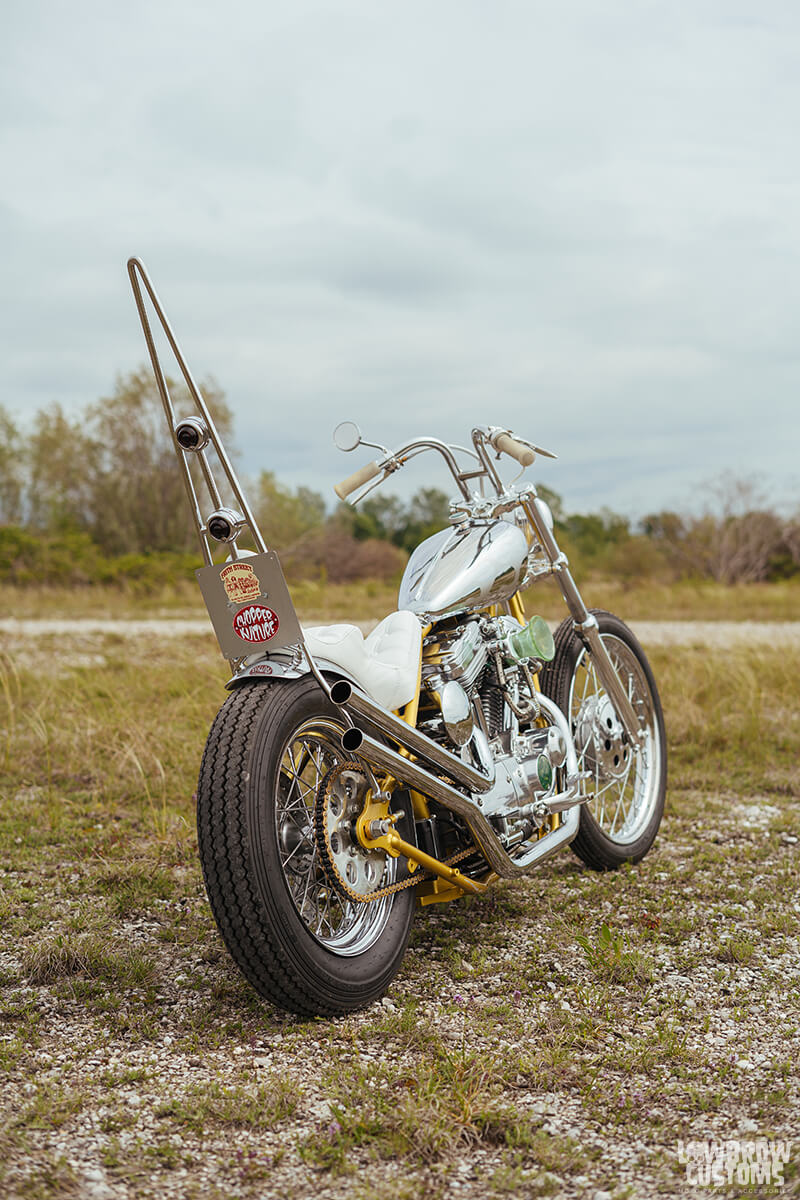 16" rear wheel.
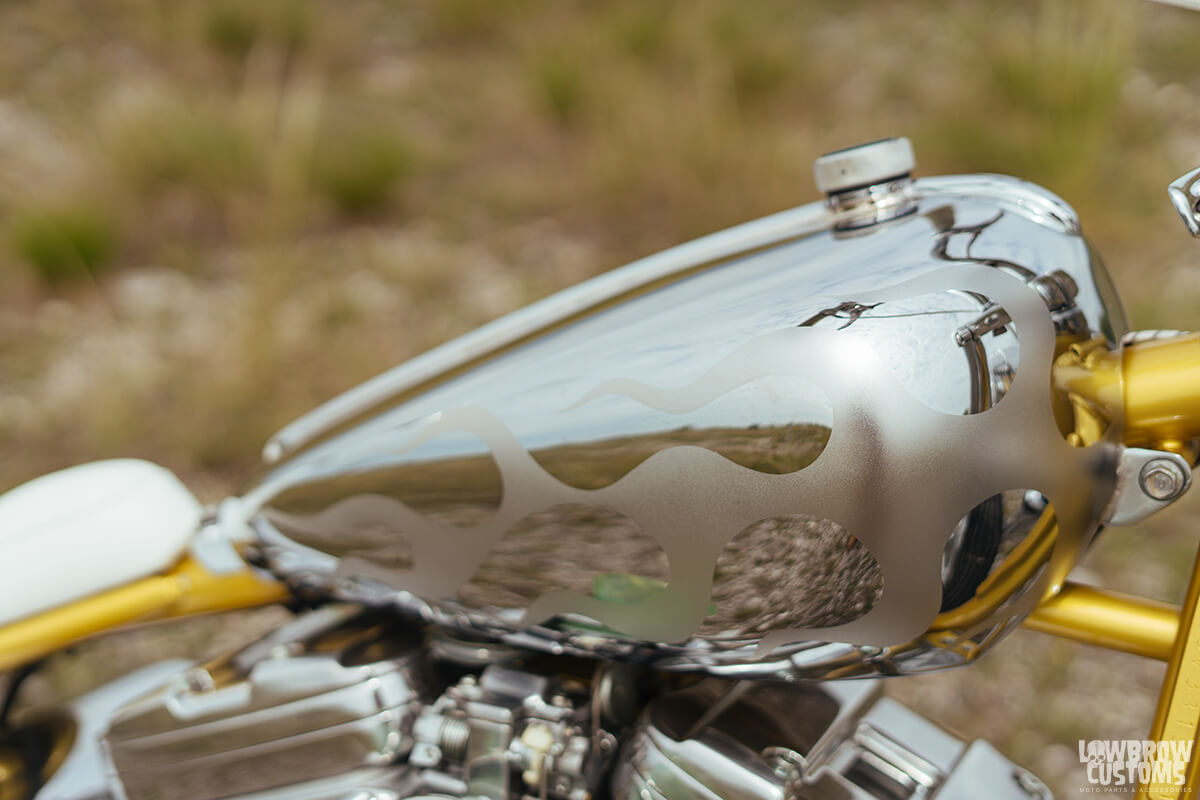 Those flames doh.
 Pangea Rabbit Ear Handlebars and Lowbrow Customs Mirror.
 Custom Velocity stack and points cover.
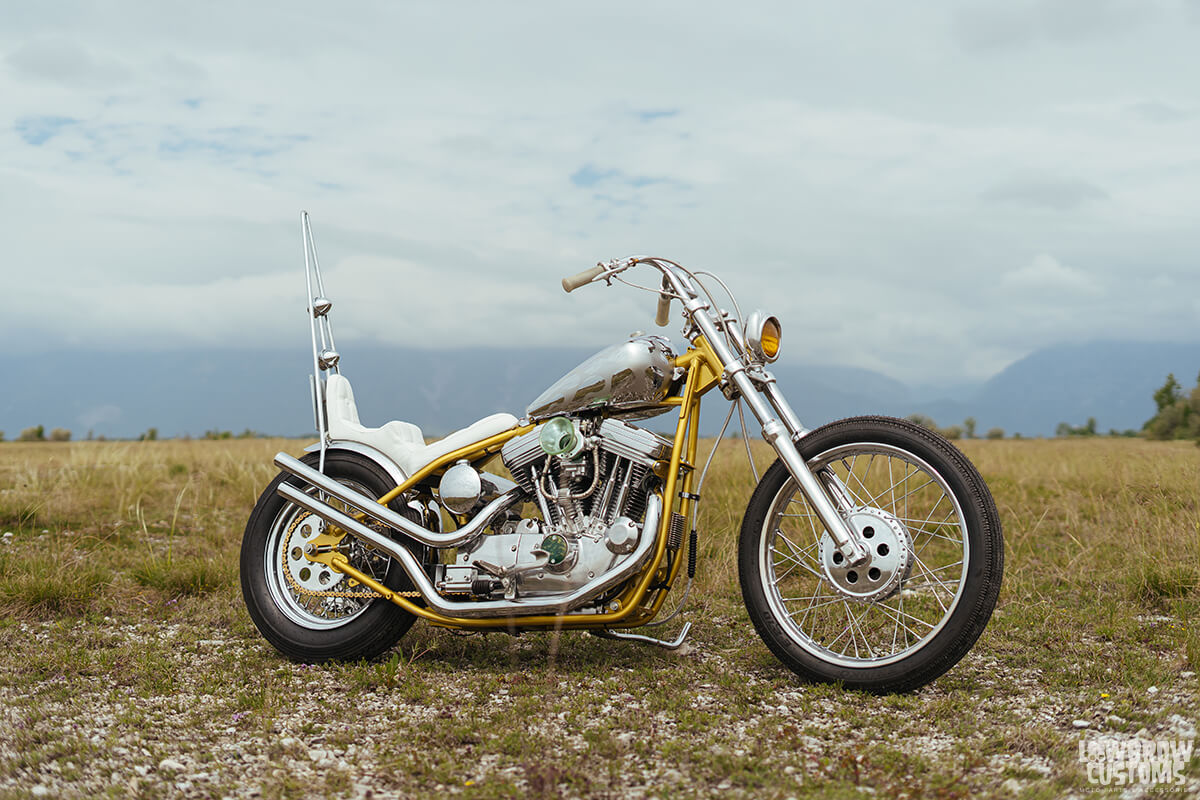 Extremely clean Sportster Chopper.
  Another angle of that custom velocity stack.
 "I think everybody should like everybody" - Andy Warhol
 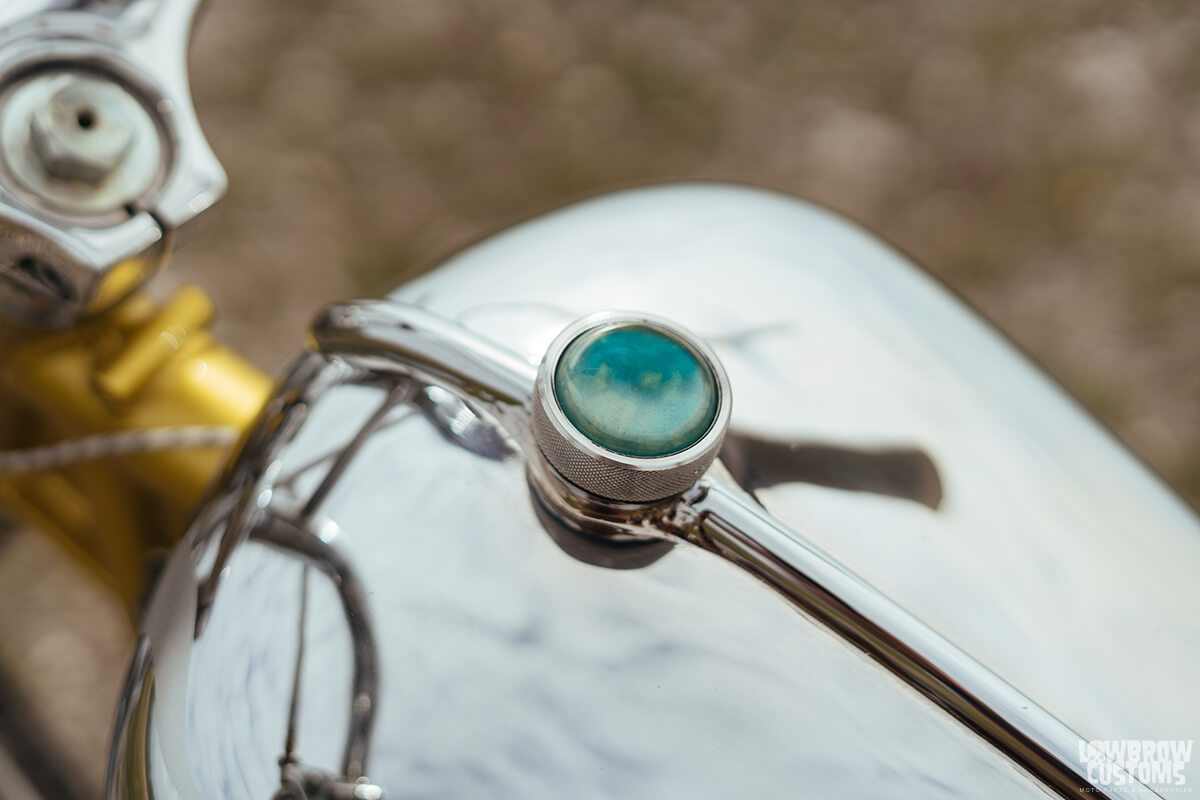 Custom gas cap matches the points and velocity stack.
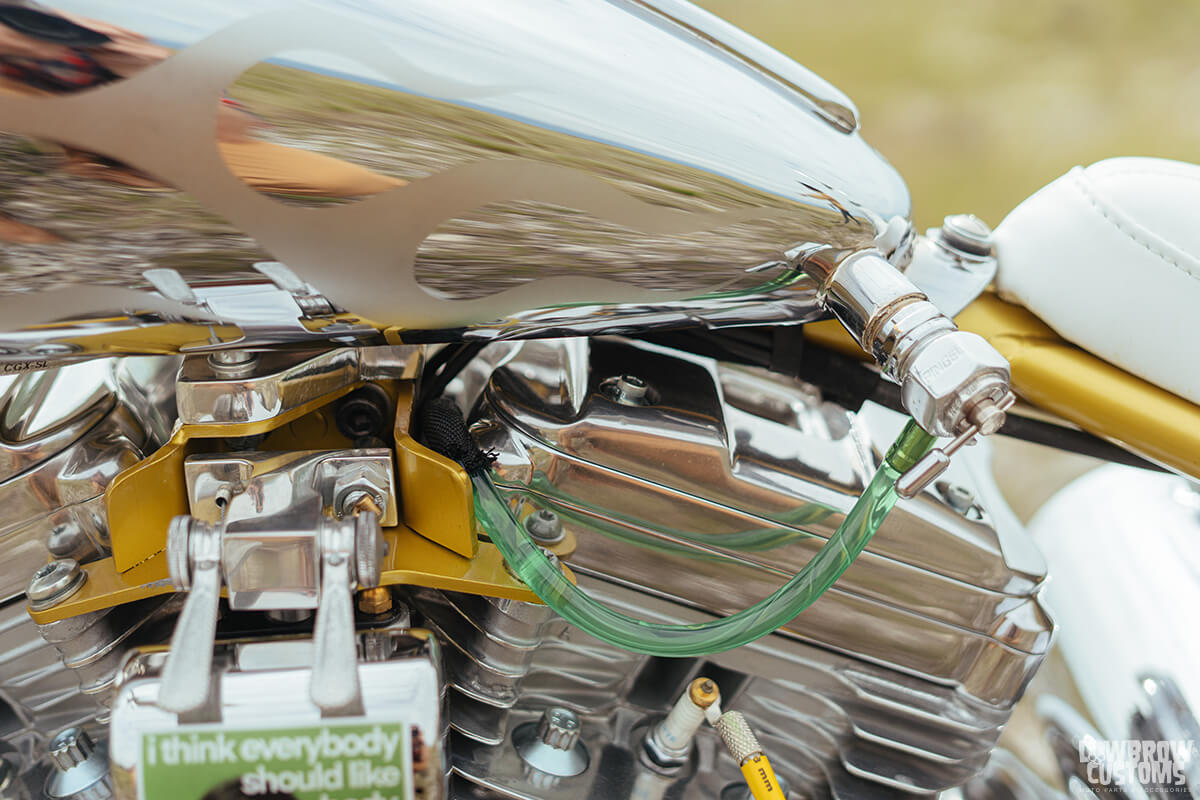 Pingle Petcock keeping that high flow.
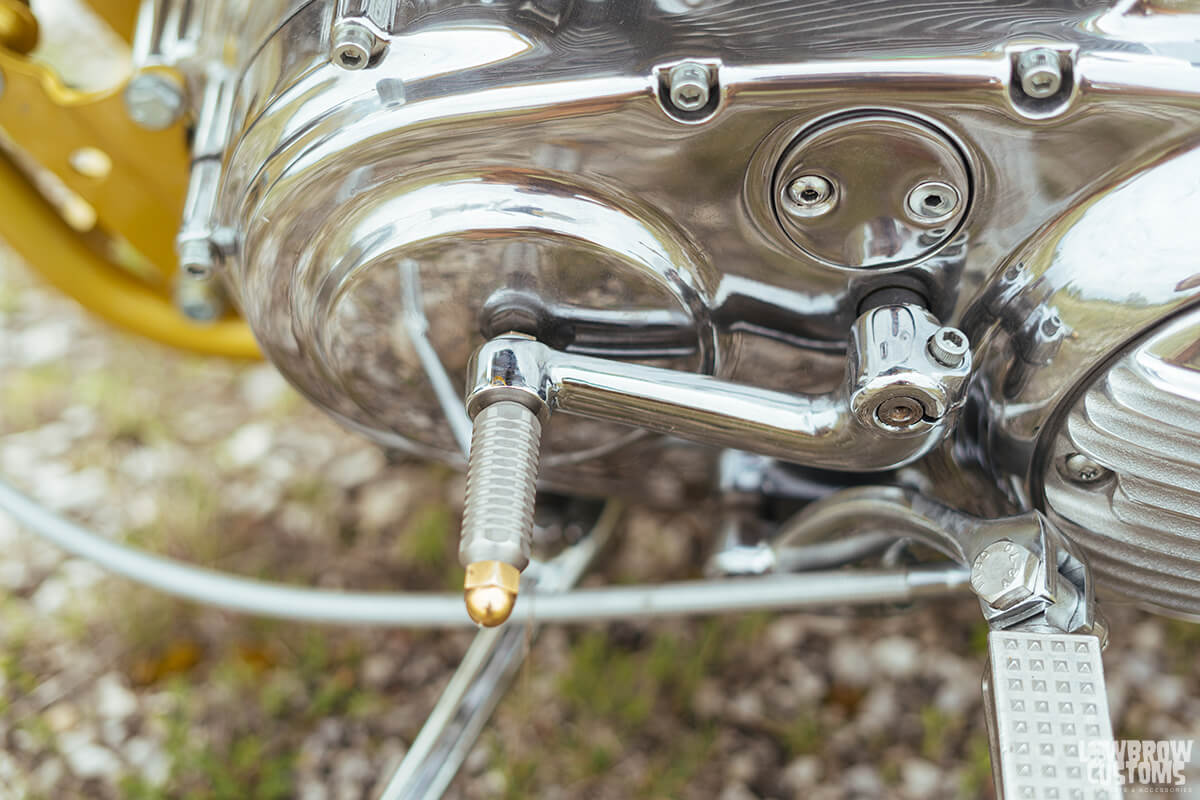 Really neat custom shifter knob.
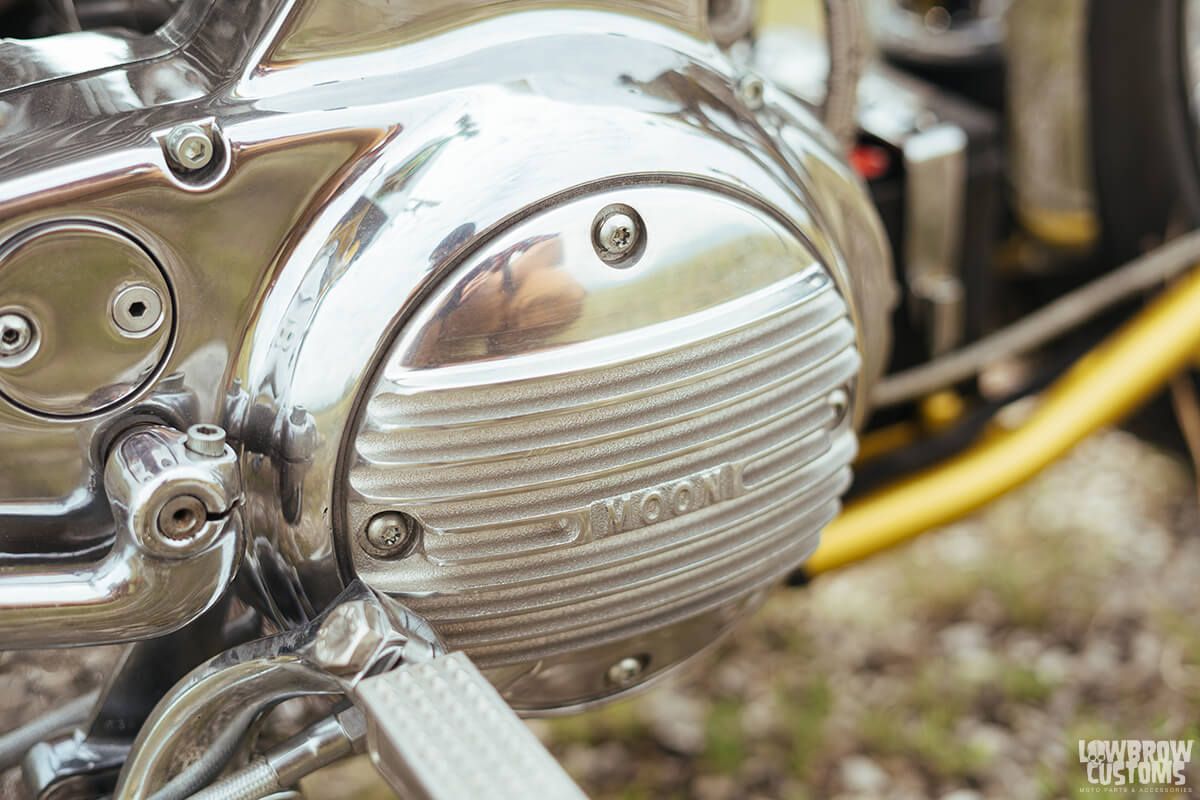
 Sissybar to the sky!
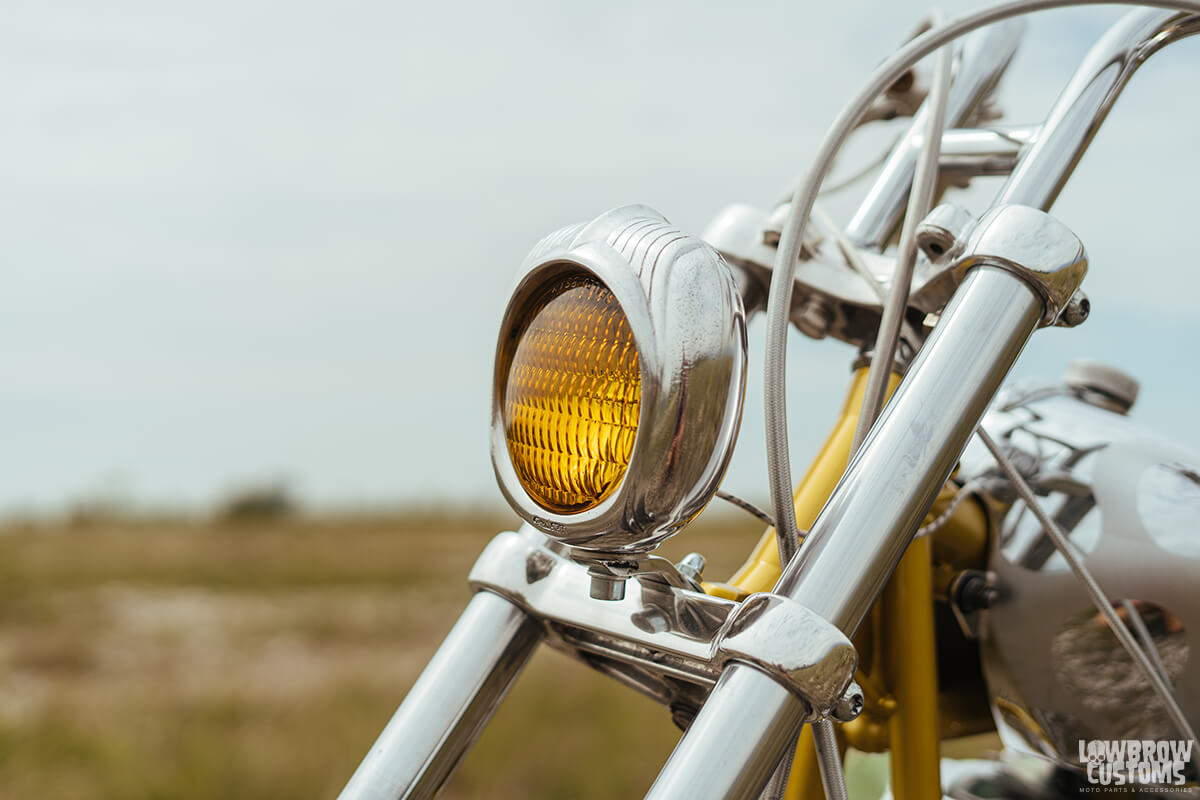 Electroline headlight.
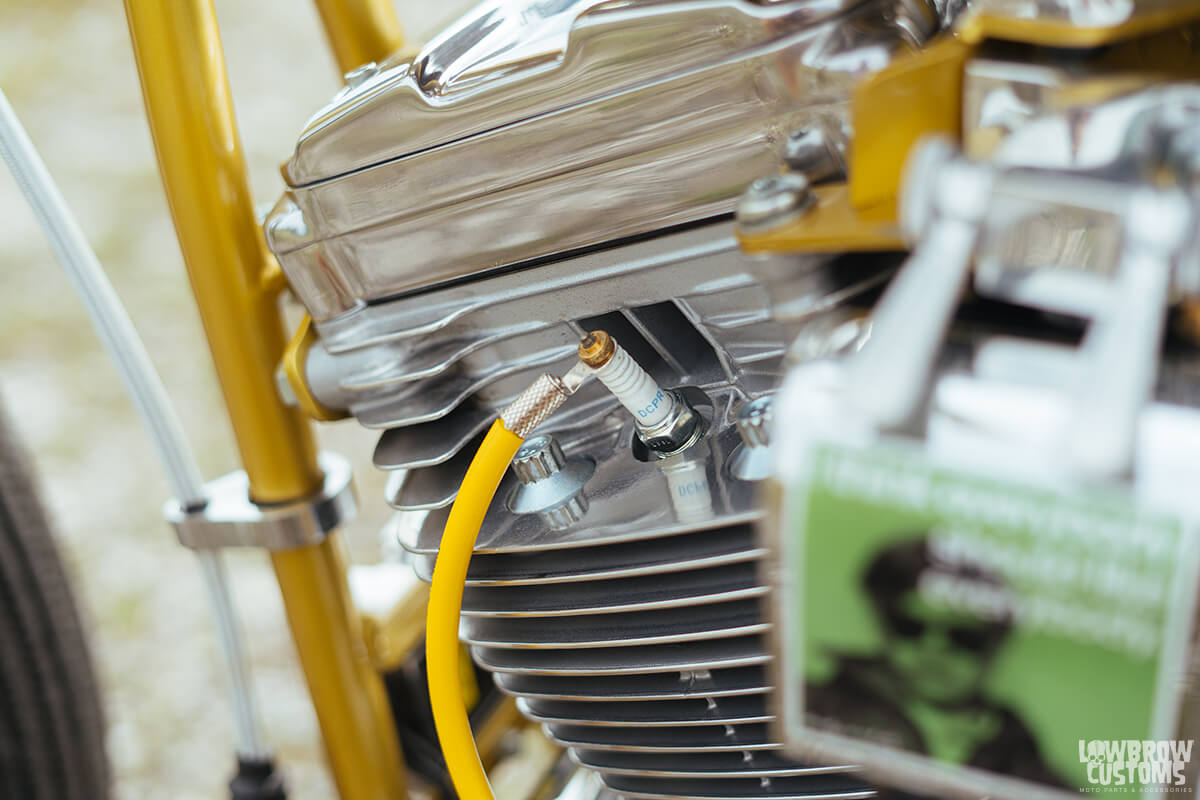 Open plug wires for that classy but shocky vibe.
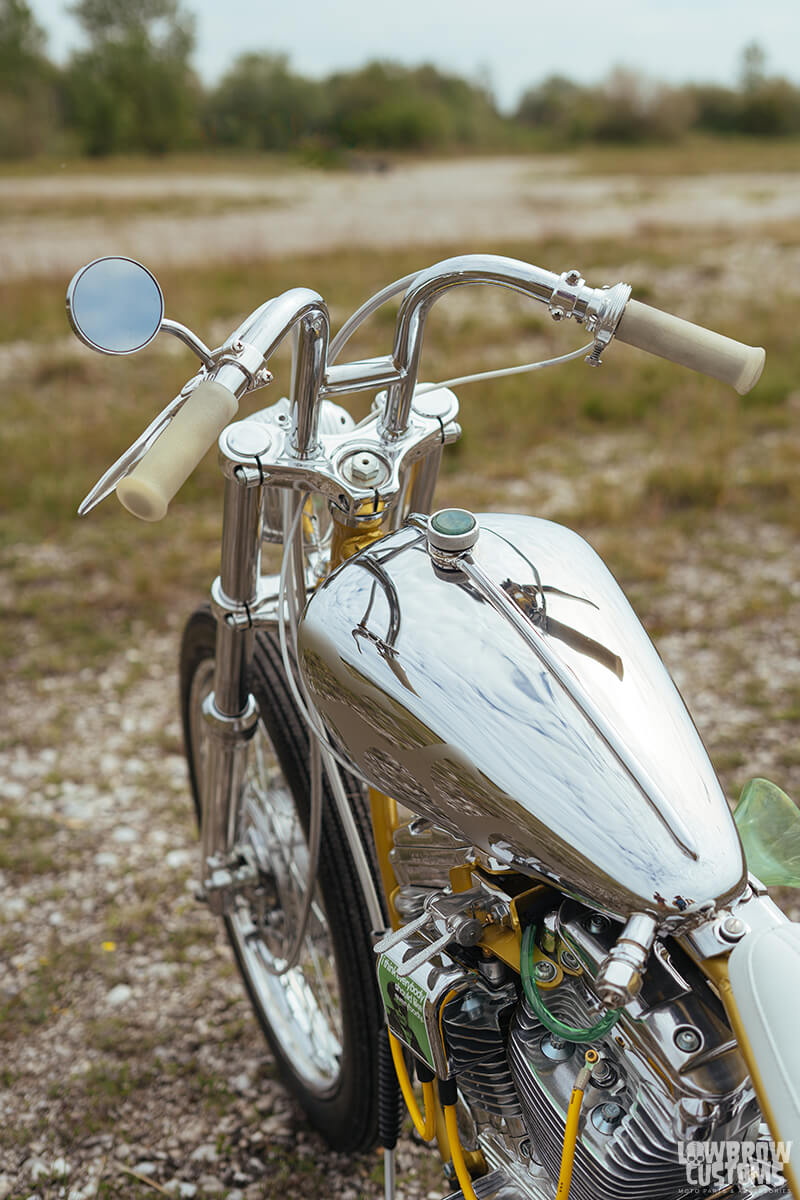 Gas tank has a killer shape.
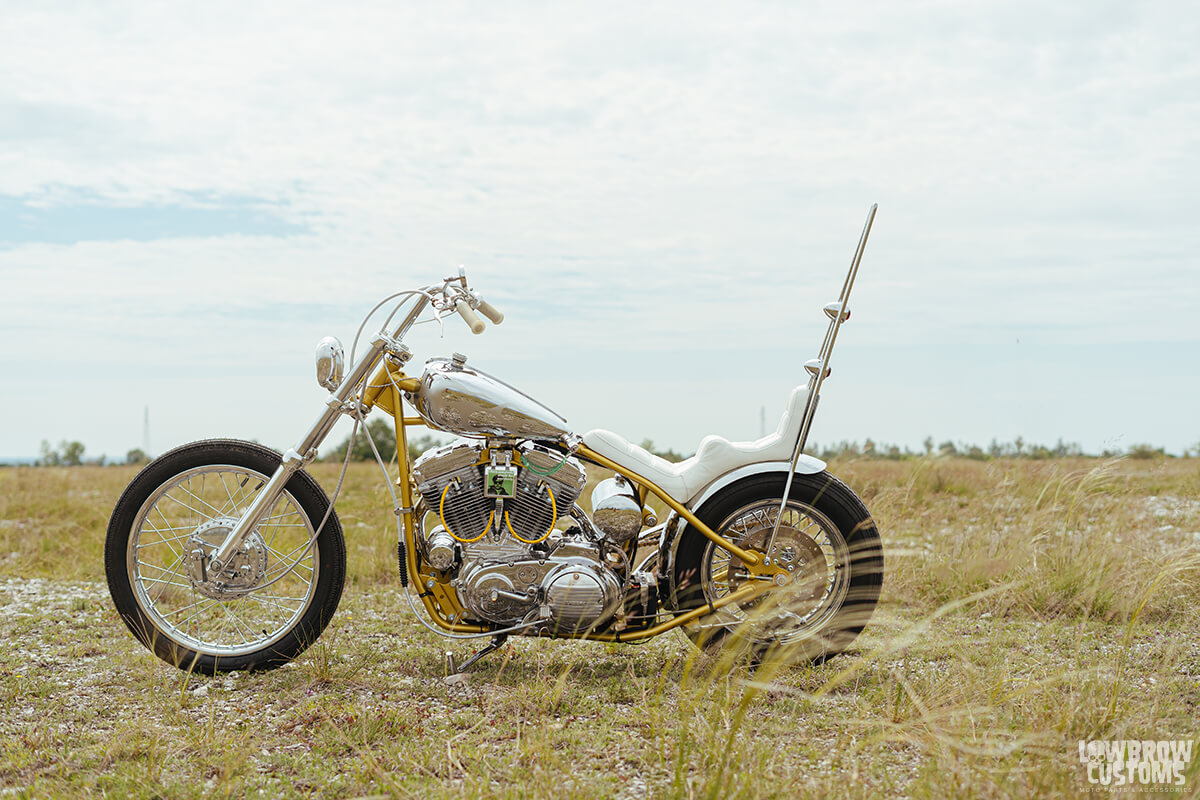 B-side looking just as good as the A-side.
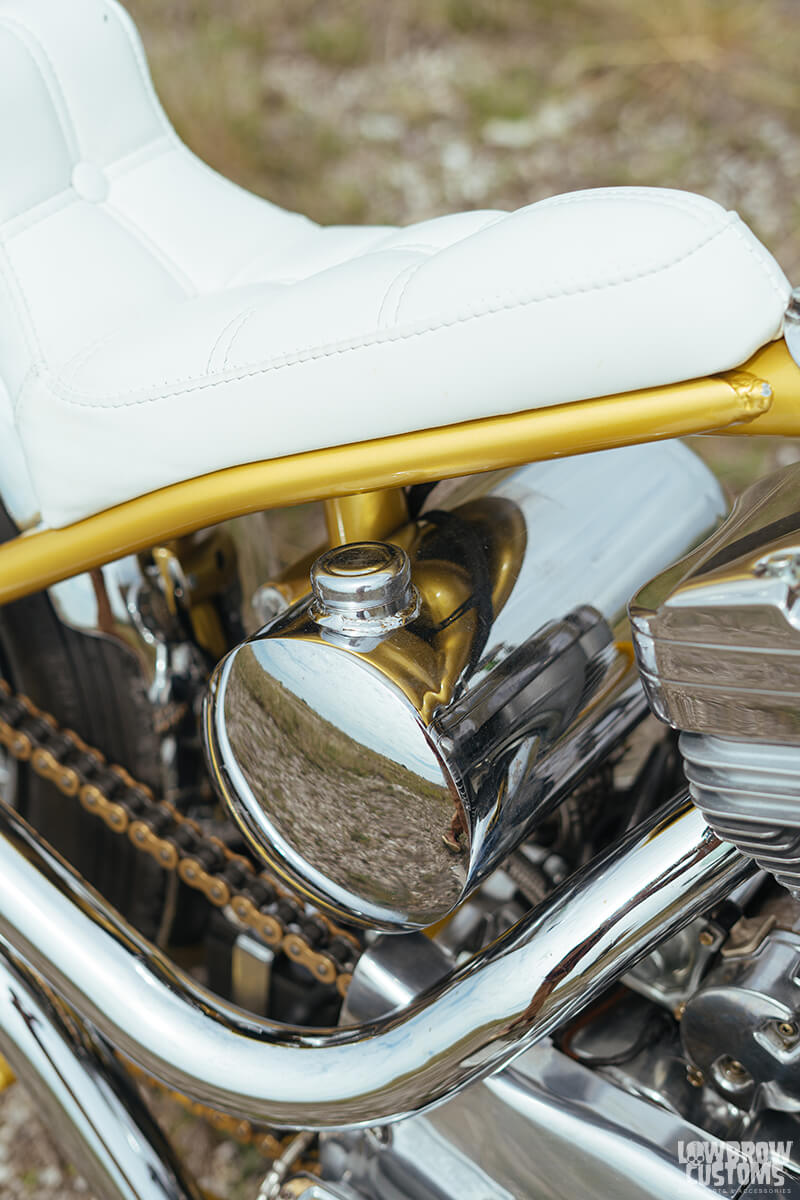 Shiny oil tank!
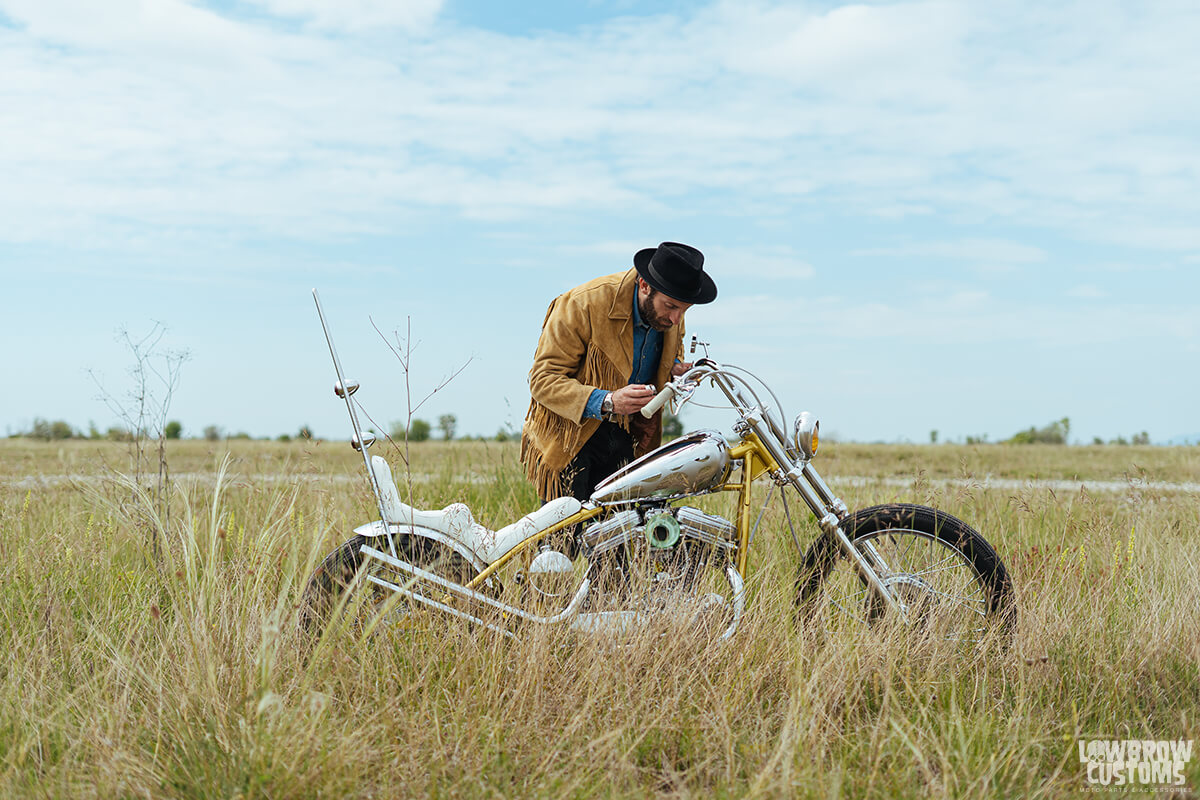 Got Gas?
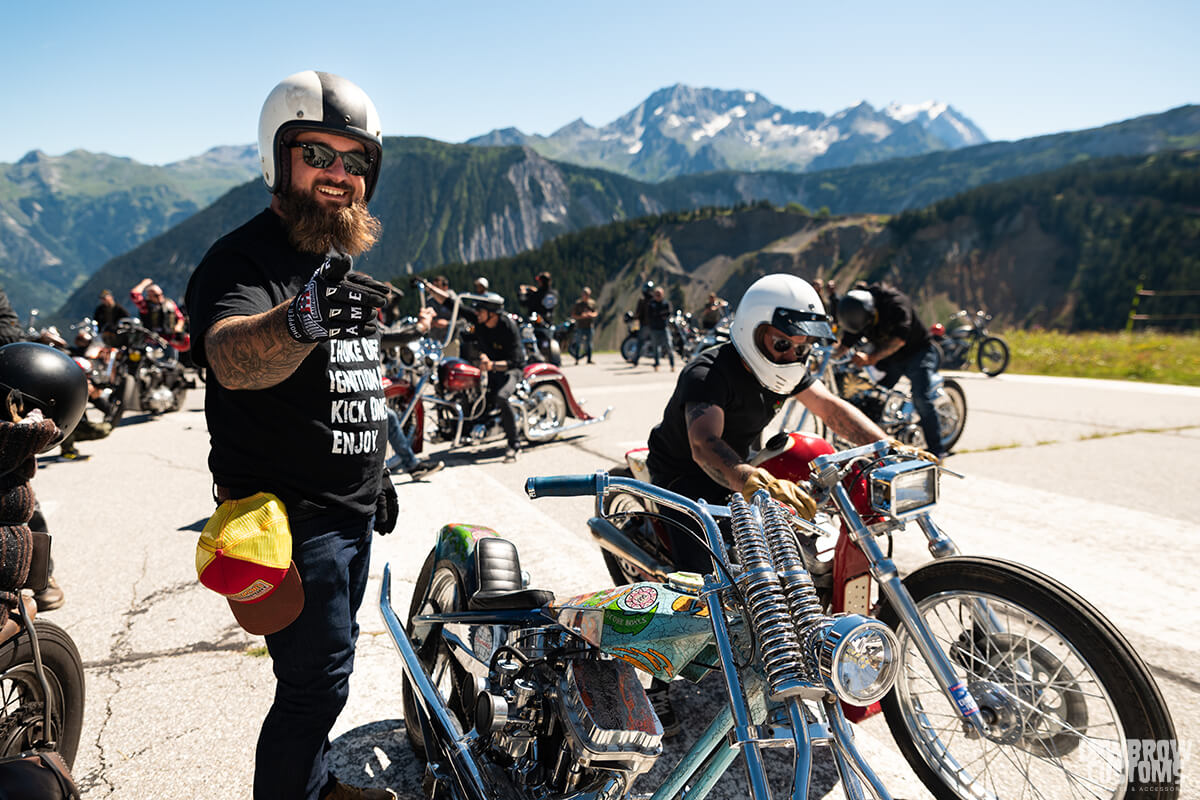
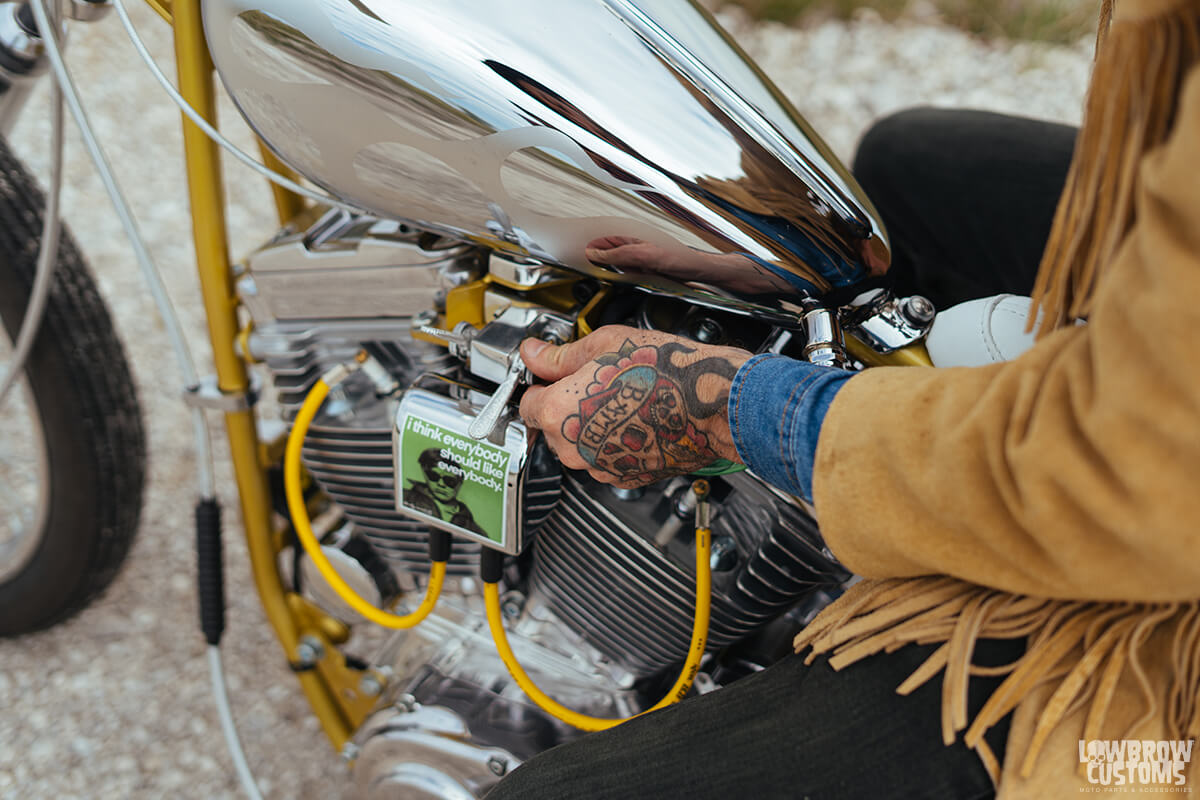 Choke on, ignition on, lets ride.
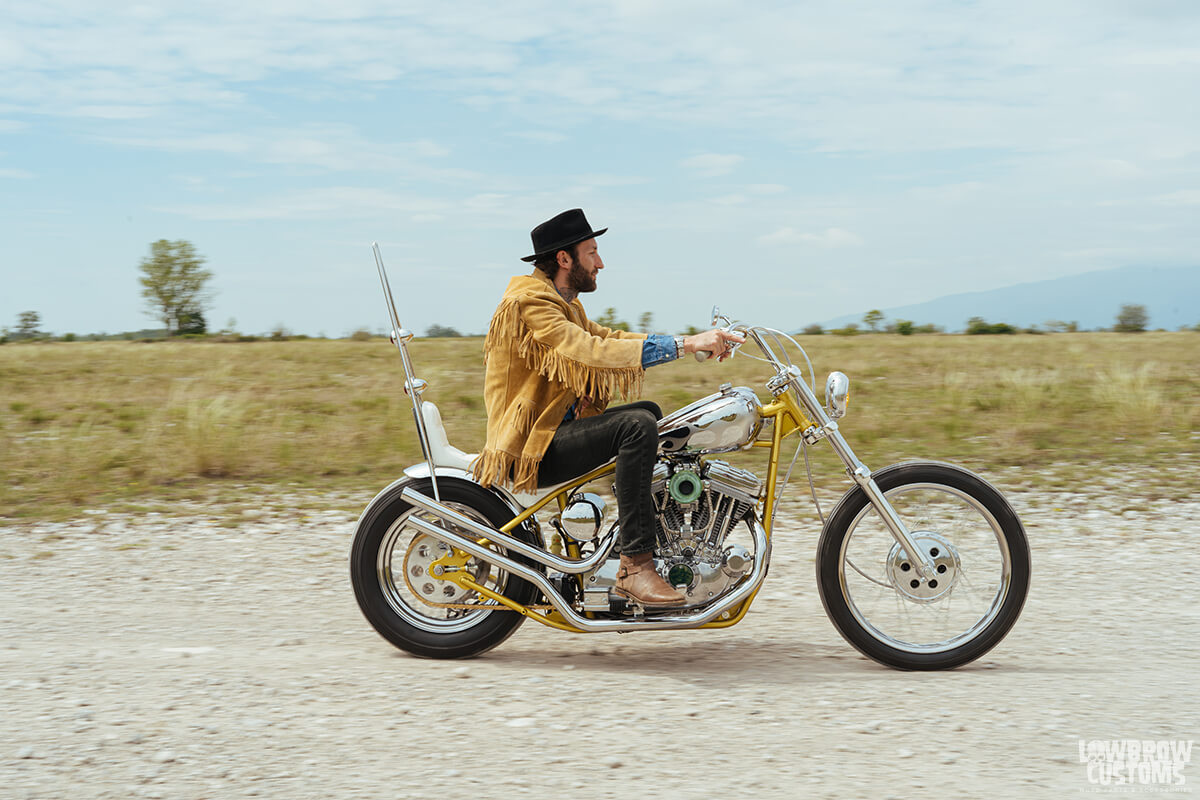 stylin...
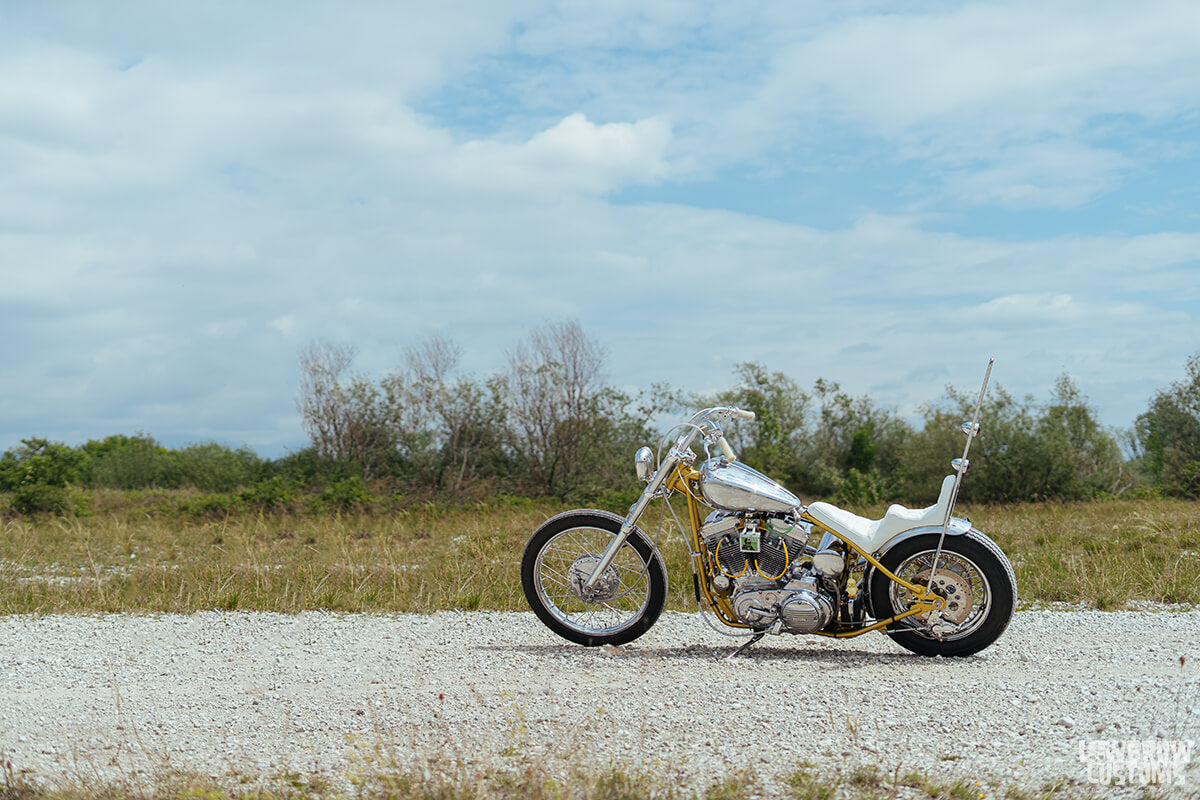 1997 Sporty Chop.


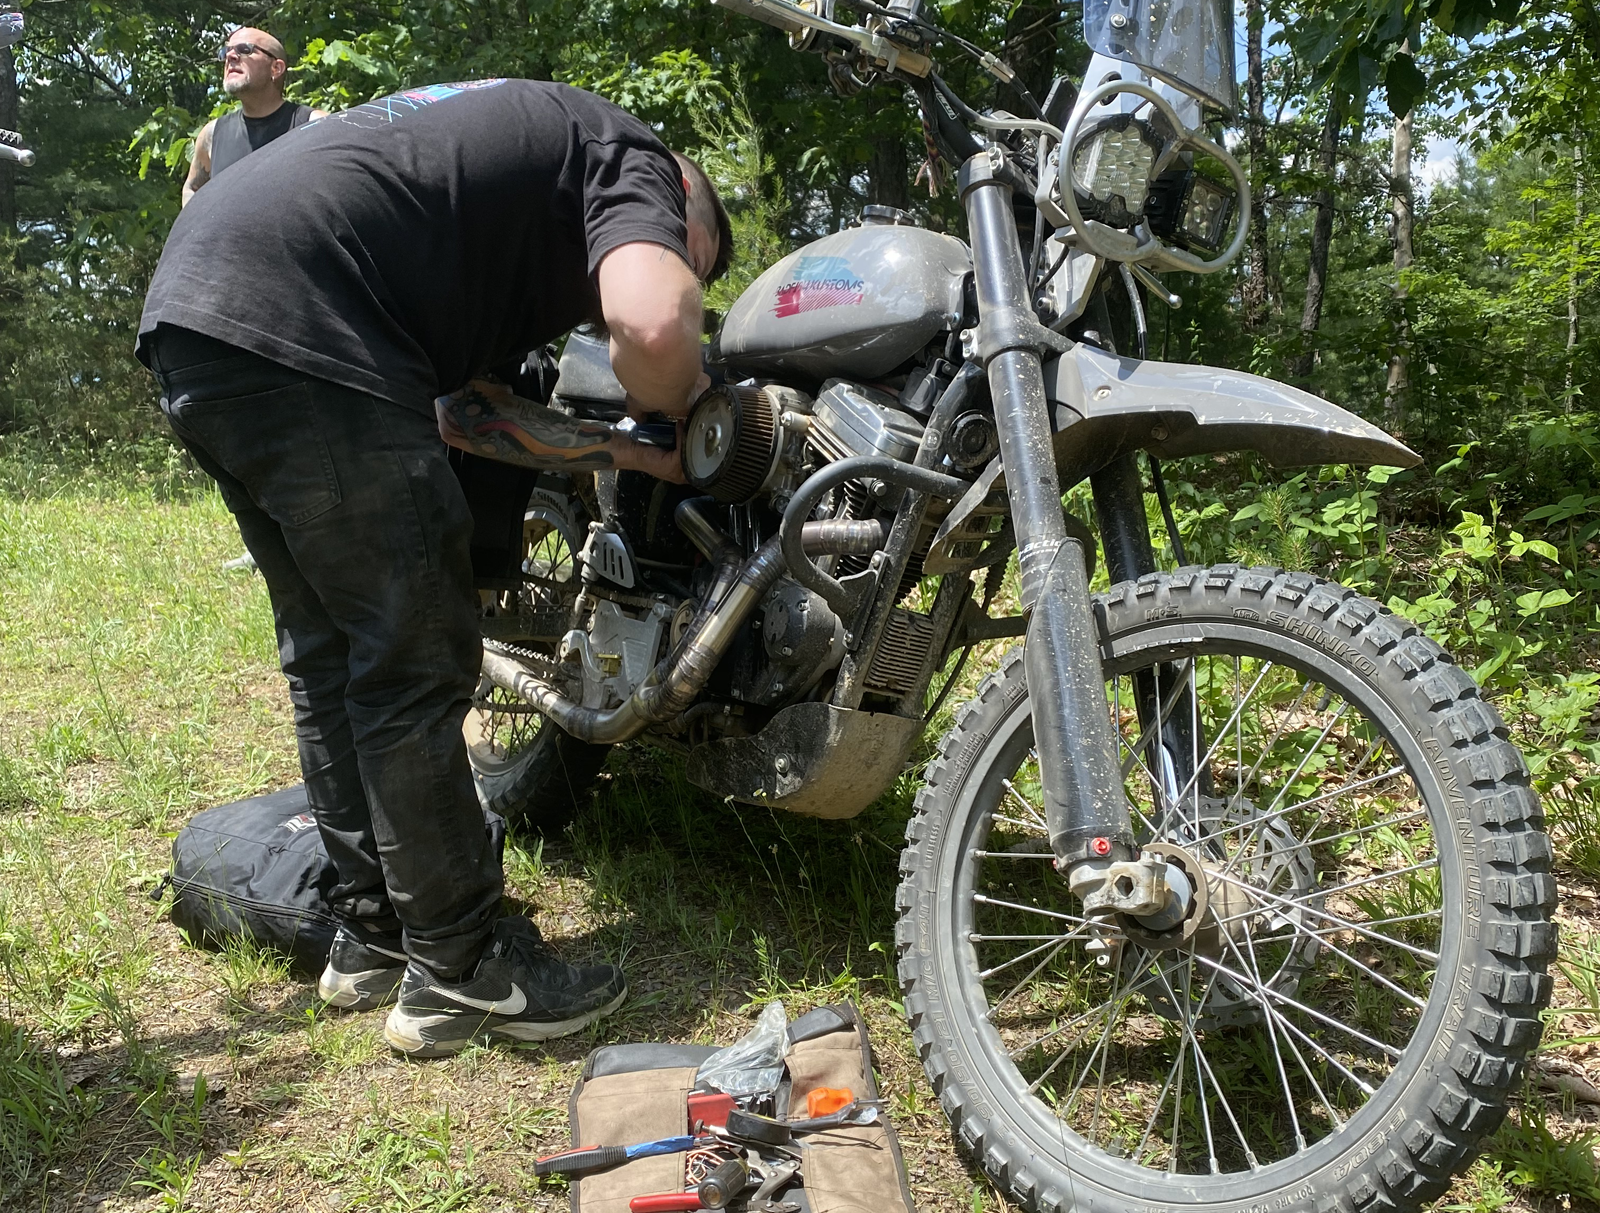
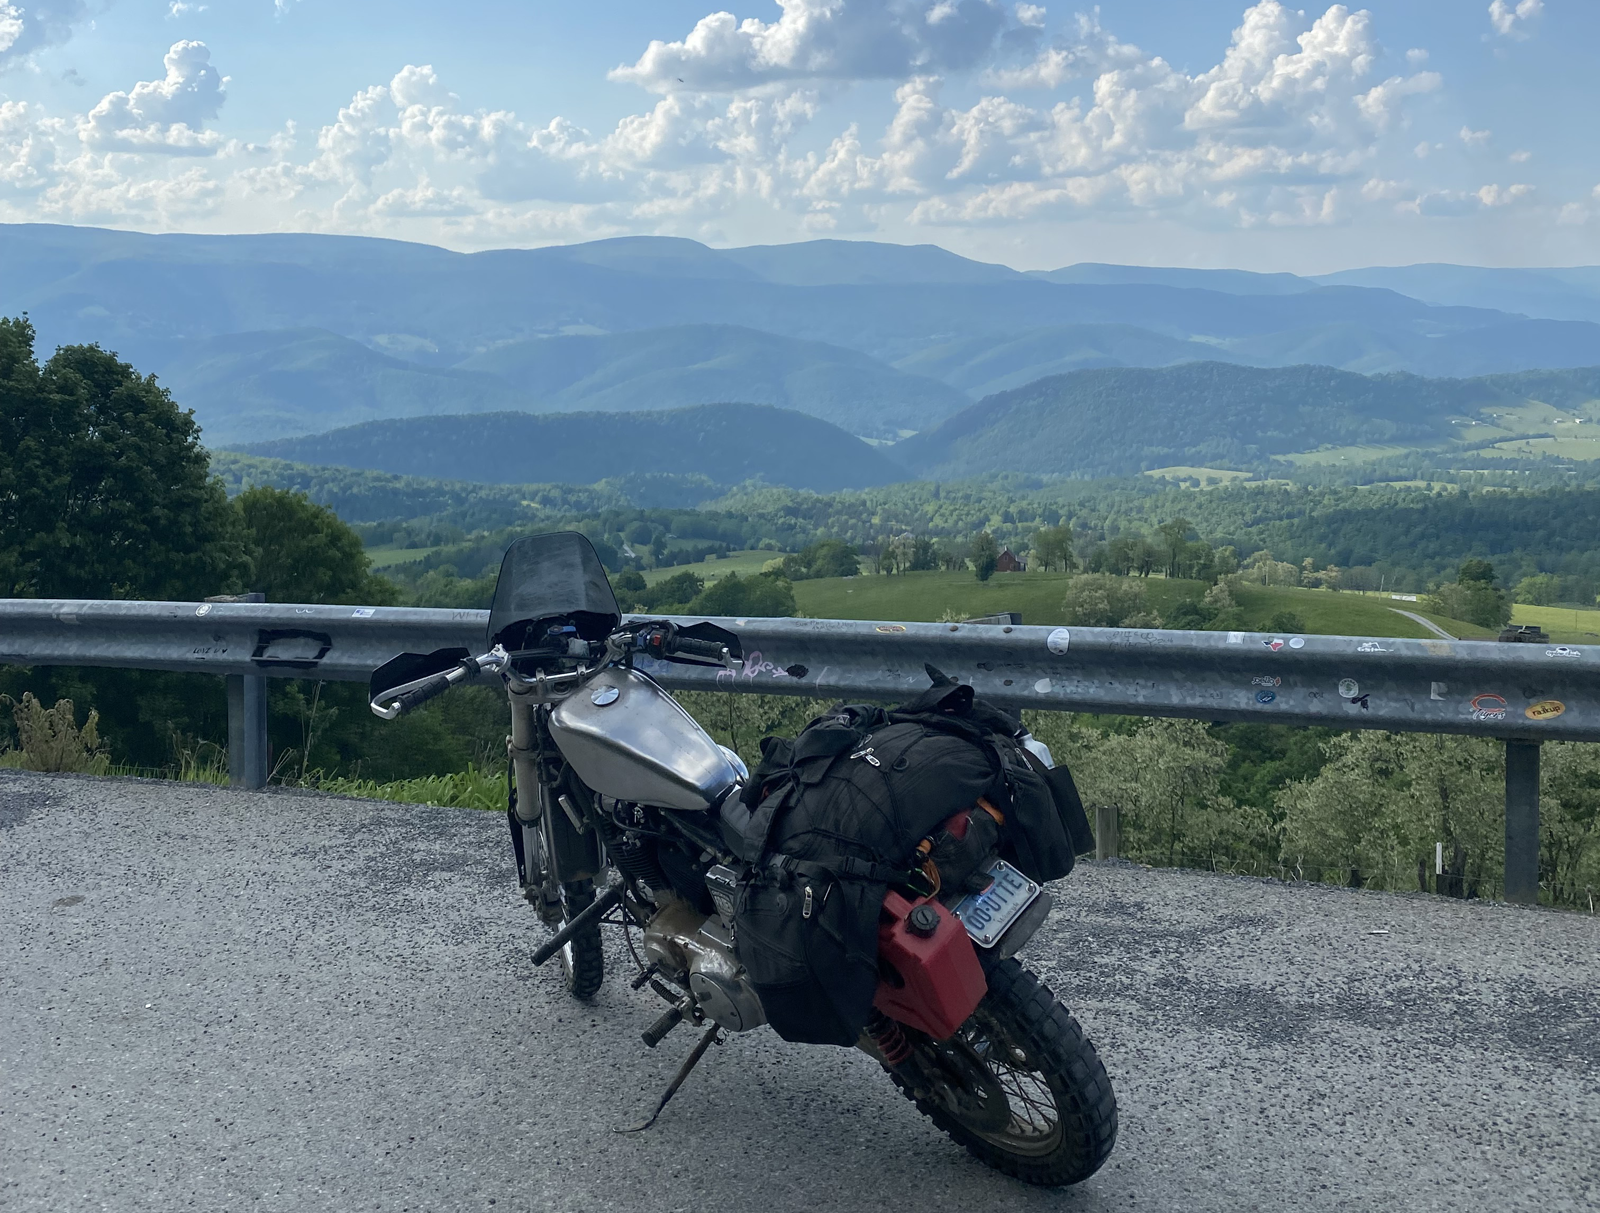
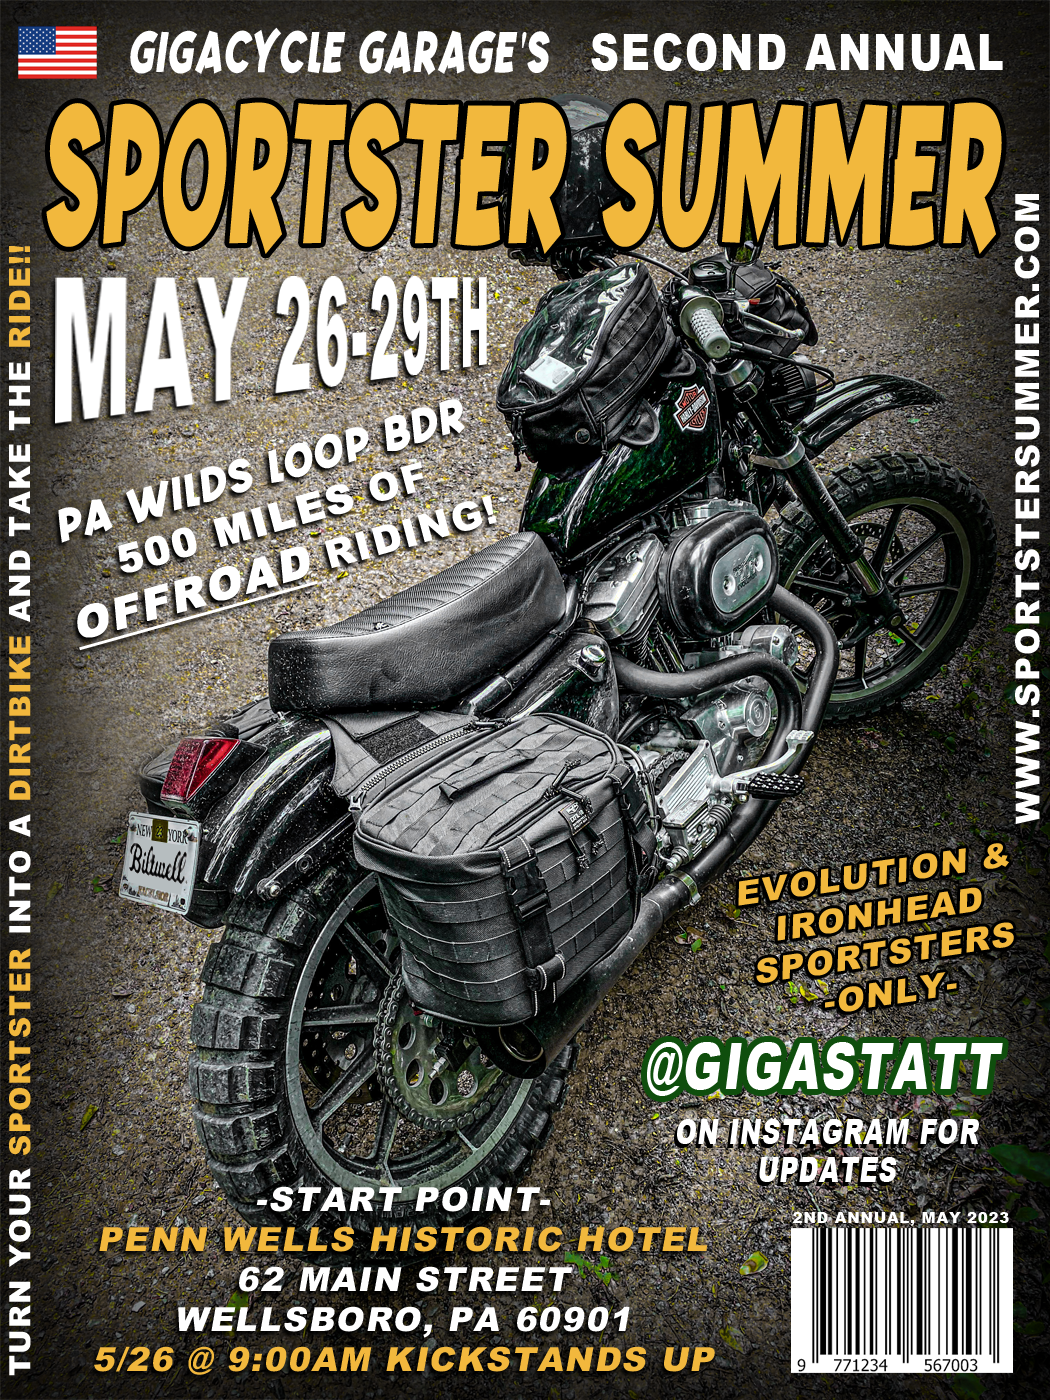
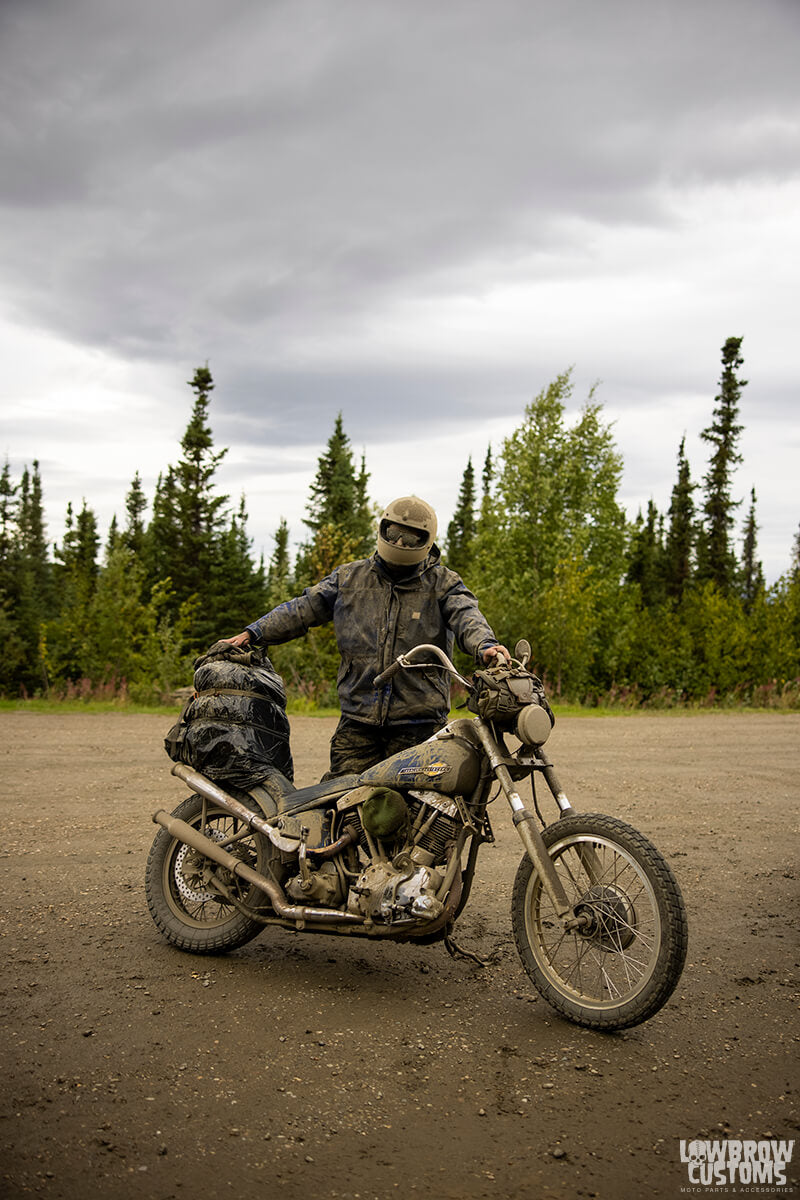
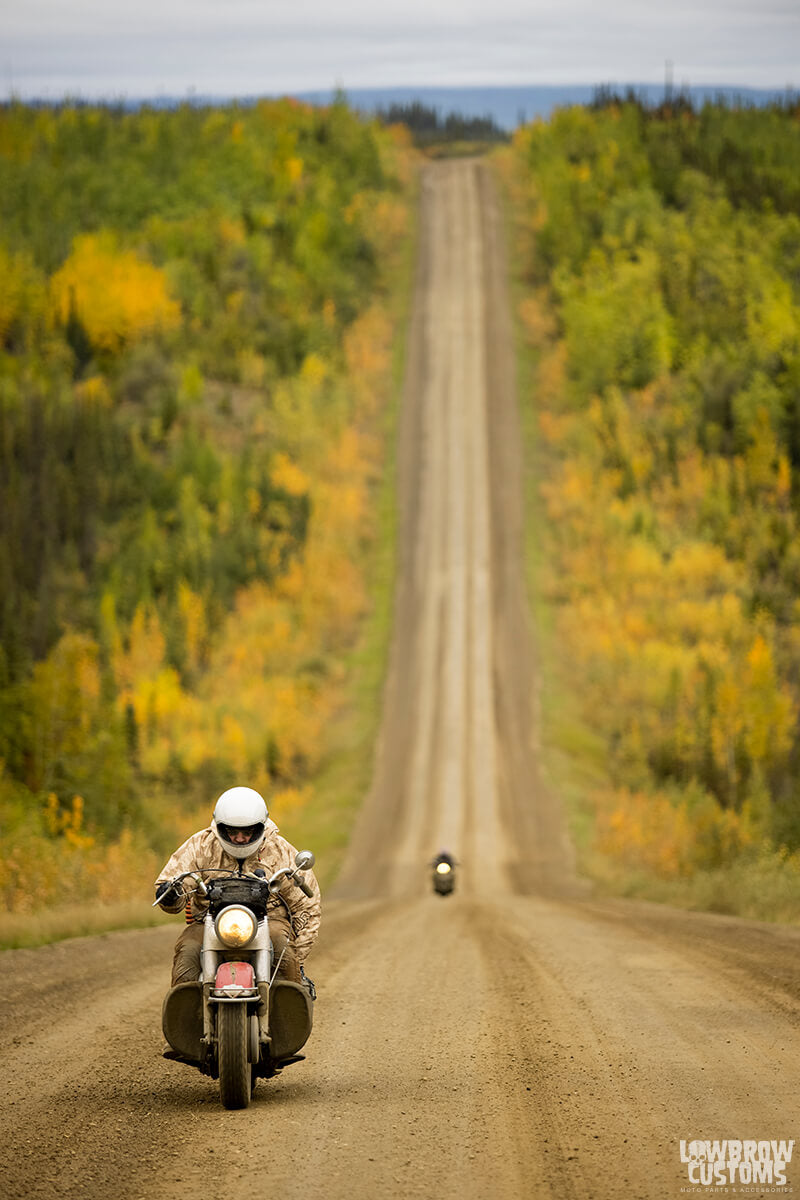
 Who says you can't make a Sportster into a dirtbike?
 Getting the bugs out before the start of the trip.
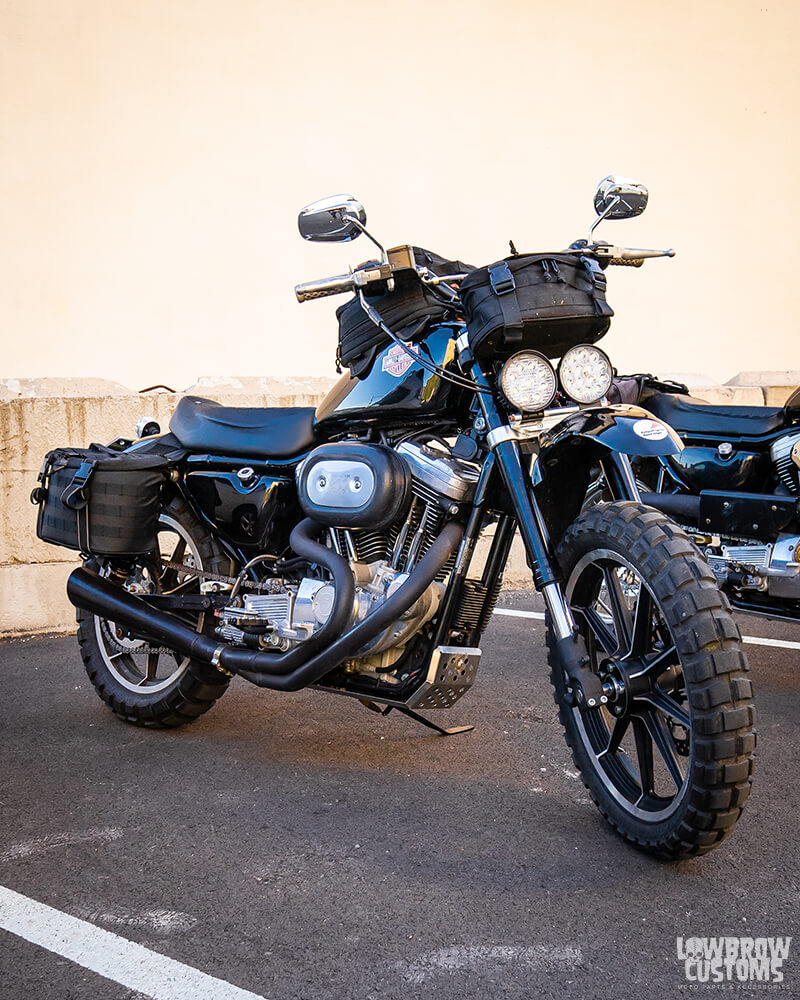 Tim's Sportster rocking a Lowbrow Hooligan Exhaust and Skid Plate.
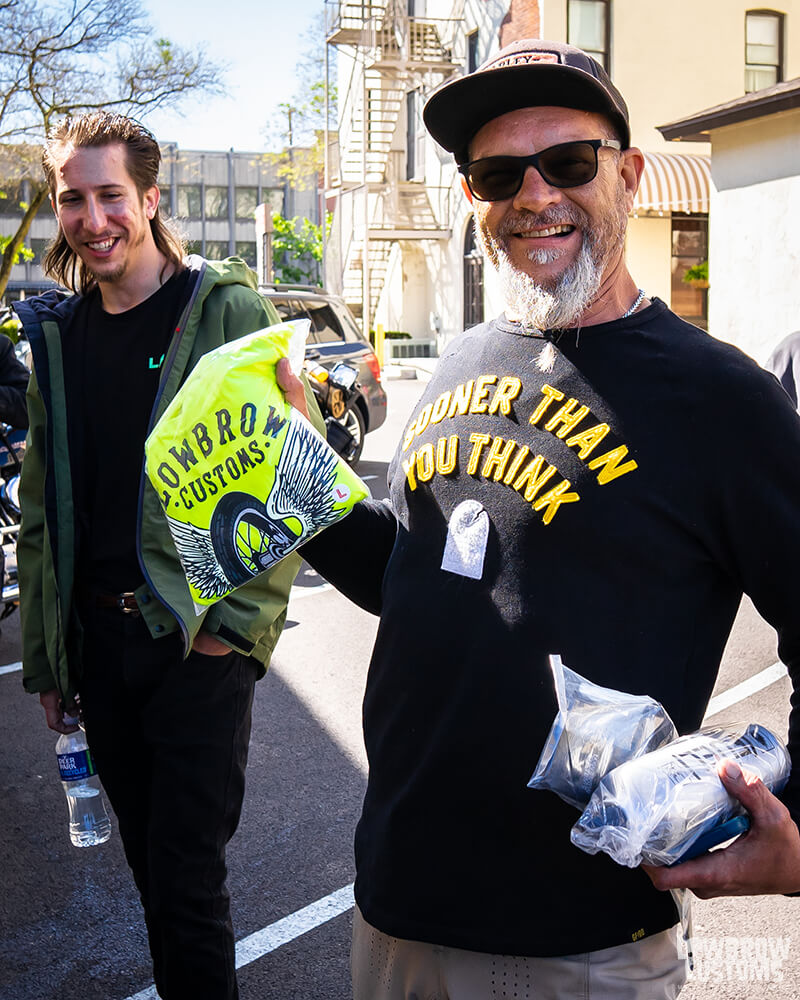 Everyone who registered for the trip got some Lowbrow Swag for participating.
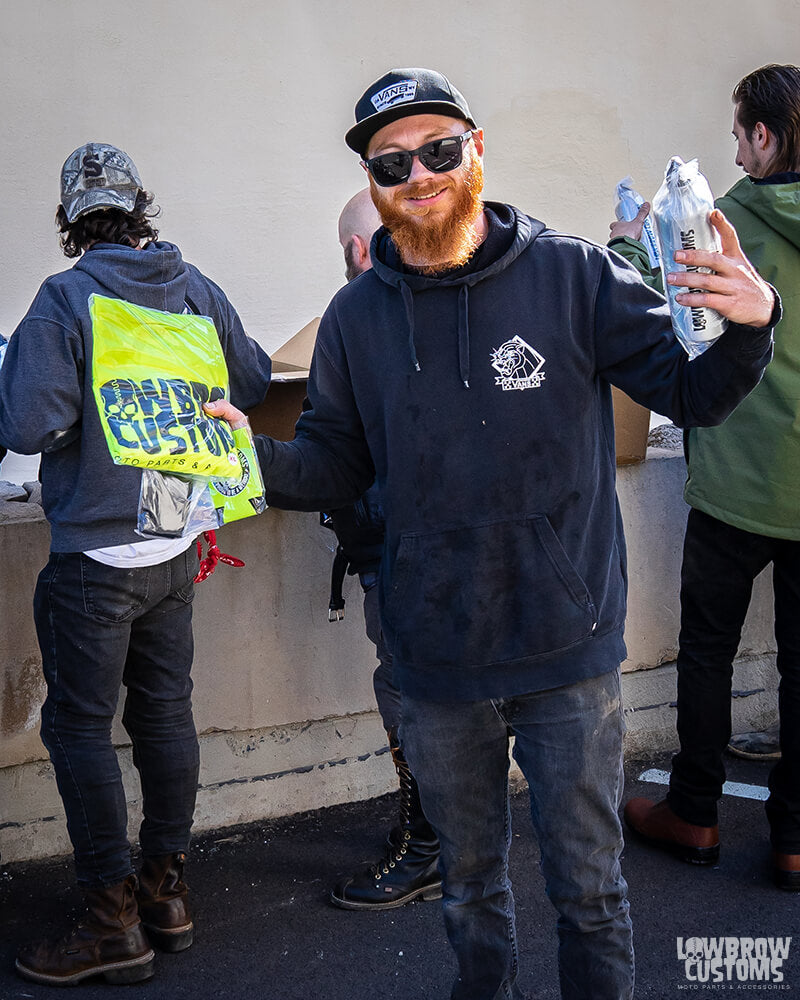 All smiles and ready for some miles.
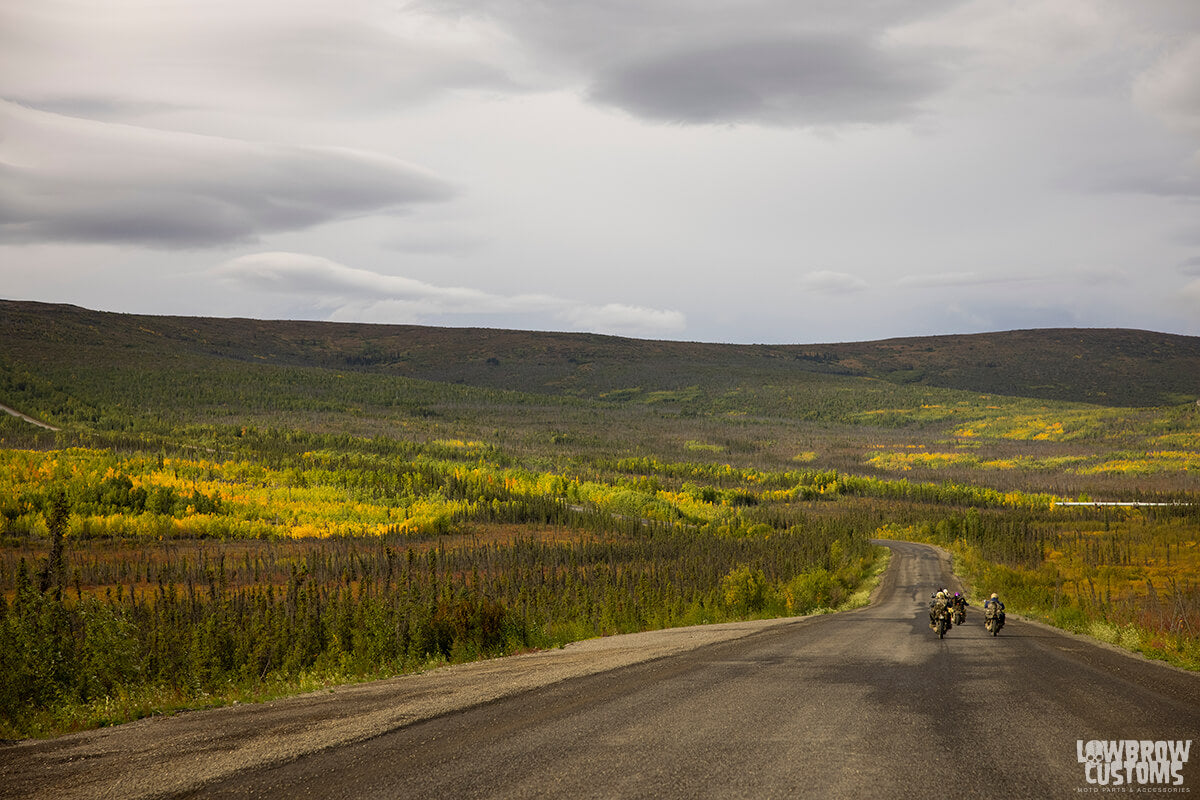
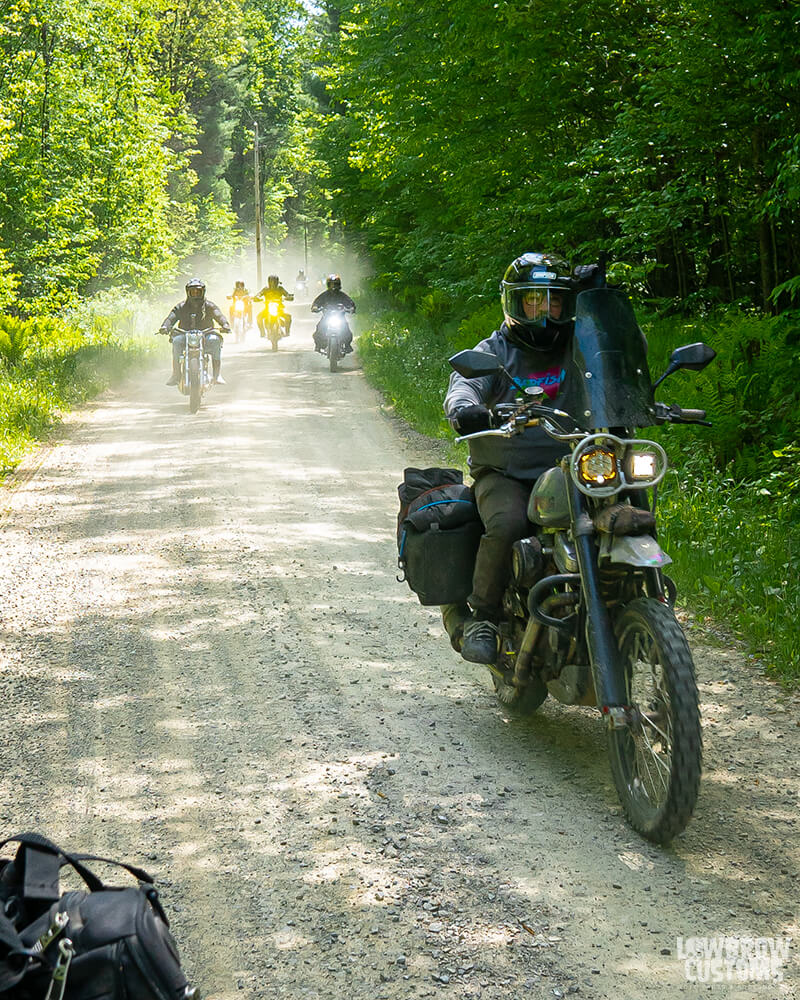 There are still plenty of gravel roads still in America
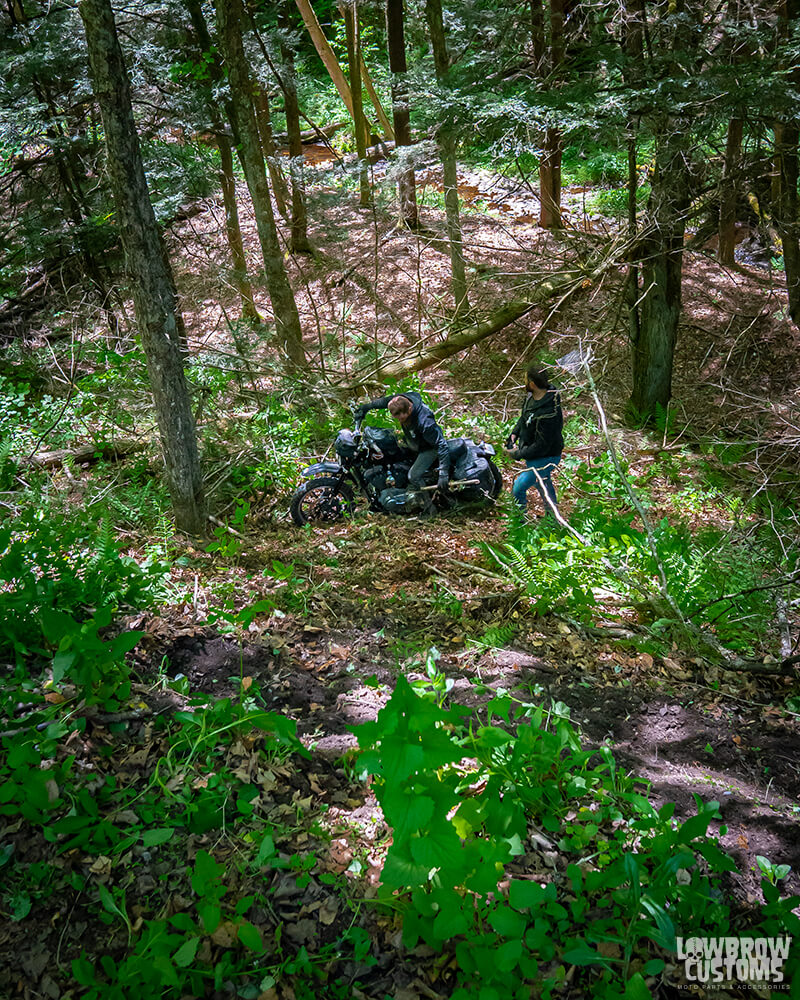 OPE!
OPE!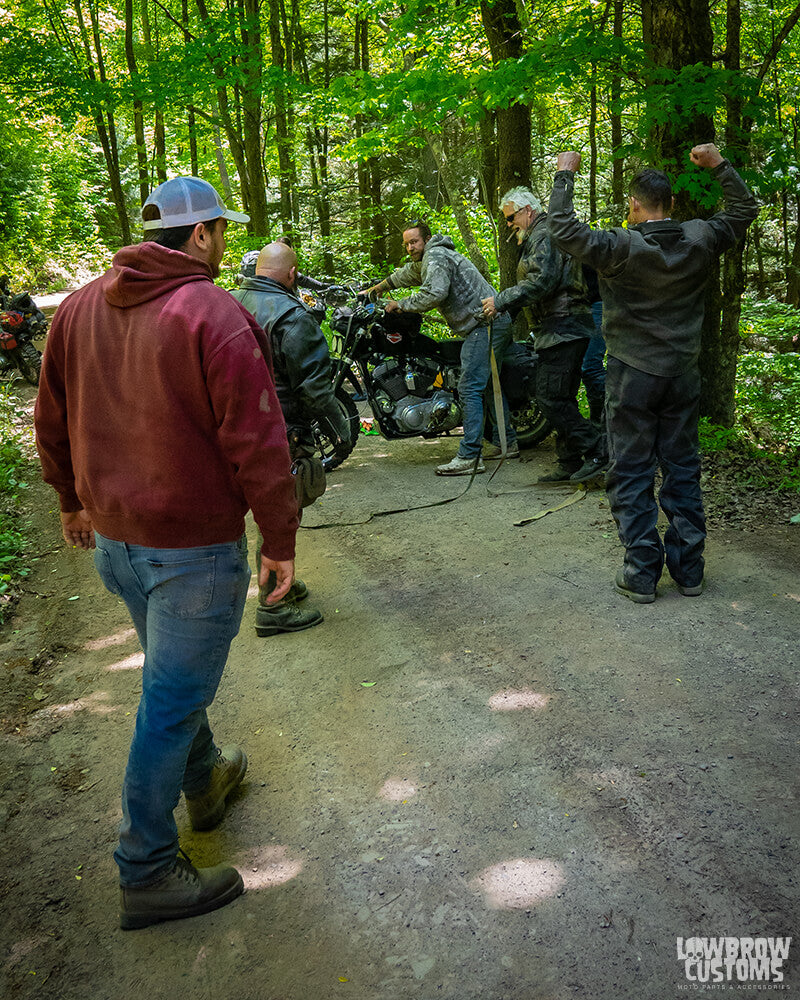 Thank god for the tow strap.
 Tim and the bike unscathed from the mountain fall.
 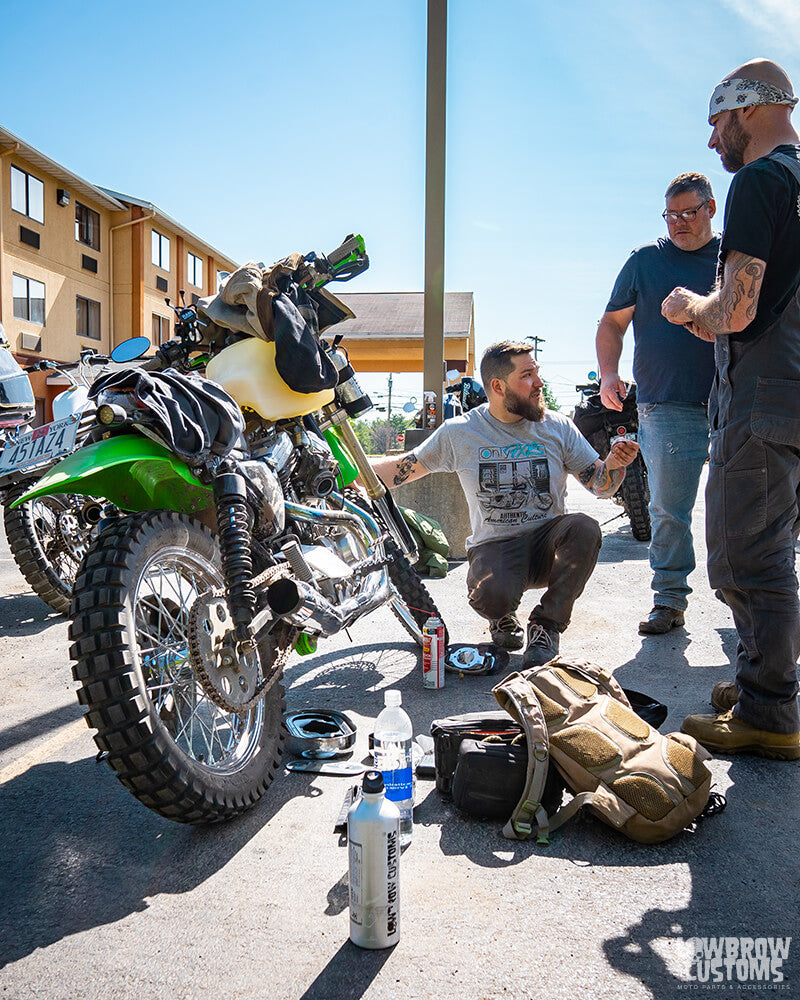 Day 2 prep.
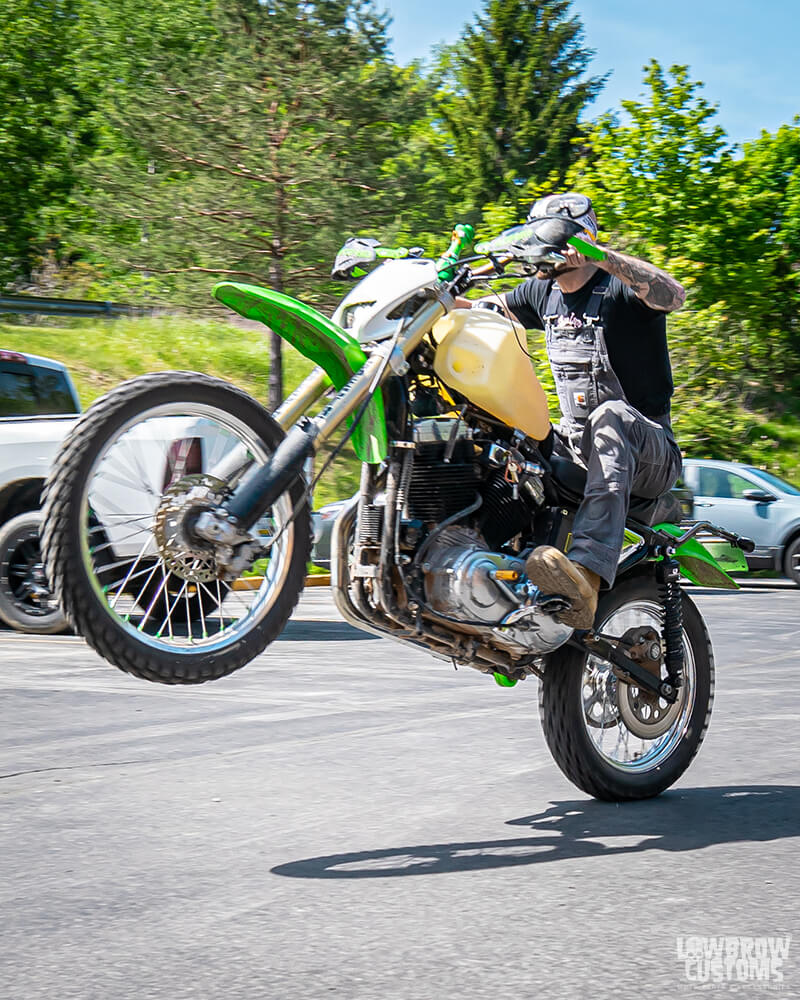 Rob having a wheelie good time.
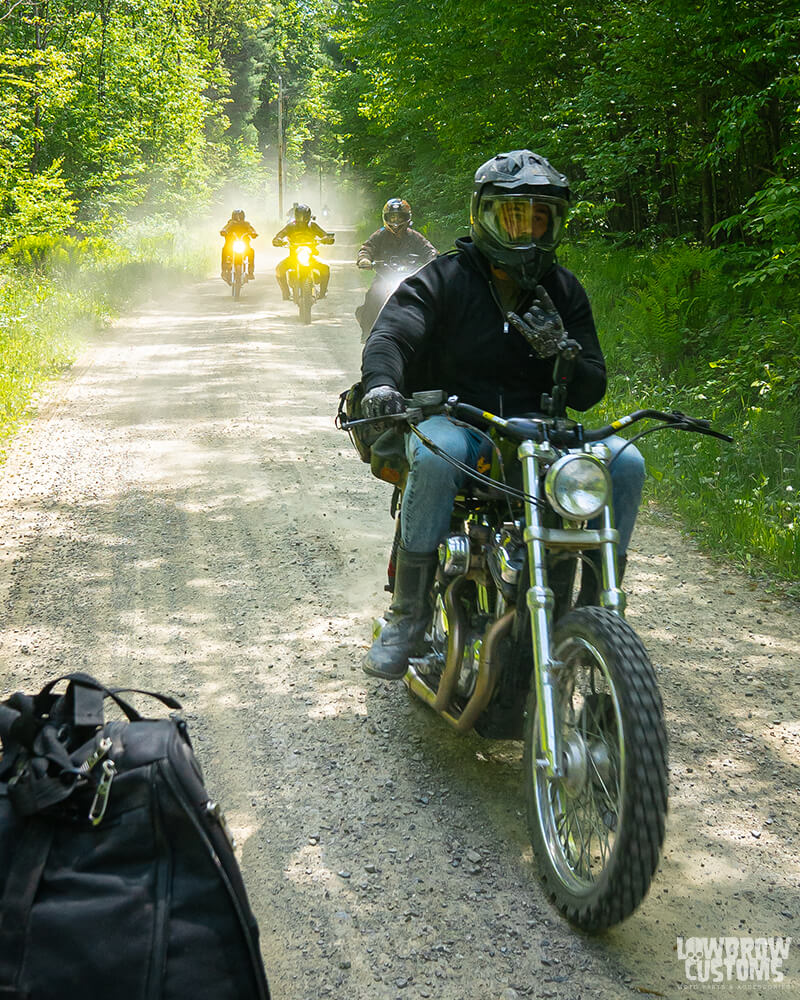 Rocking and rollin!
 Tim and some of the bois.
 Sky high, lets ride.
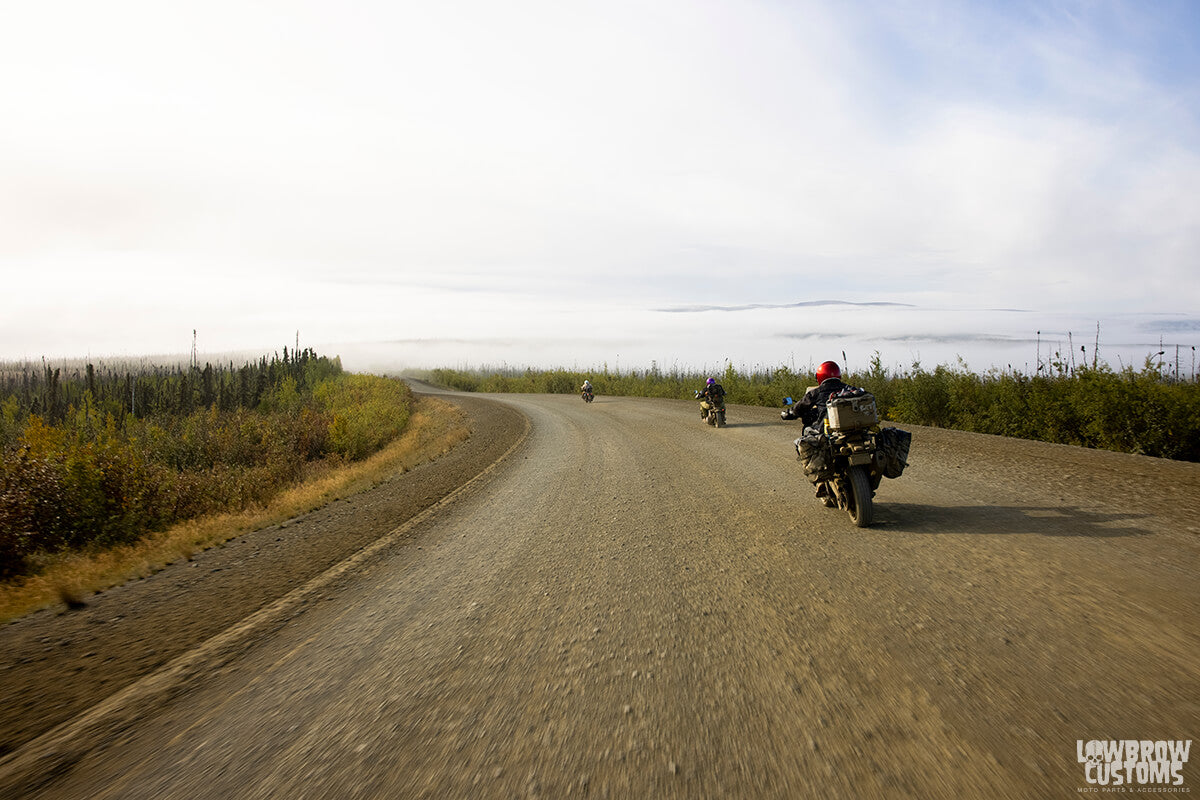
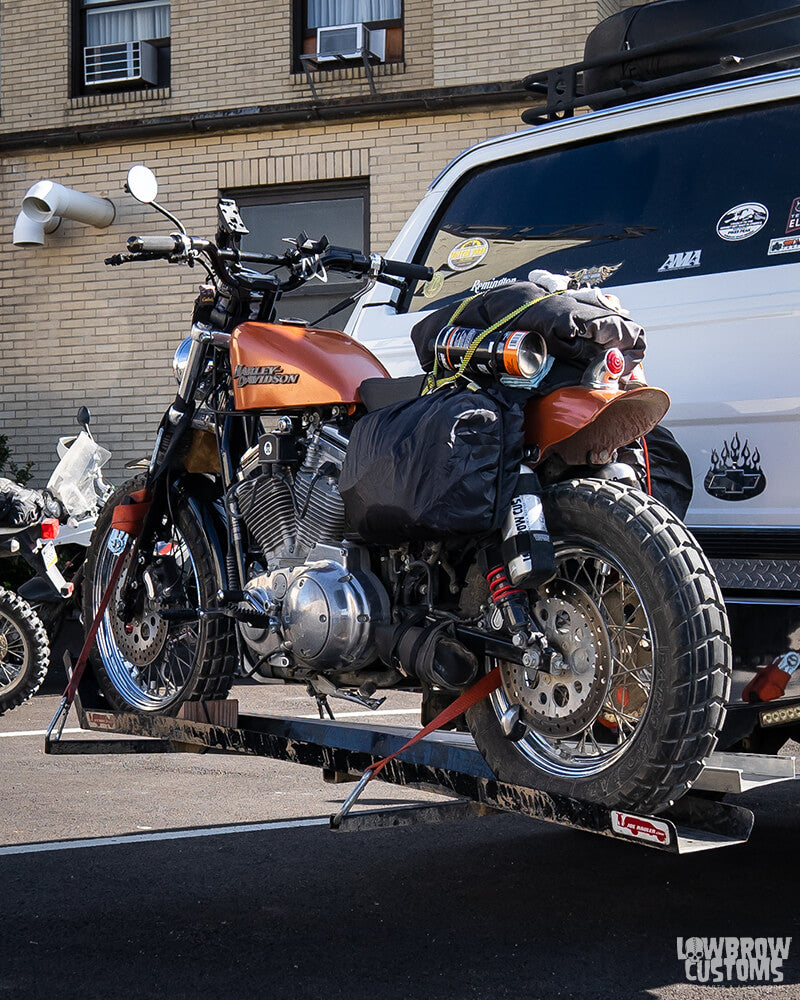 riders came from far and wide to ride this wild run.
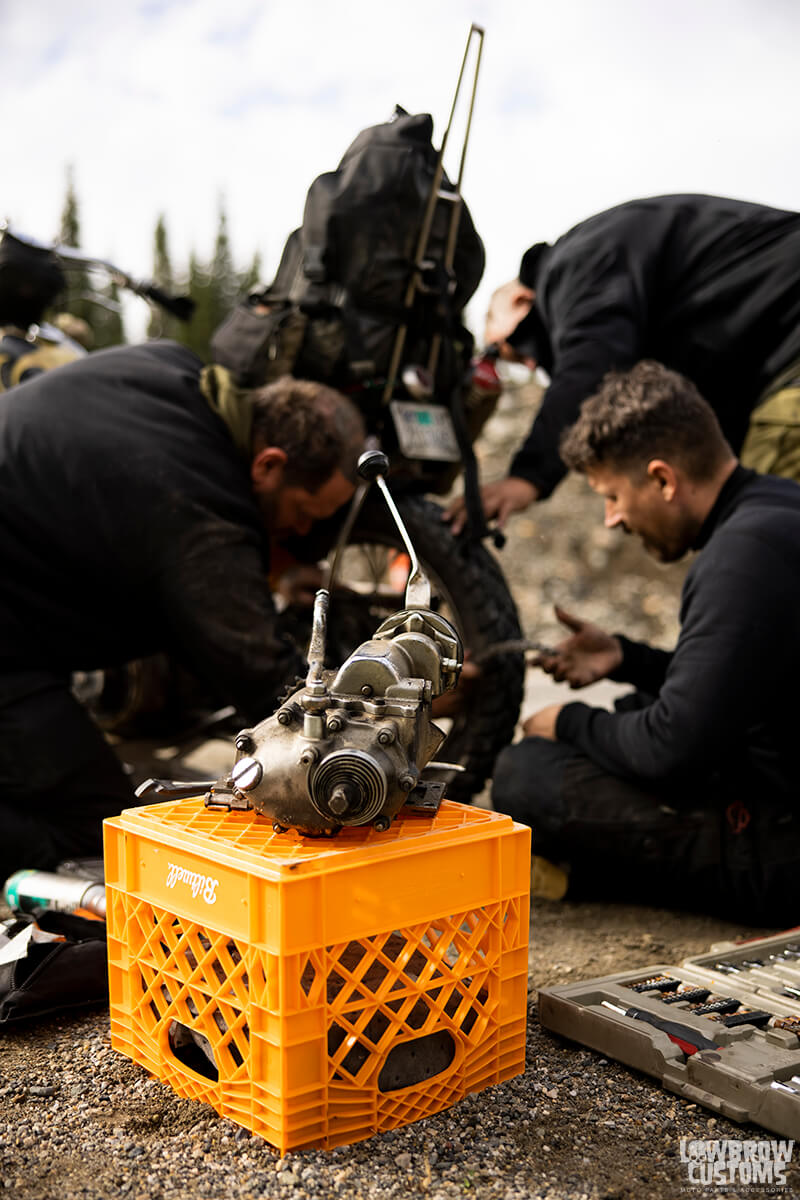
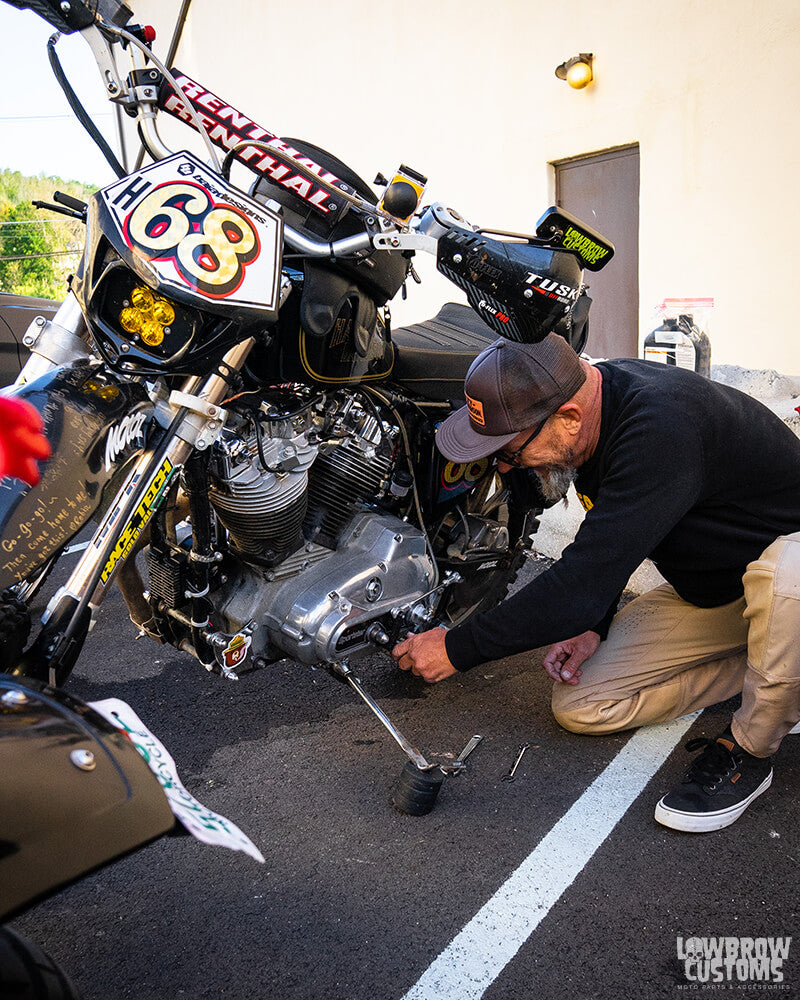 Some last minute maintenance.
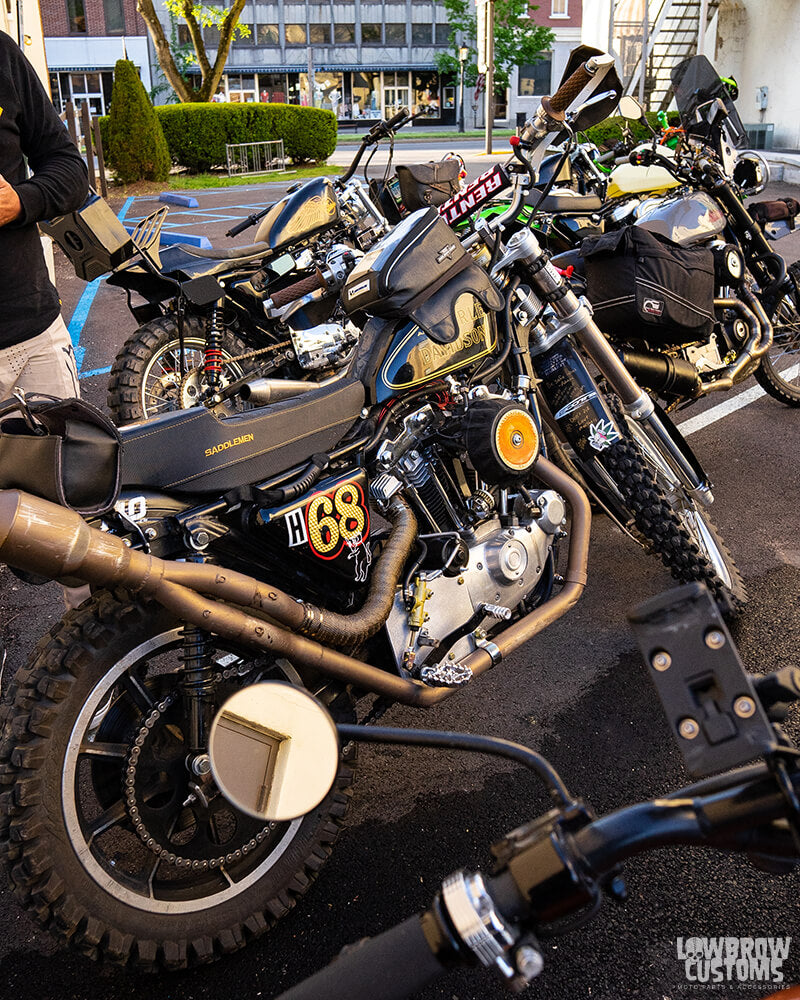 Sportster Summer coming into full effect.
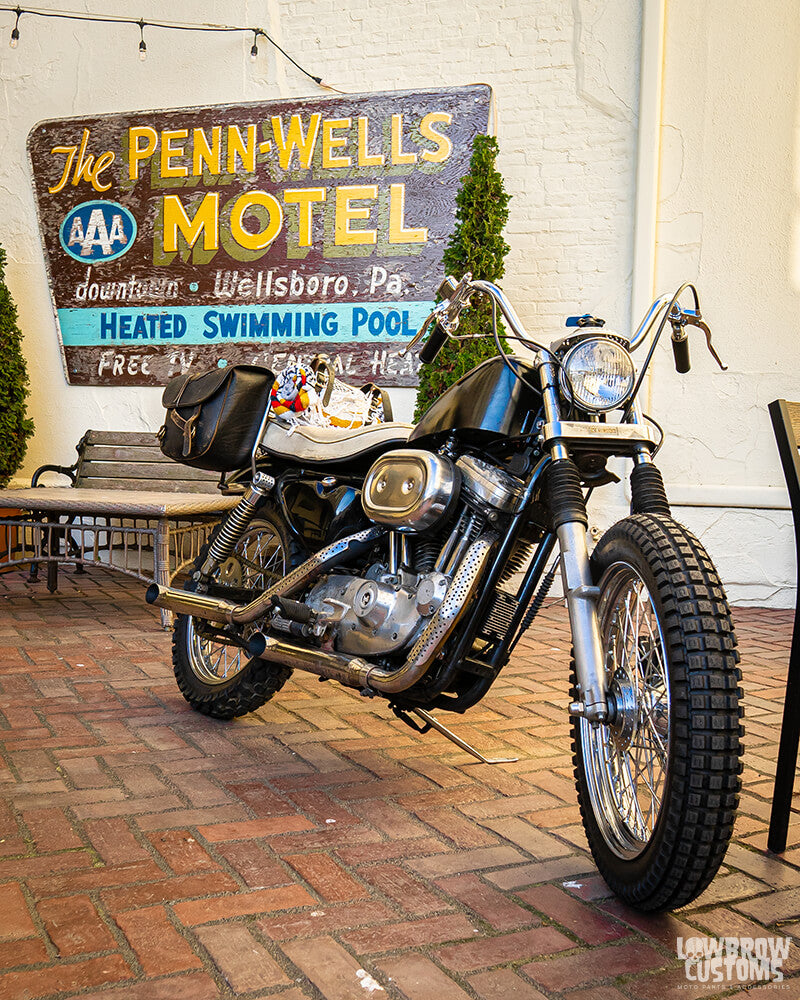 Classy on all cylinders.
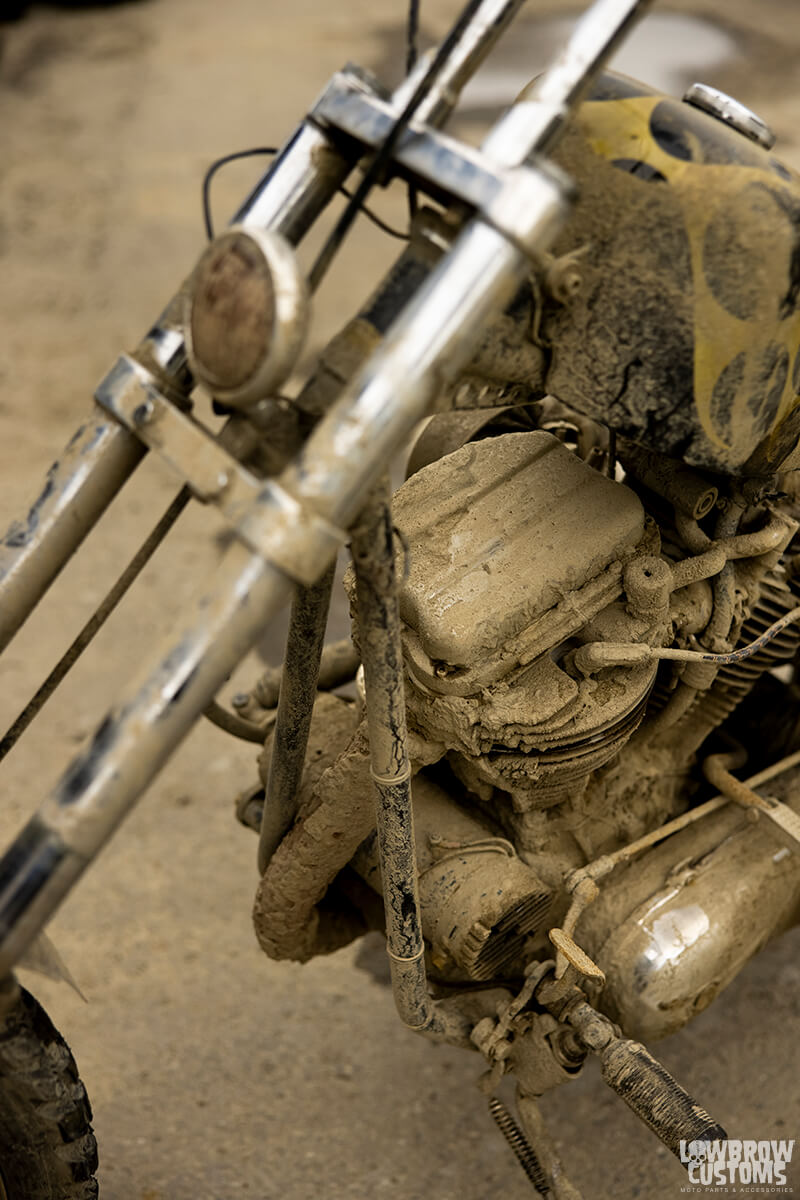
 She didn't stay clean for long.
 And they are off.
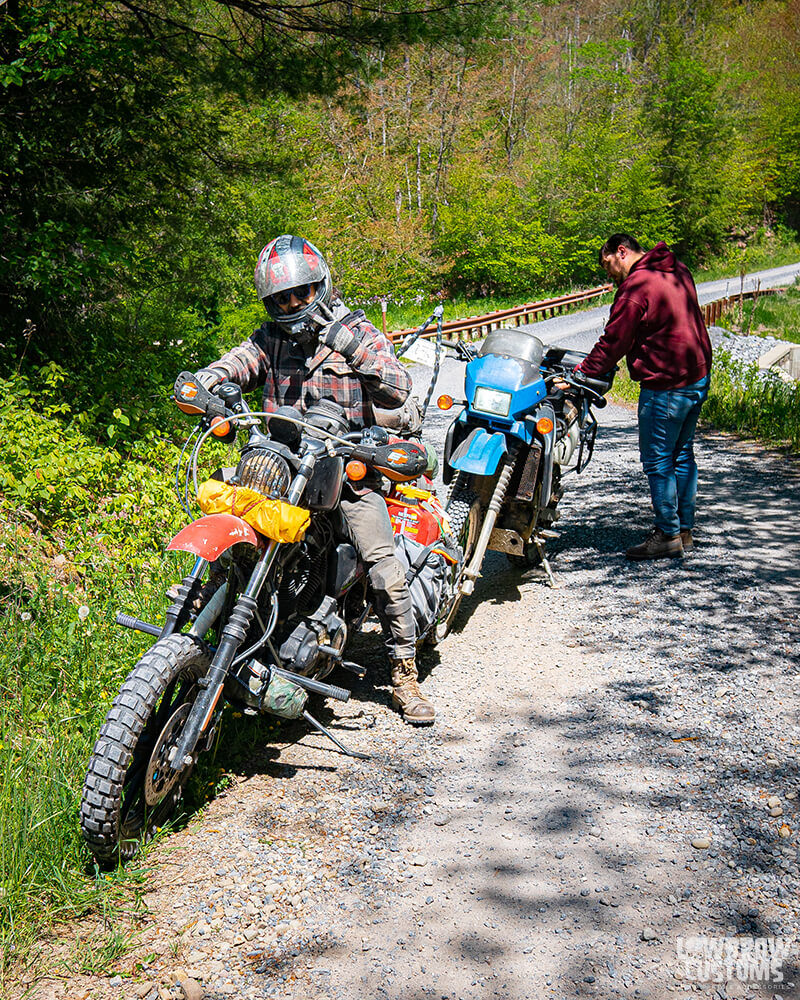 Water break.
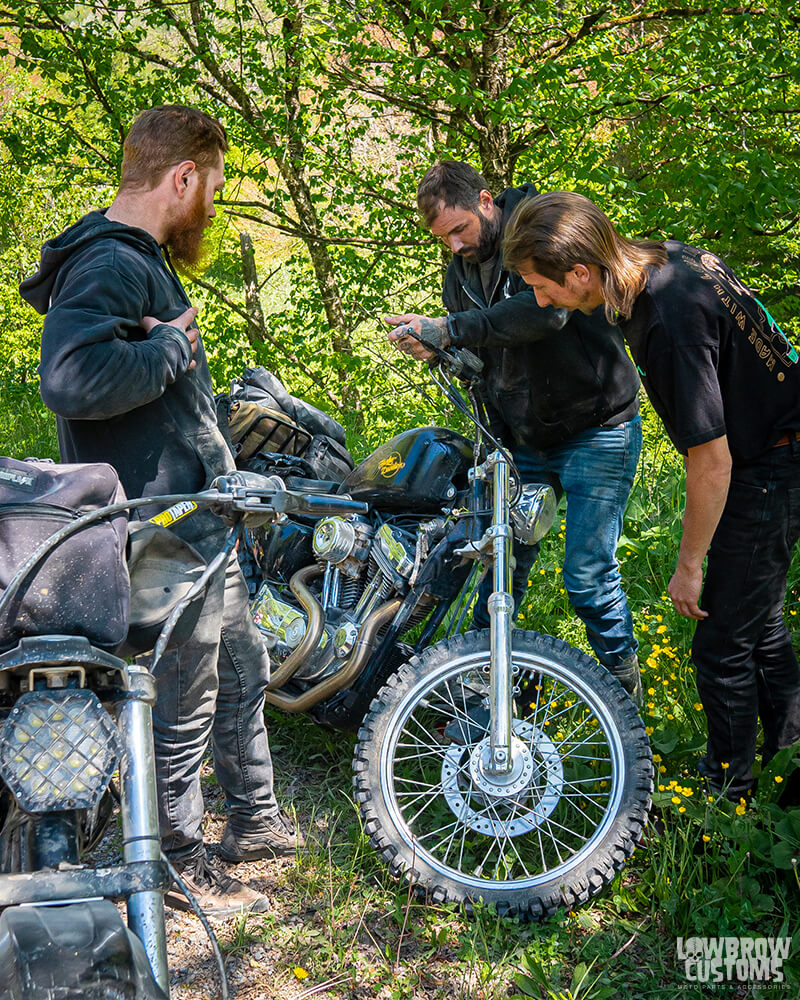 Somethings up.
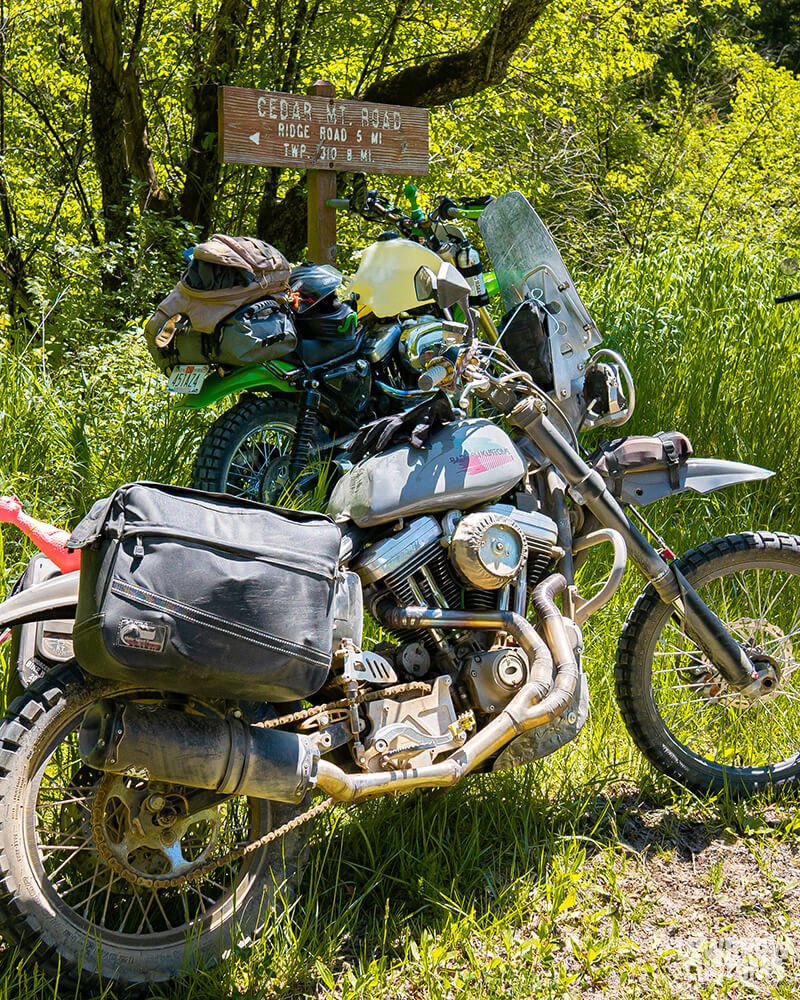 Cedar mount rd.
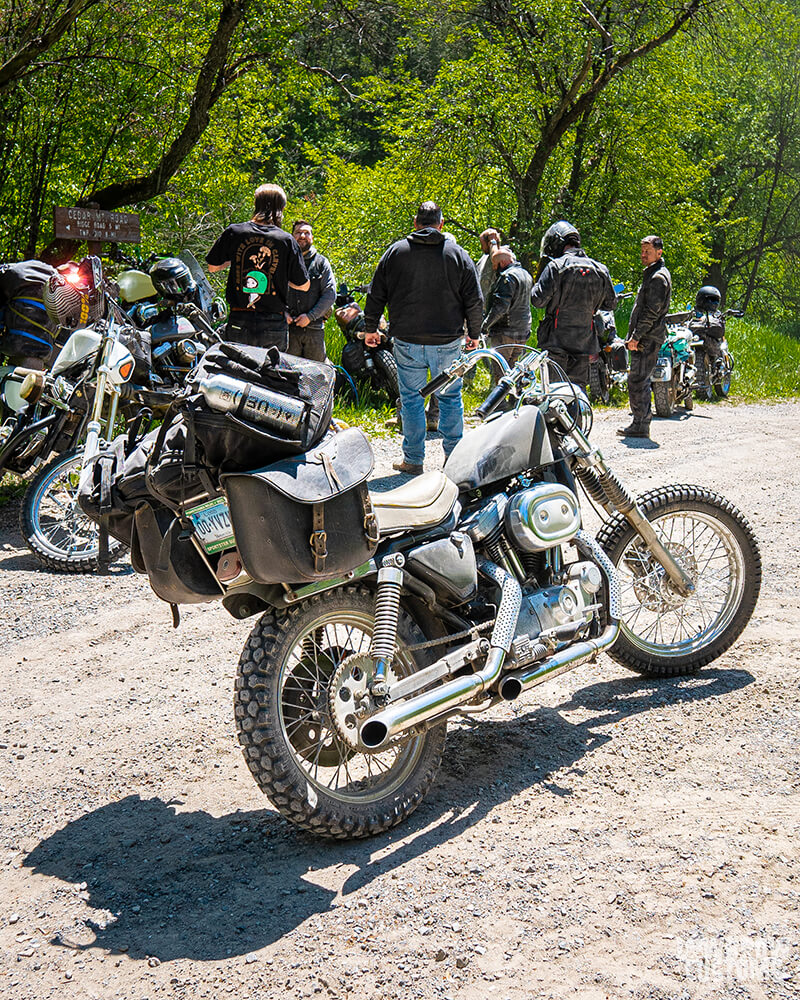 Sportster hangs.
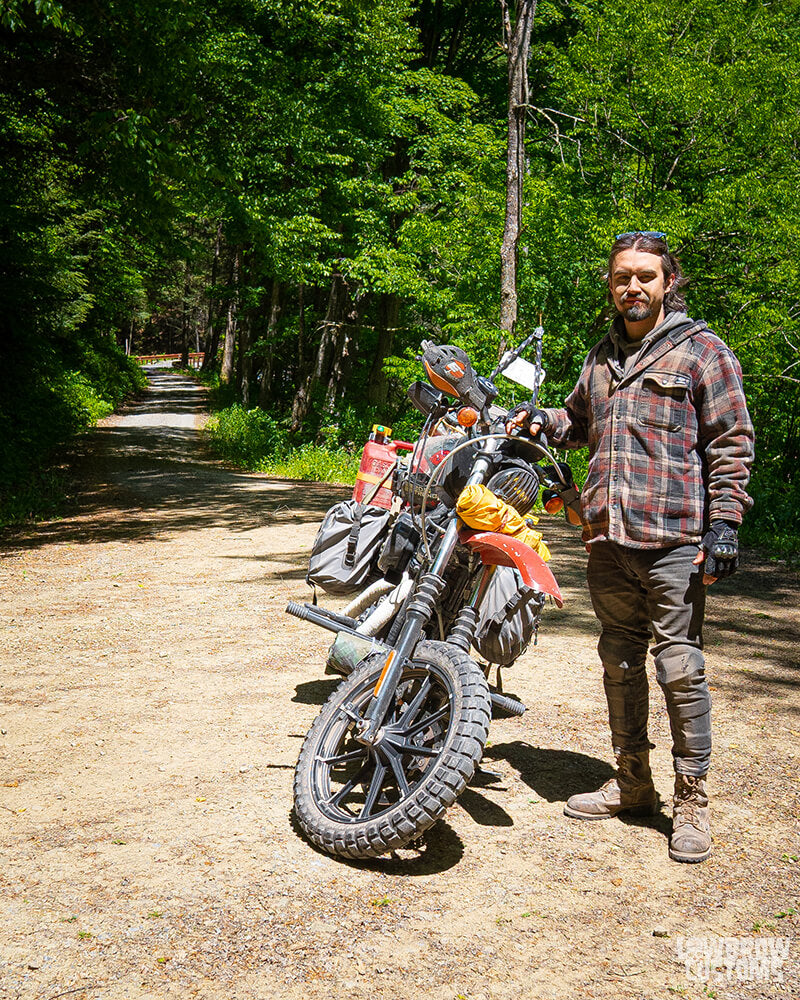 What lyes behind us.
 Gassed up.
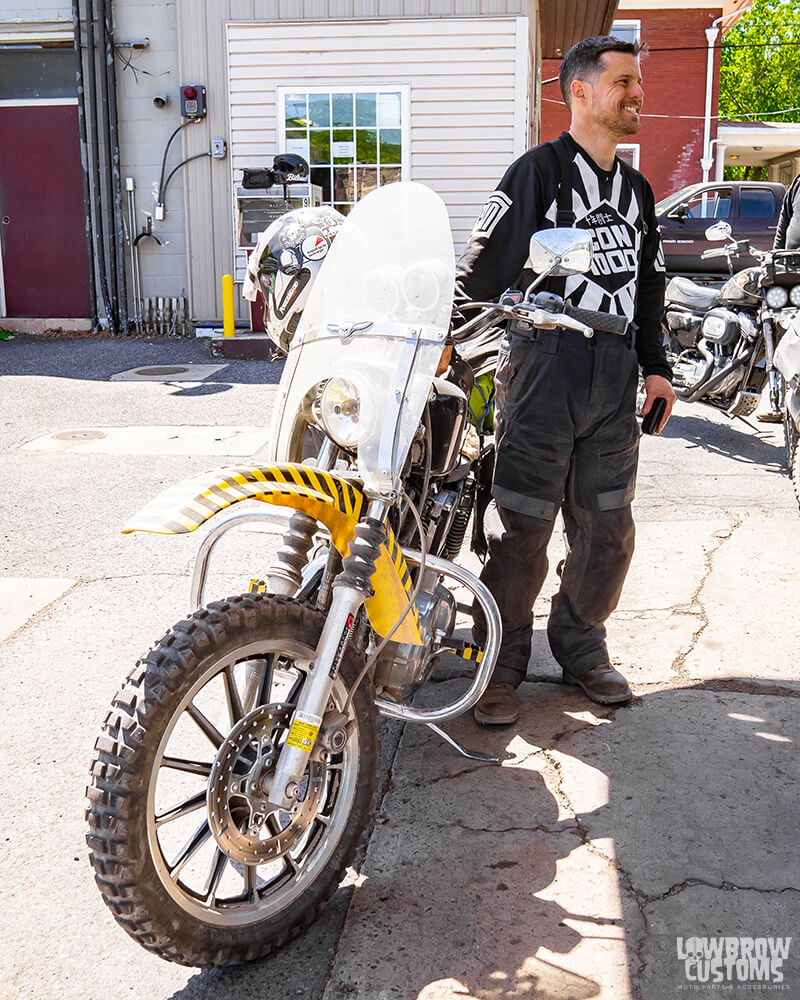 Them overalls are whats up.
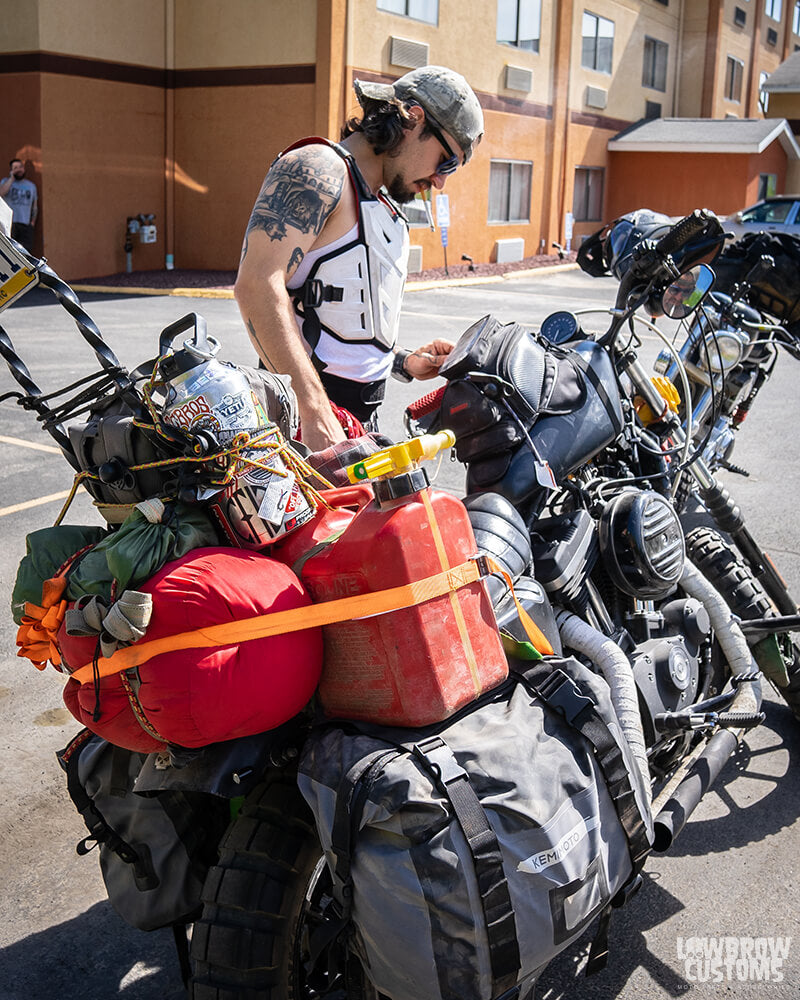 Pack like you may need it.
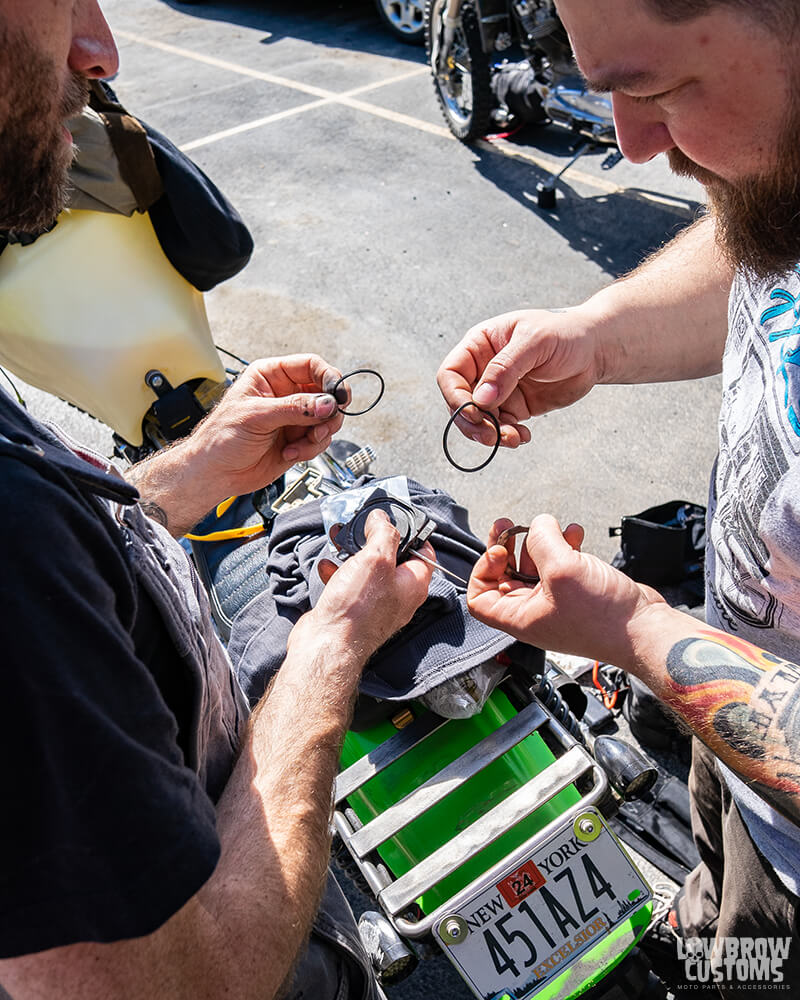 Trade ya.
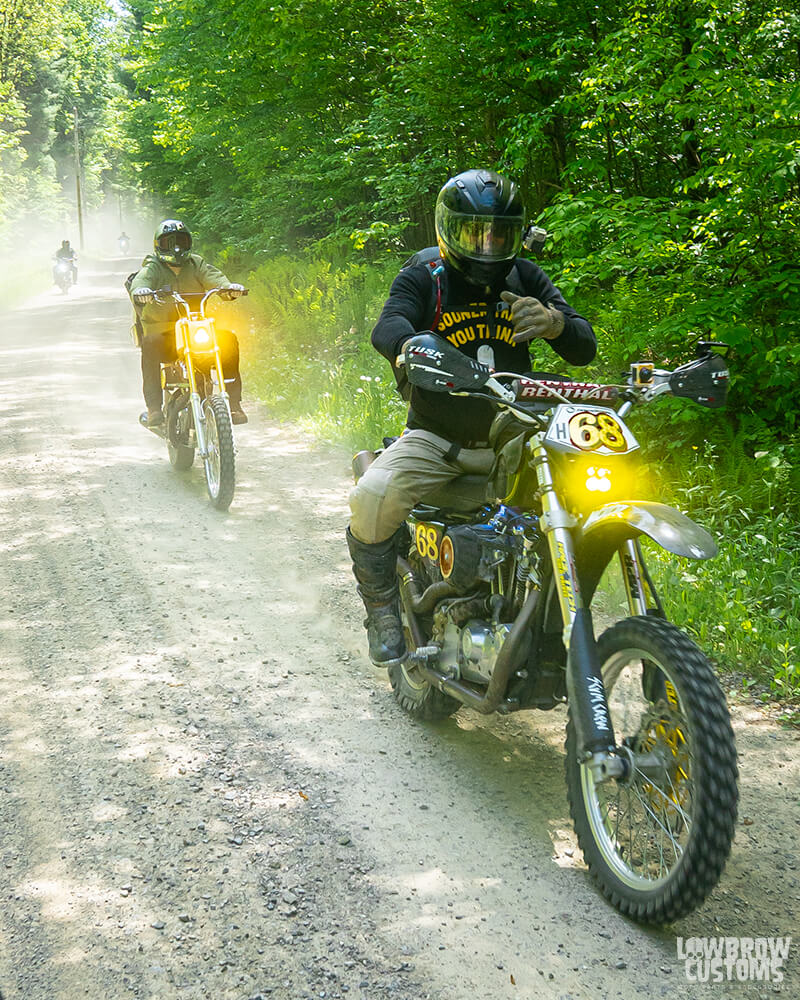 Till next year. SEEEEE YA!
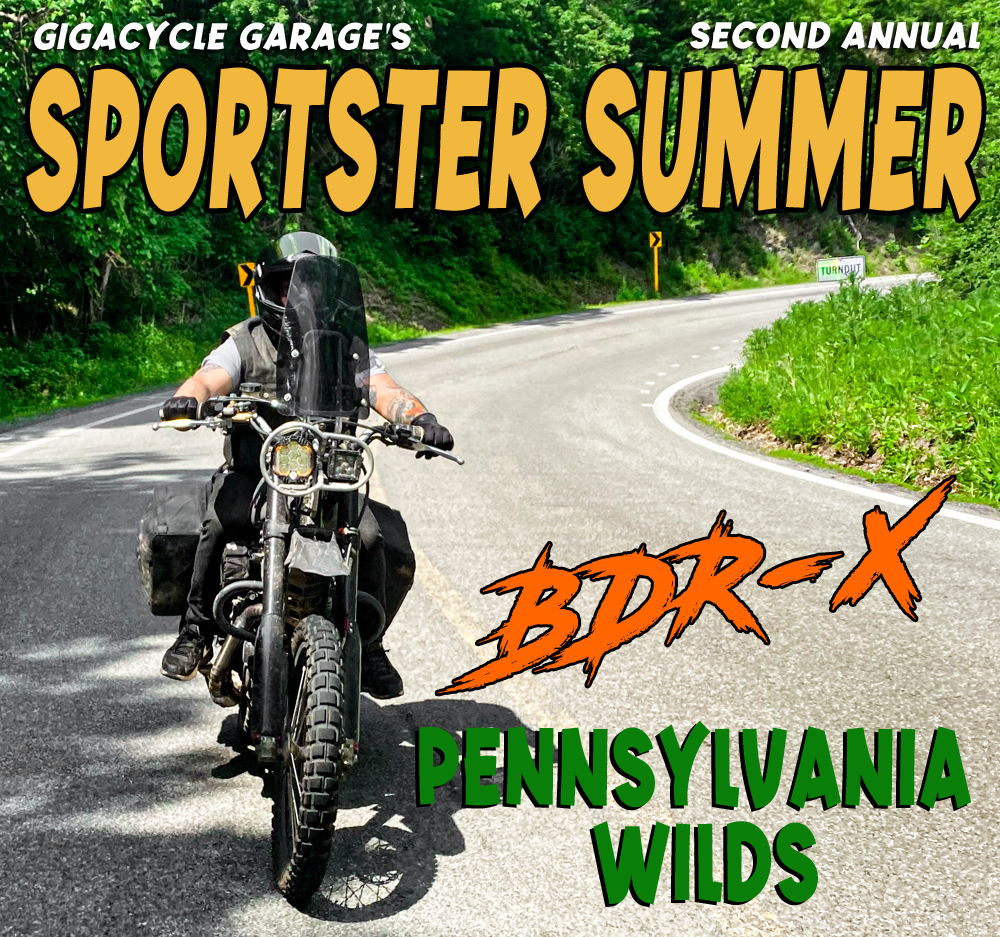
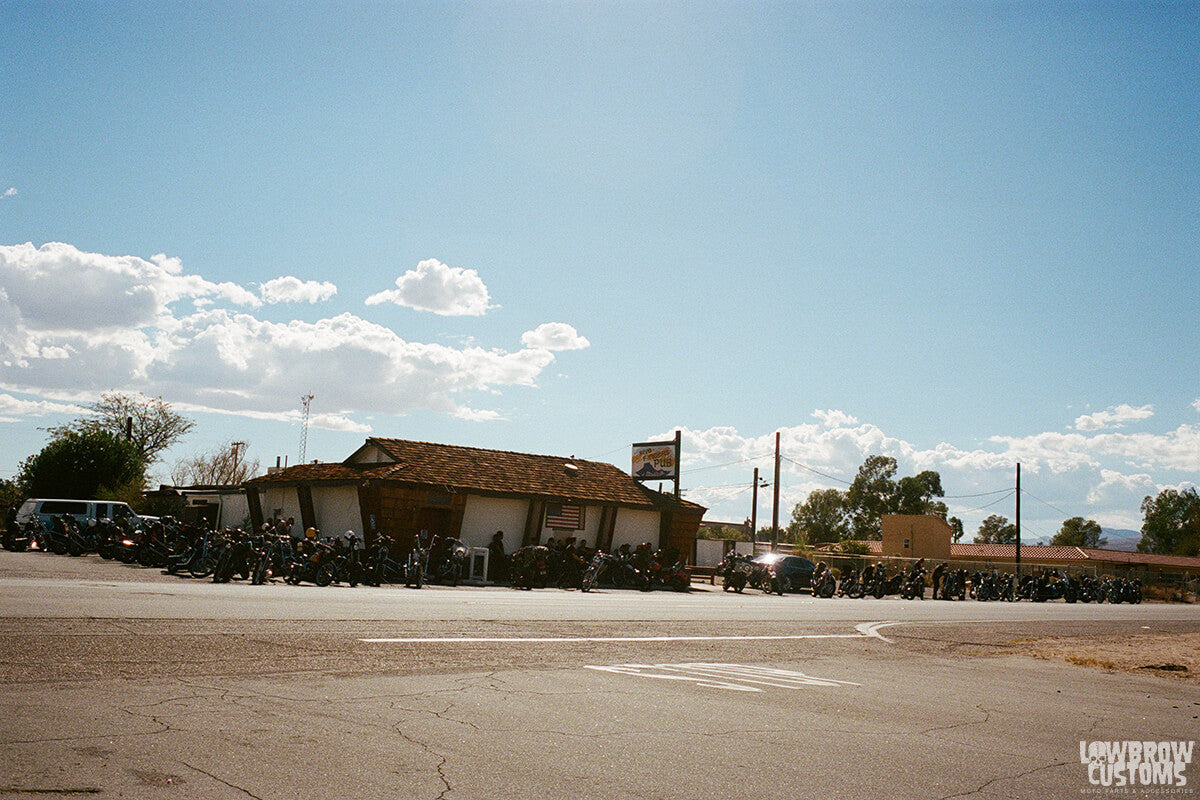 100 plus choppers show up to a bar on the way to Death Valley
 Groups meeting up before taking off towards the desert.
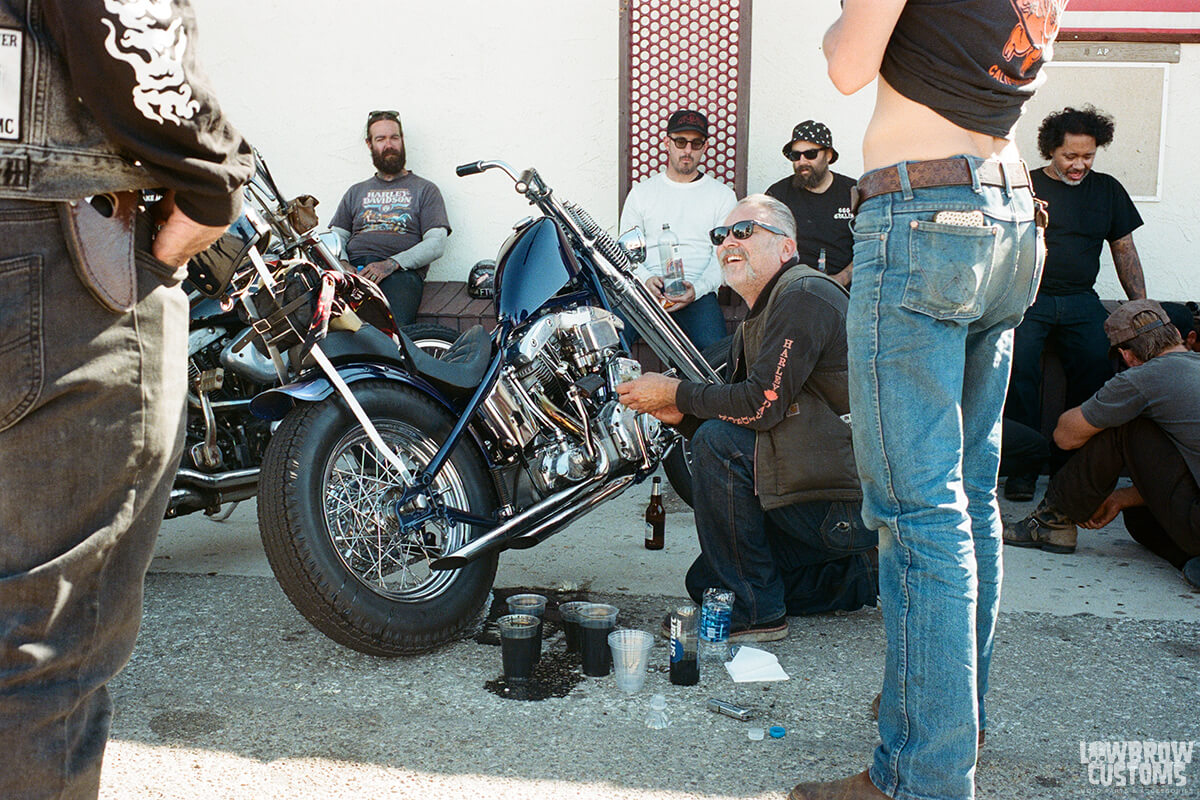 Thats a lot of oil in them cups!
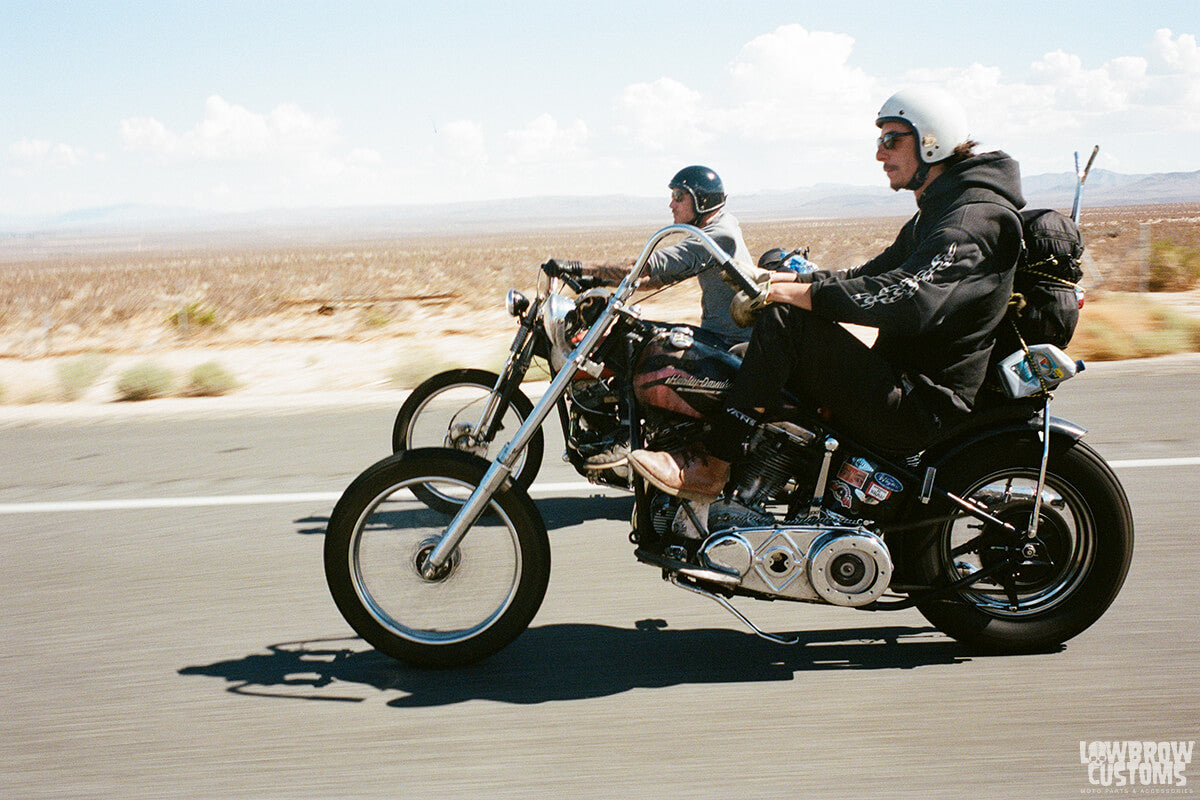 Riding in the blazing sun!
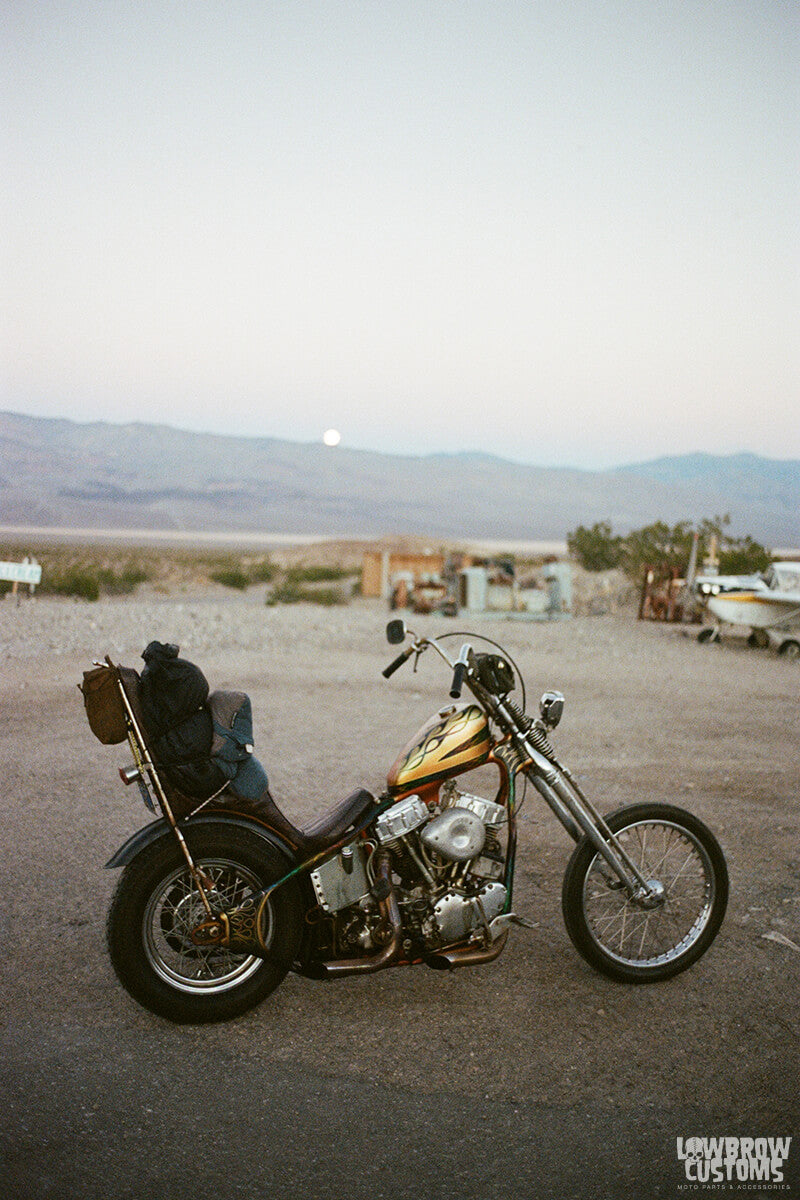 Ryan Grossman's Harley Panhead just before nightfall at camp.
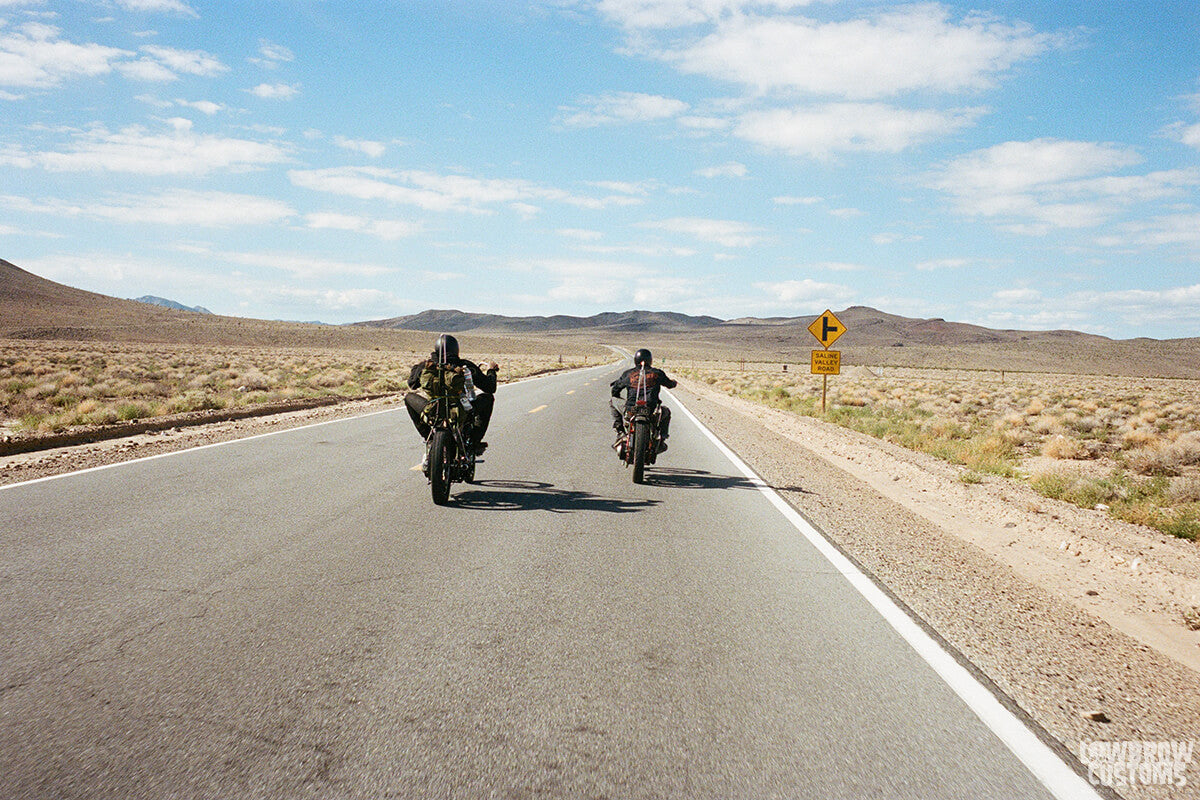
 Maintenance.
  Flying in the desert sun.
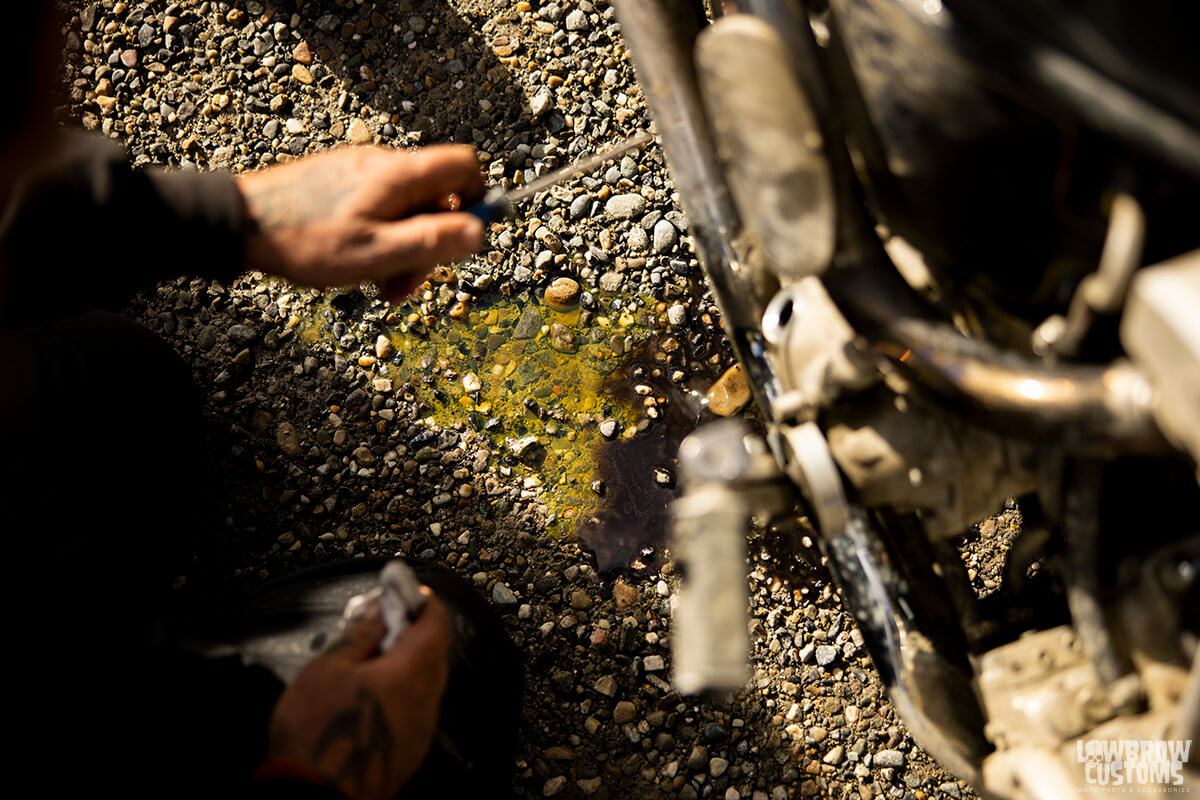
 Don't mind the oil drips. Just means theres some still in the motor.
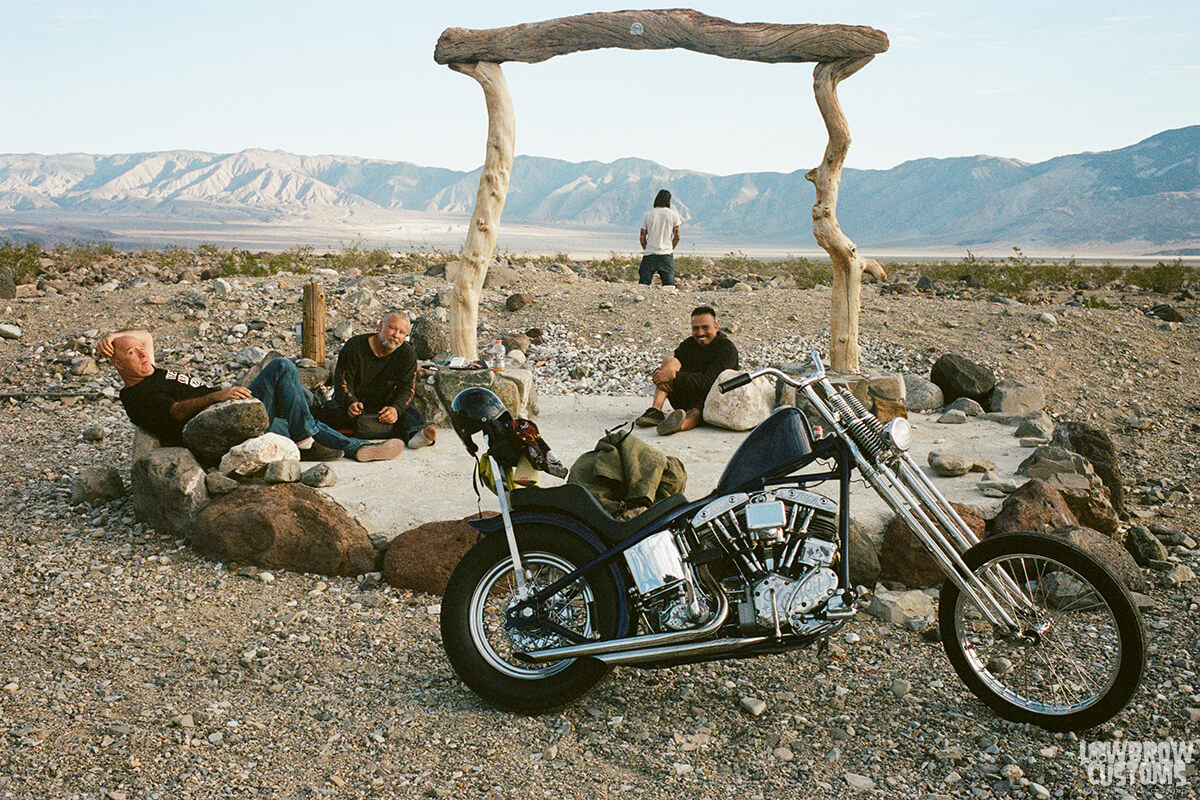
 Its all about the memories made between friends.
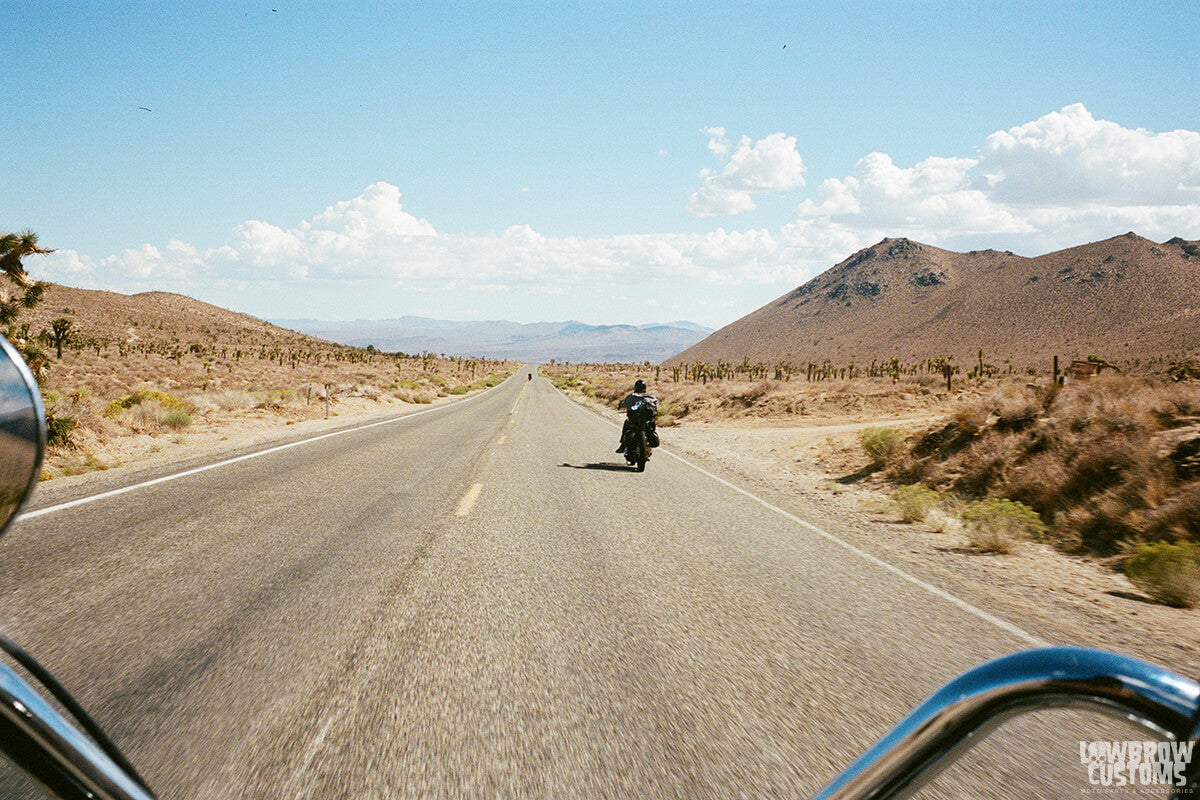 Through the bars.
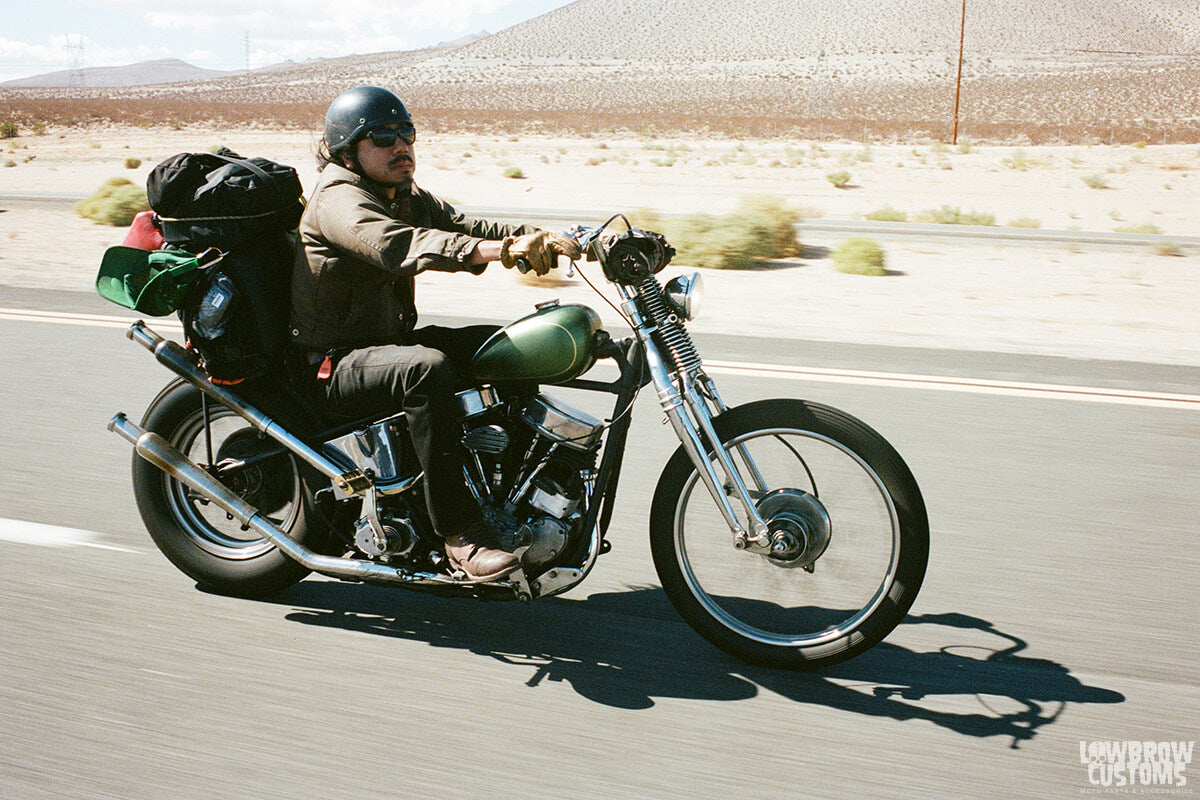 Stylin...
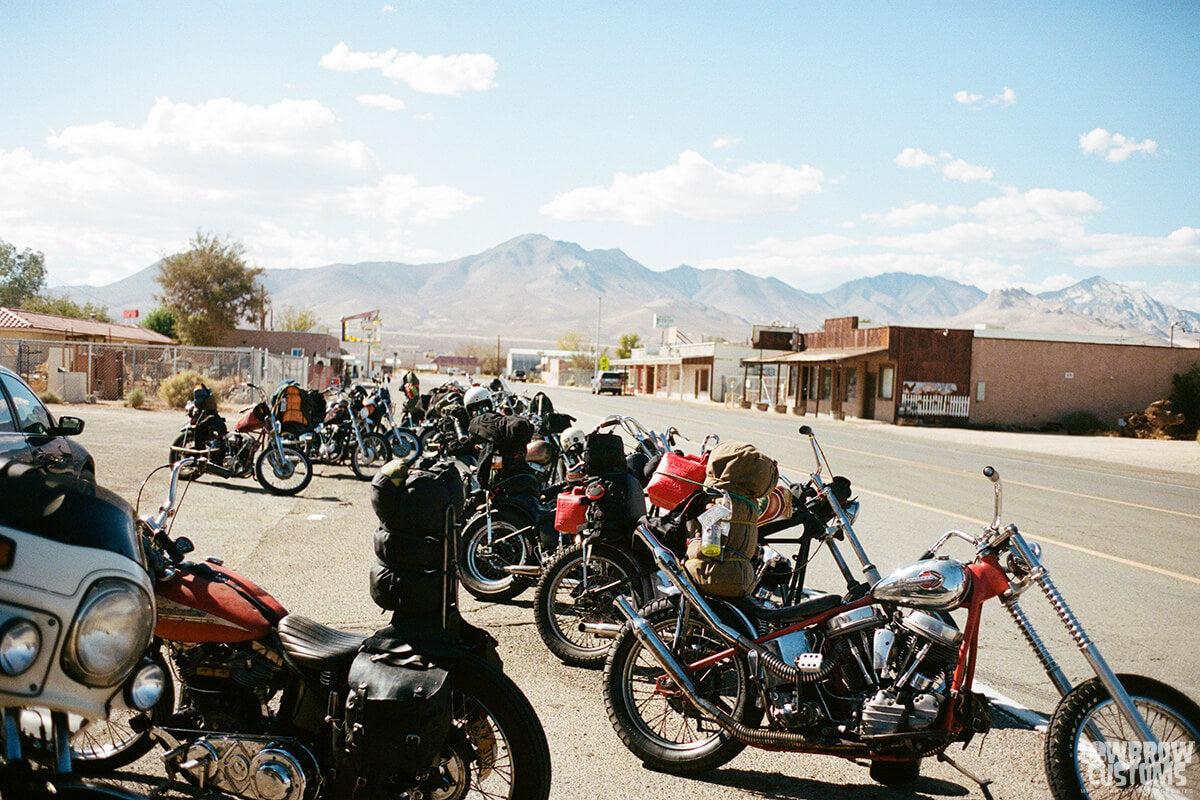 The wild wild west.
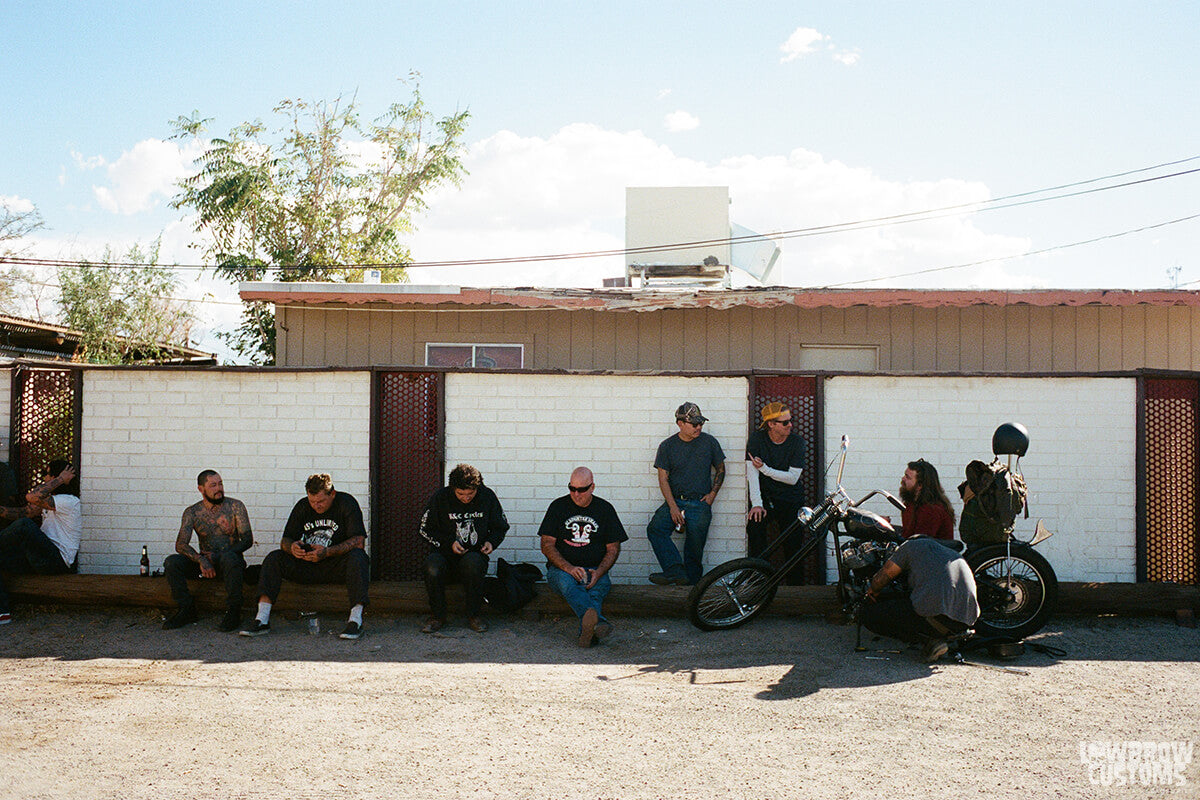 Any bit of shade to keep cool.
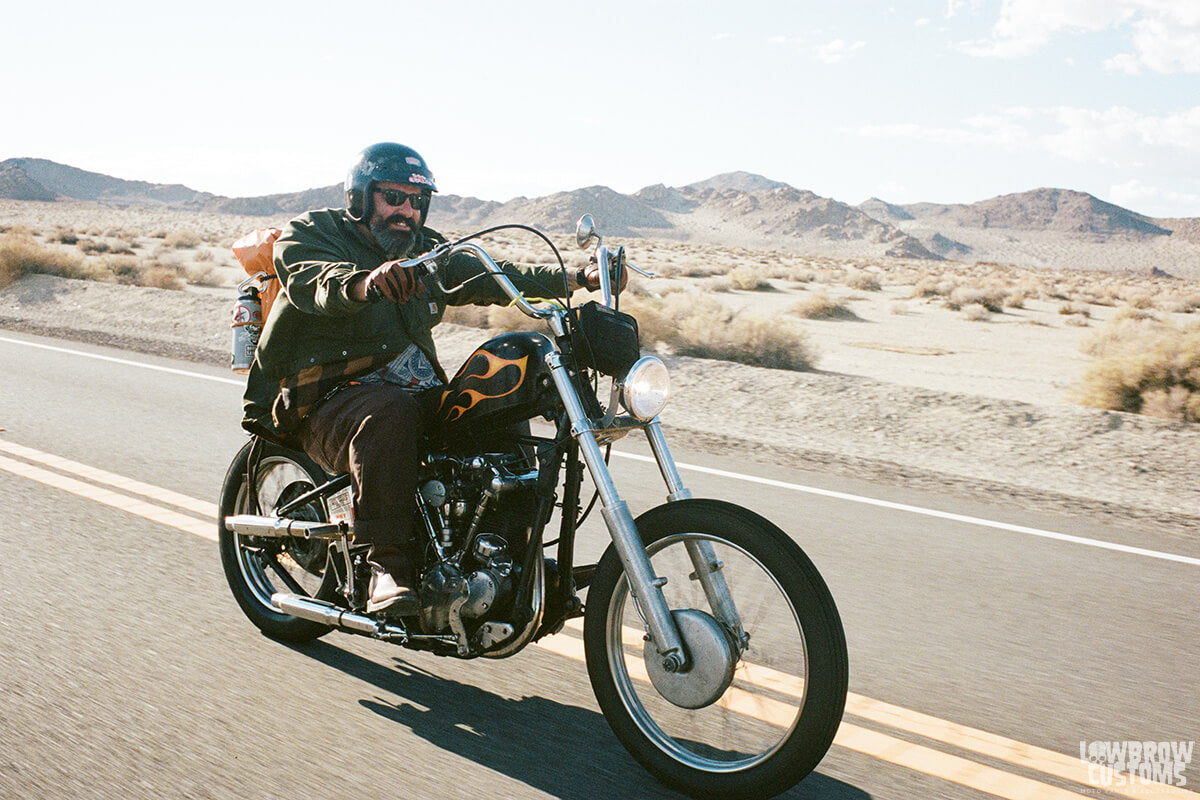 Smiling ear to ear.
 Crucial gas stop. Not many gas stations point A to point B
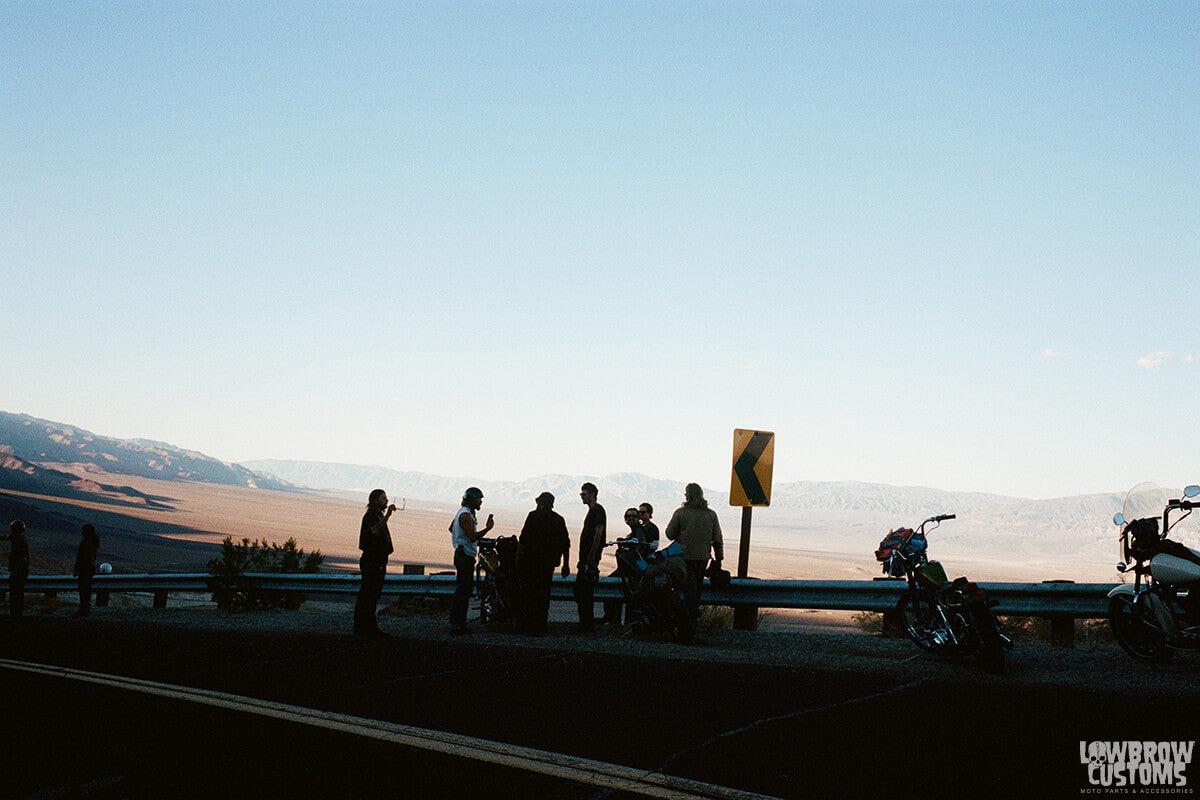 Some site seeing.
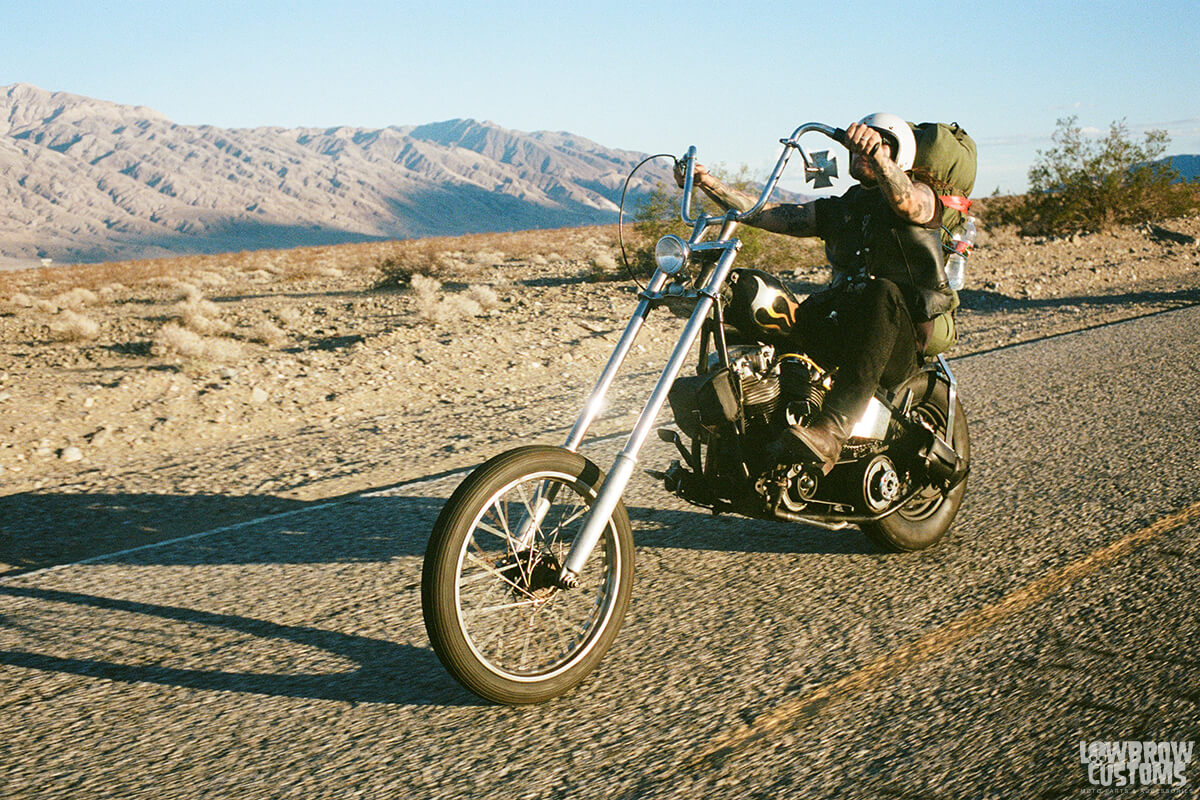 Rollin heavy...
 The Death Valley Lounge.
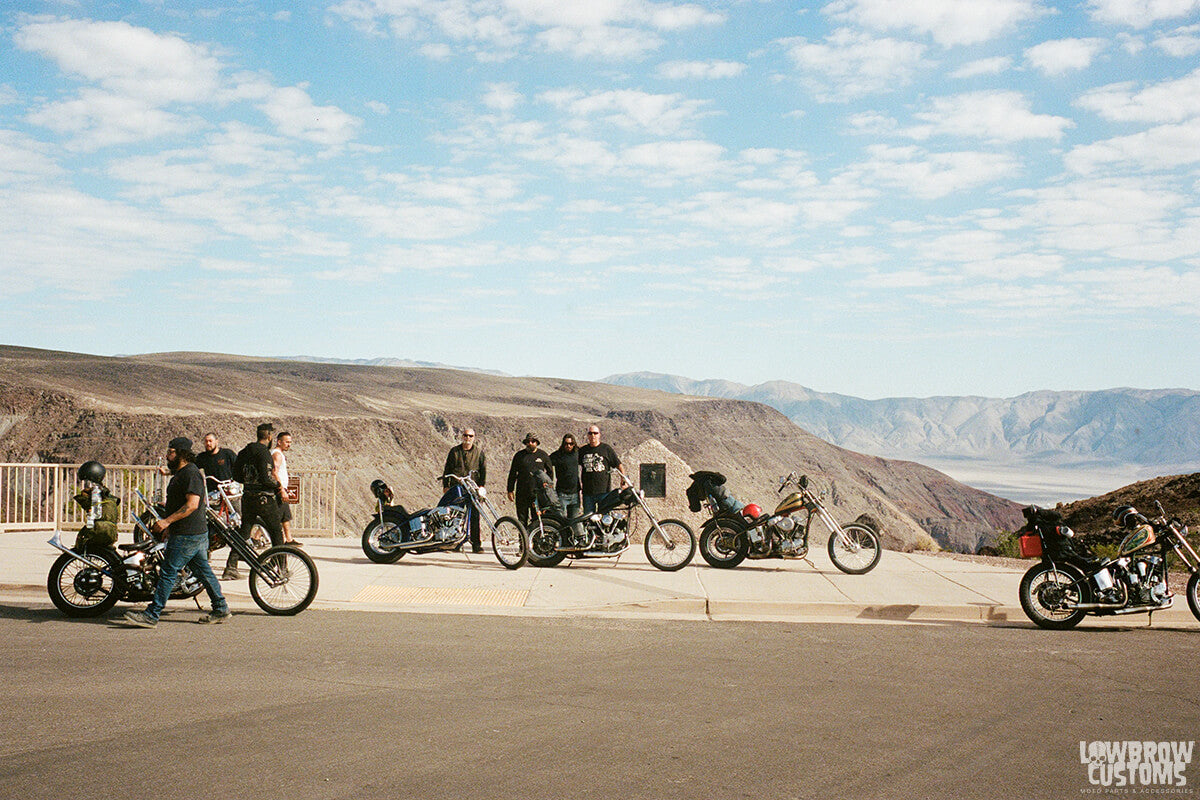 Just dudes being dudes.
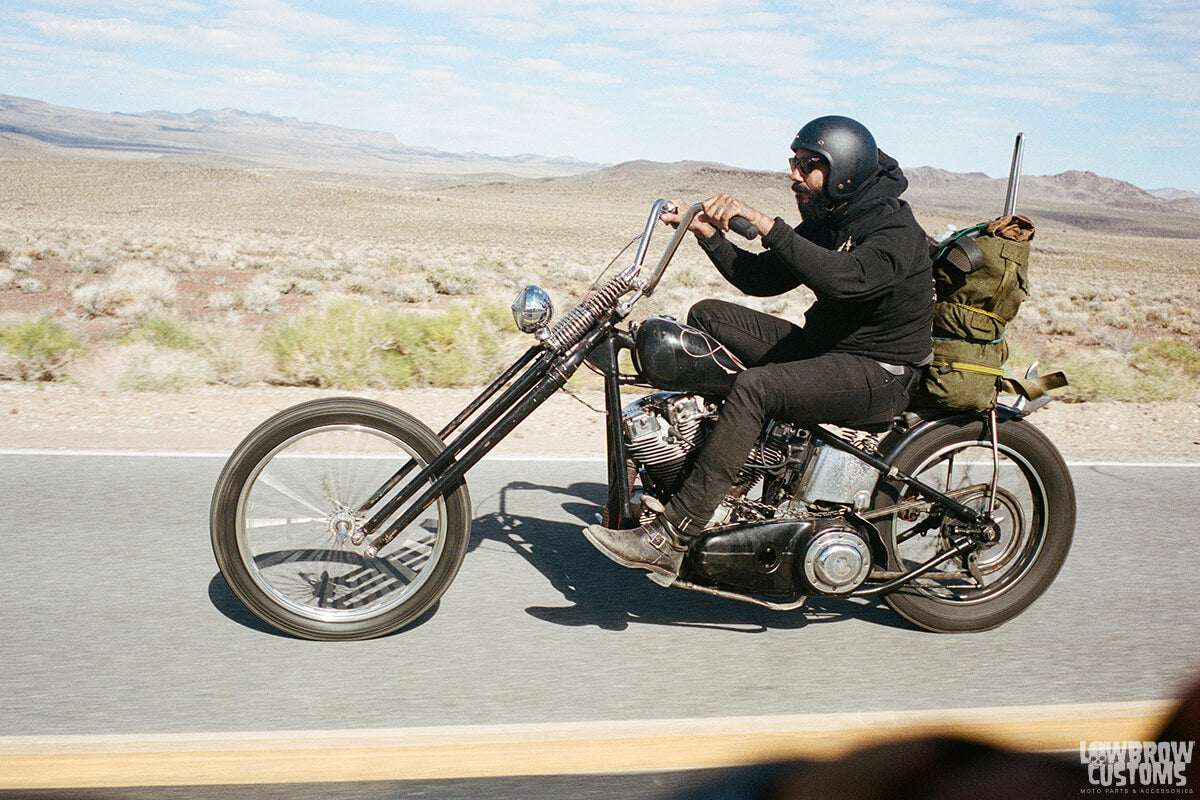 Jason Robinson...
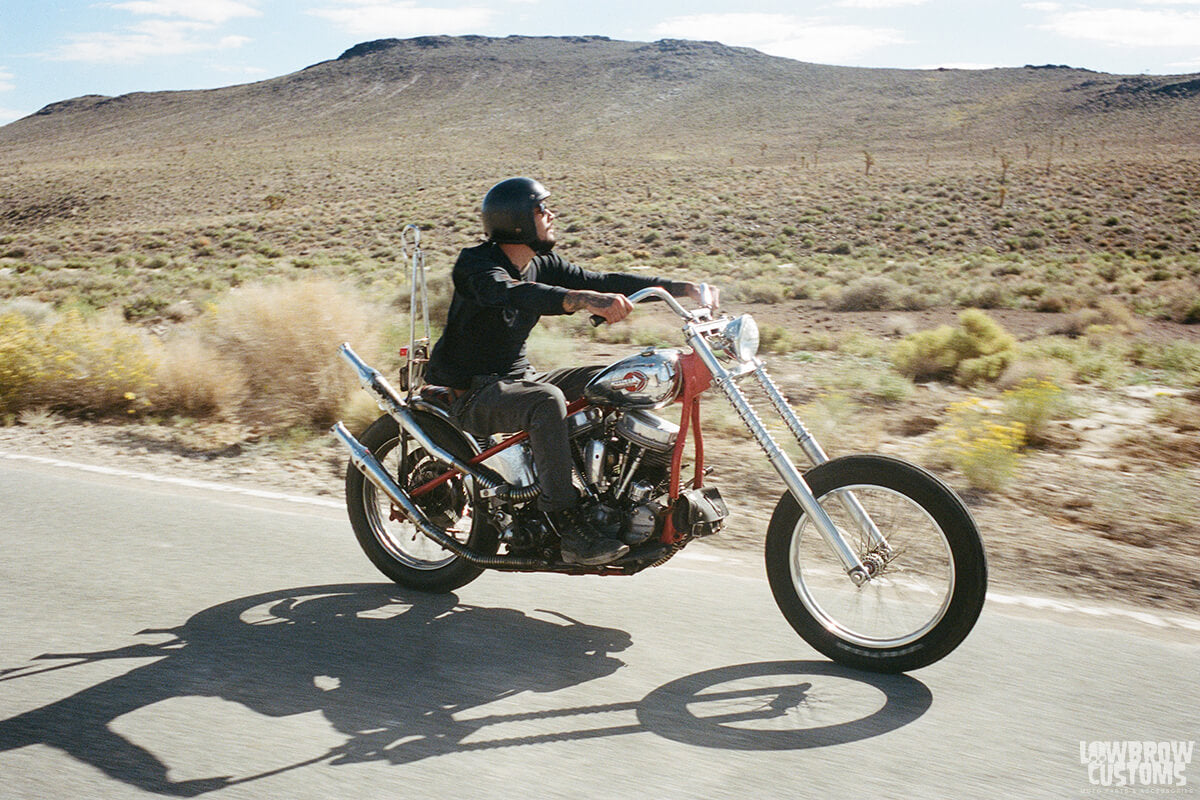 Always something to look out in the vast nothingness.
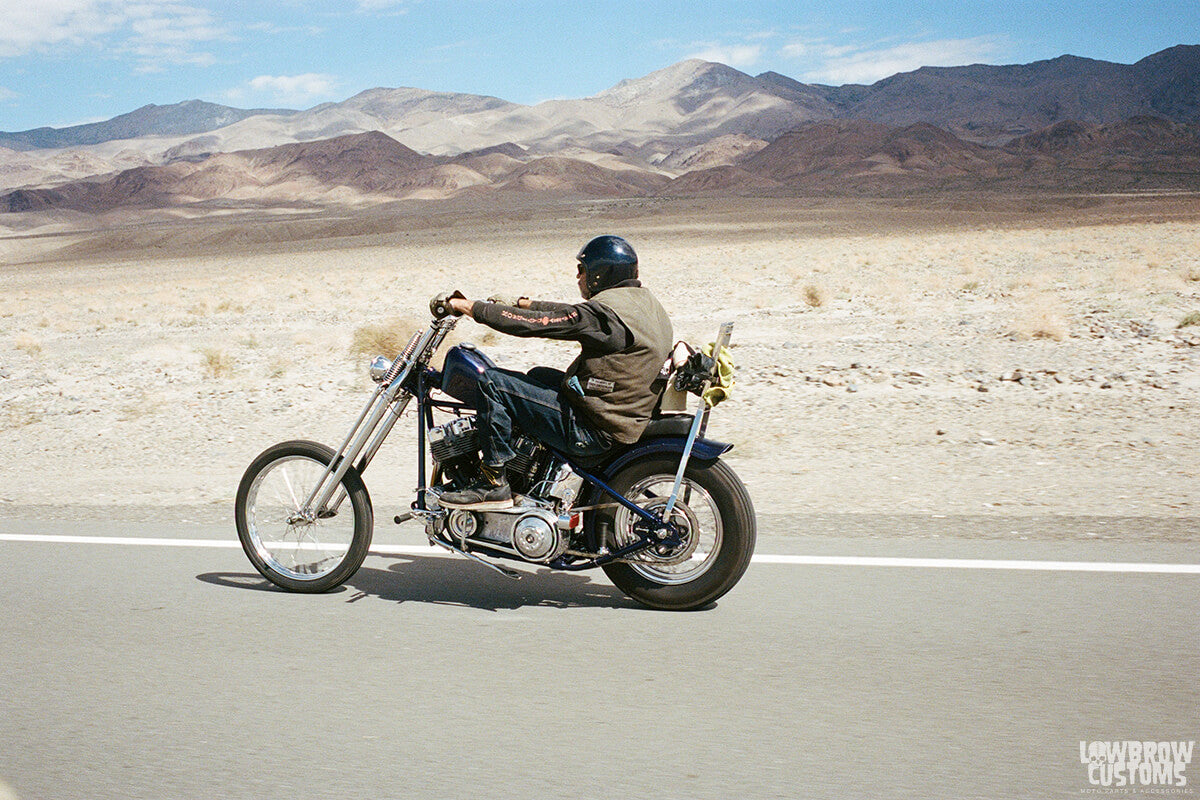 Those rolling mountains.
 What looks like an endless road of vast nothingness.
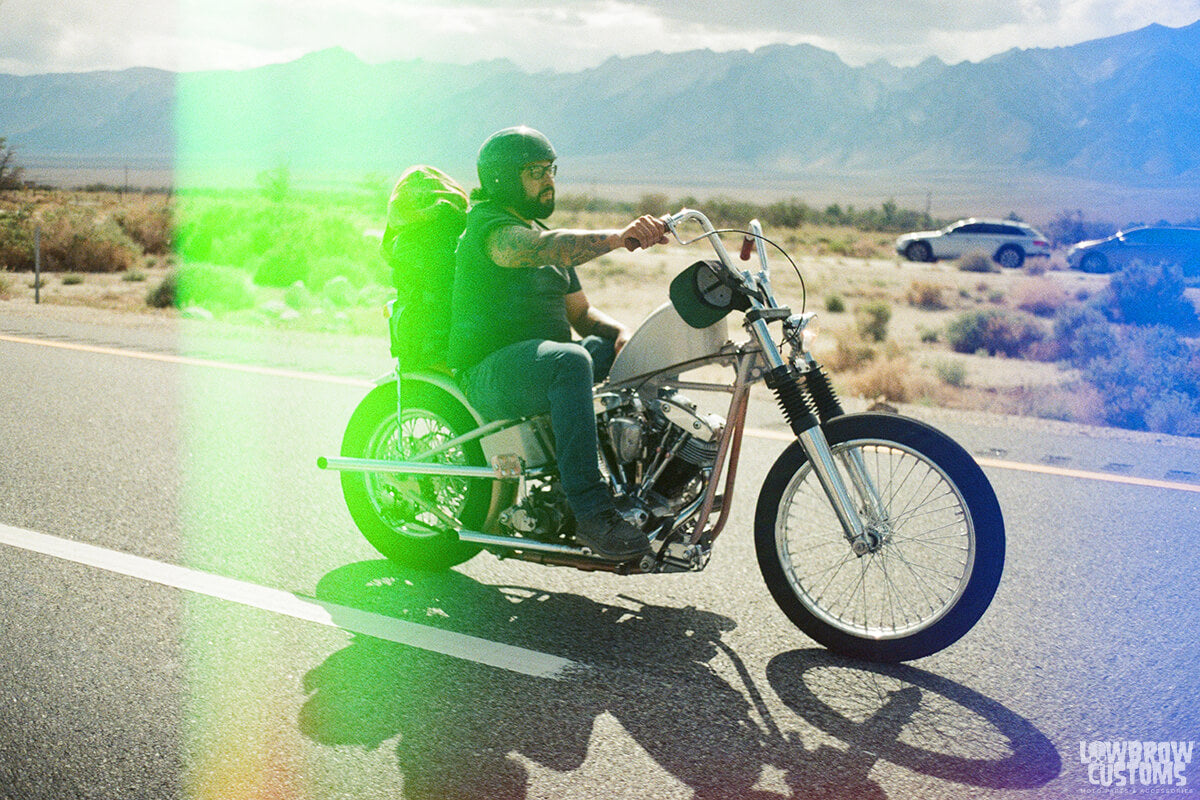 The joys of film...
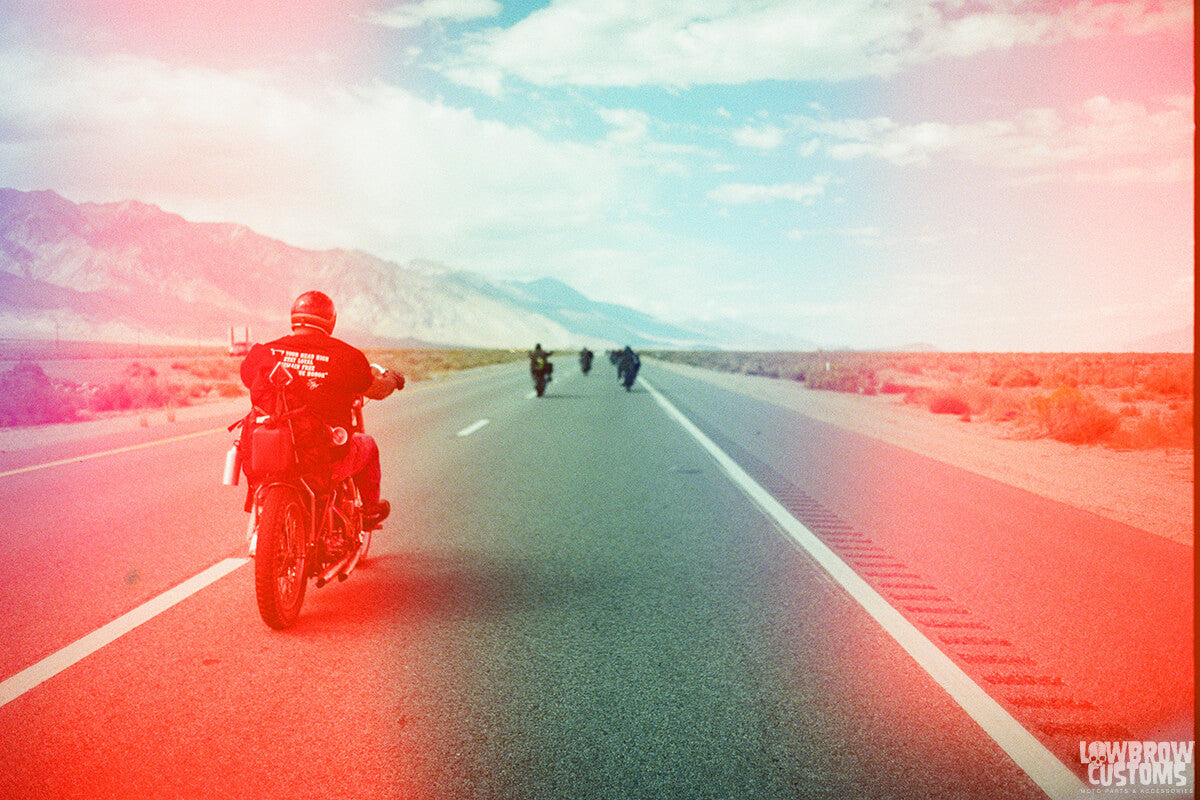 Sometimes it comes out with really cool effects.
 breakdowns...
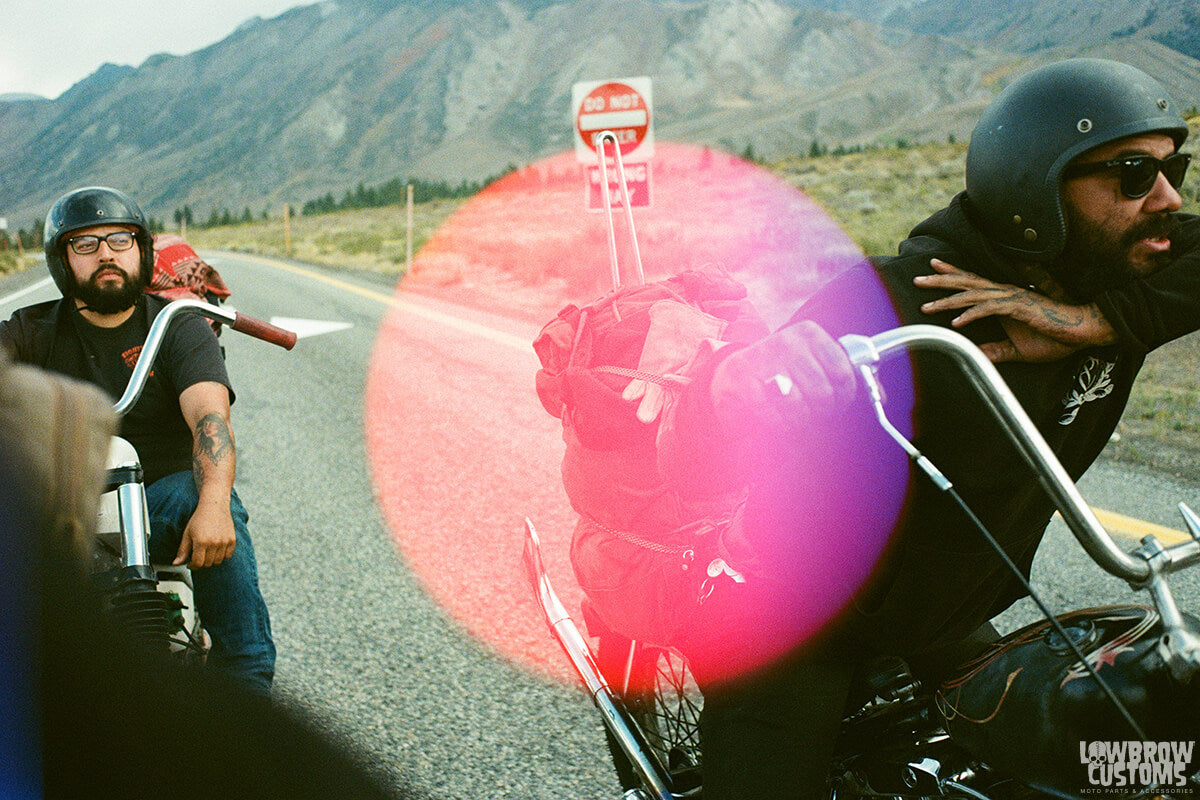 Waiting...
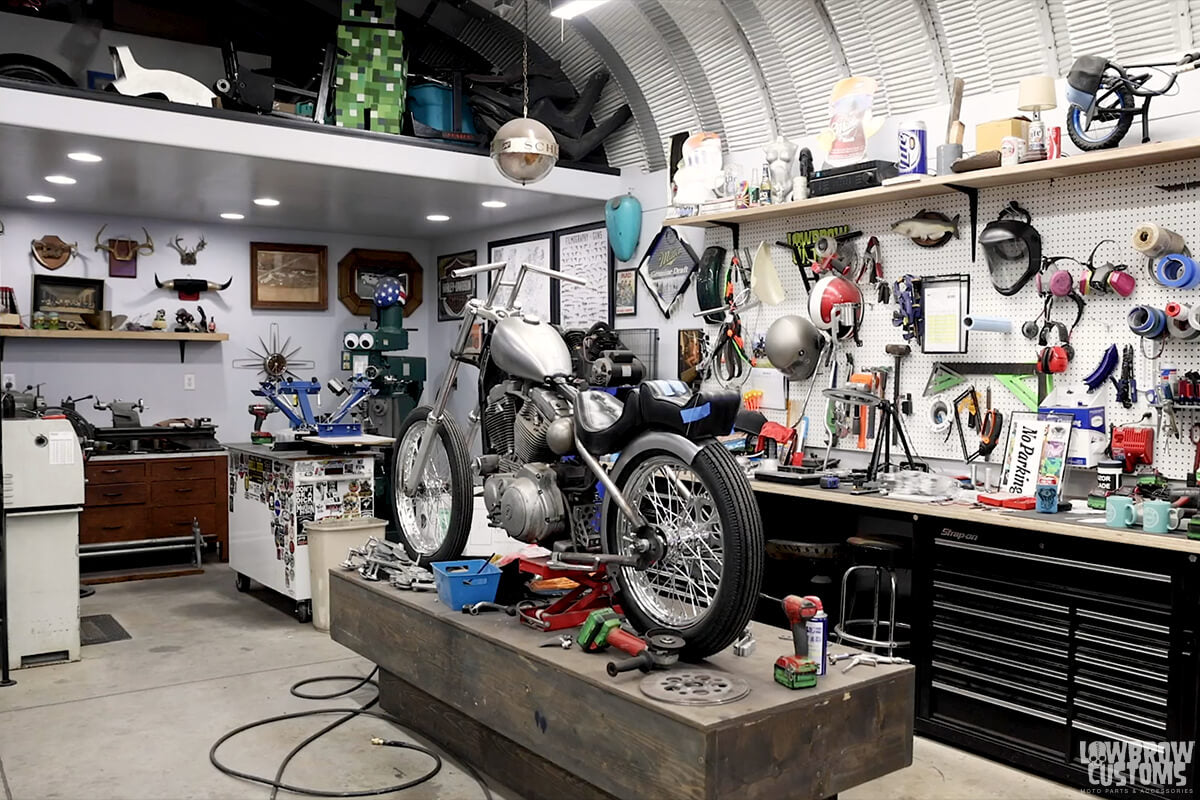 Sportster project for a customer and R&D work / storage.
 Timmy stoked o the bars, get wind from a leaf blower, riding in the wind.
 "They say not to put your finger in anything you wouldn't put your dick in, but we put our dicks in a lot of saws around here." - Tyler
 The Ironhorse trailer.
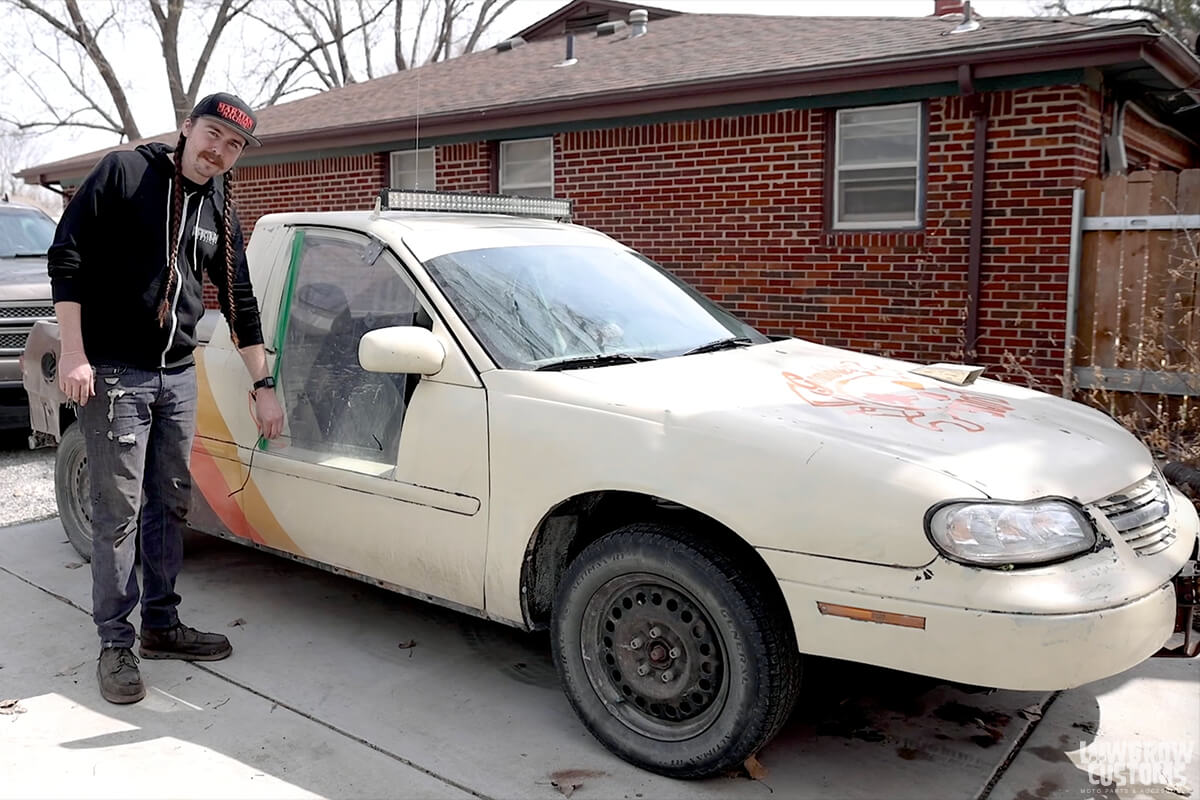 "ever see a Chevy with the buttafly doors" - Timmy
 Explaining the female soft jaws they had to sand cast to help machine their infamous penis pegs.
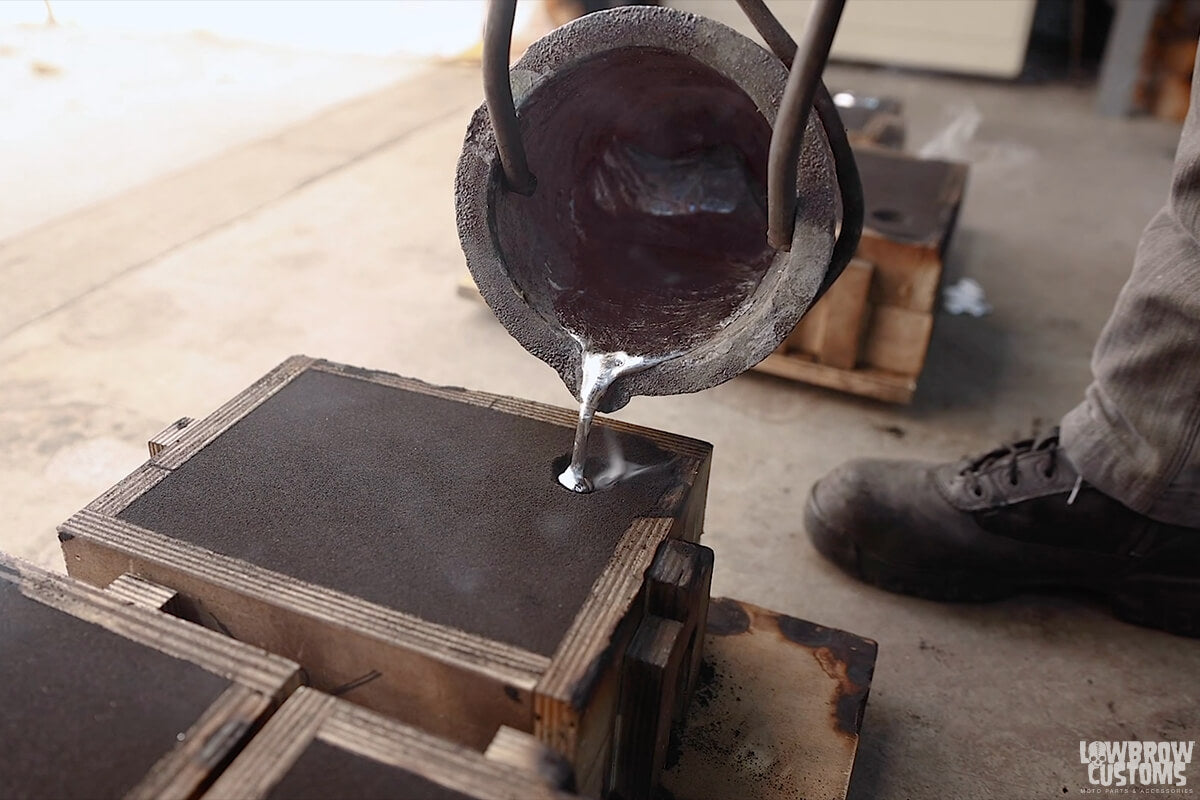 1200 degrees molten aluminum going into a sand casting pattern box.
 Seriously that shits hot.
 Welcome to the chop shop!
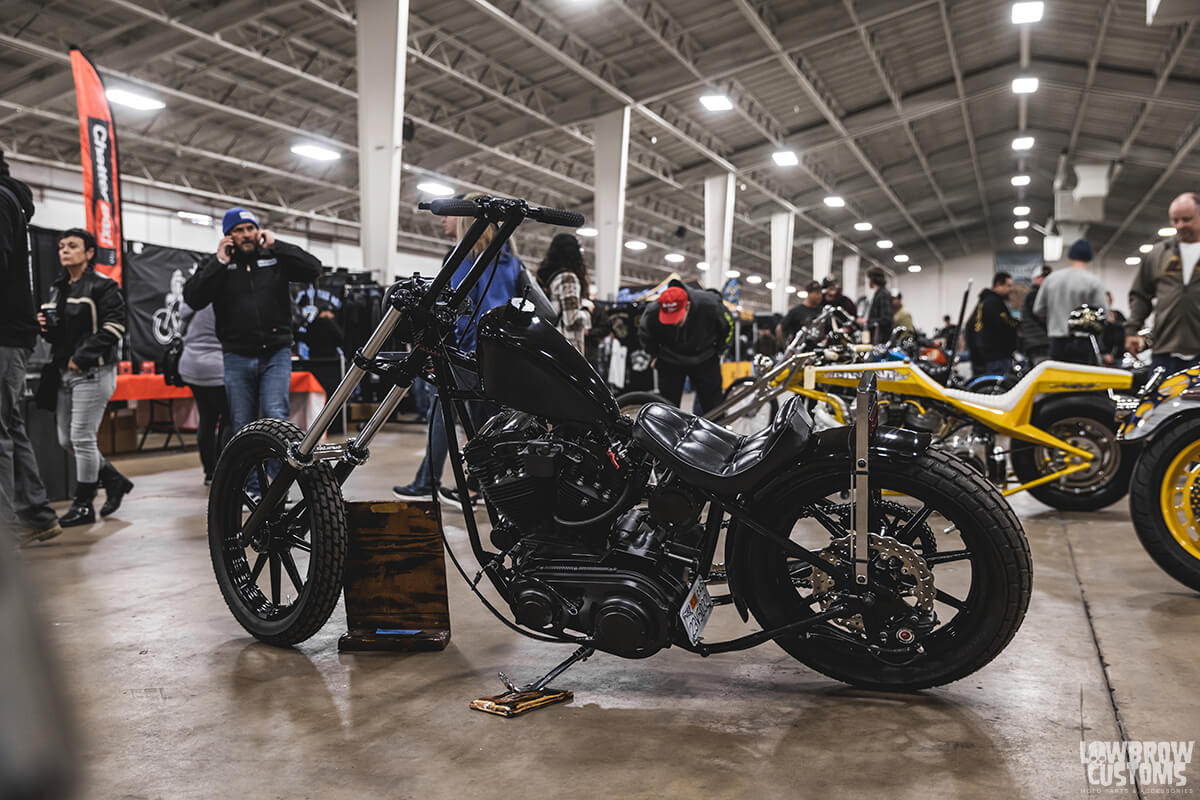 Josh's bike in the Parts And Labor show.
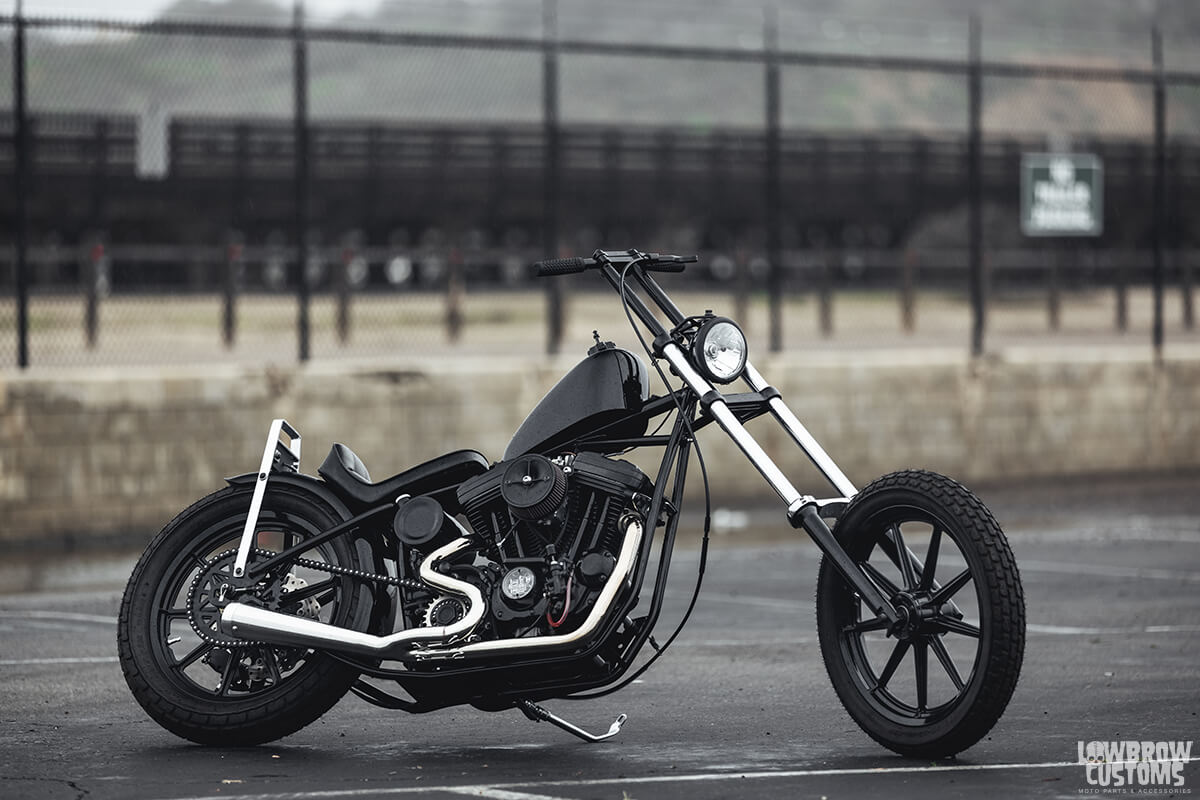 19" front, 19" rear, 6 over tubes, custom exhaust, and so much more.
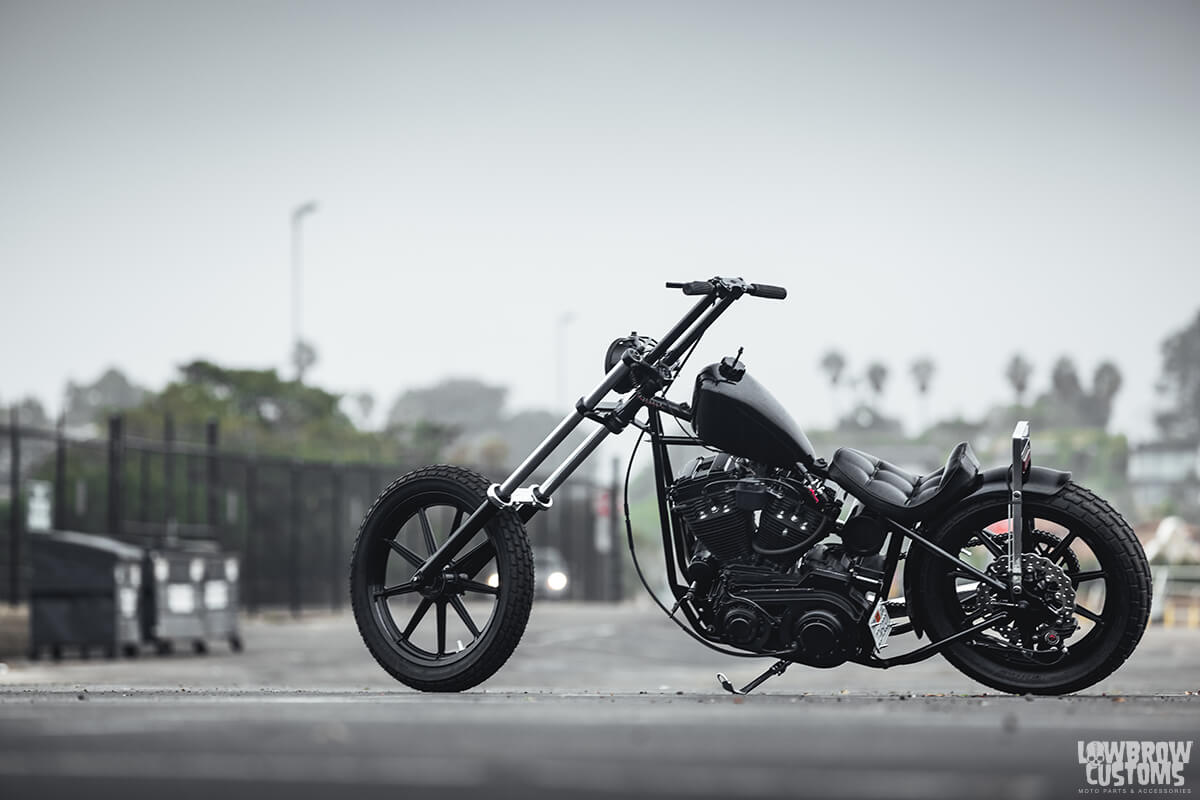 That lean though!
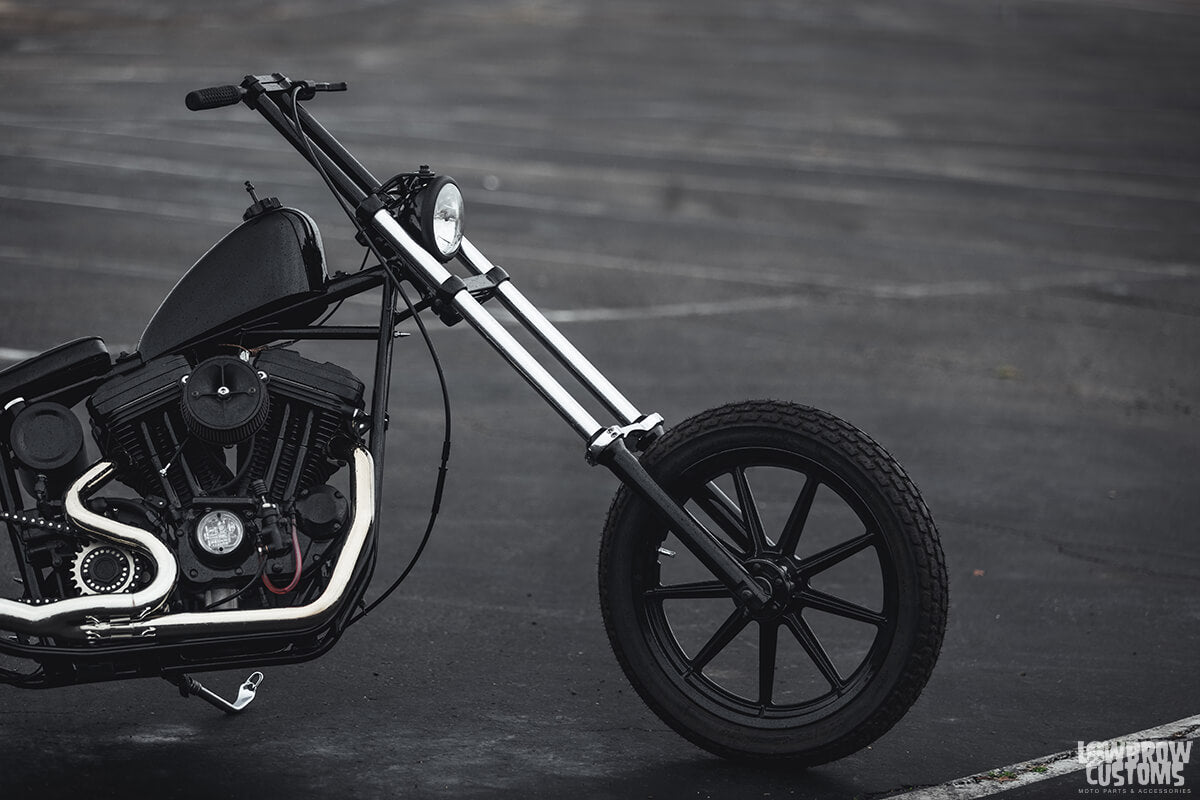 She's just one long ripper!
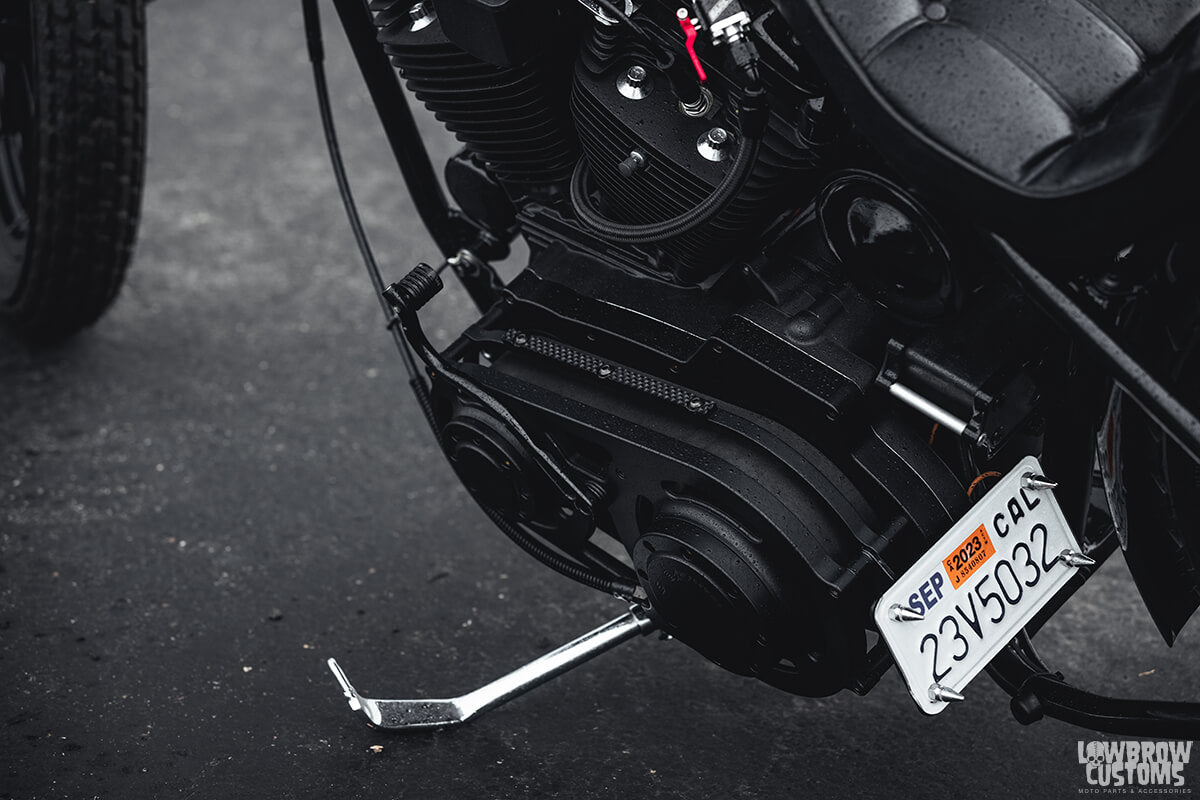 Killer Evolutions 2" open primary concept with ridges for your foot on the top.
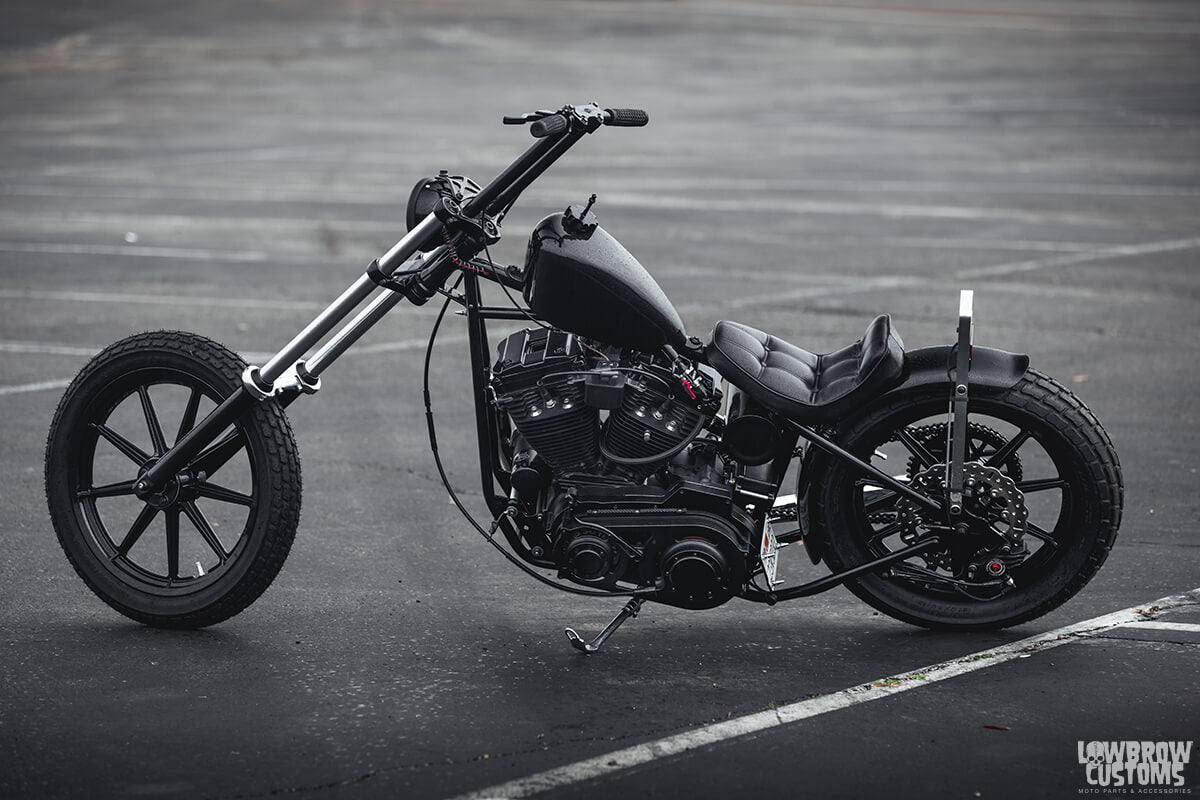 Lowbrow Customs Frisco Sportster tank, Manta Ray Fender. She's got the goods.
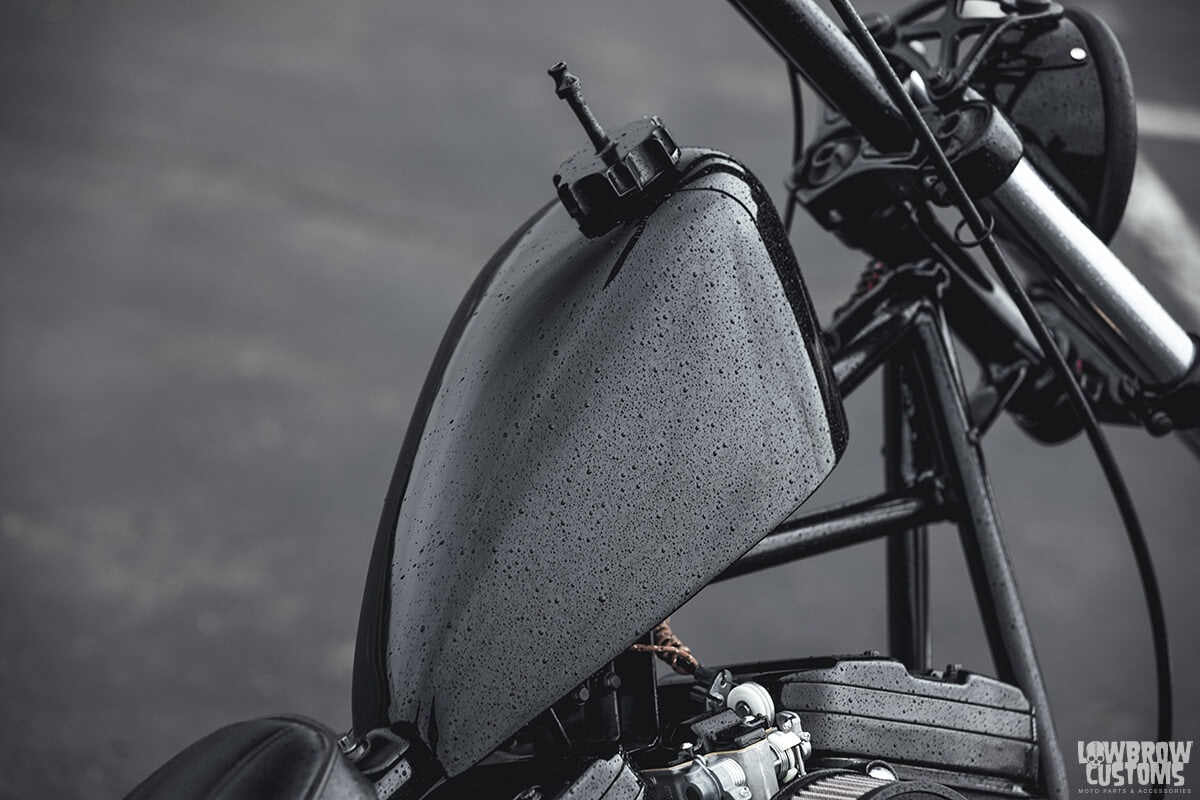 Vivid Black paint with a side of misty rain.
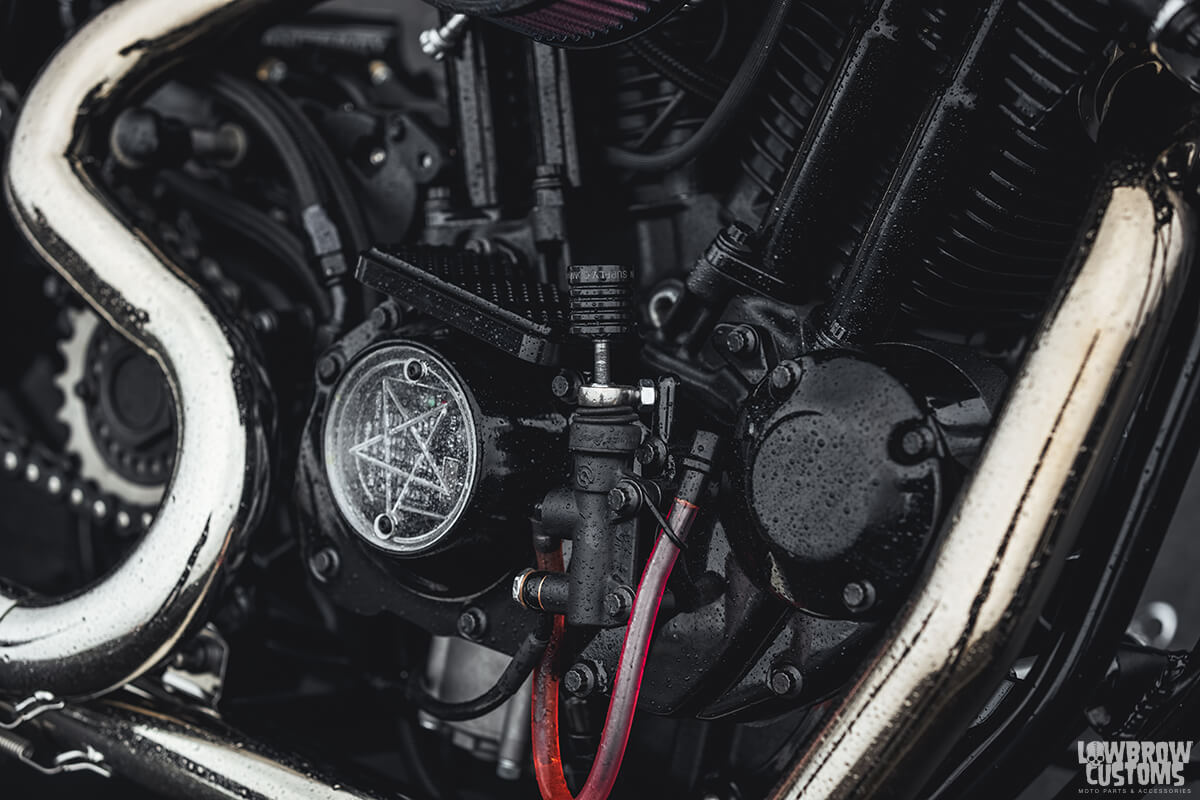 Yeah, that's the foot set up and brake. WHA the!?
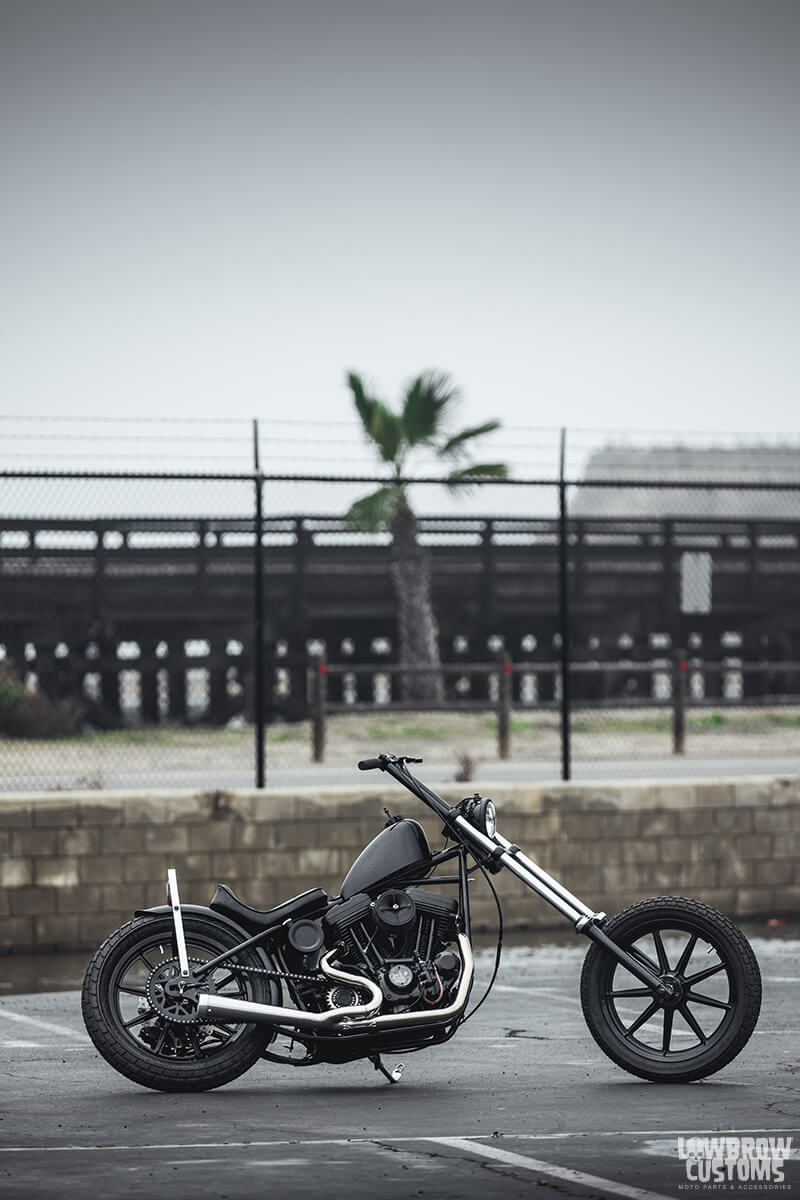 California sun is right around the corner this beast.
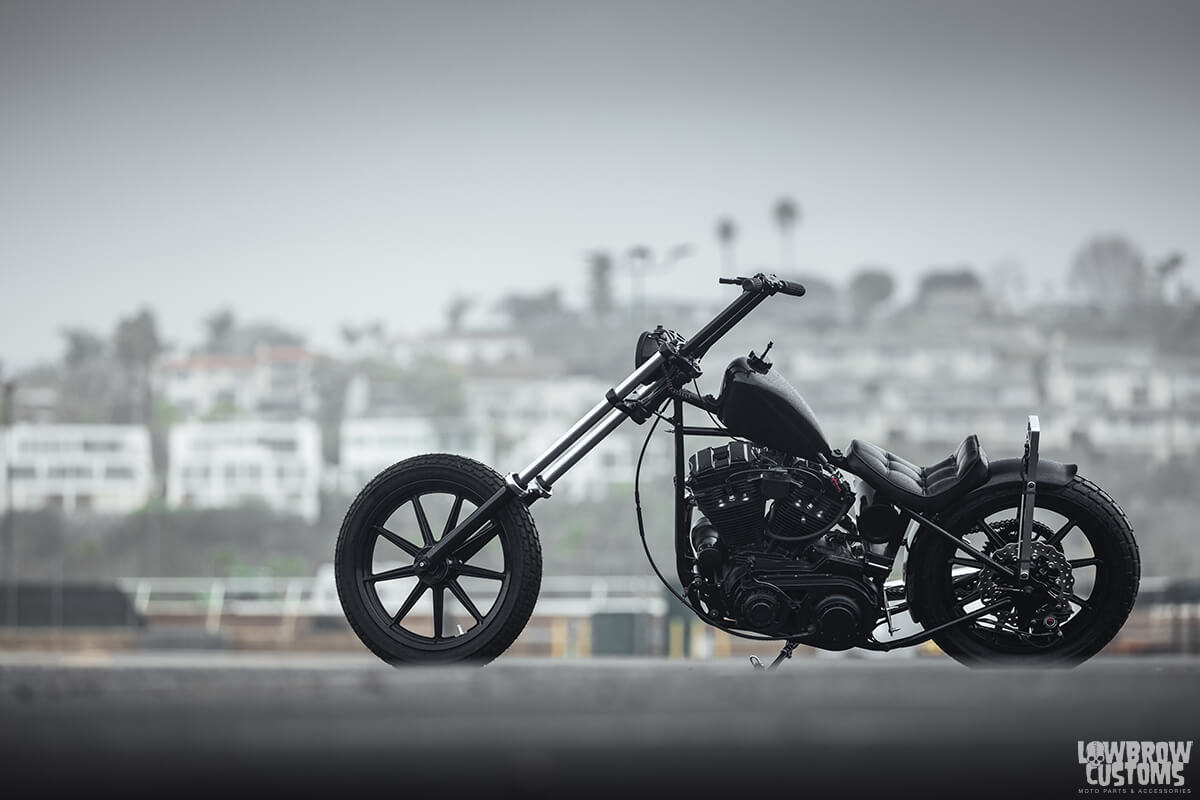 A TrackerDie Exclusive.
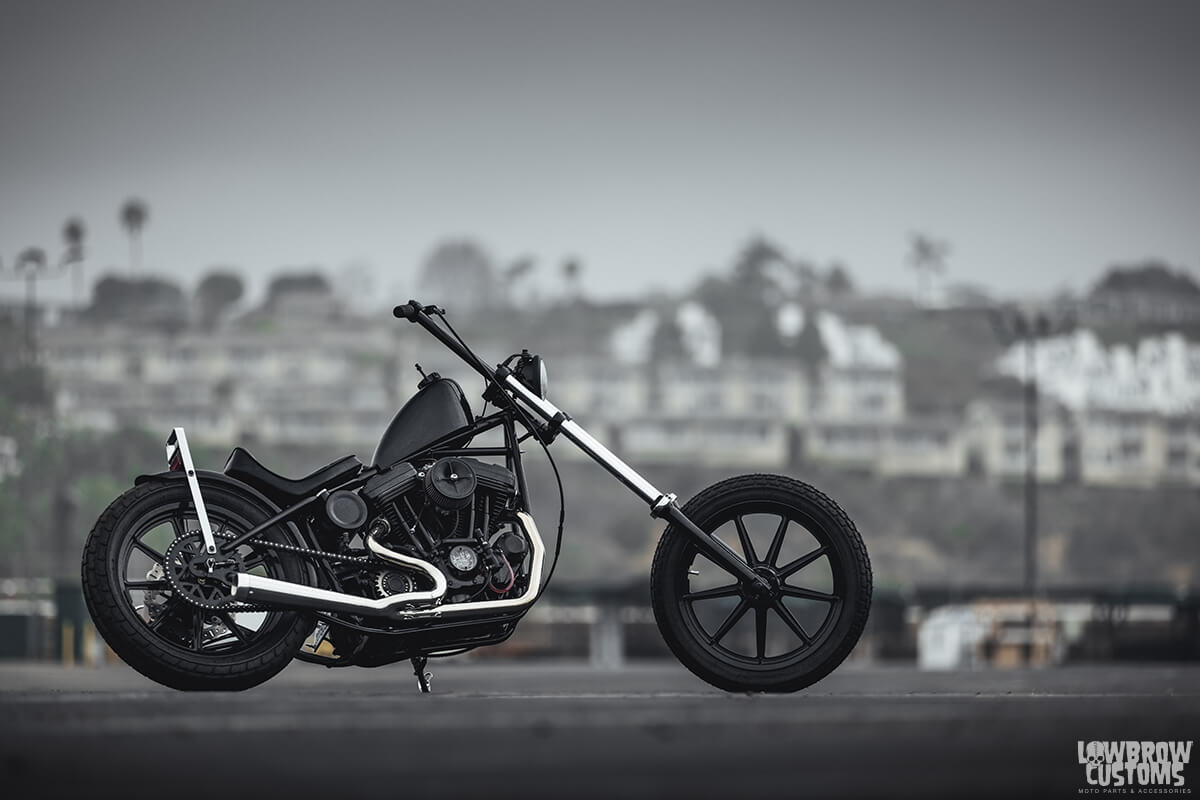 Take it all in, she's a real thing of beauty.
 From clapped out and wack, to hold my beer this thing will rip your face off in a hurry.
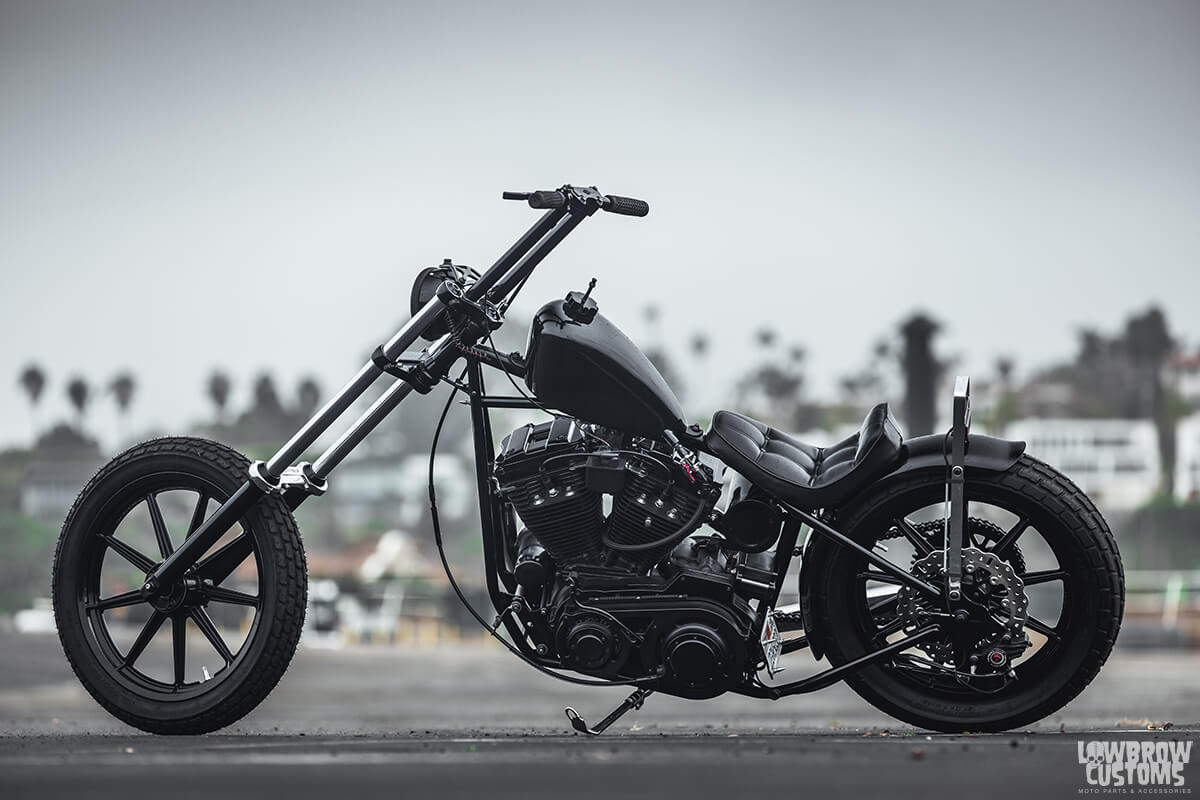 Paughco frame with the windowed neck.
 6" over tubes with TrackerDie's extended fork tube dampers making it 8" over.
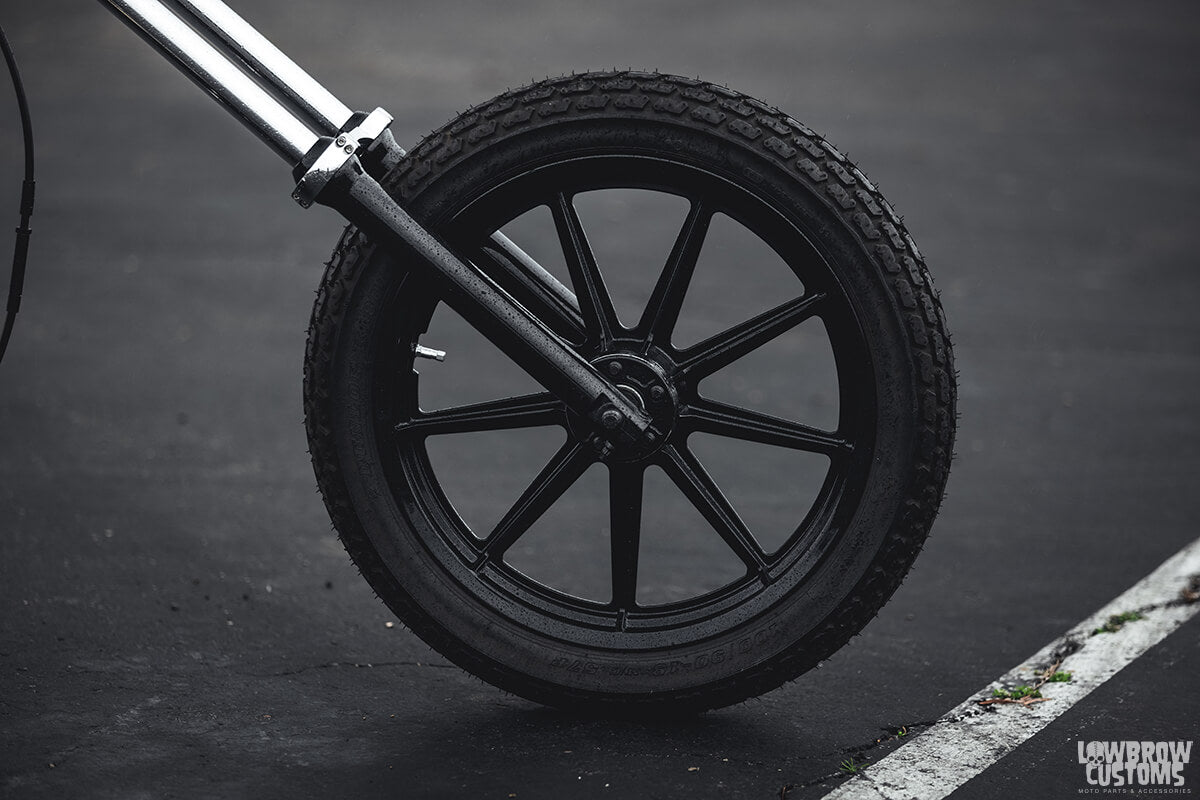 On the front a 19" Stock HD 9 spoke mag wheel with a 19" Dunlop K180F tire.
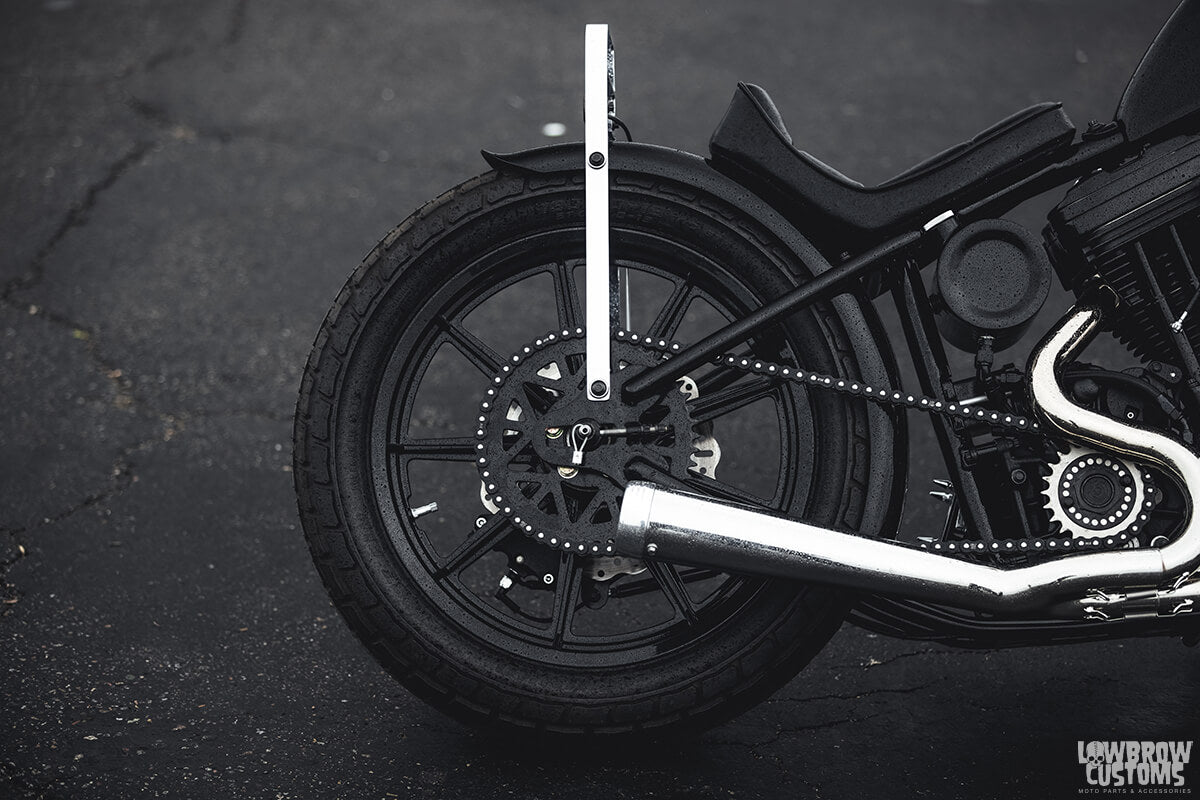 On the rear a 19" stock HD 9 spoke mag wheel with 19" Shinko SR267 Tire.
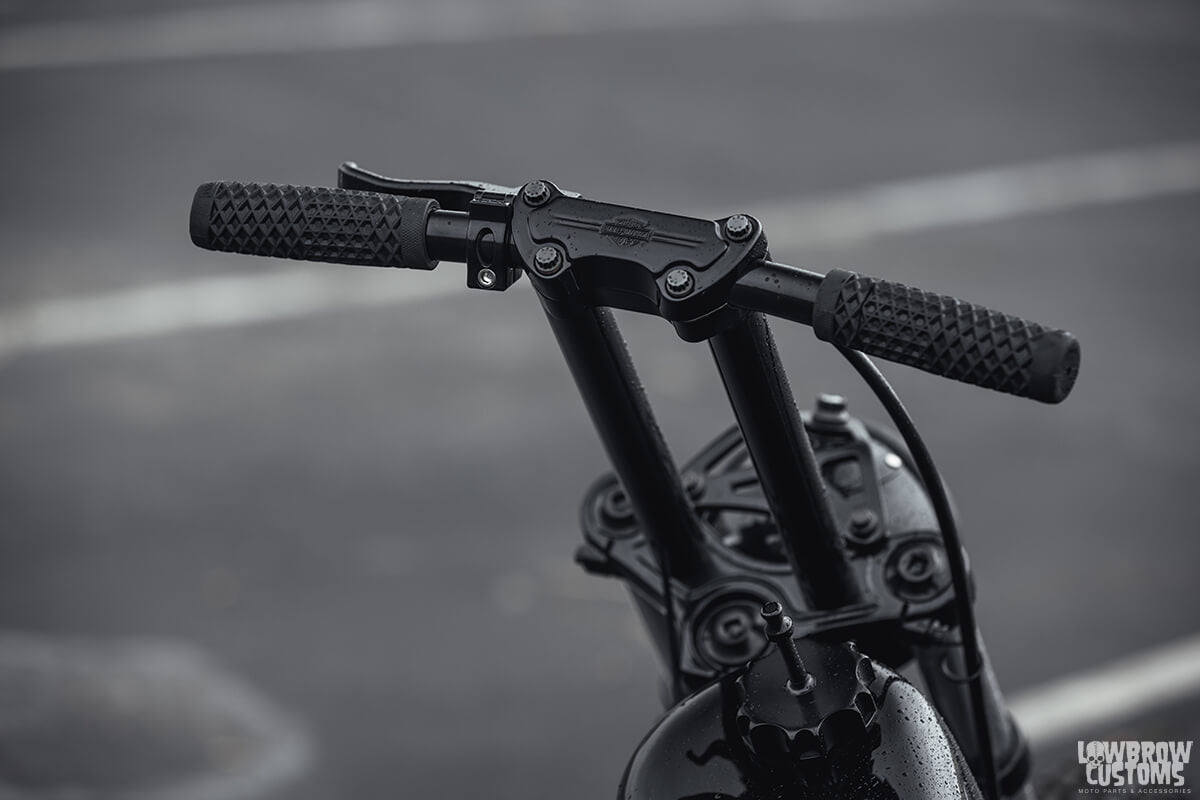 Some custom bars with internal throttle, 1 finger short throw clutch and Vans / Cult ODI Grips
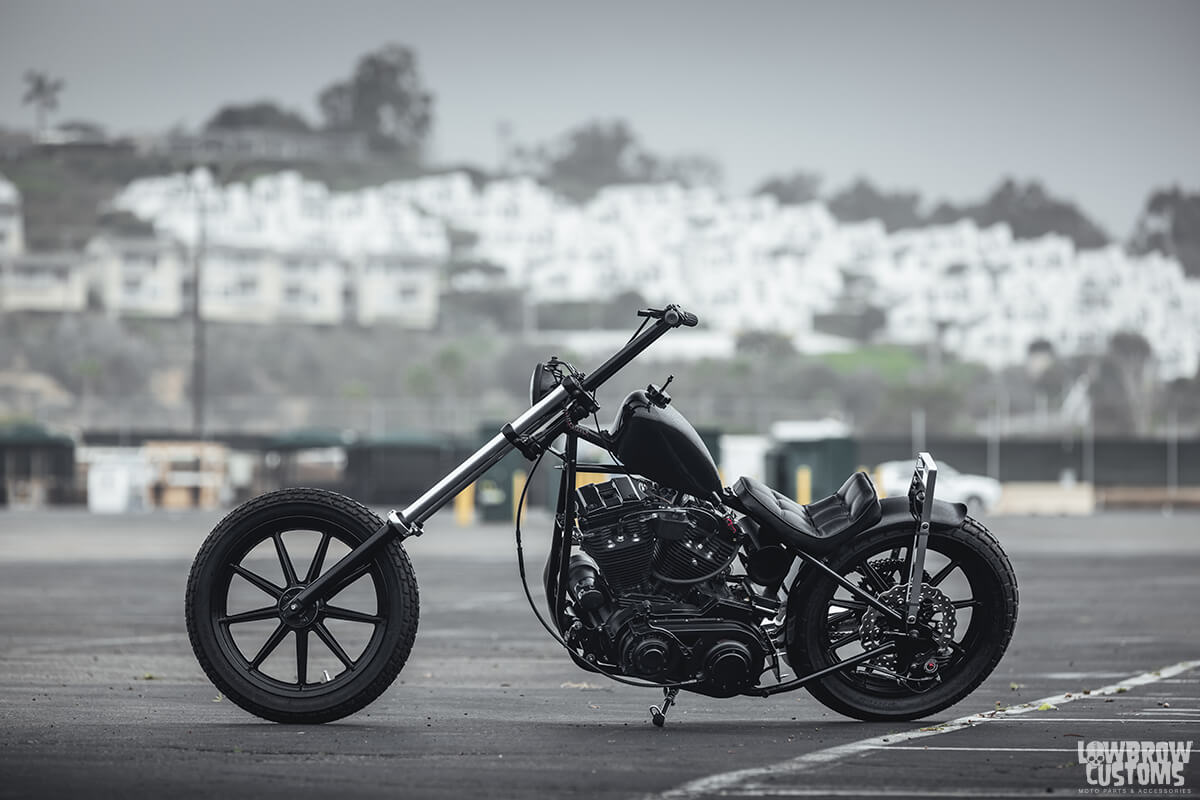 Just the perfect solo ripper.
  Doom and gloom in Delmar made for some really nice lighting.
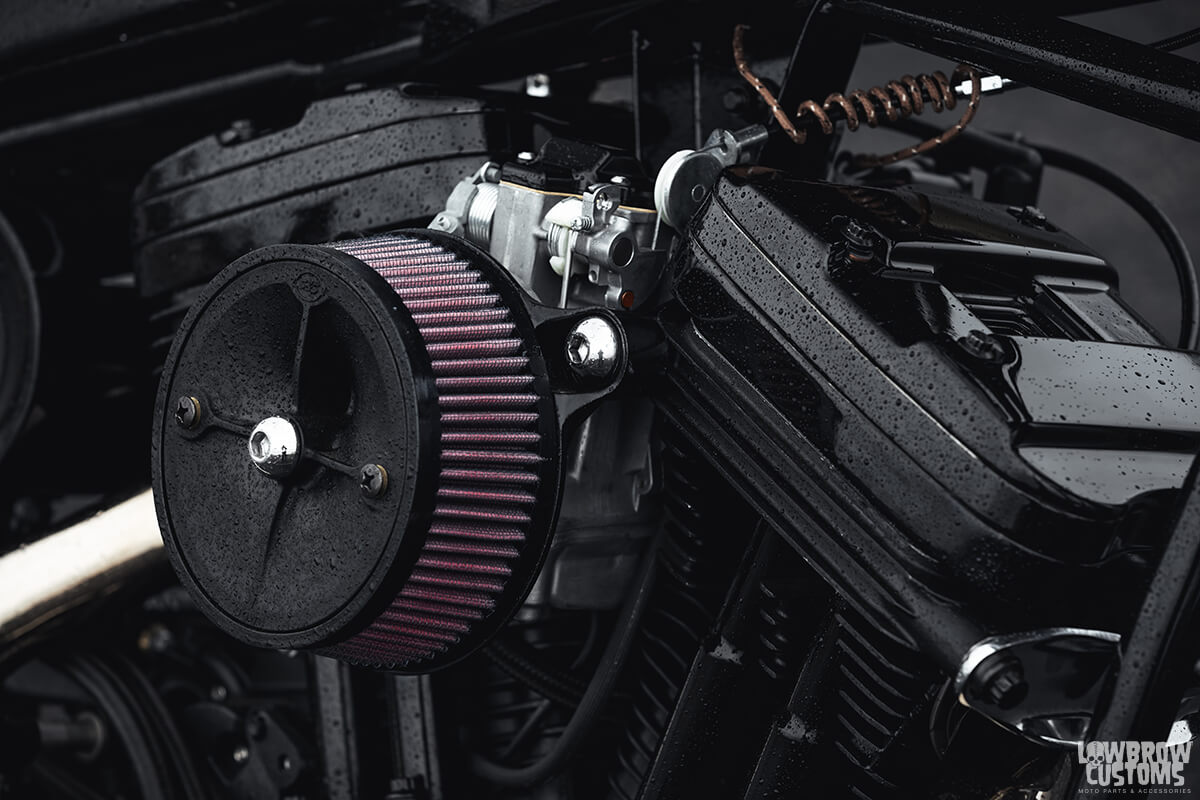 S&S Stealth air cleaner on a Mikuni carb, yeah she's dialed.
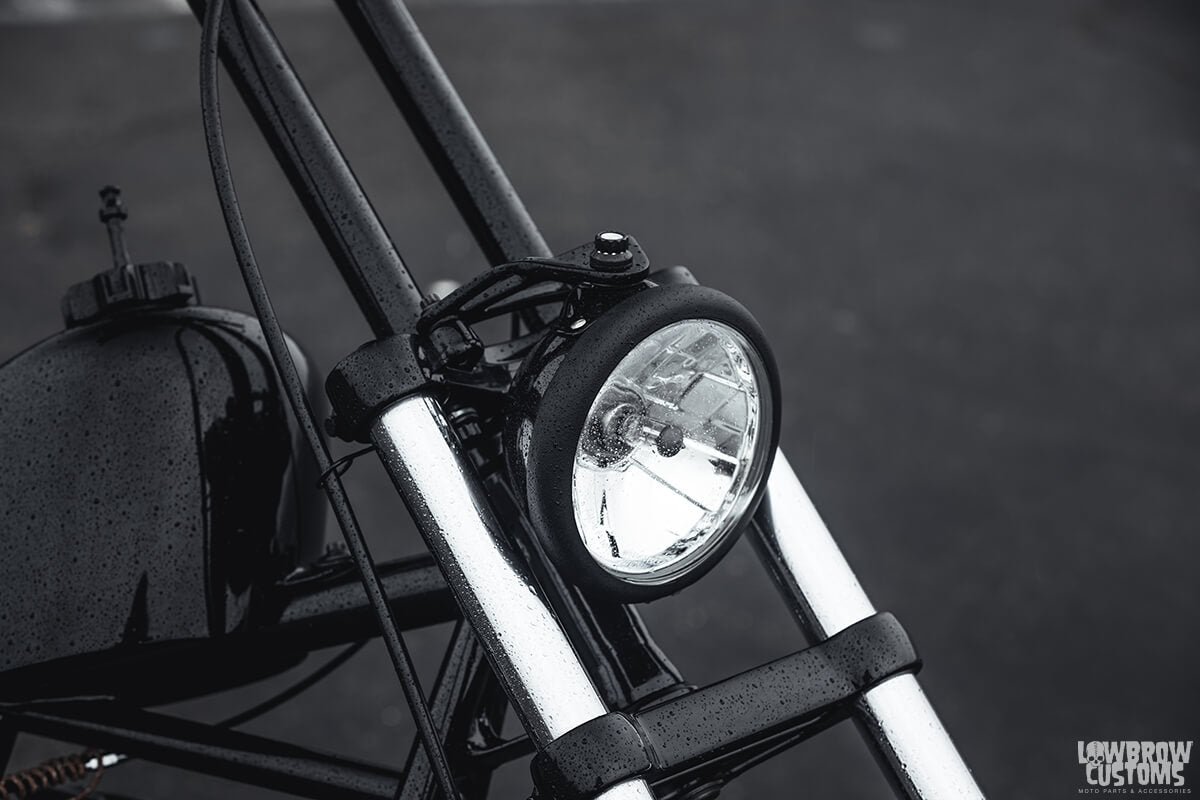 Standard top mount headlight utilizing the TrackerDie Headlight mount.
 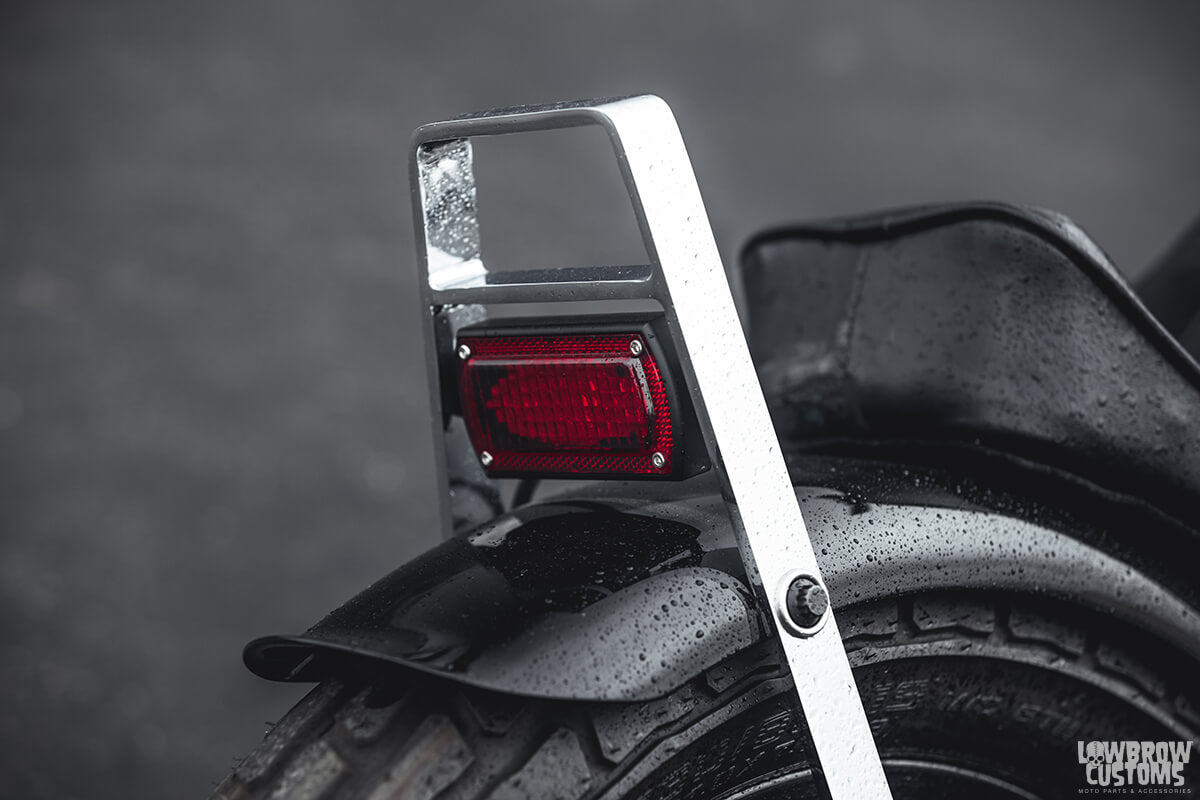 Prism Supply tail light customized black.
 Custom rounded off oil tank with filler under the seat.
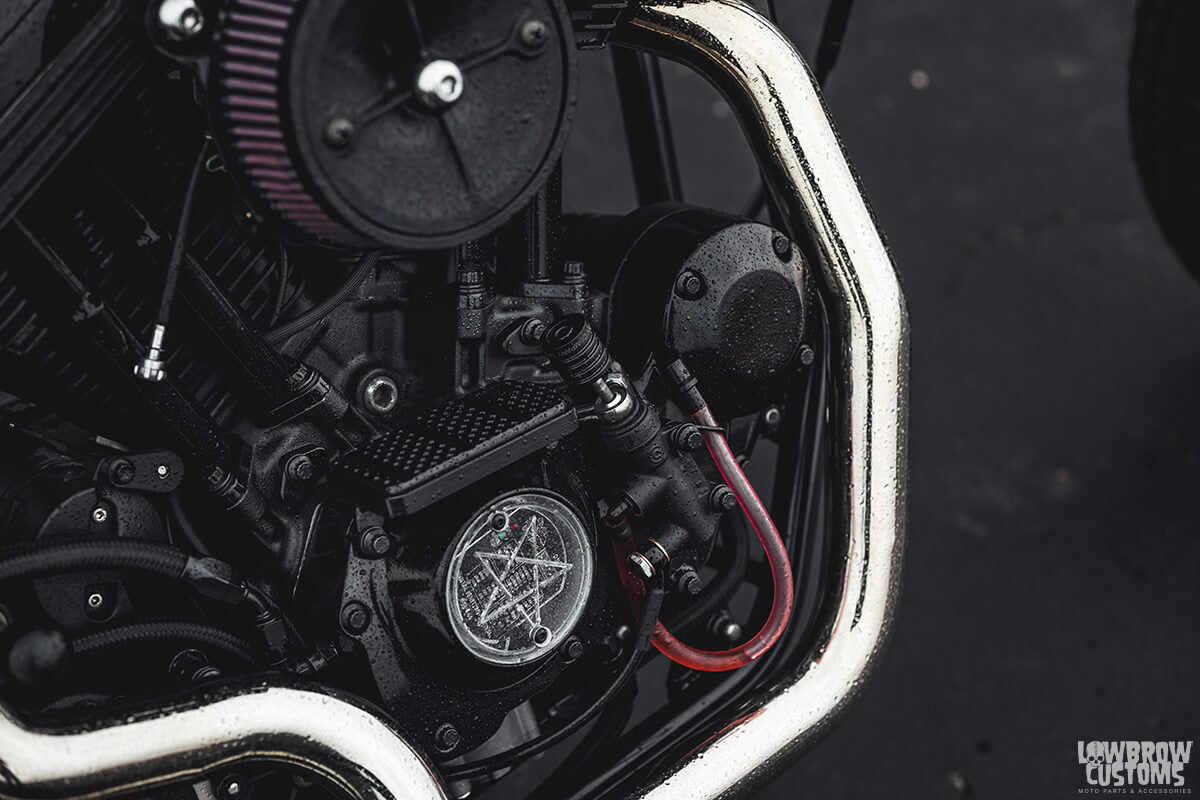 Another look at that crazy foot control brake setup.
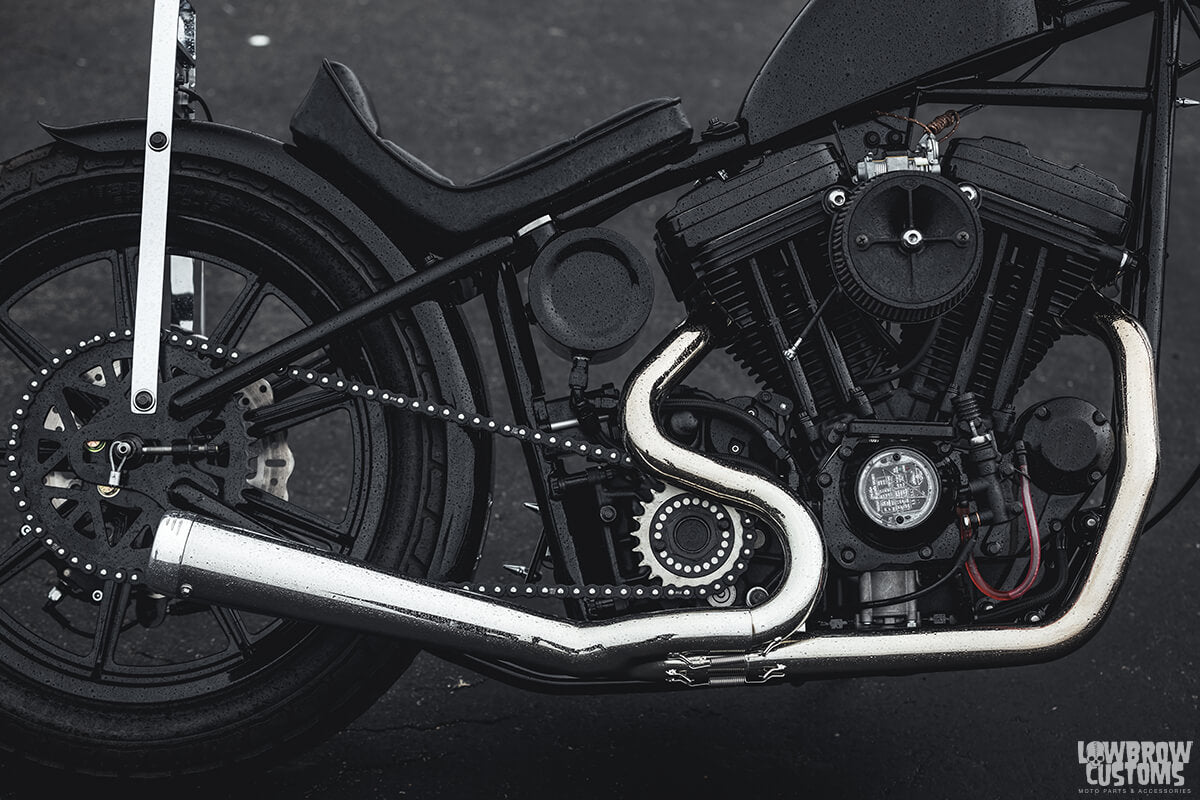 Stainless custom blend 2 into 1 exhaust.
 TrackerDie Chain conversion rear sprocket.
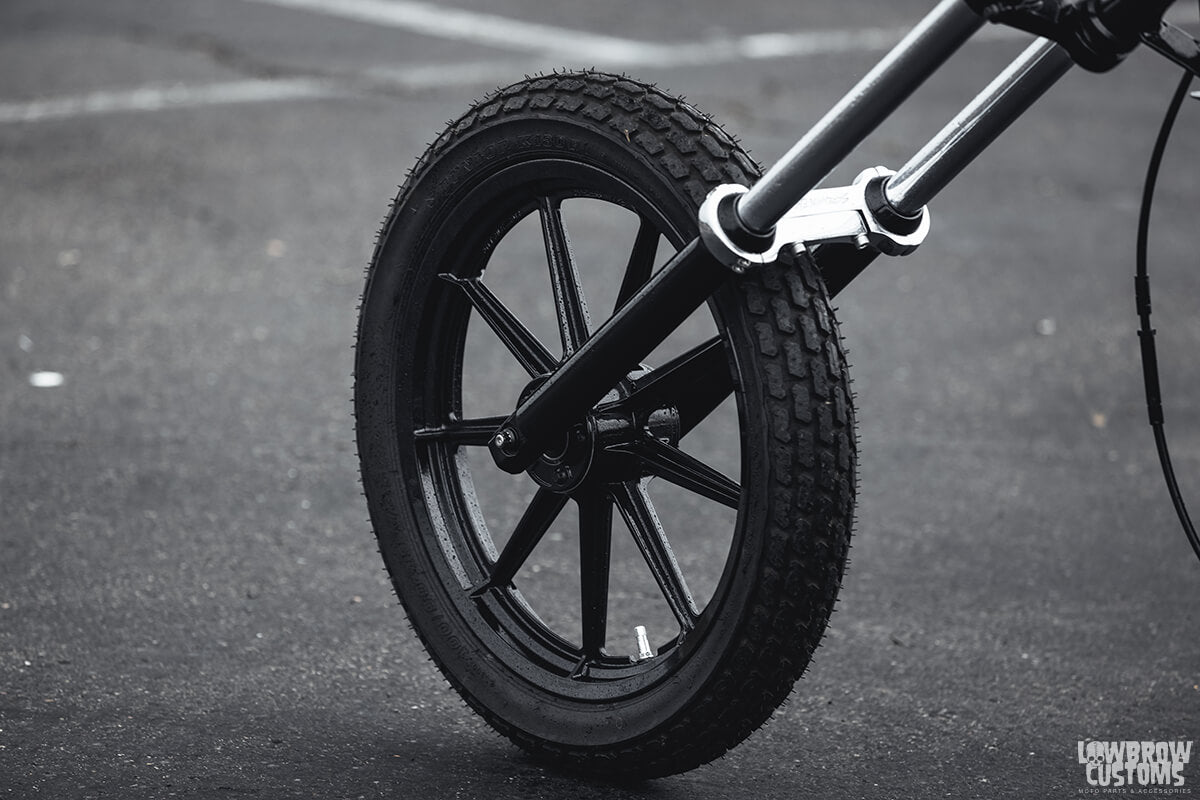 Custom fork stabalizer.
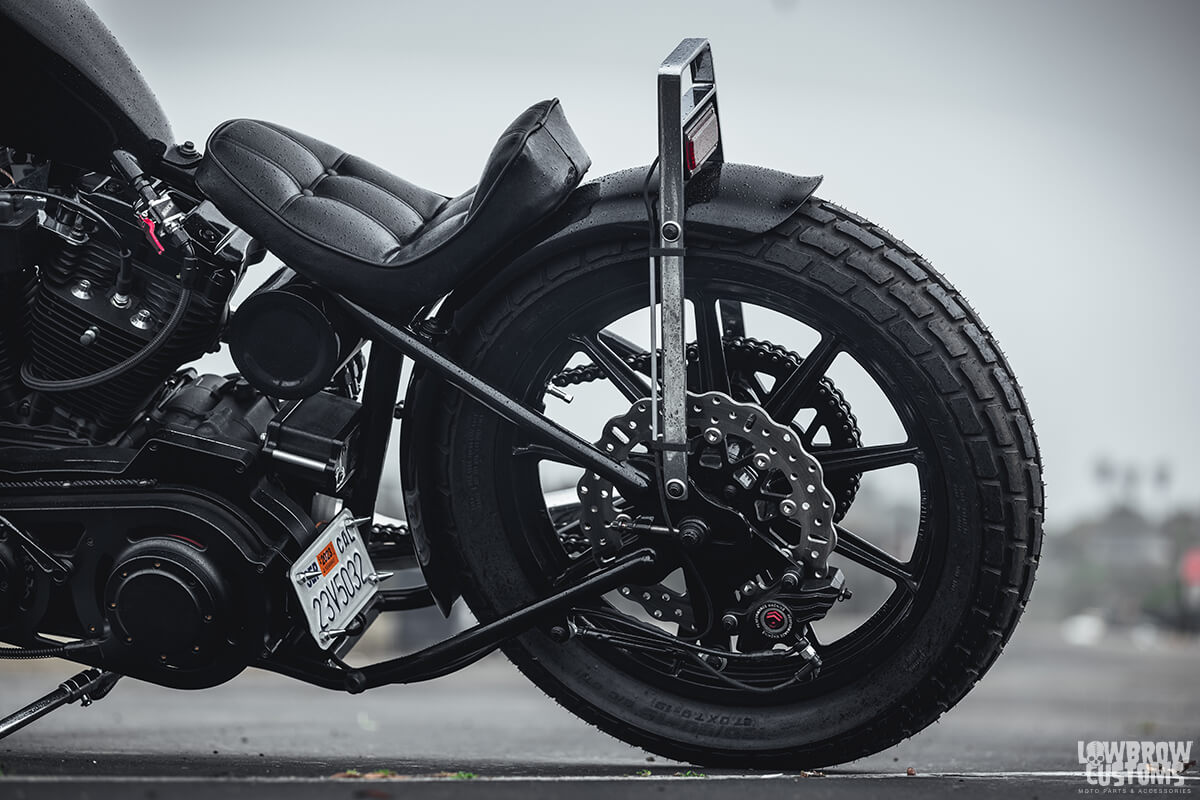 tight fit with the oil tank, anti gravity batter and license plate.
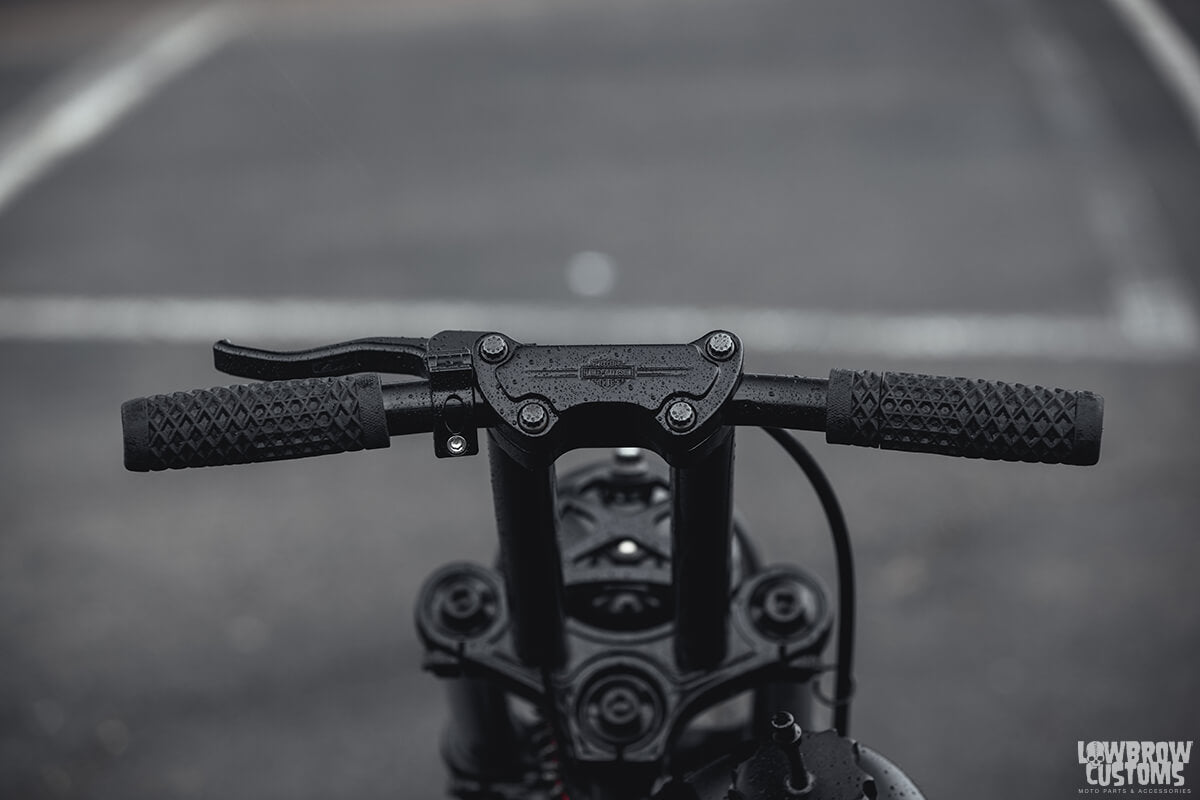 Through the bars.
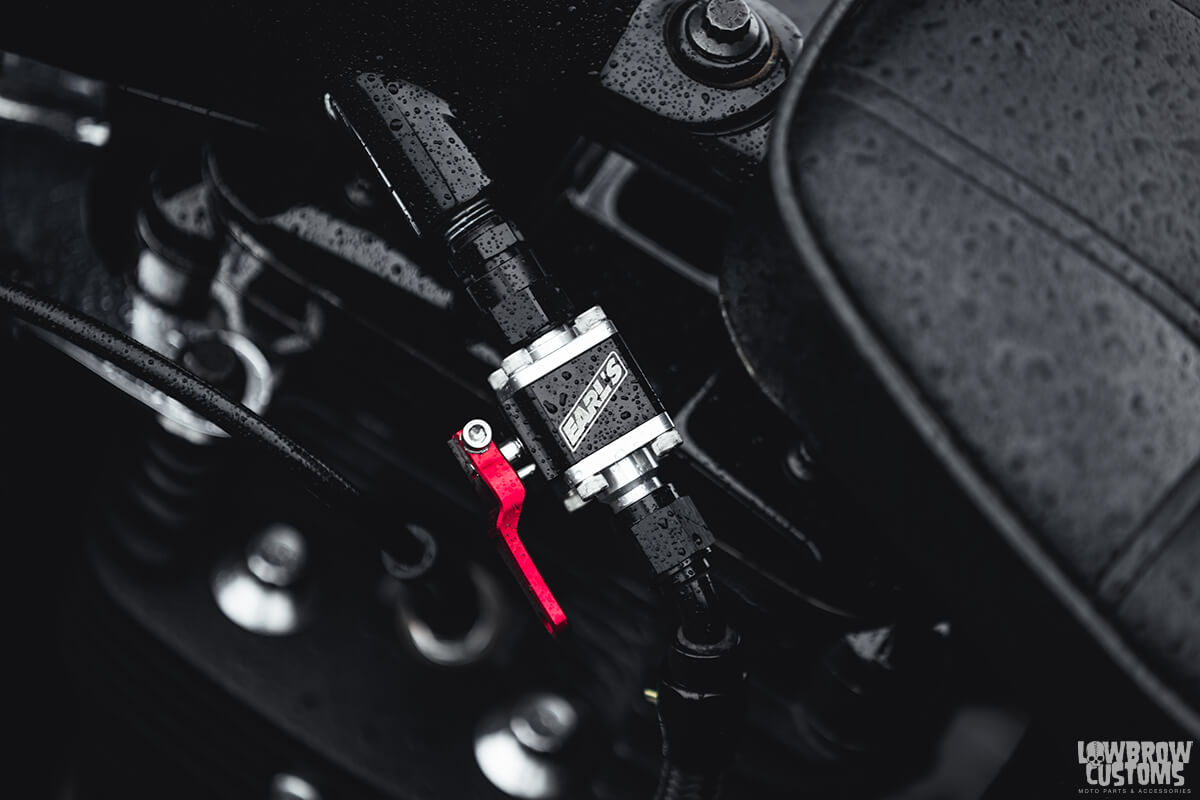 Earl's petcock
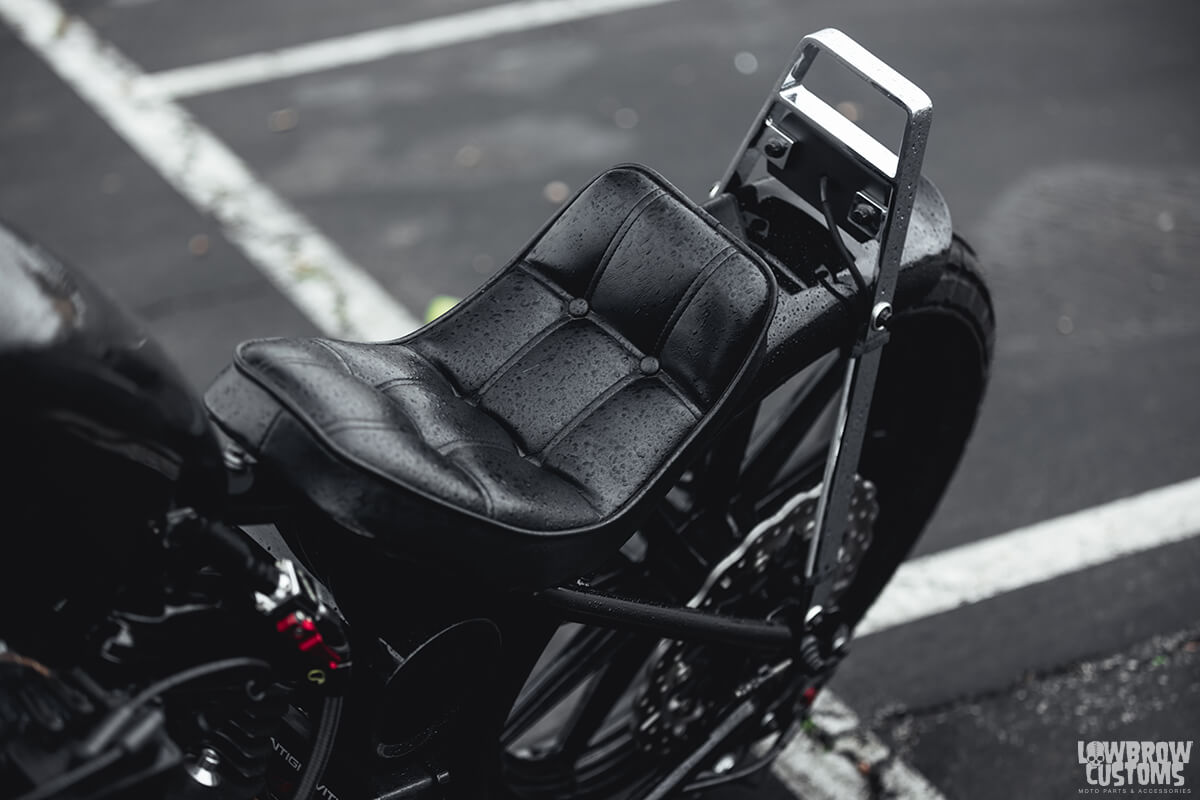 90's scorpion seat.
 Stance check, yup still killa.
 B-side never looked so good.
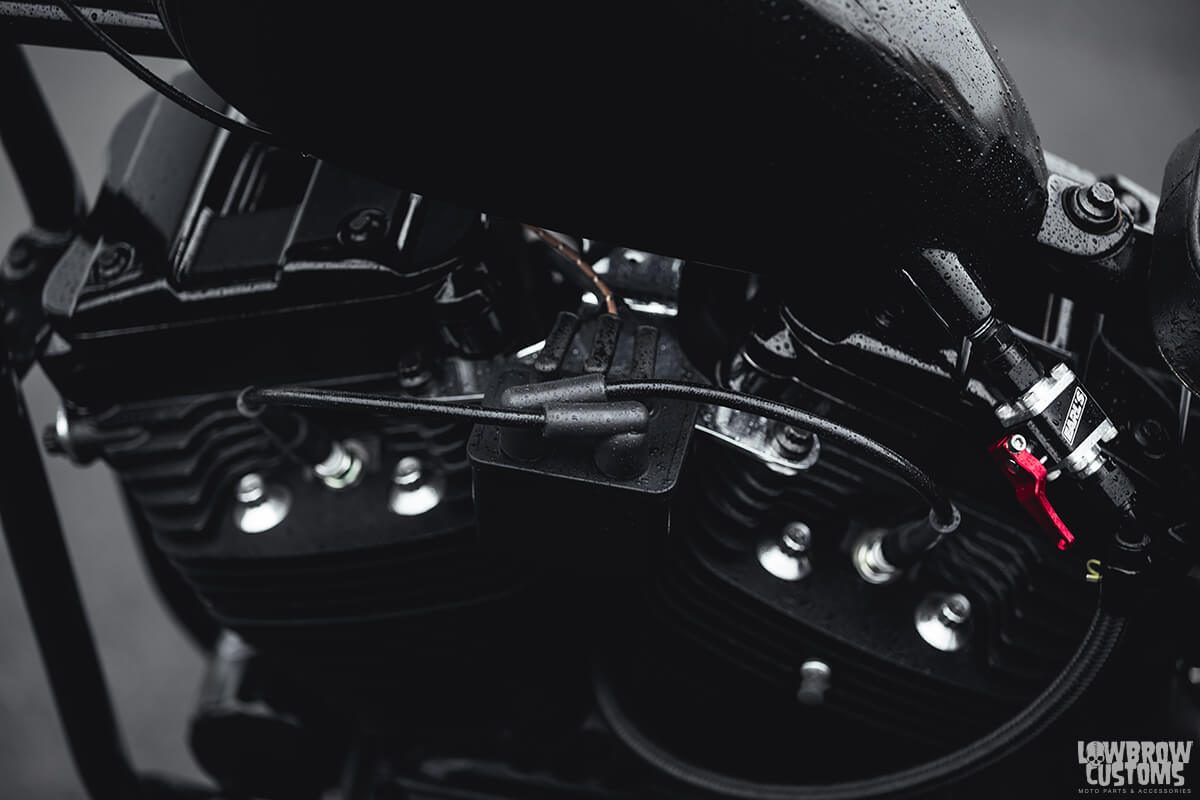 Criss cross will make ya Jump Jump.
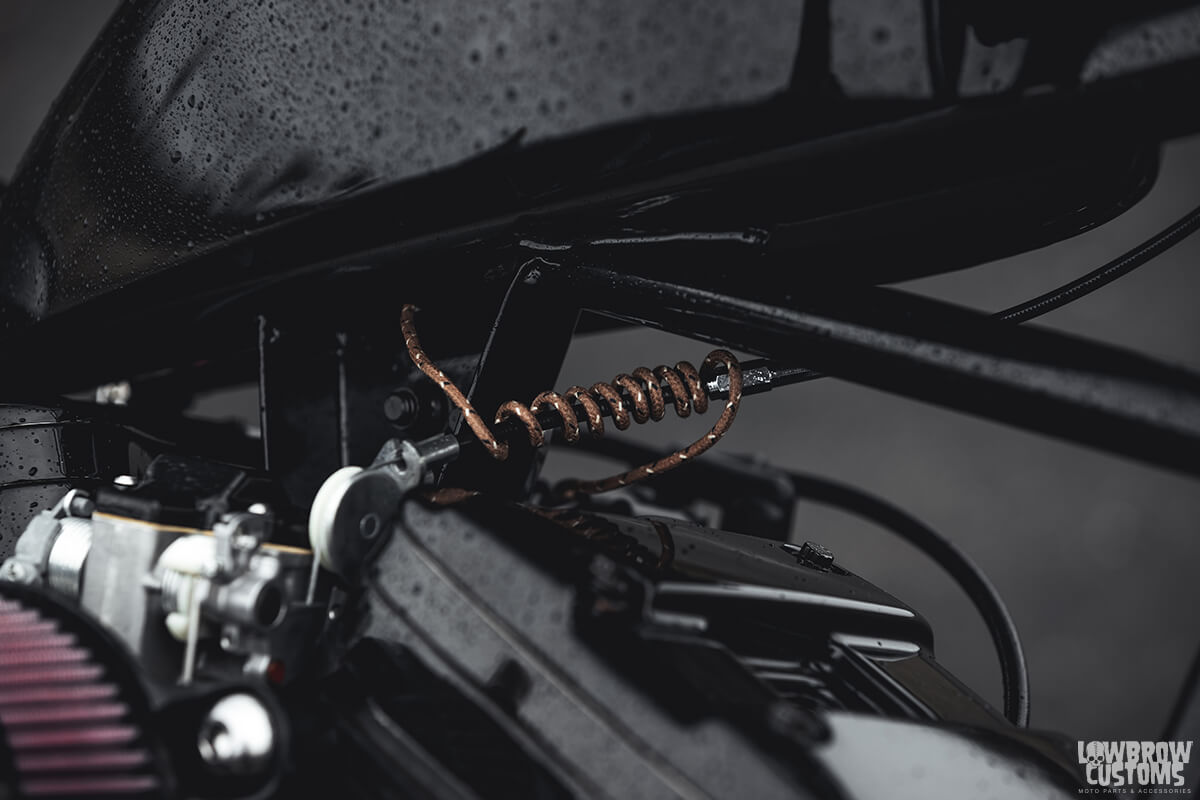 Curly q's with Lowbrow 16 gauge wire.
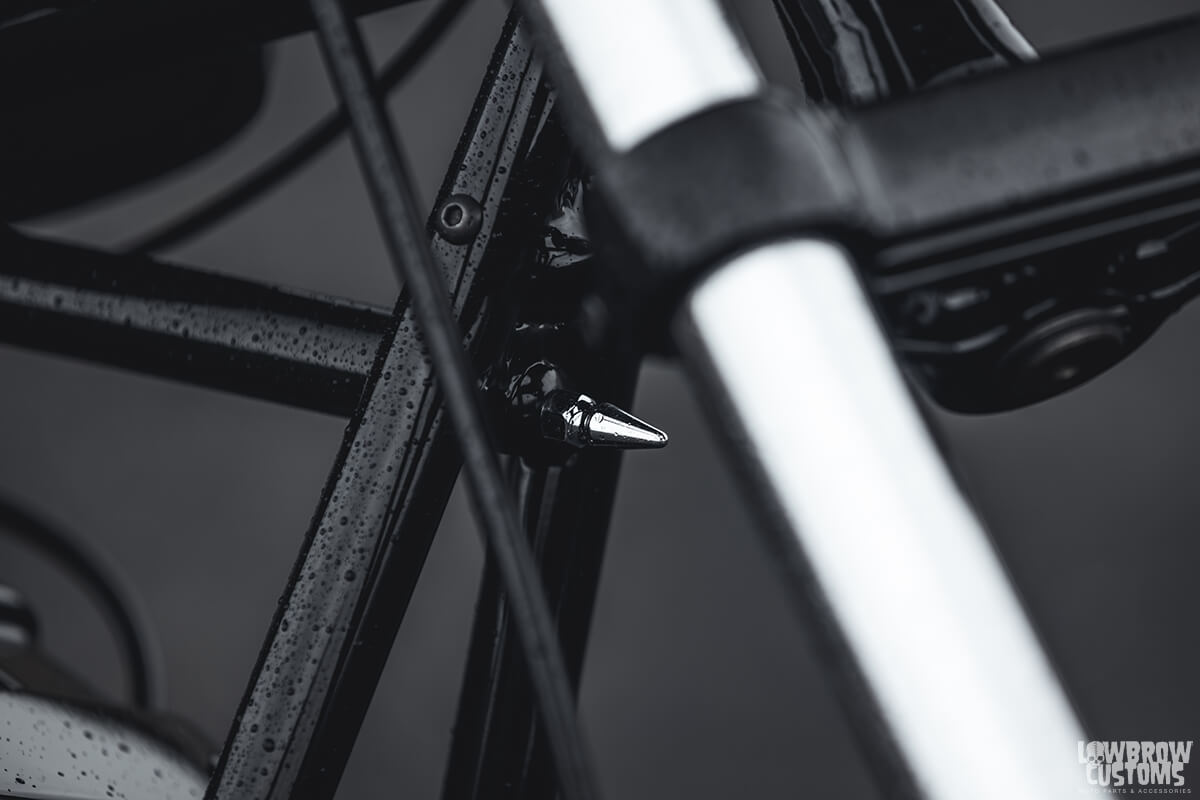 One spike for the punks.
 Another look at the TrackerDie Headlight mount and Lowbrow Customs fork and stem caps.
 Race shit.
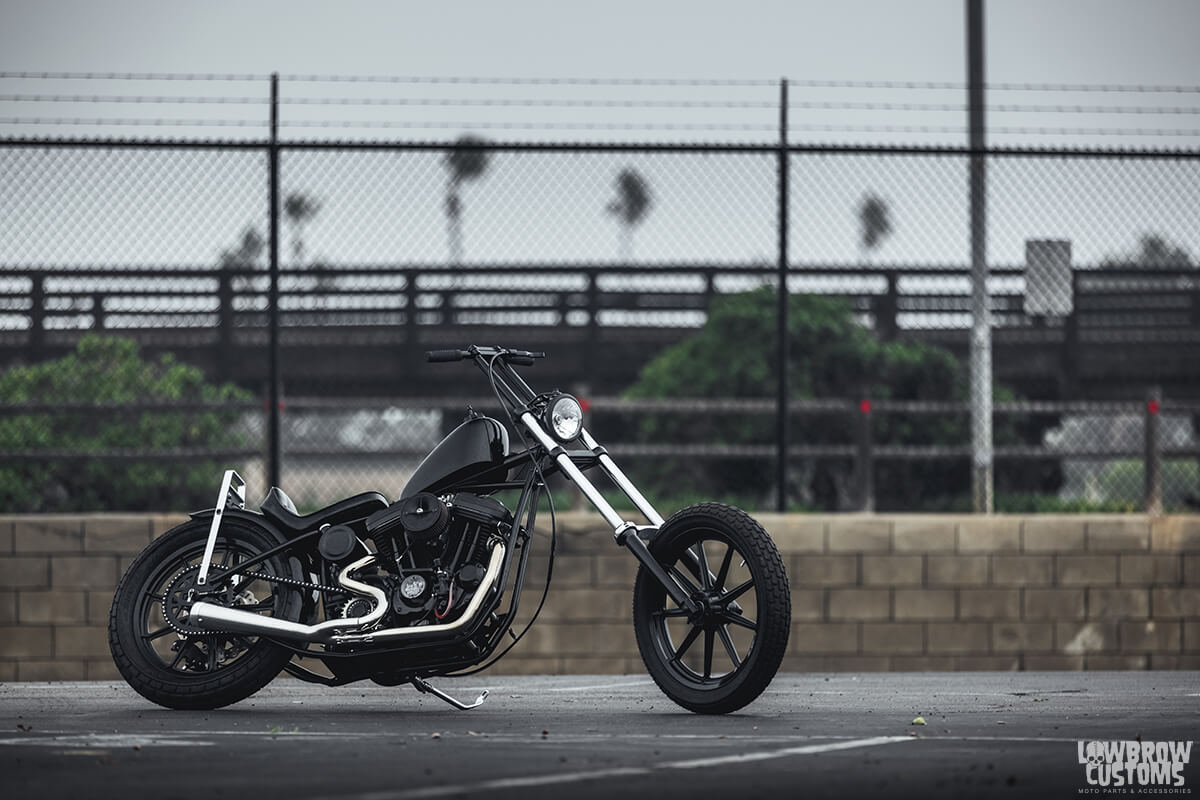 Bwack Widow, peace out!
 Simple yet elegant lines with a lot of
 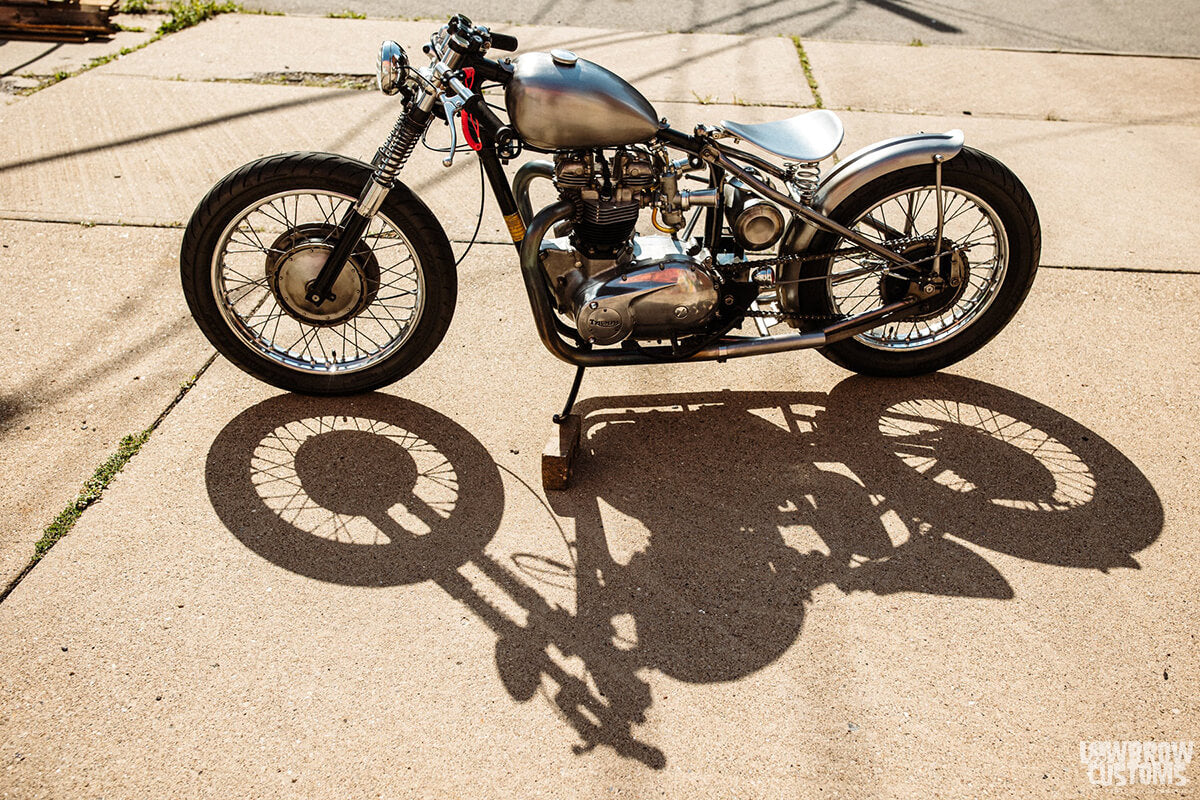 The raw finish gives off a beautiful look.
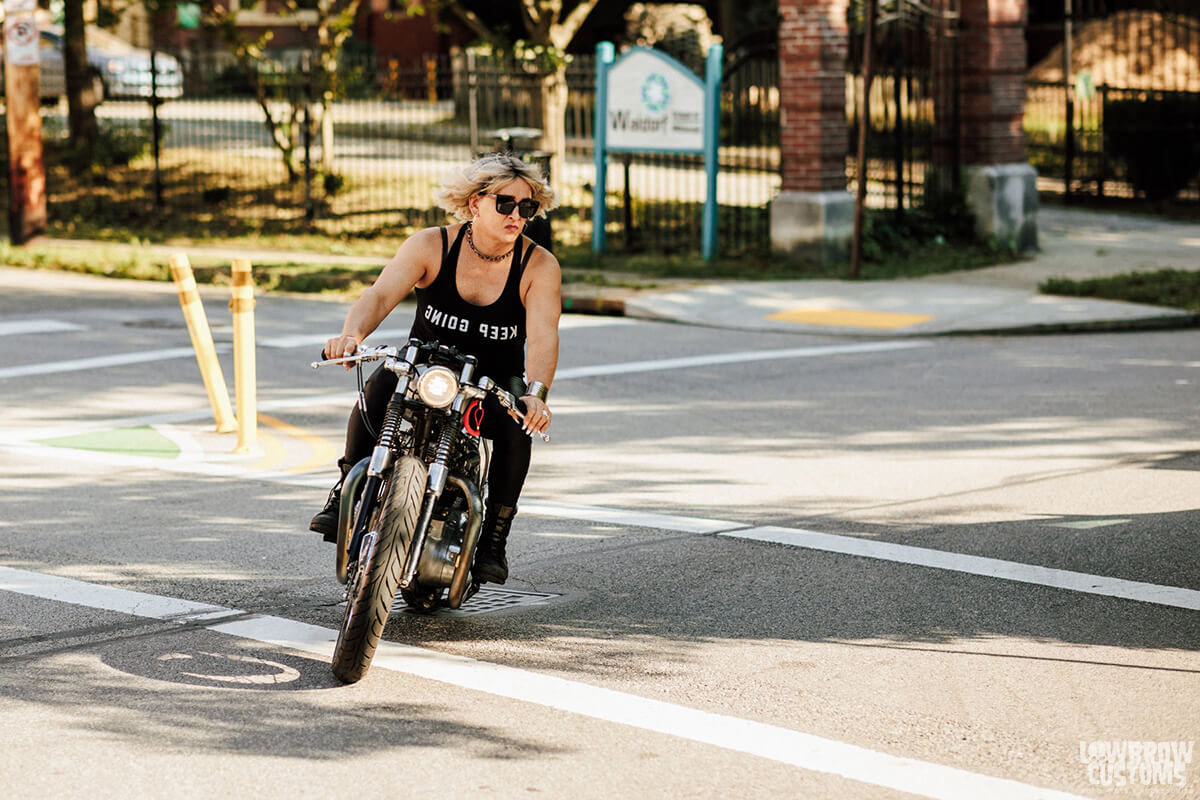 Aggressive race stance and controls.
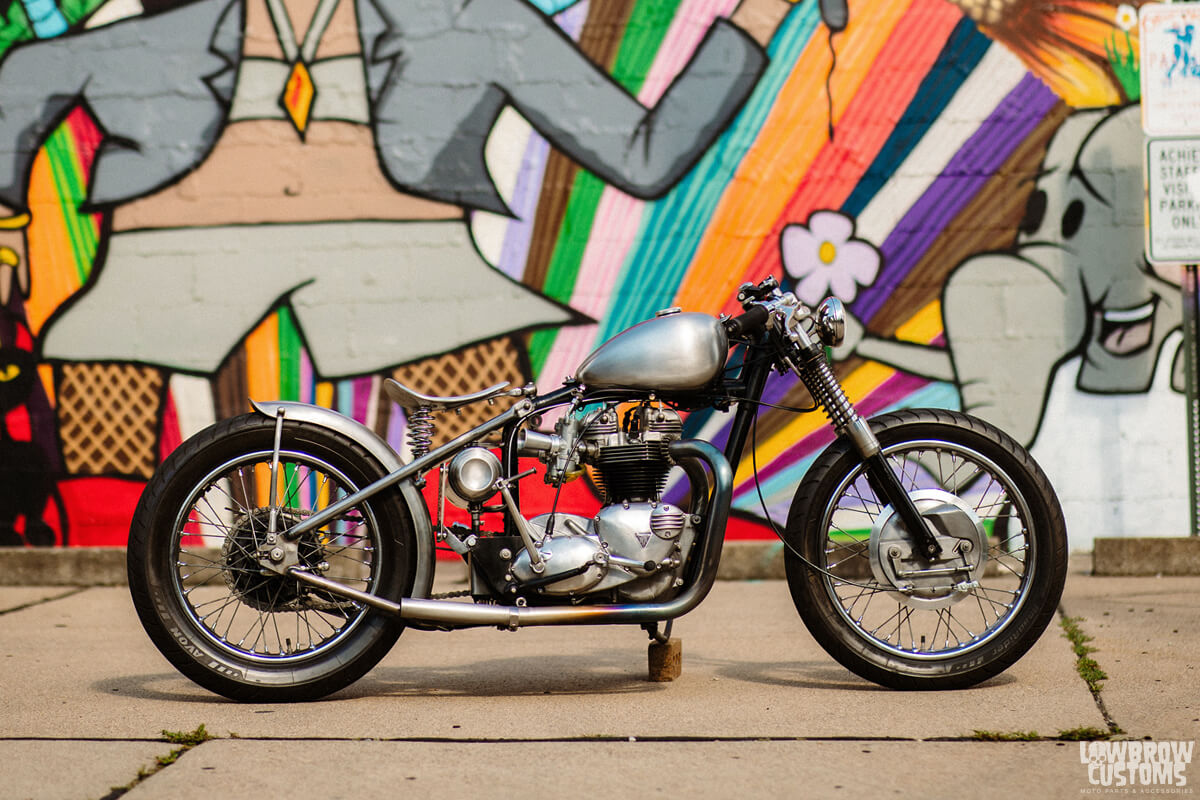
 Chopper or racebike or both?
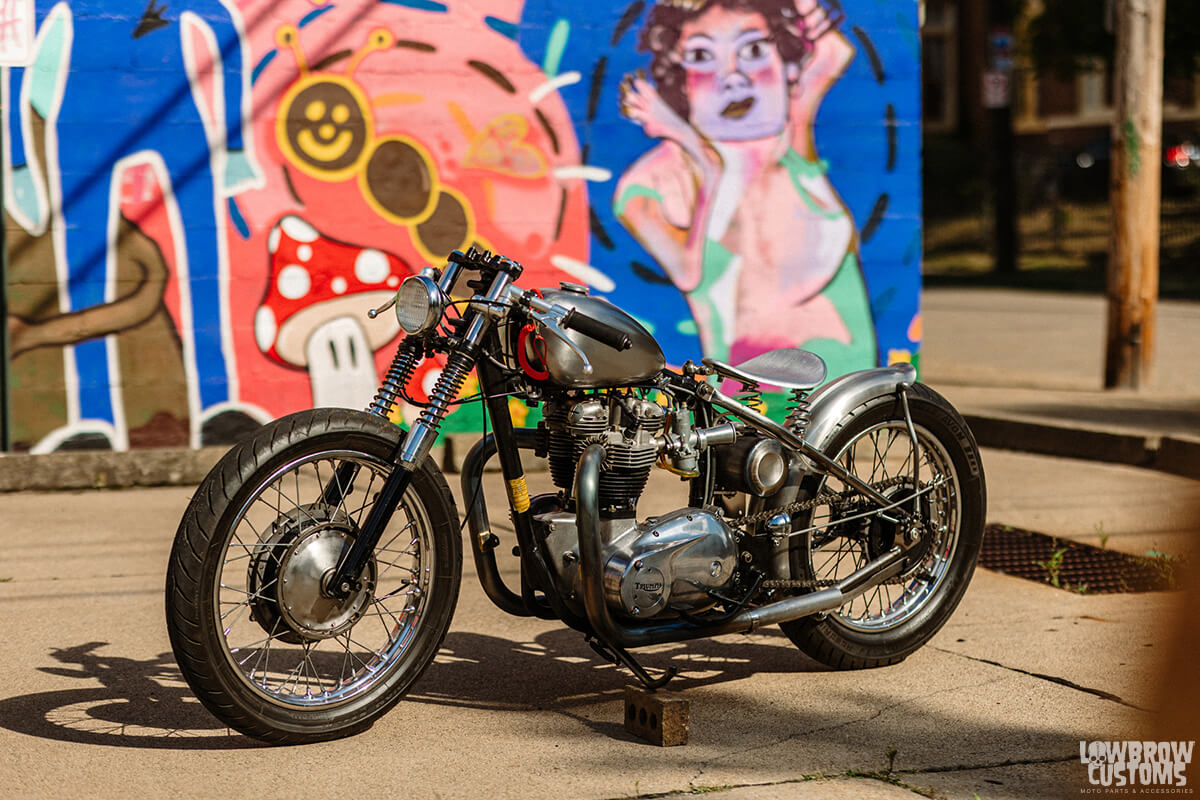 The beautiful thing about a bolt-on hardtail is you get to keep the stock front loop which has your vin, motor mounts etc. Keeps everything easy and legit.
 The raw finishes keep clean and rust free with some oil rubbed in every now and again.
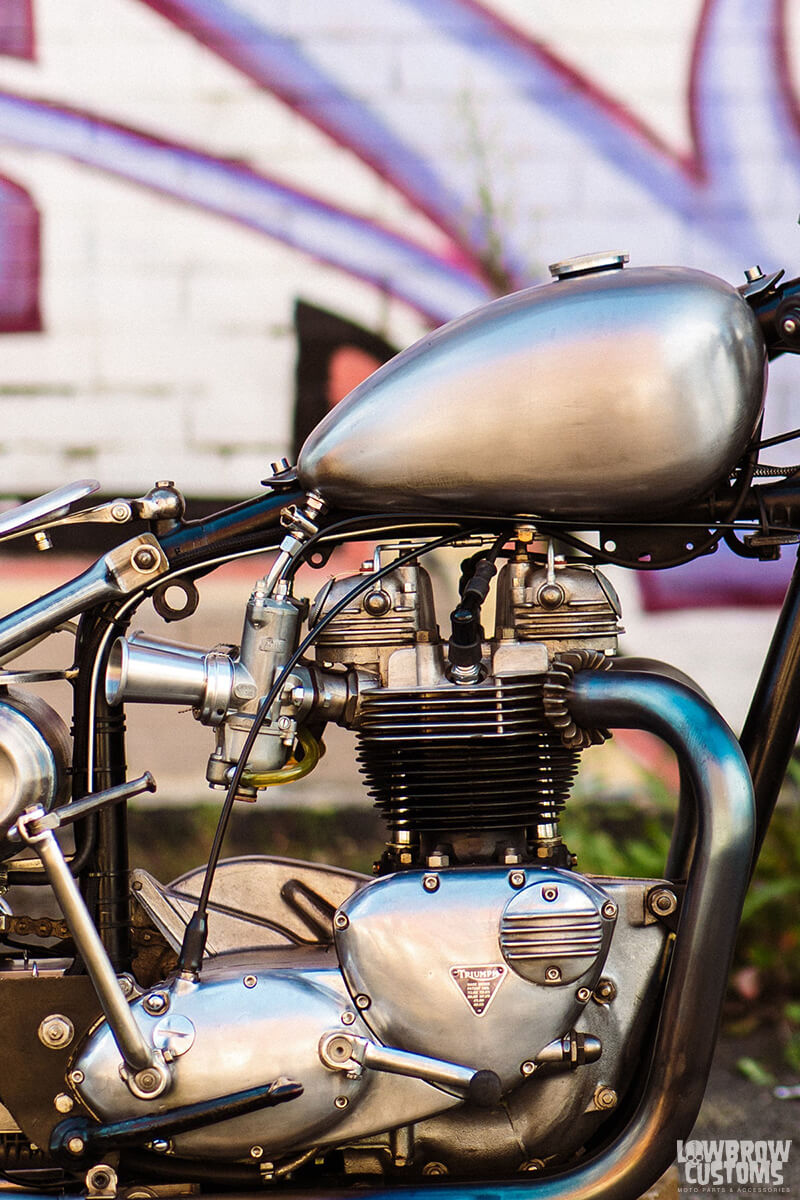 1968 Triumph 650 Unit motor
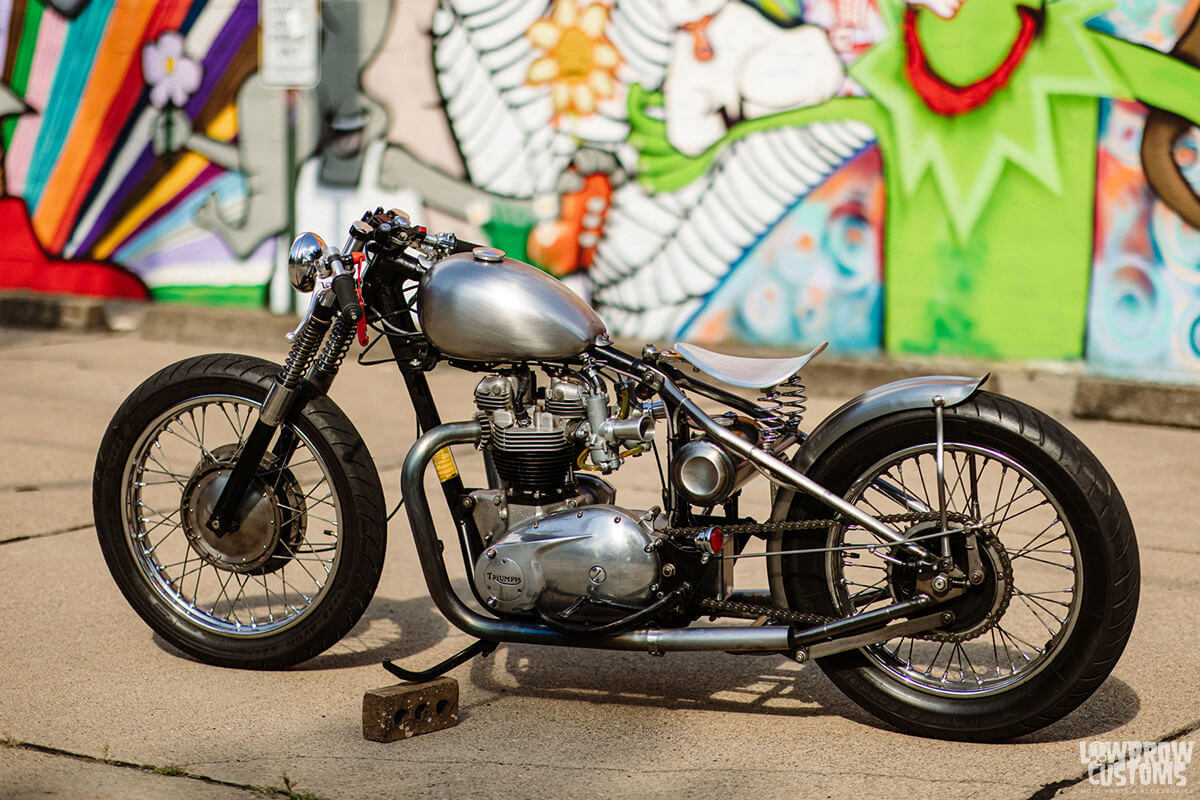
 "I have become the woman I was meant to be and still remain a passionate motorcyclist and gearhead. Being transgender and living my truth makes all of the other parts of my life more special." - Jessika
 Jessika and her 1968 Triumph rolling down the road.
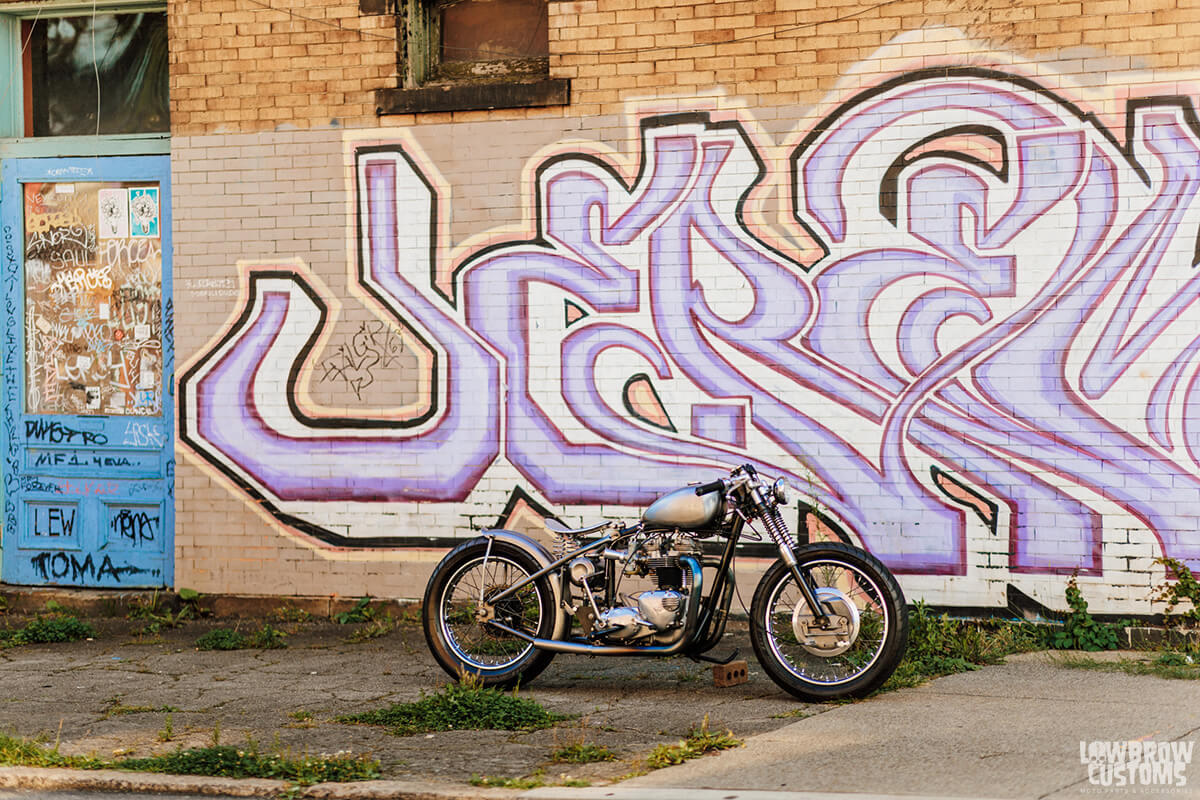 1968 Triumph T-120 Bonneville
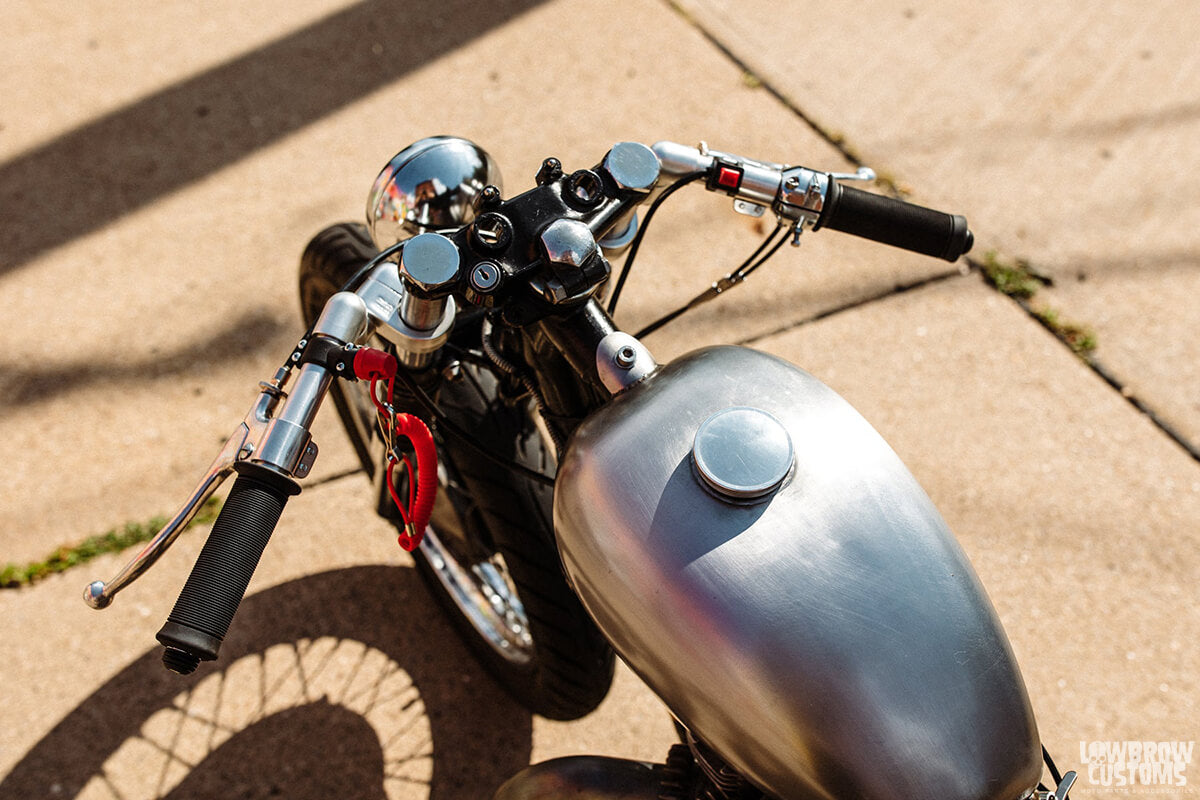 Clip-on bars are awesome from land speed racing. You can change the angles easily. Also has a tethered kill switch also common with land speed racing.
 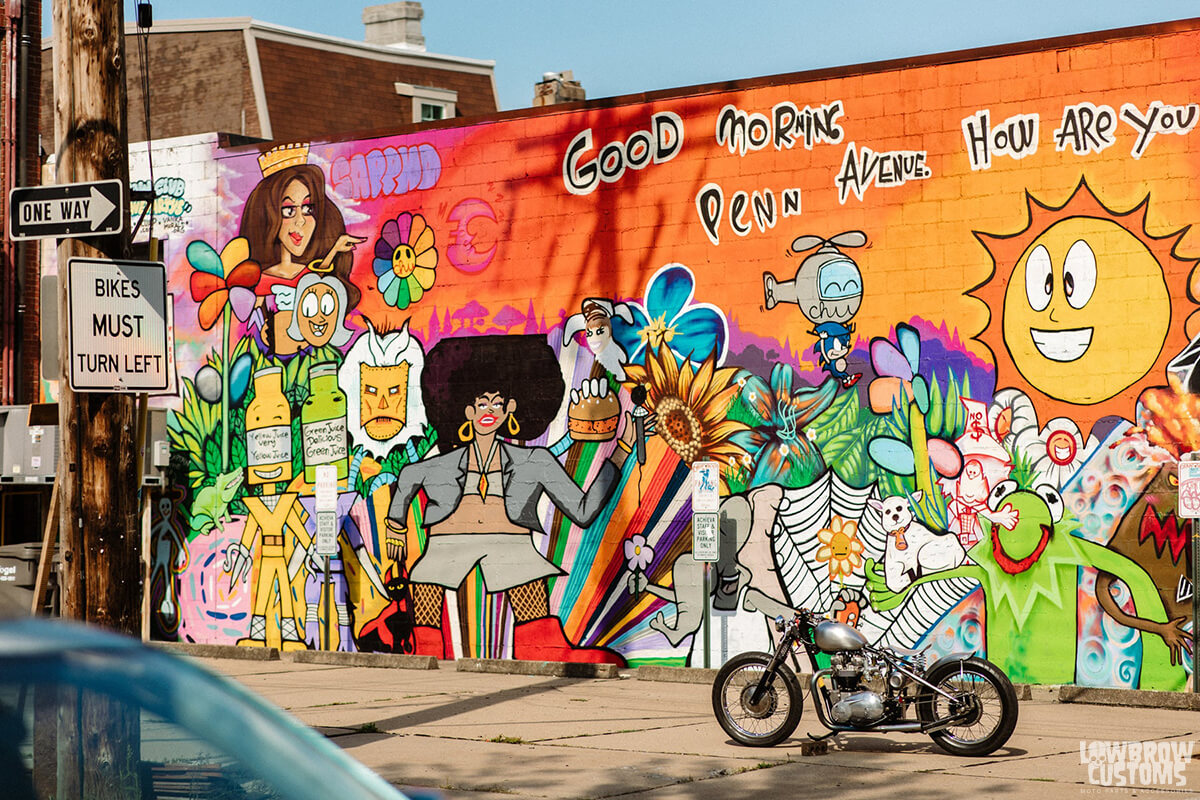 Shiny, bold, and just a really incredible build.
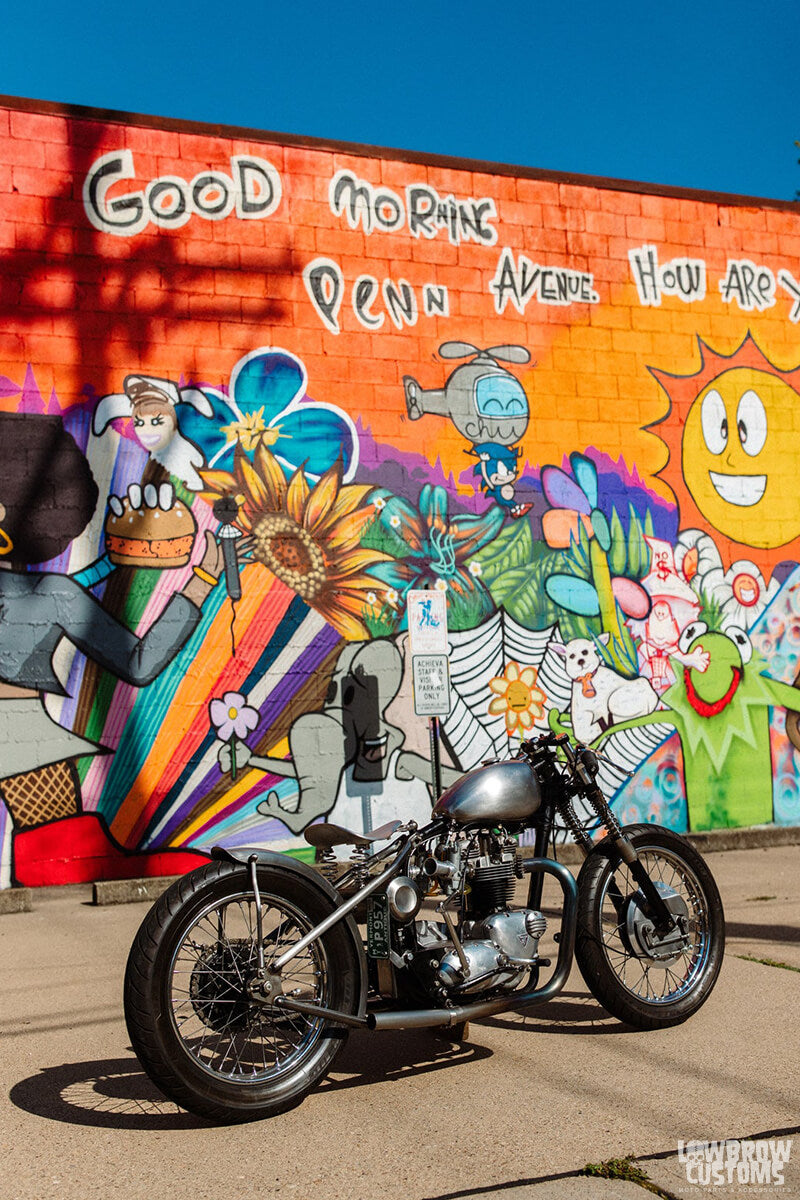 Avon tires.
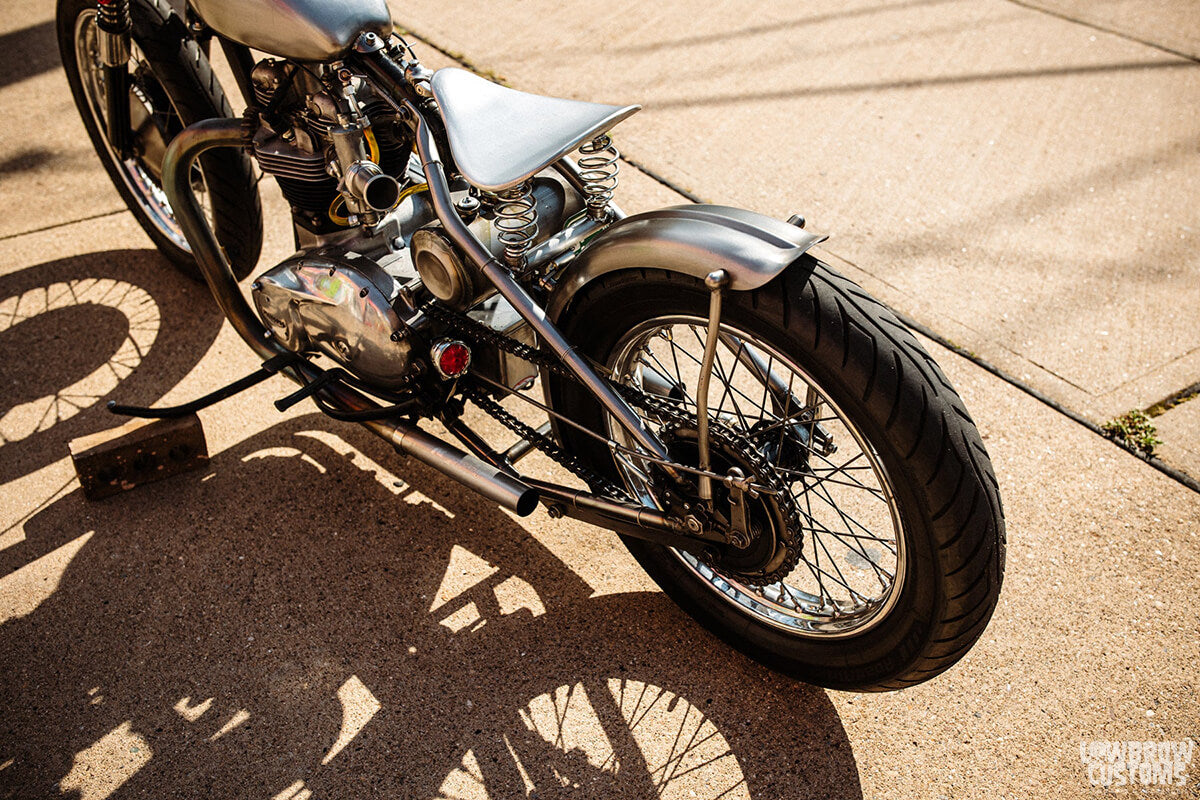
 A real good look at those forks.
 Lowbrow Customs
 Emgo Alloy Brake & Clutch levers.
 A clean and tidy engine, wiring and oil lines.
 Lowbrow Customs bolt on hardtail for Triumphs.
 Just a super clean and beautiful Triumph.
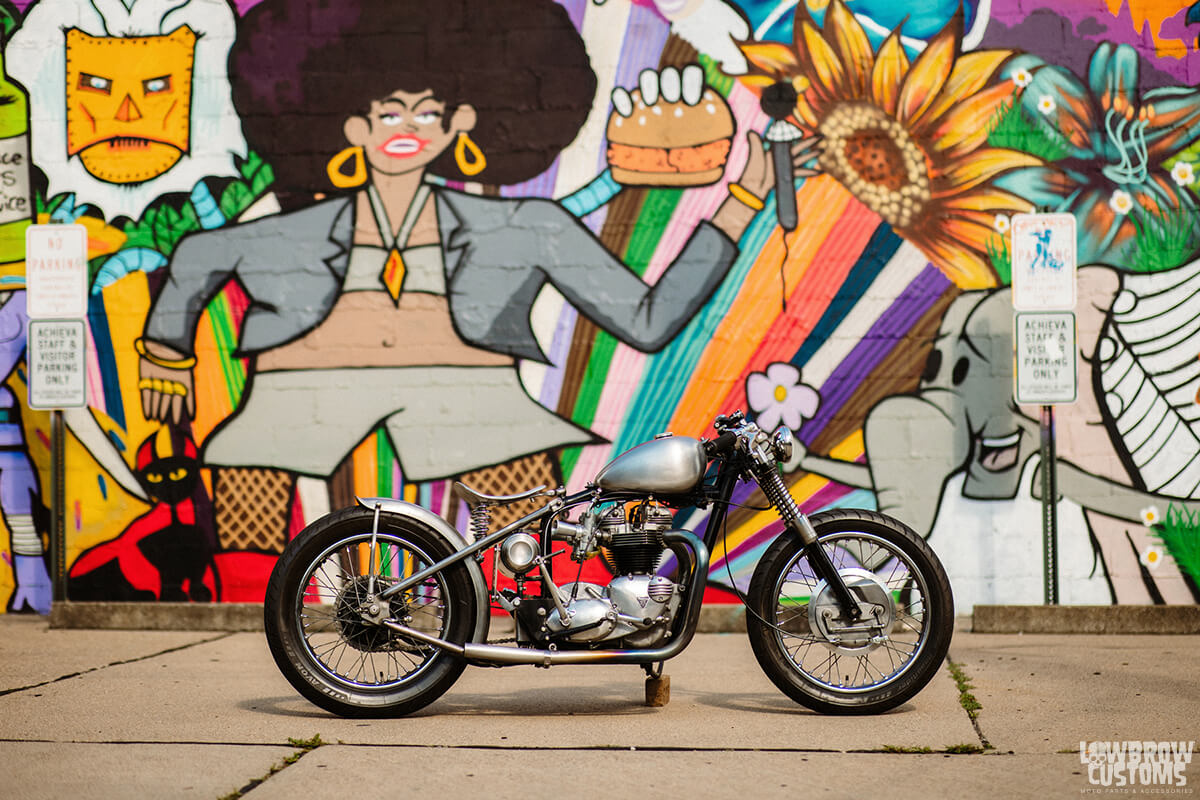 All class.
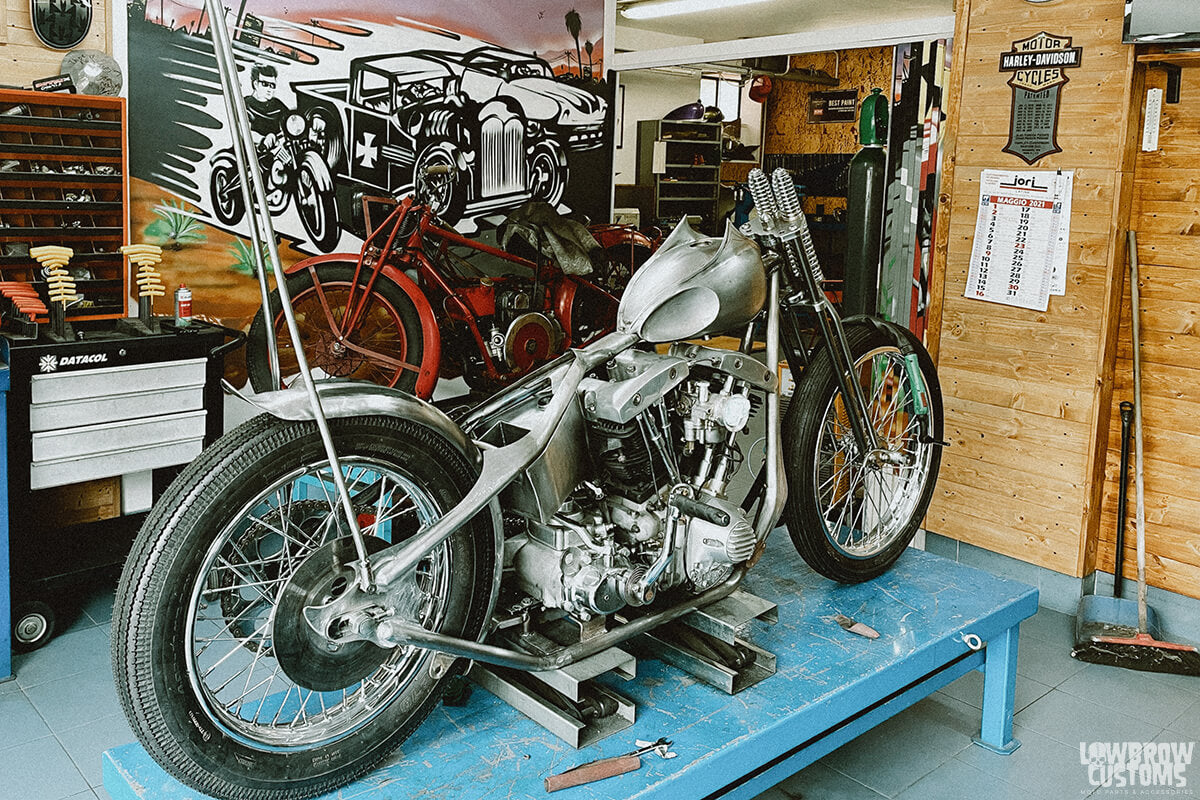
 Lorenzo testing out some bars and how the controls feel.
  Mirko Marinelli getting ready to install the oil tank.
  Installed an S&S oil pump onto the motor.
 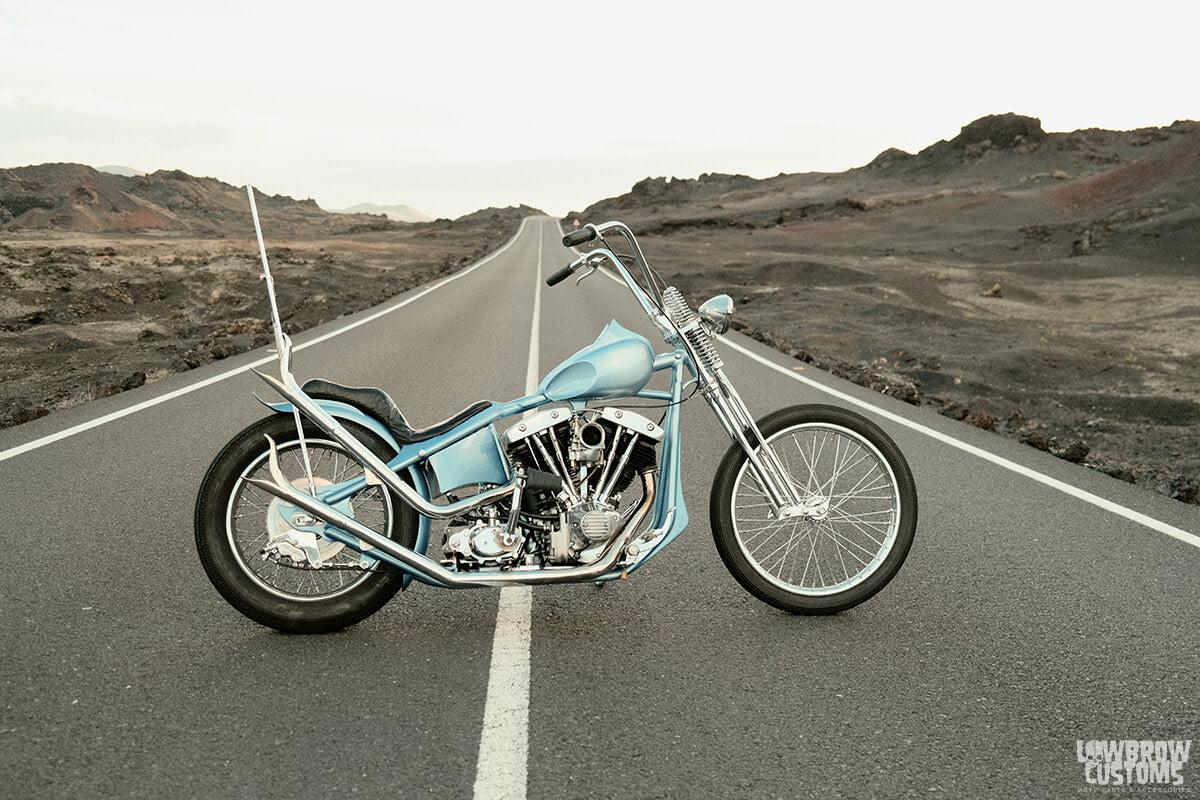 In the sun that blue pops into a teal.
 Rolling heavy in the Canary Islands.
 25,000 miles and still rolling strong.
  1340cc Harley-Davidson Shovelhead Engine. Photo by Mikey Revolt at Parts and Labor 2023 show.
  Look at all the metal molding on this frame, its insane. Photo by Mikey Revolt taken at Parts and Labor 2023 show.
 The handmade springer by Mirko is incredible. Photo by Mikey Revolt at the Parts and Labor 2023 show.
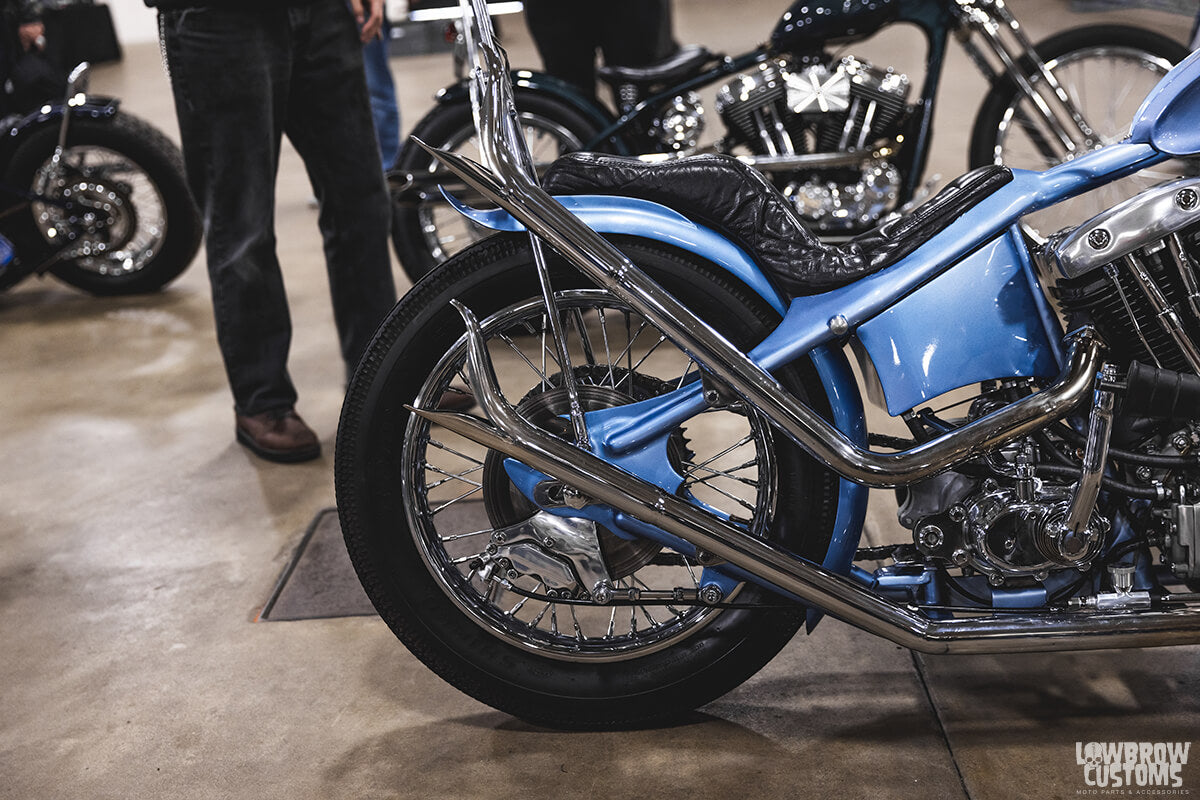 Rear wheel 18" with a Shinko Super Classic 270 Tire. Photo by Mikey Revolt at the Parts and Labor 2023 show
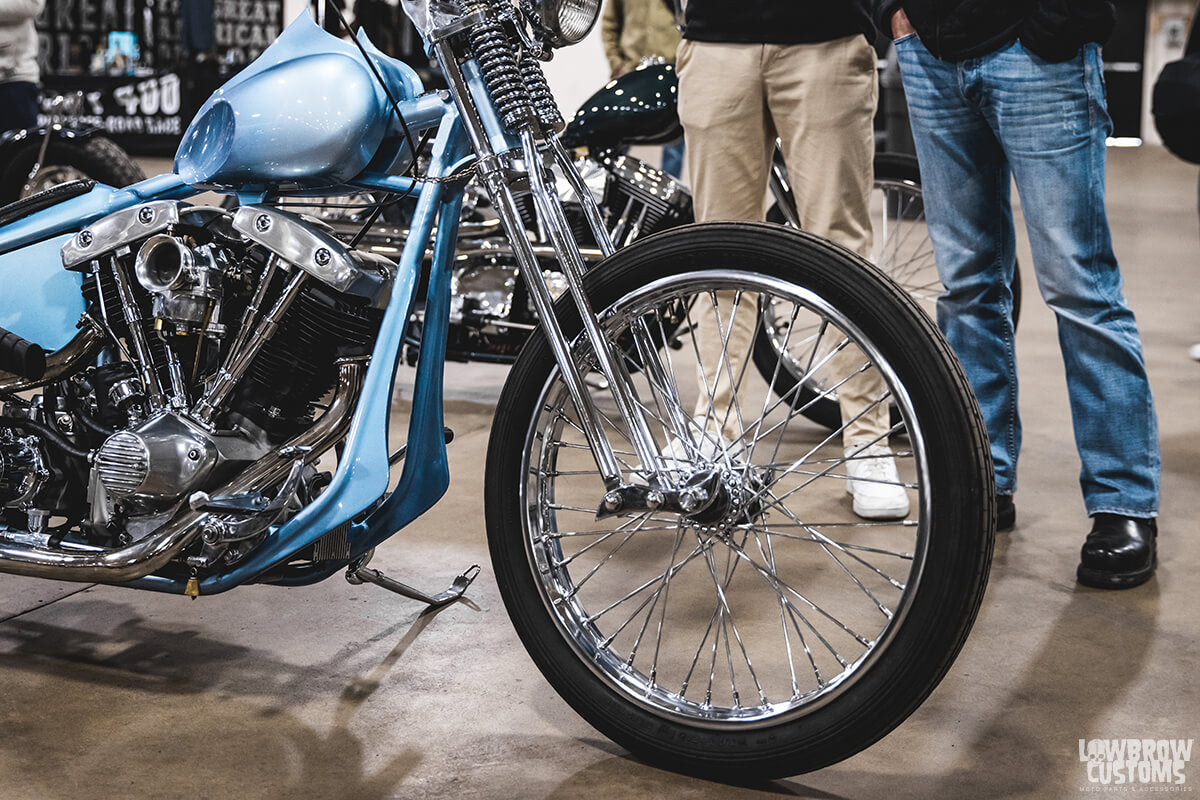 21" front wheel with a Avon Speed Master Tire. Photo by Mikey Revolt at the Parts and Labor 2023 show
 In the paint booth.
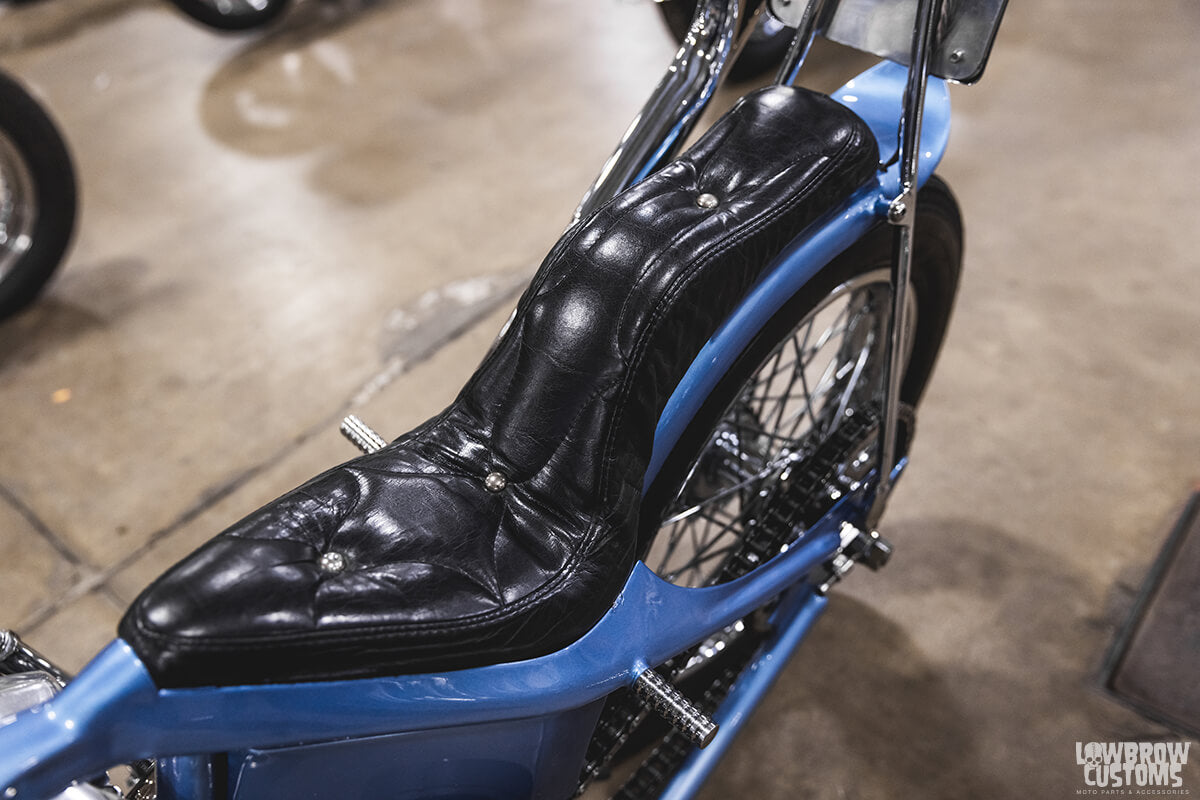 That custom made Italian leather seat, high class! Photo by Mikey Revolt at the Parts and Labor 2023 show.
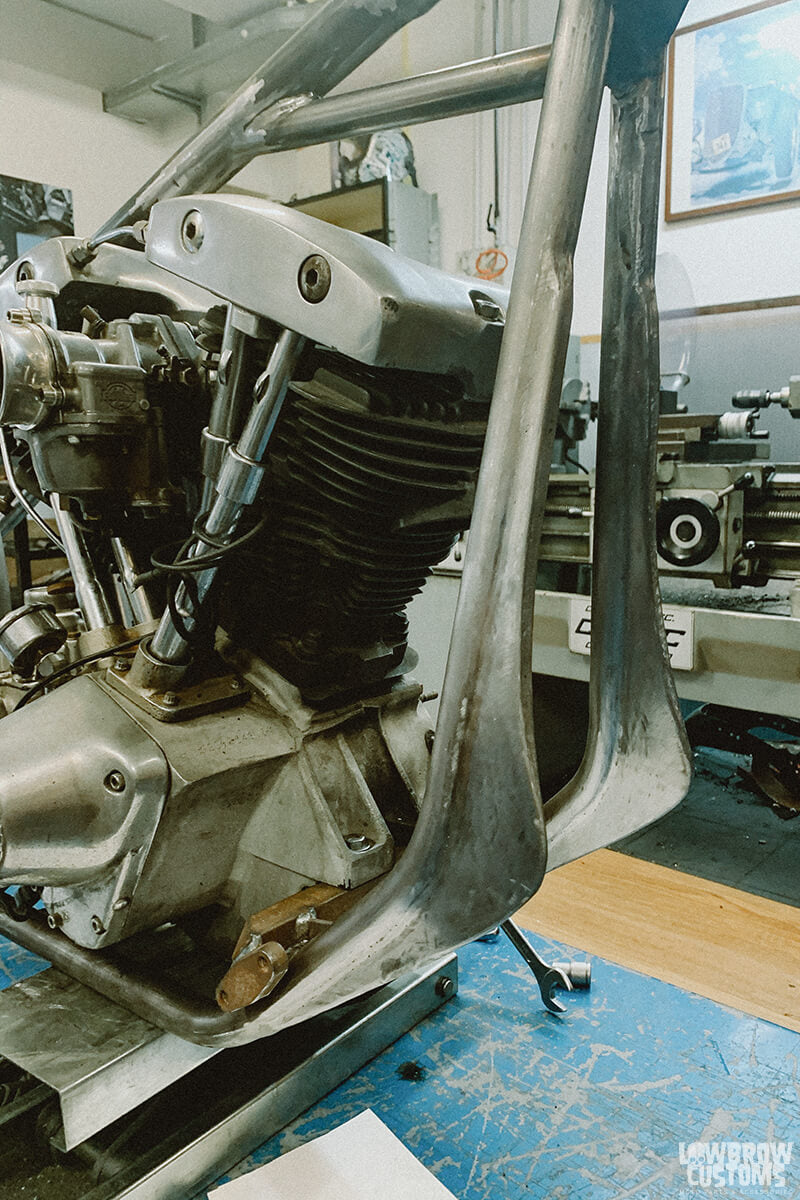 Prime example of how the whole frame was custom molded with metal.
 Custom made Wassel gas tank.
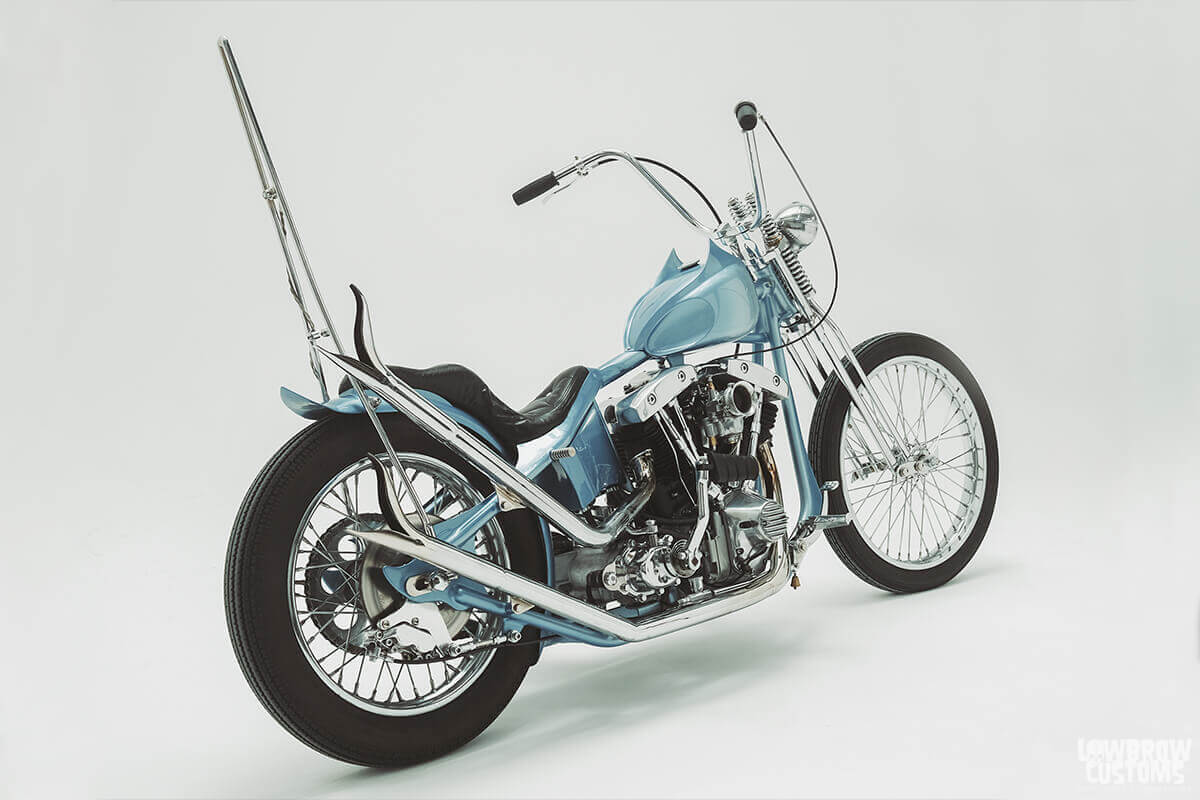 A rolling work of art.
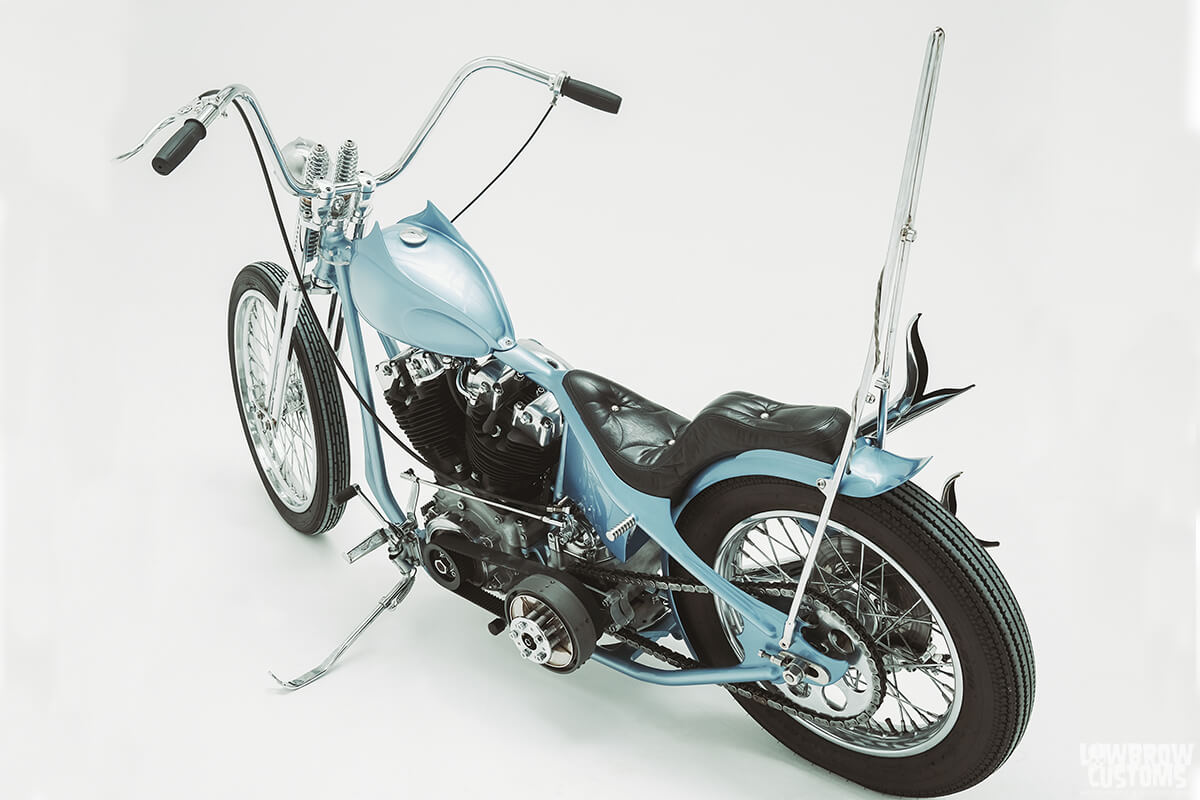 Theres no bad angles.
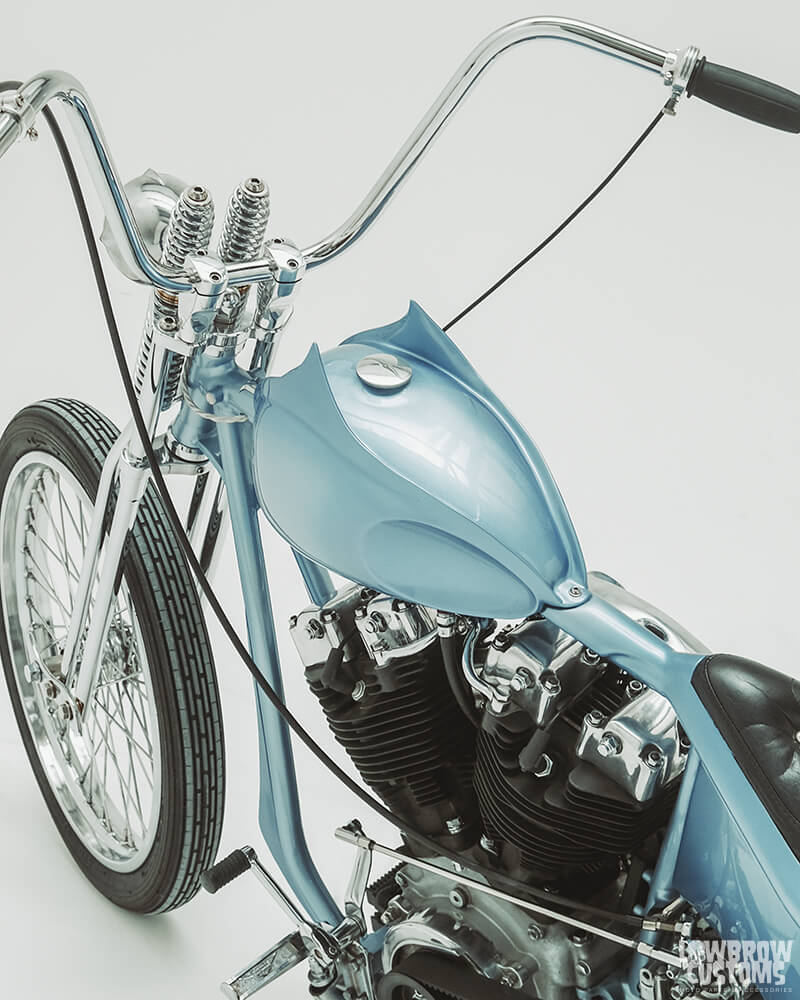 Extremely clean lines.
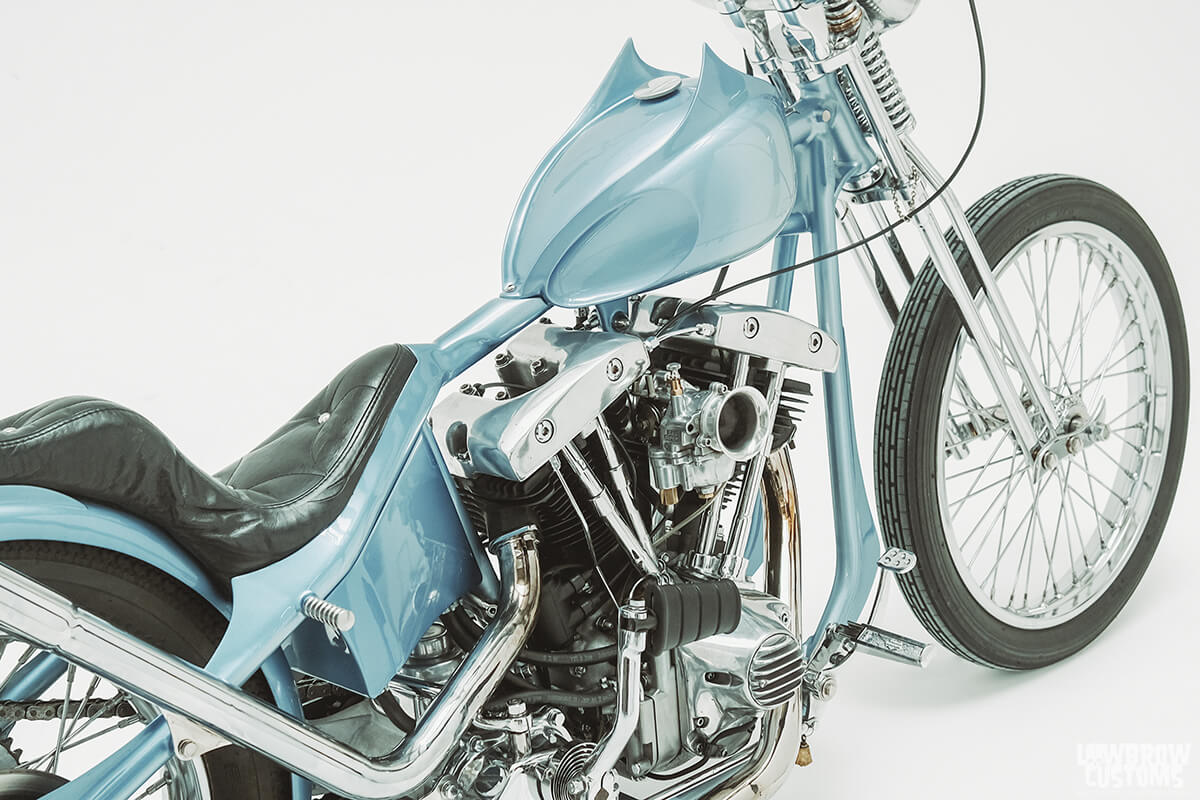 Seat fits perfect in the molding.
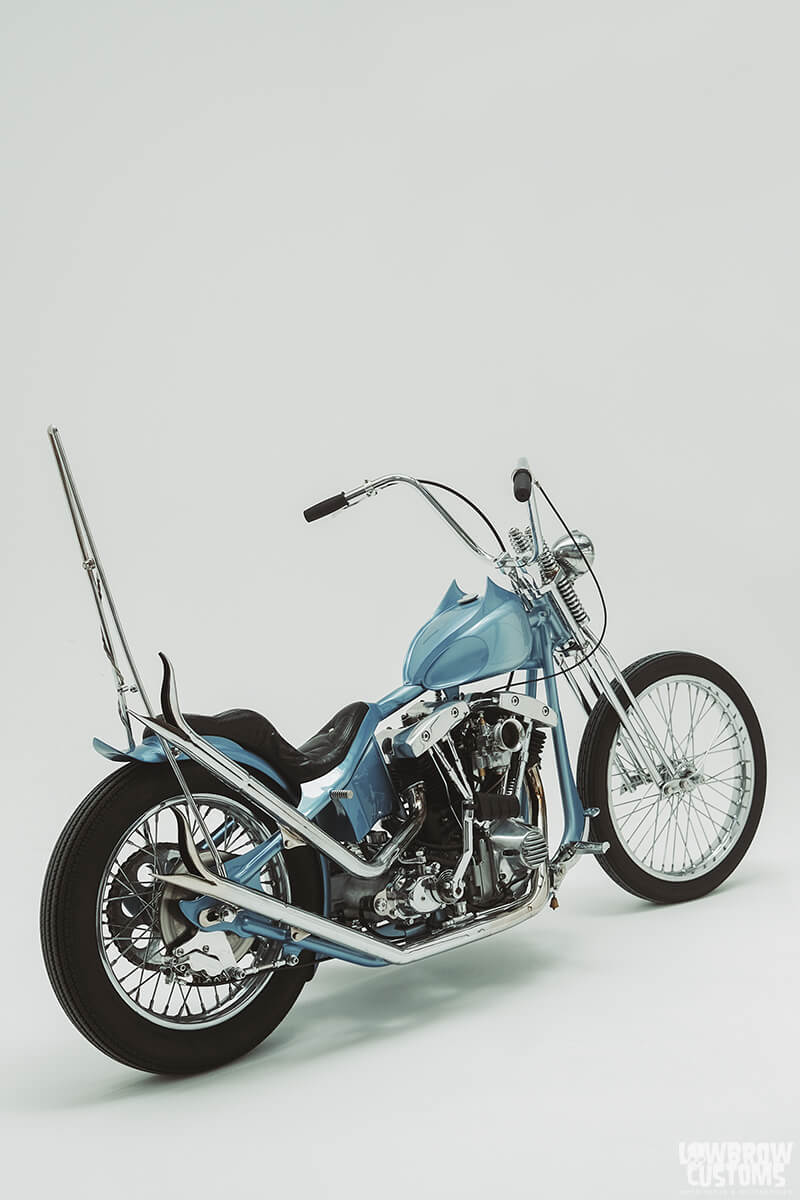 Snake bite exhaust tips just add to the flair of the rear fender and axle plates.
 Even with miles put down this beauty is clean.
 One kick, let'r rip.
 Golden hour with the Blue Haze.
 the tiniest tail light. Photo by Mikey Revolt
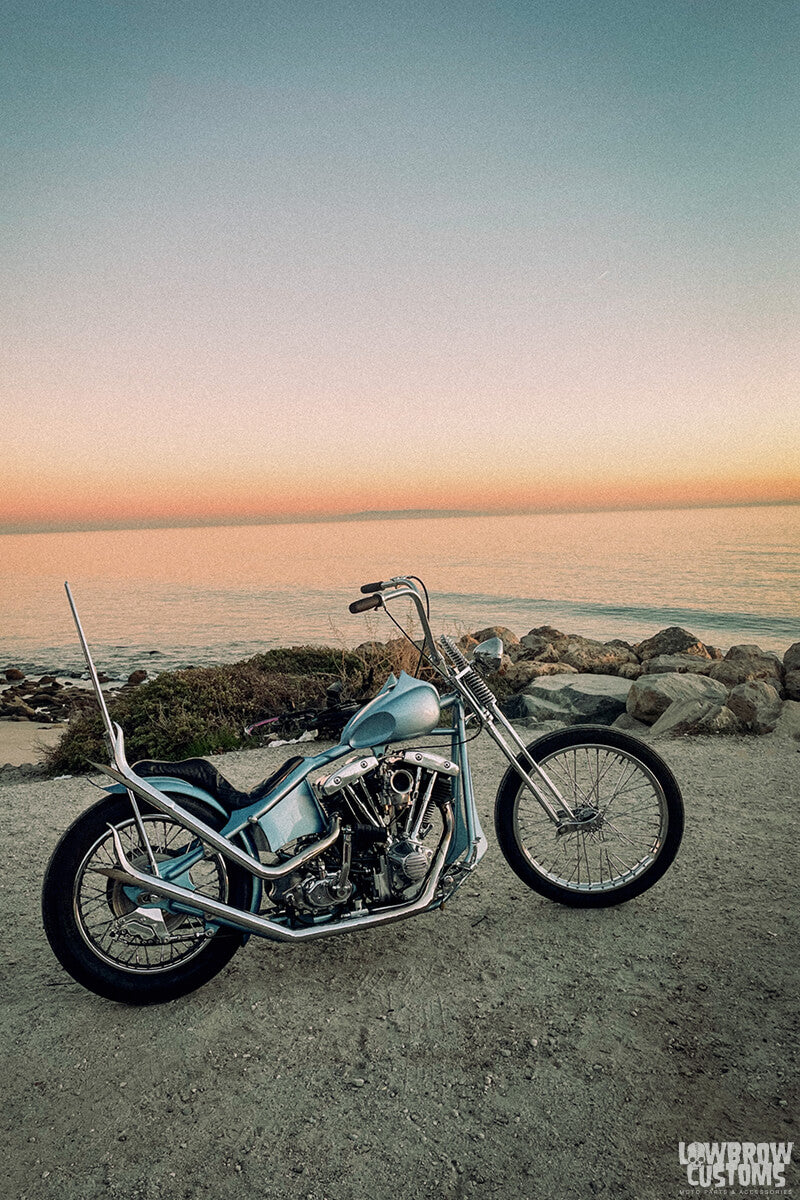 The coast of England.
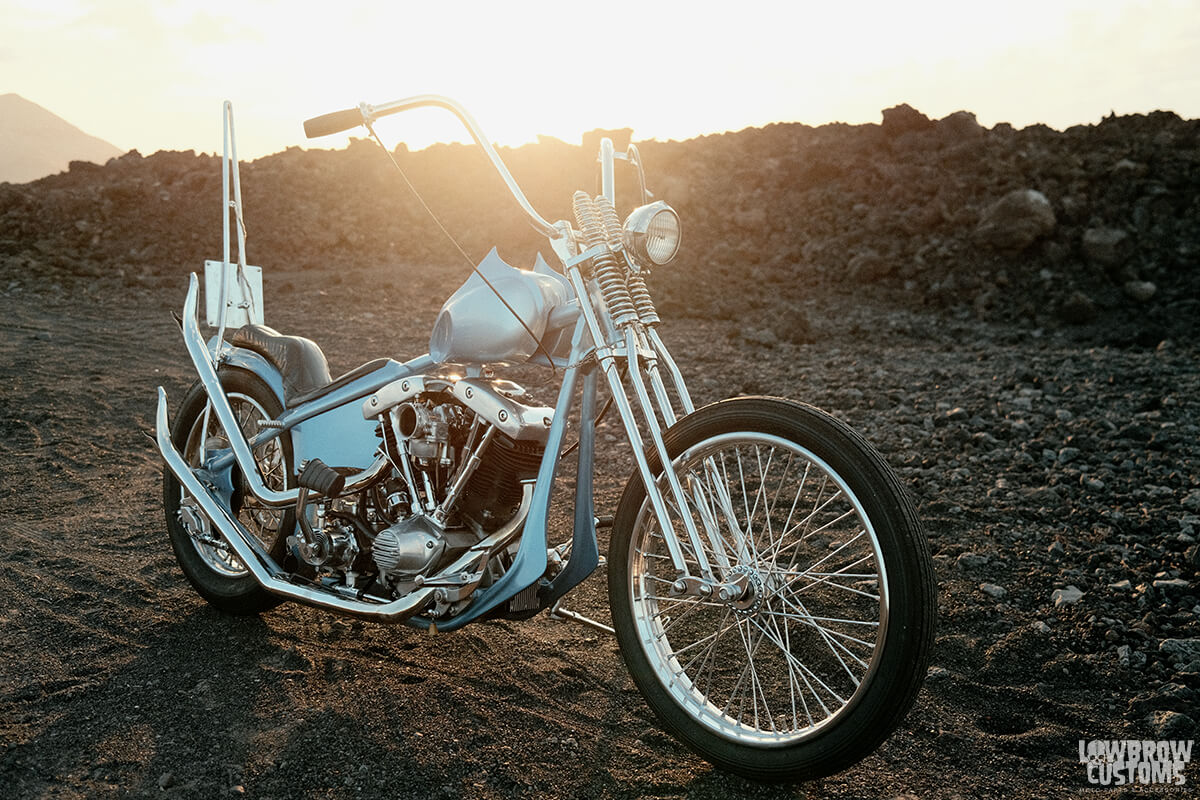 Glowing in the sunlight.
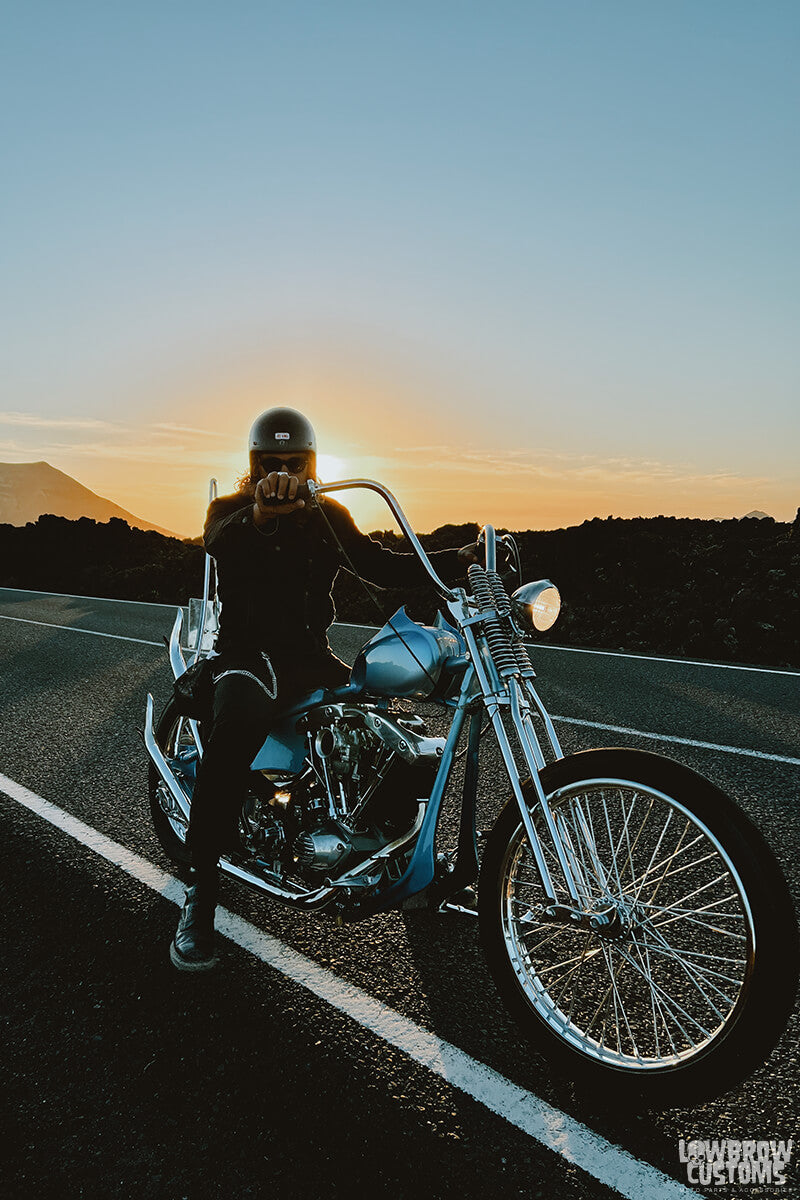 In the middle of nowhere.
 Seeing the vast nothingness.
 Bill Rolling to his house on his 1948 Harley-Davidson Panhead.
 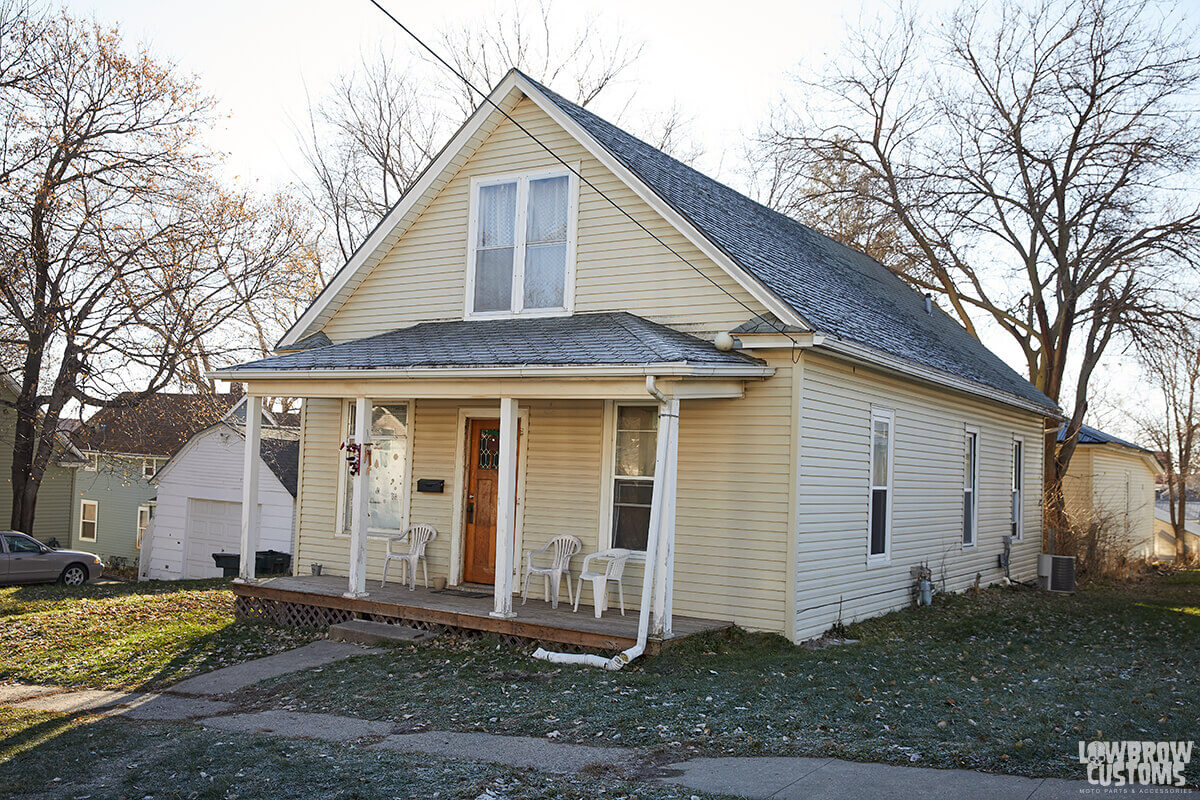 Bill's house
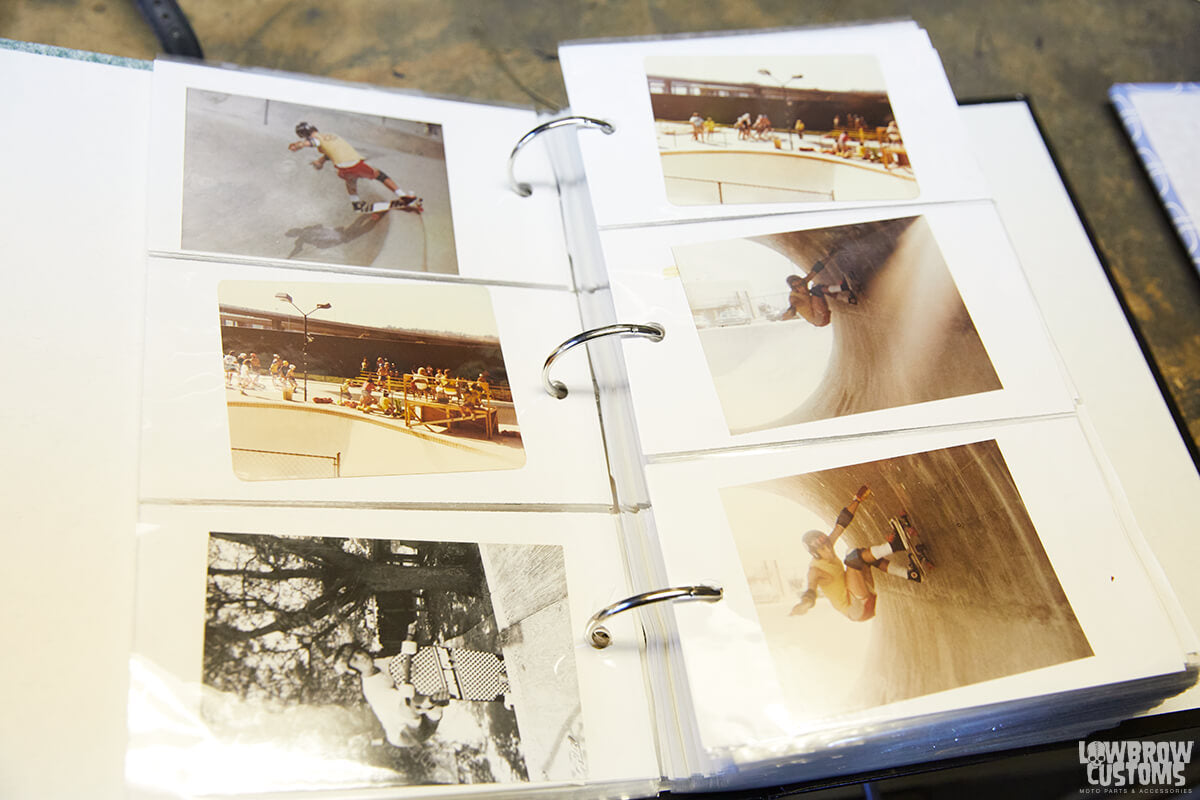 Some skateboarding photos of Bill when he was a kid in an old album.
 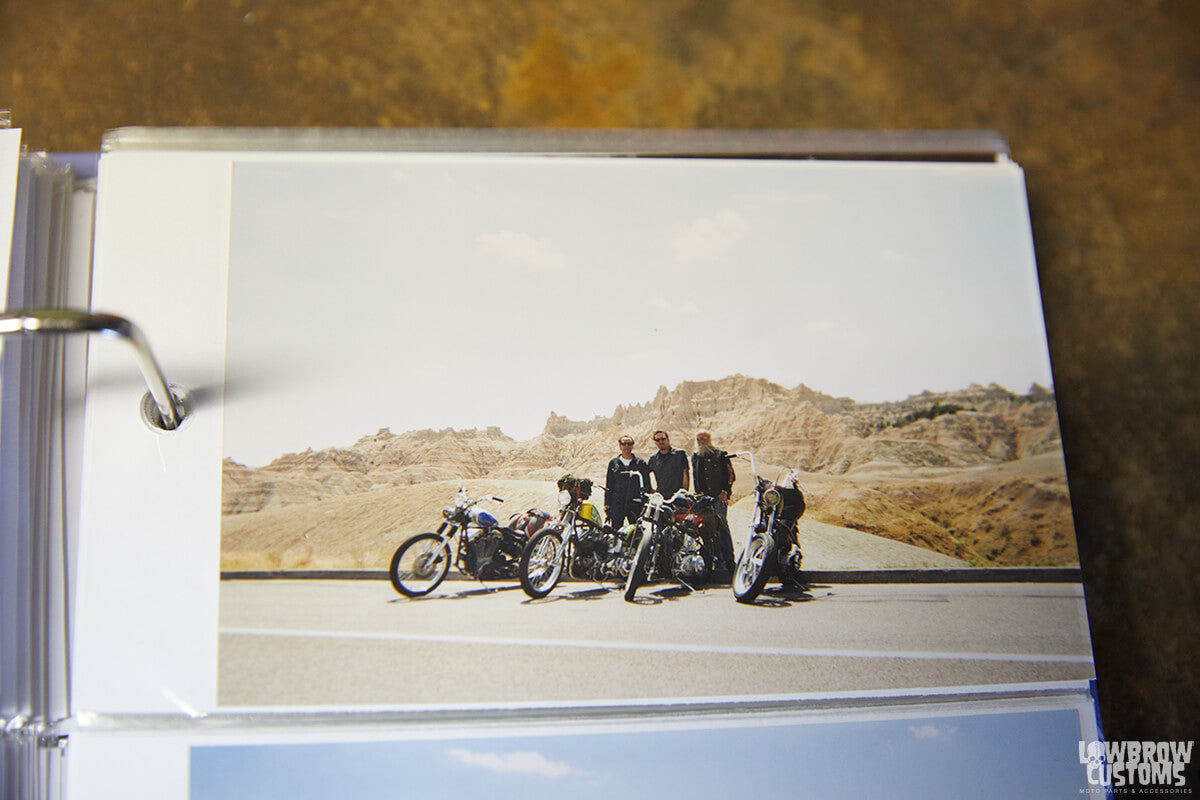 Bill with a friend and Tom Fugle on thier way to Sturgis.
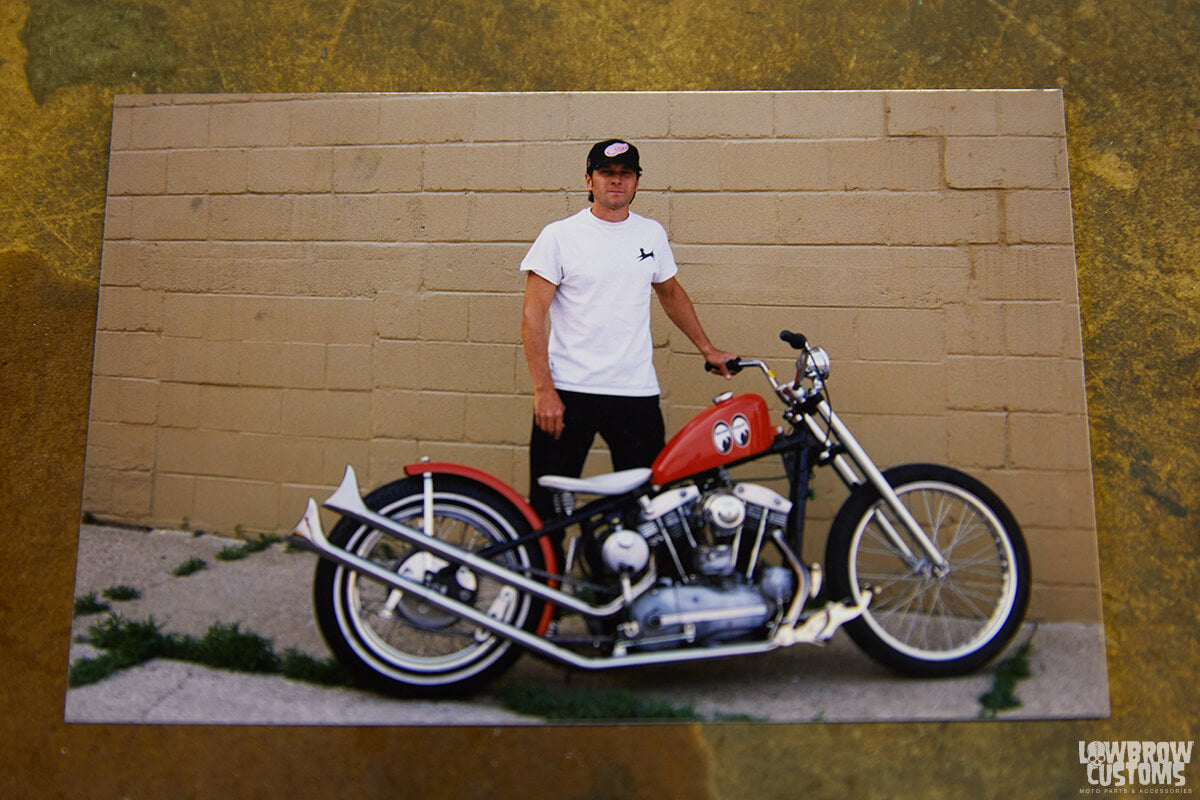
 Bill in front of where Tom Fugle's house once was telling a story of something that happened in the street.
 A cool photo of Tom in one of Bill's old albums chillin at a gas station having a full throttle.
  The small garage under Bill's house.
 A really great photo of Bill racing.
 Bill in the back corner of his garage.
  David Mann's shades!
 Bill and his wife Mollie.
  Bill and Mollie have some really nice Mid-century pieces.
 Tom in the badlands.
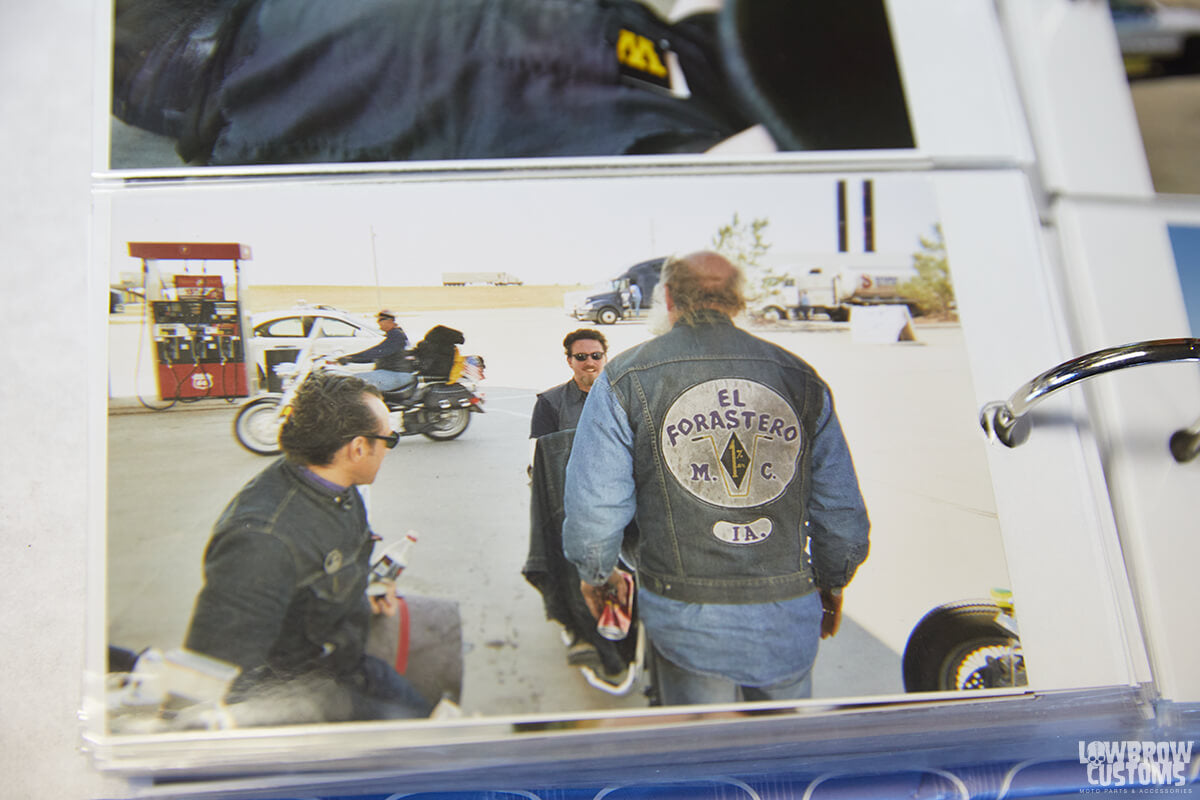 Tom was the founder of the El Forasteros.
 Bill at HRCS in Yokohama in 2006 with his Panhead chopper.
  Here's another Ironhead Sportster build by Bill.
 Another shot of the green Panhead that got to go to Japan.
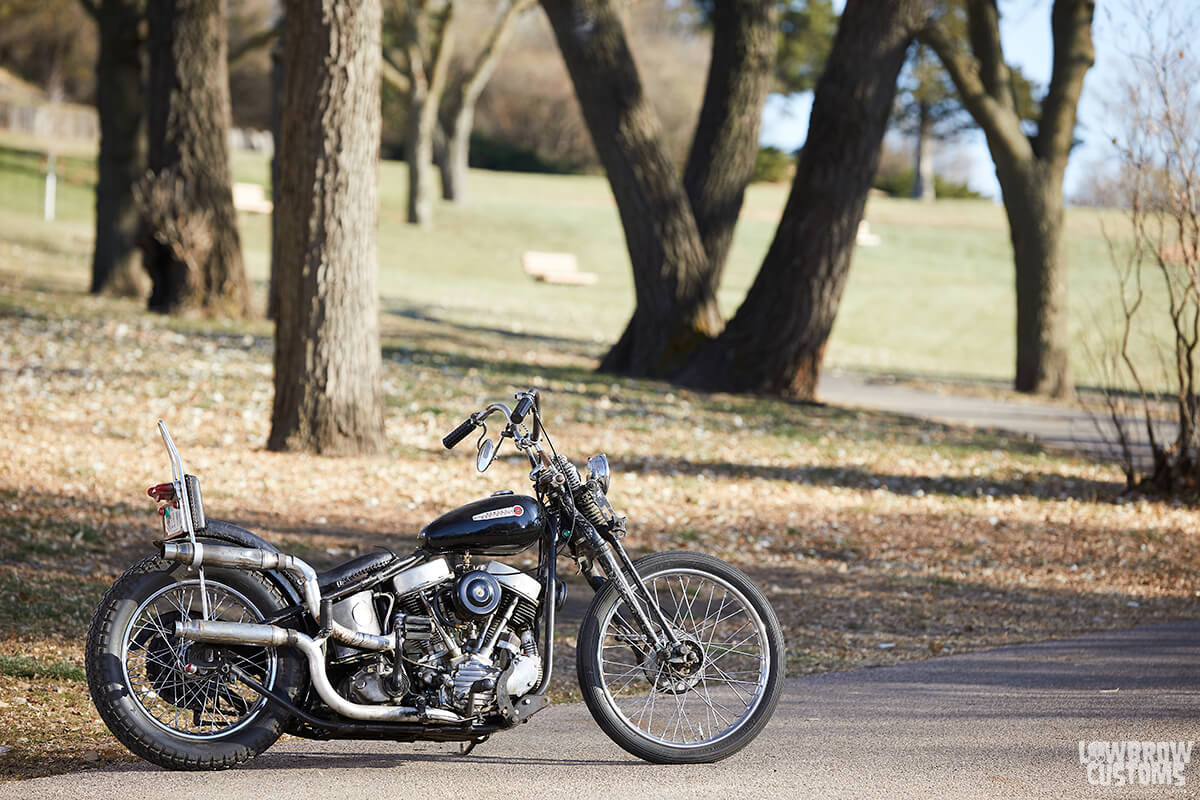 Bill's 48FL
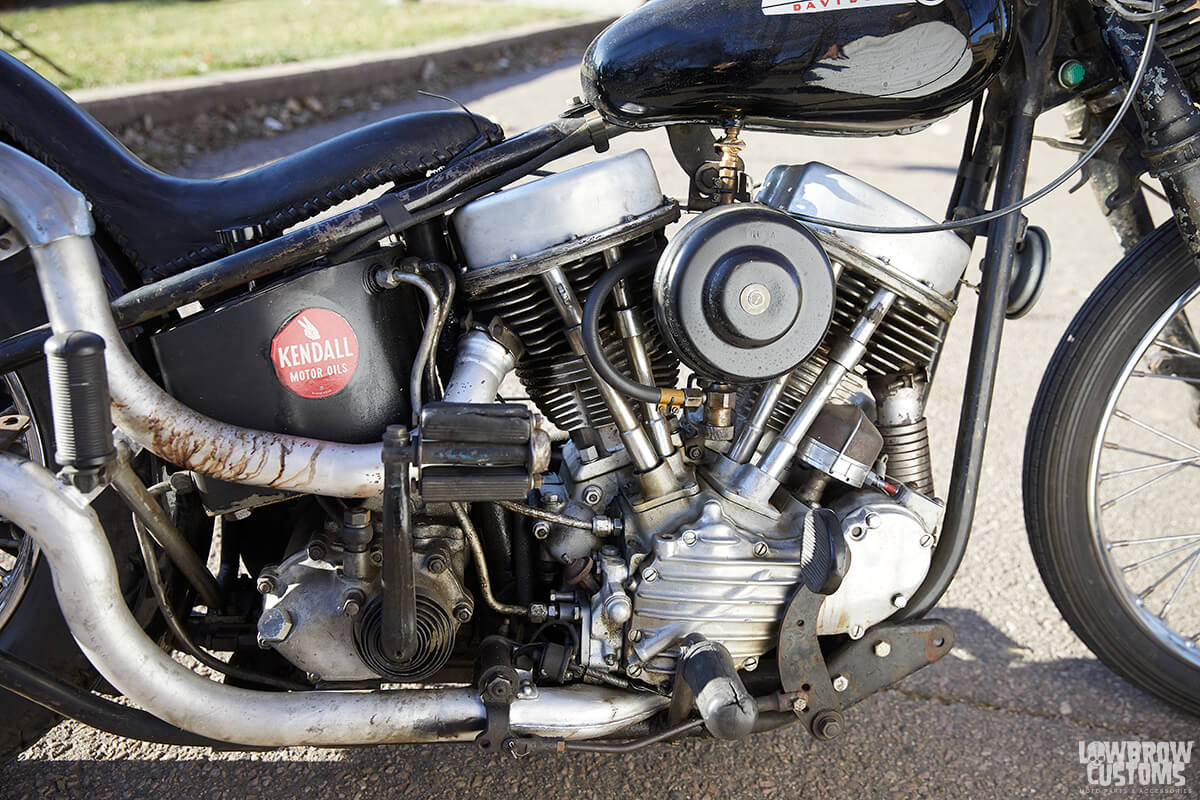
 That skinny seat.
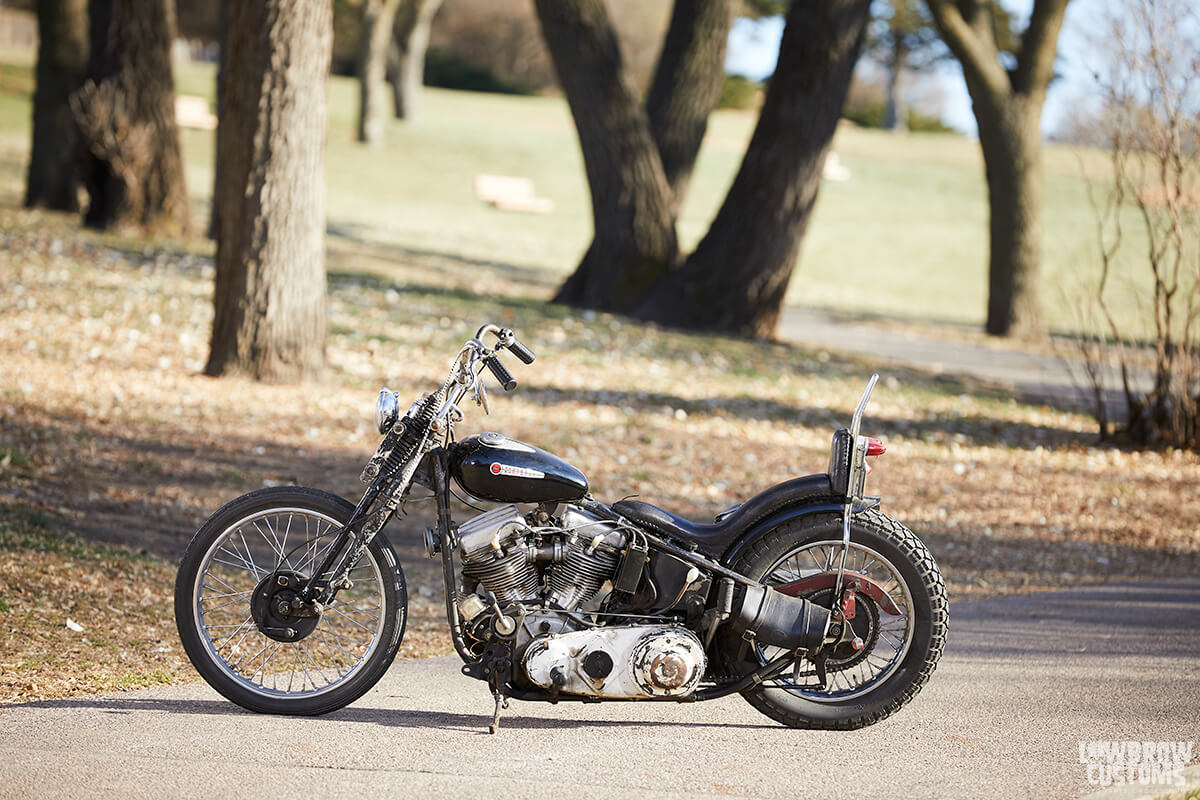 In the past 30 years, Bill built many different HDs. Where he arrived was the black Panheads in a wishbone frames.
 Near Tom Fugle's old school.
 Simple and classy
 Very clean and the styling is on point.
 Those split tanks are really doing it for this bike.
 Front end.
 You guessed it another 48 panhead.
 Two into 1 high pipe.
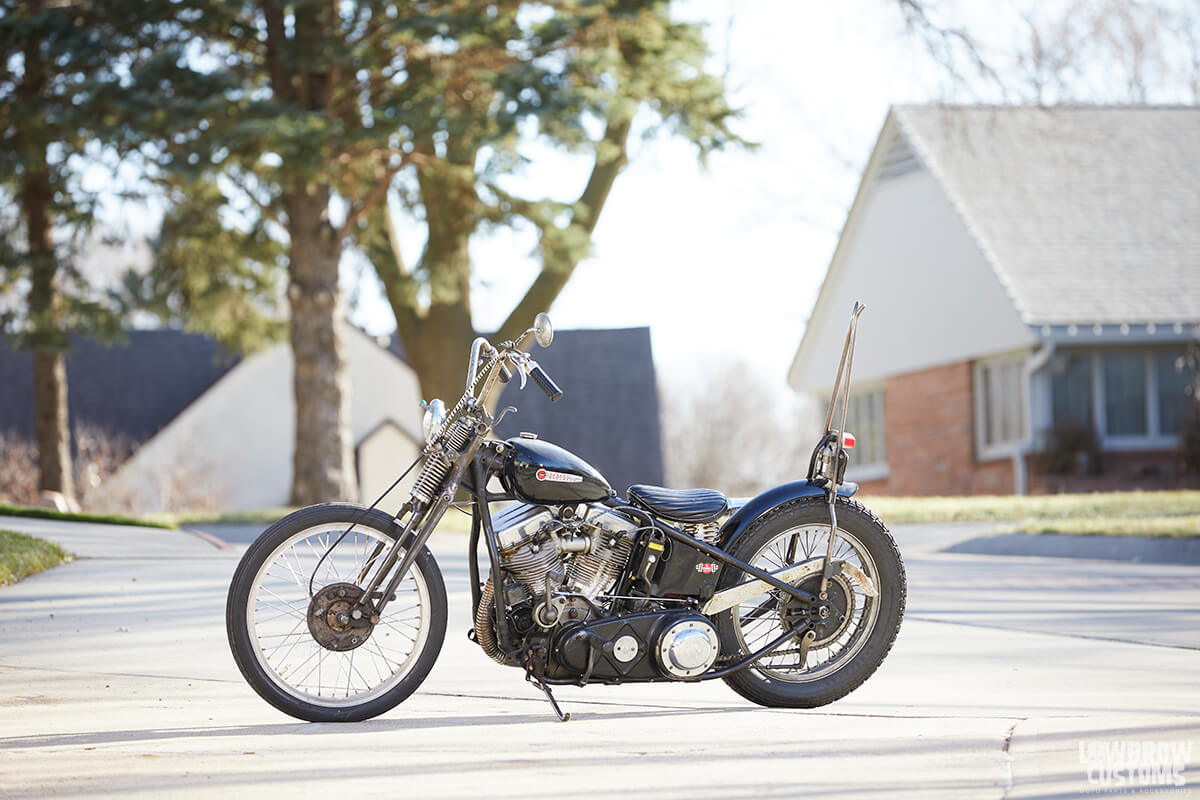 Each Panhead a little different then the last, its own flair, and its own iconic look.
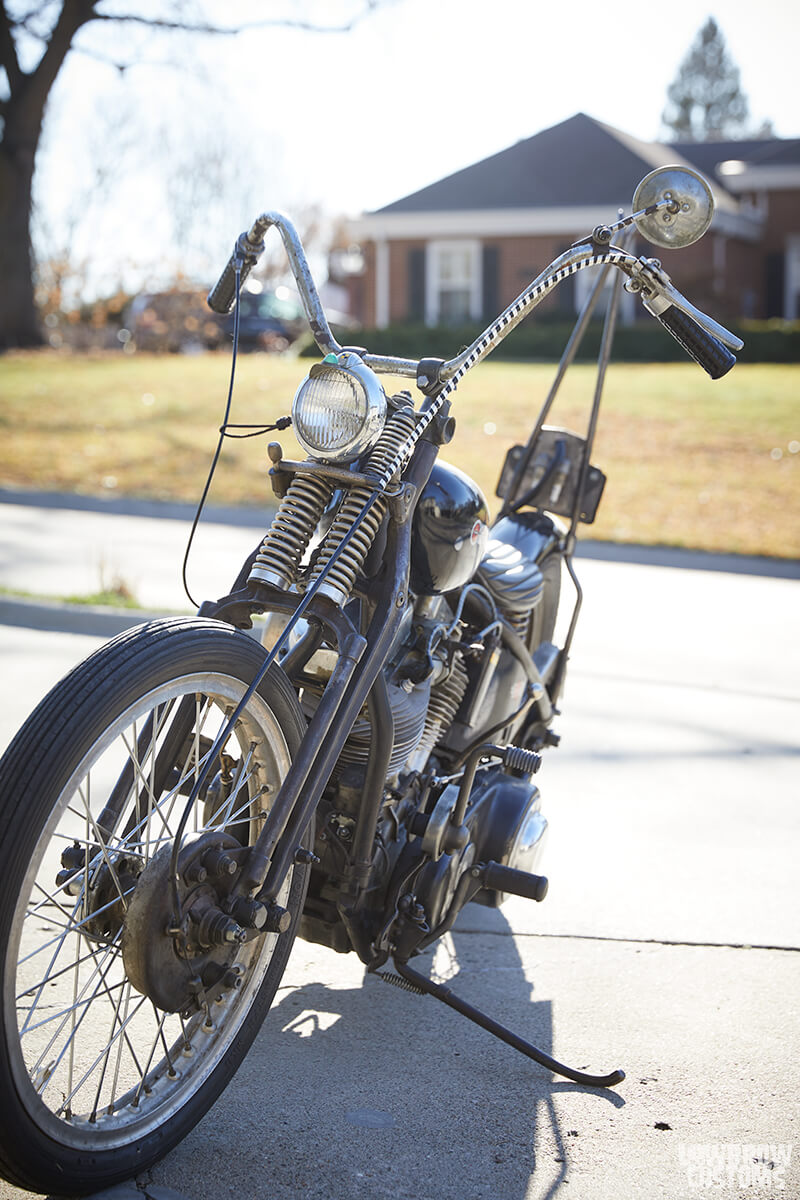 Crusty in all the right places.
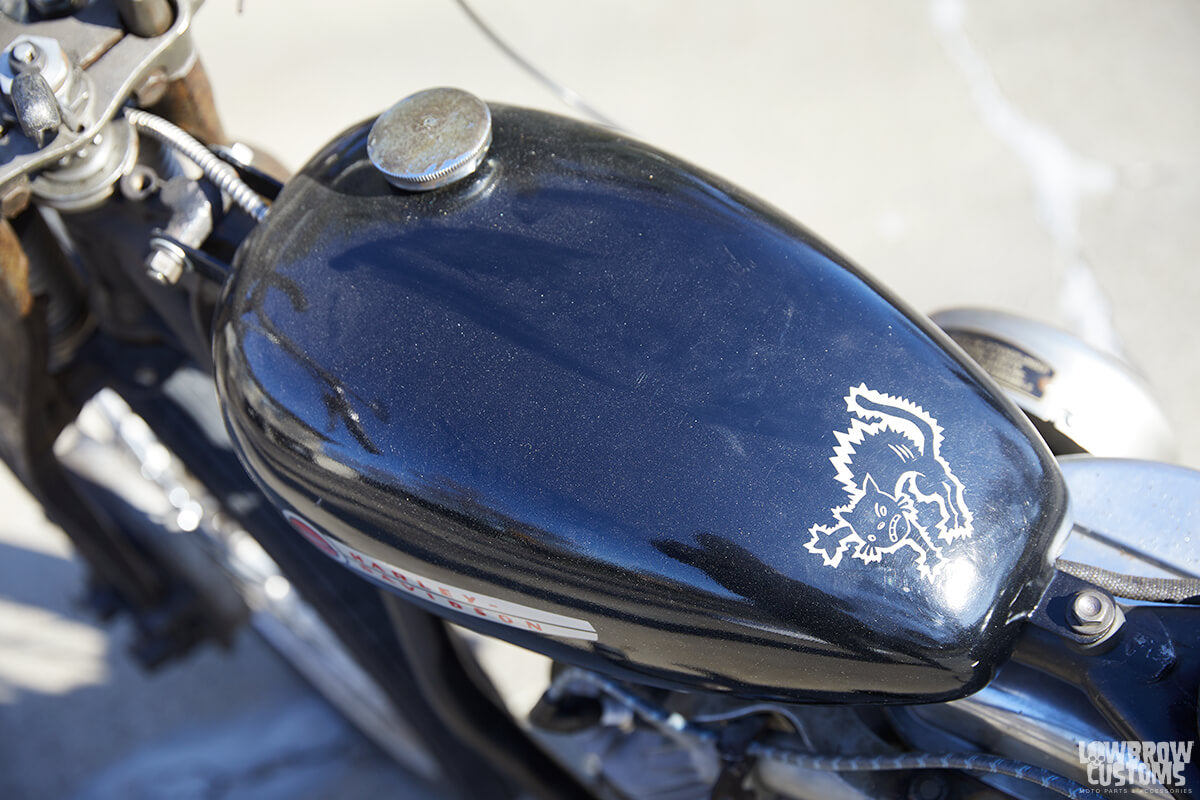 Bill's gotta thing for cats.
 Doing it before anyone else.
 One kick and let'r rip.
 All original paint.
 Just an incredibly beautiful stock Panhead.
 Runs like a top.
 even has the OG warning label.
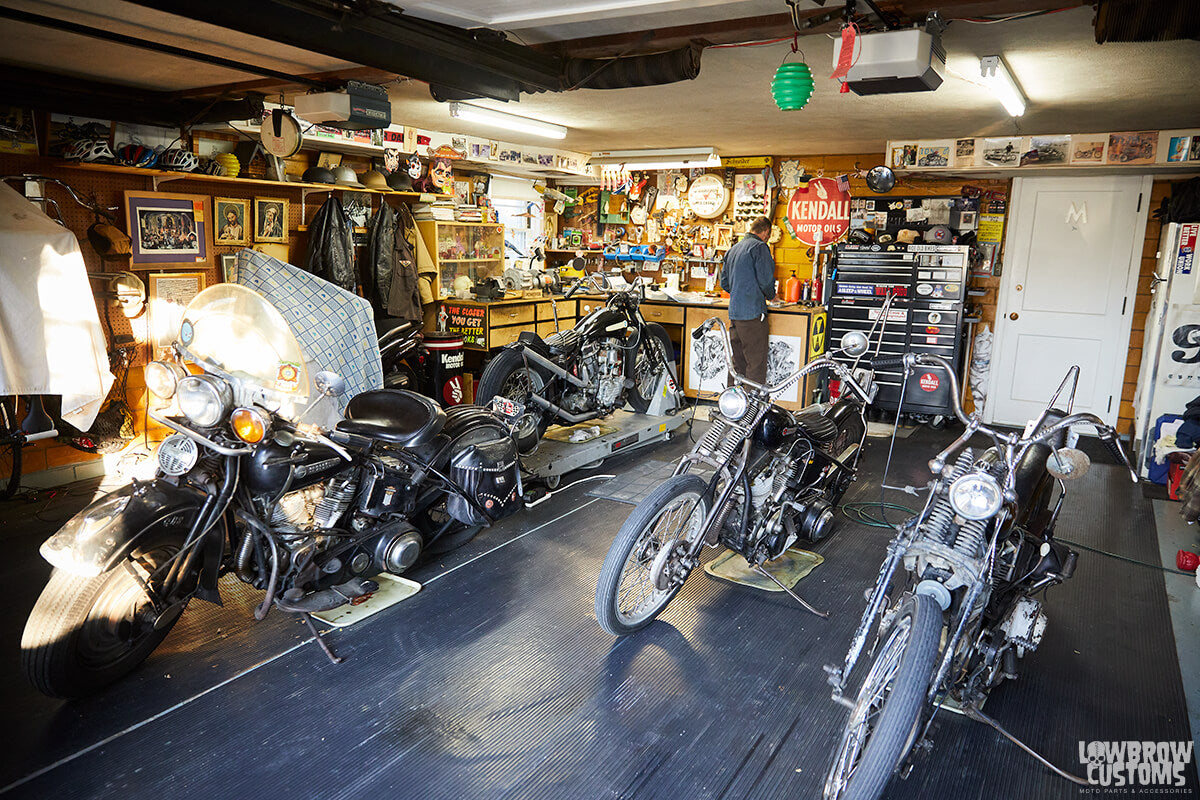 What looks like a small garage outside, is spacious enough to hold all 4 of Bill's 48's and he still has room to add some.
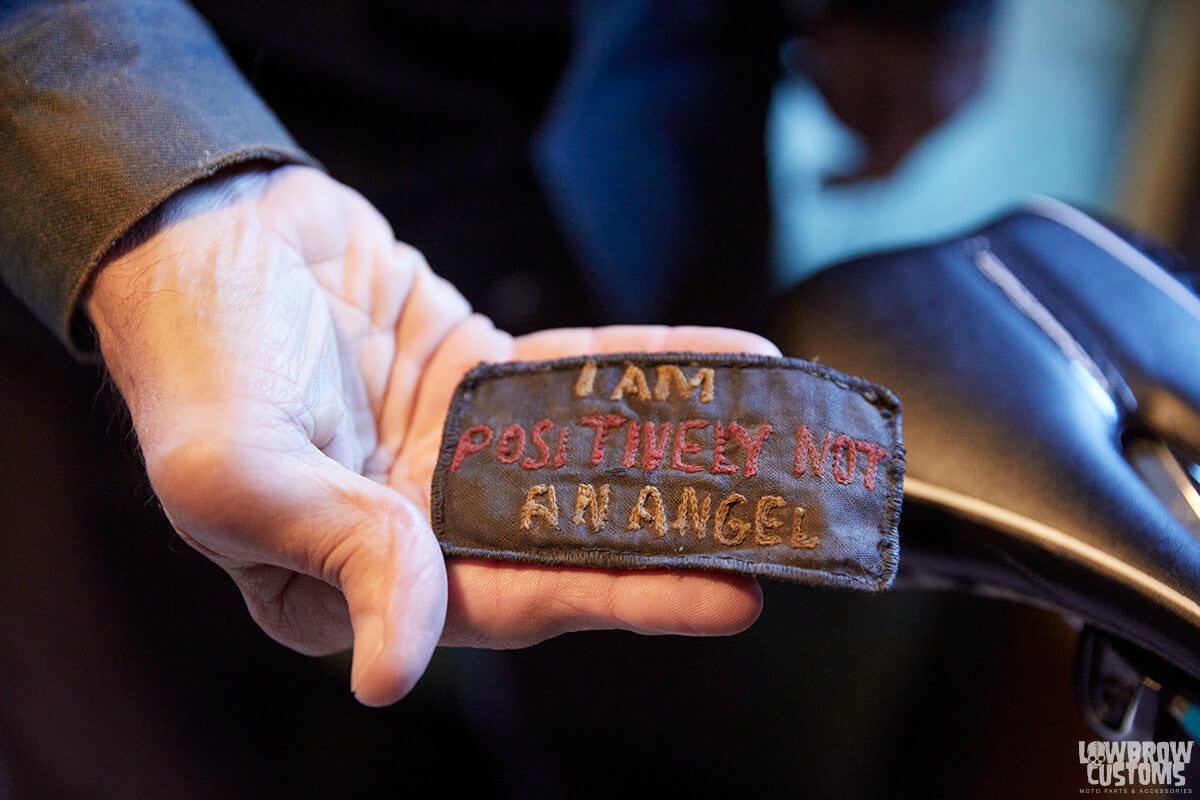 A treasured patch in Bill's glass case.
 Bill's an avid cyclist. He loves anything two wheeled.
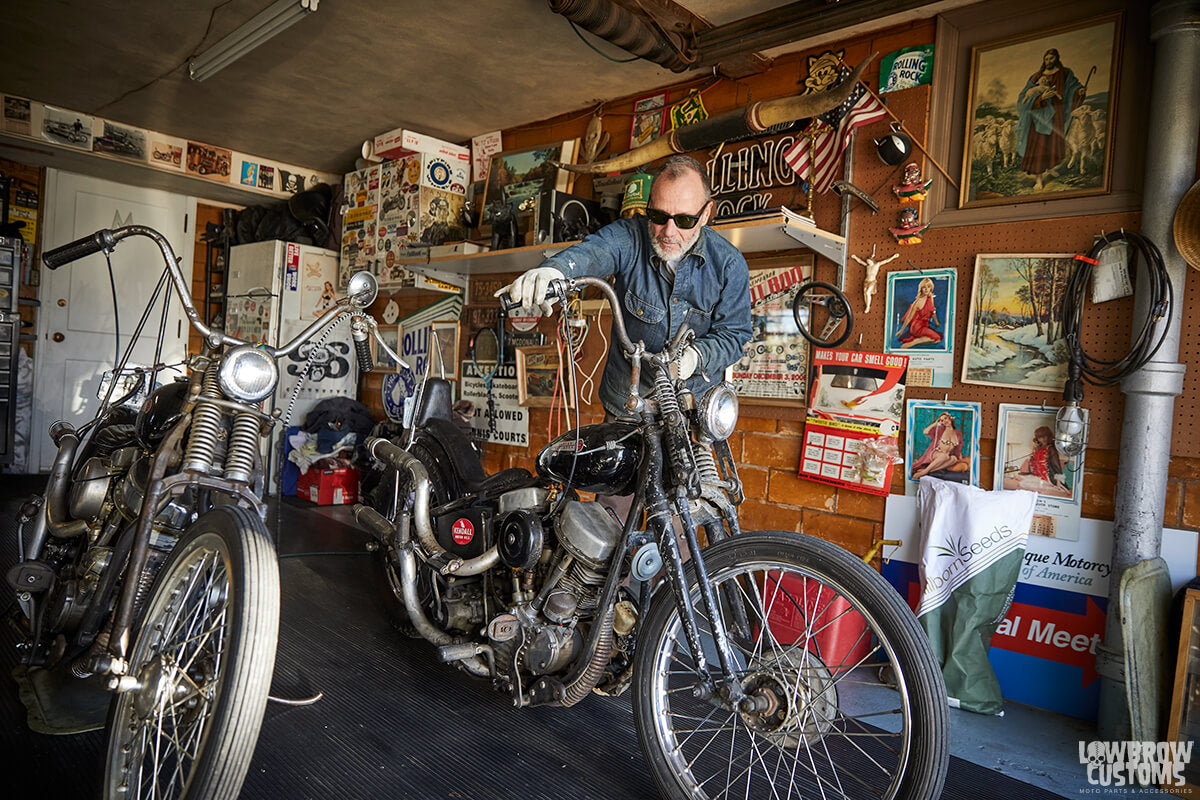 Let's roll.
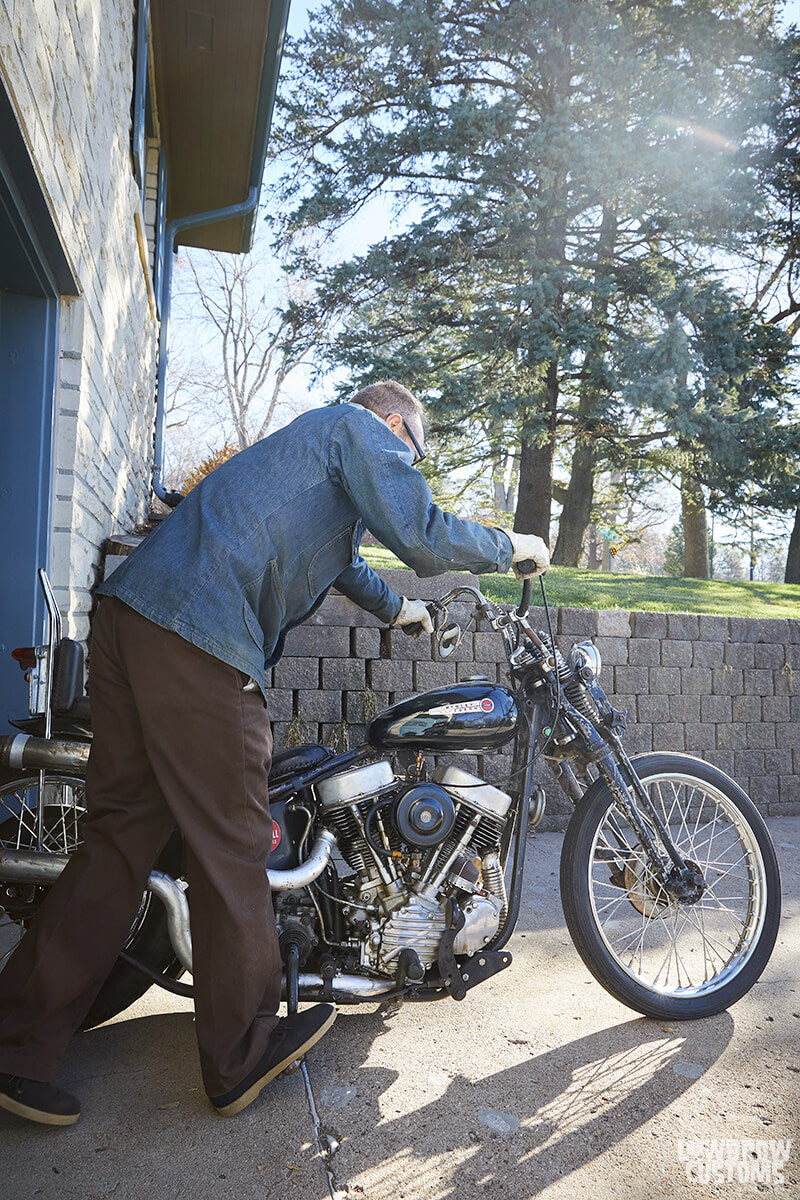 Coming out into the daylight.
 Some of Bill's decor in the garage.
 More on the walls in Bill's garage.
 A closer look at the trophy case.
 Having some coffee and chatting about some memories.
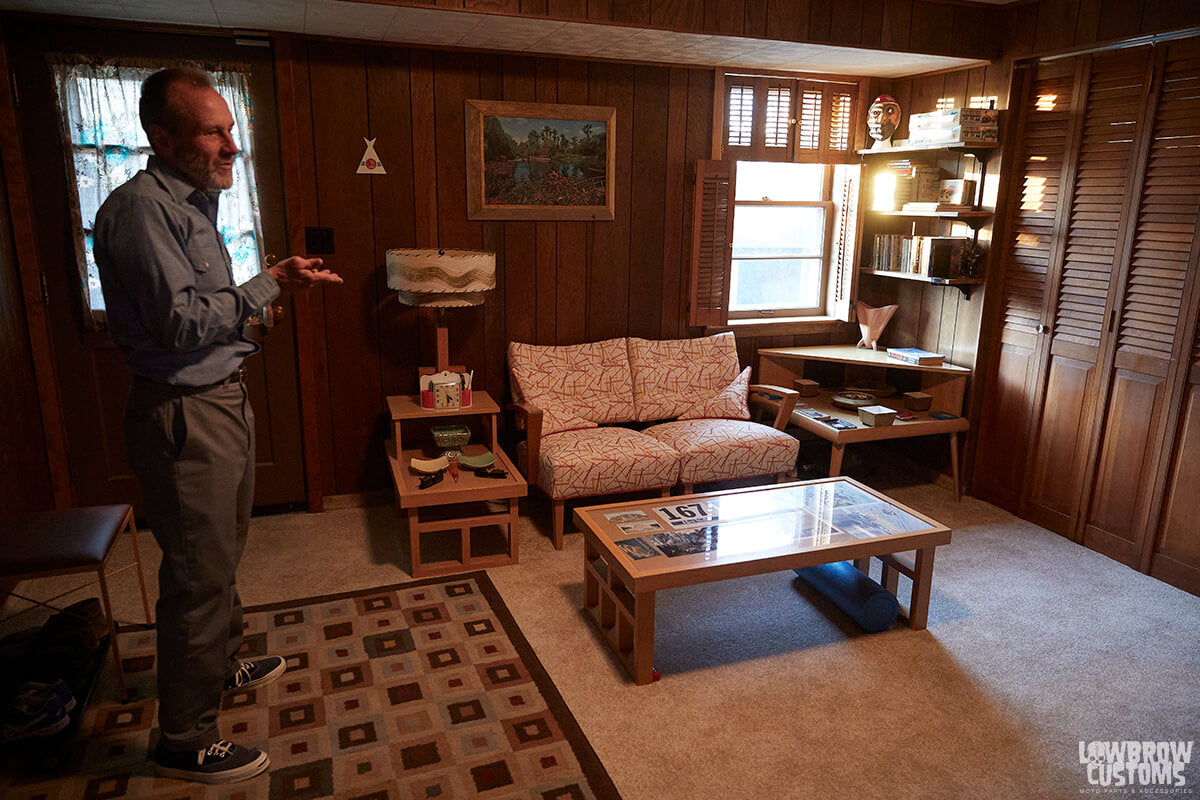 More of Bill's Mid-century Modern design in his house.
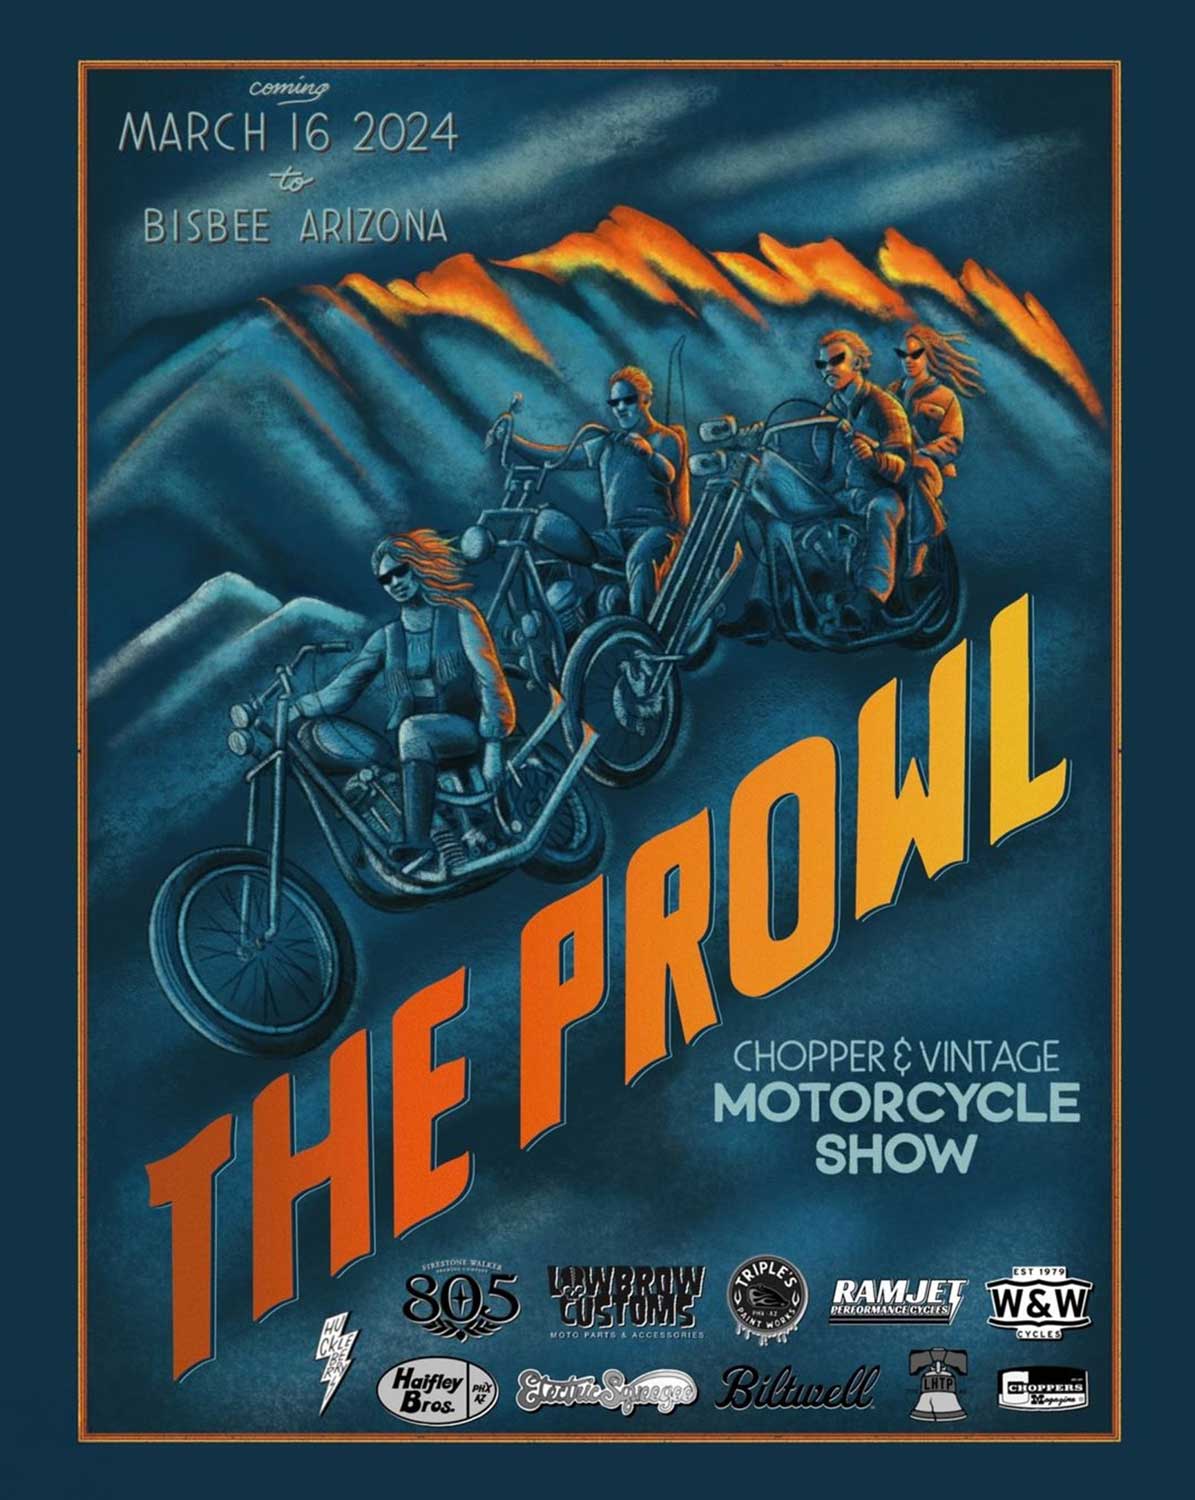
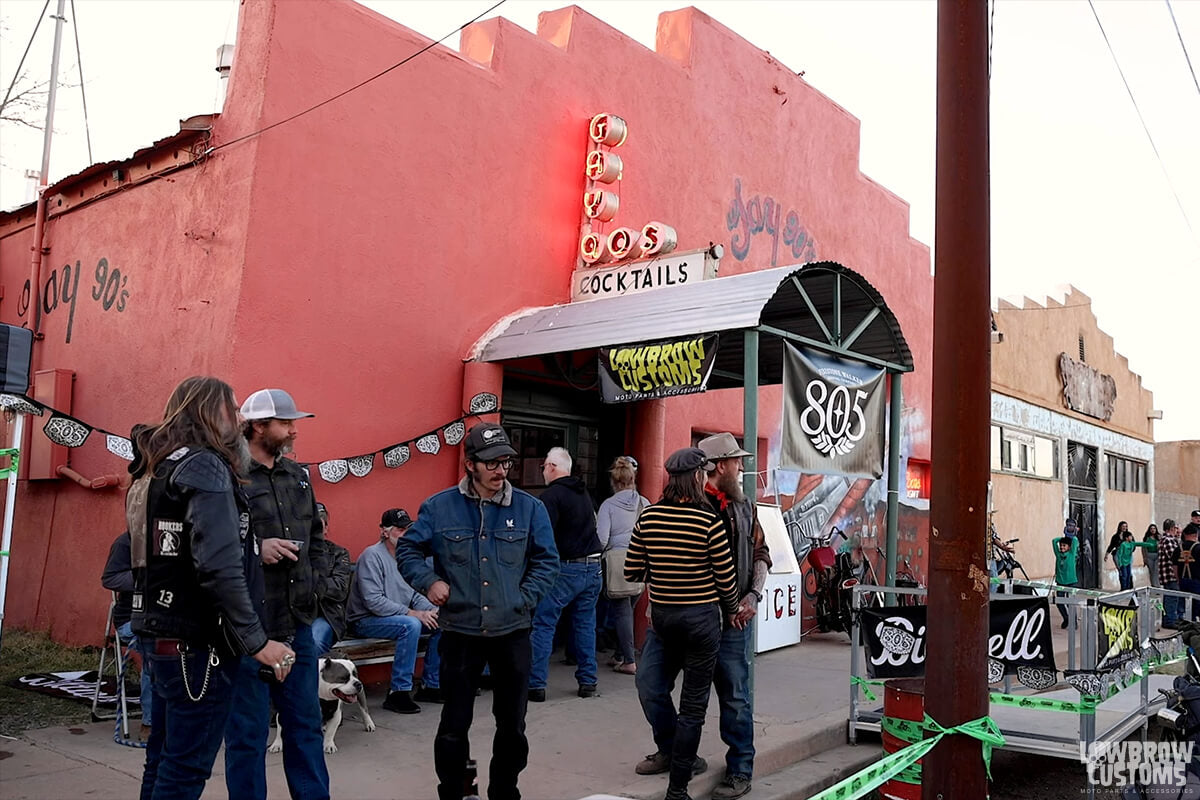 Outside the Gay 90's Bar.
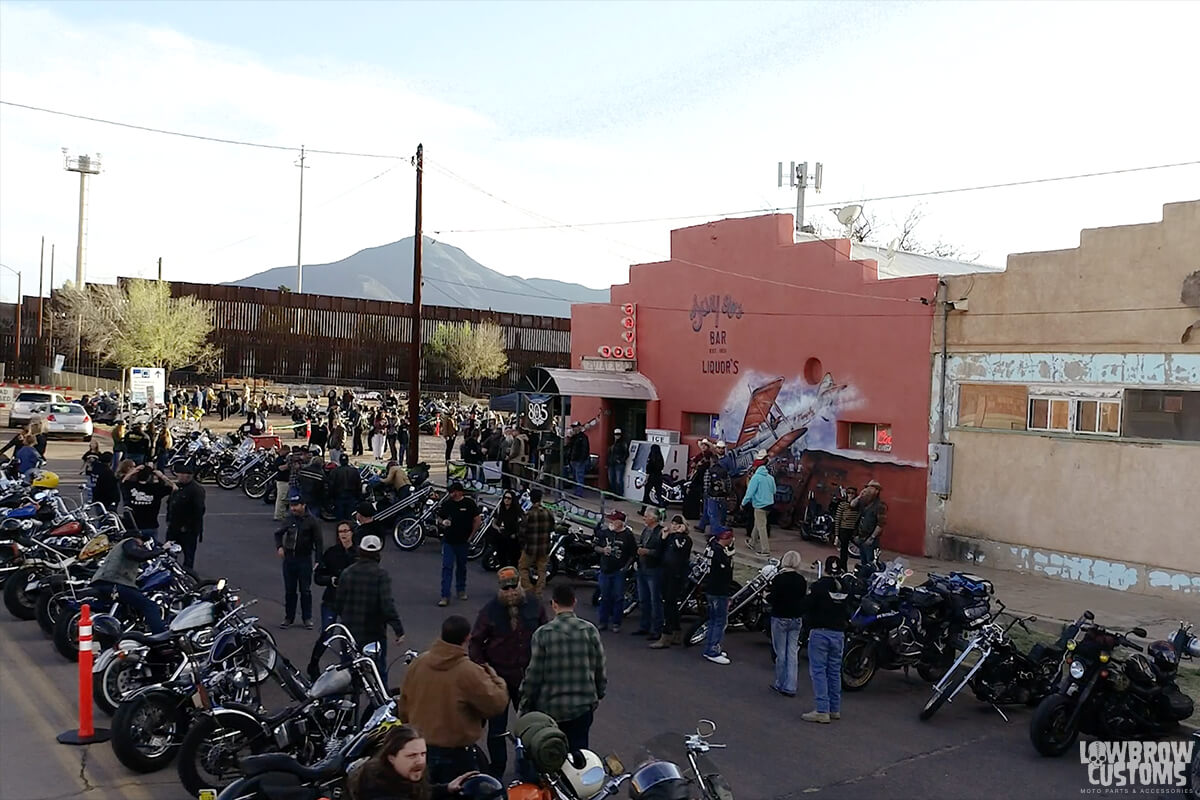 Choppers lined the streets, all the way to the wall.
 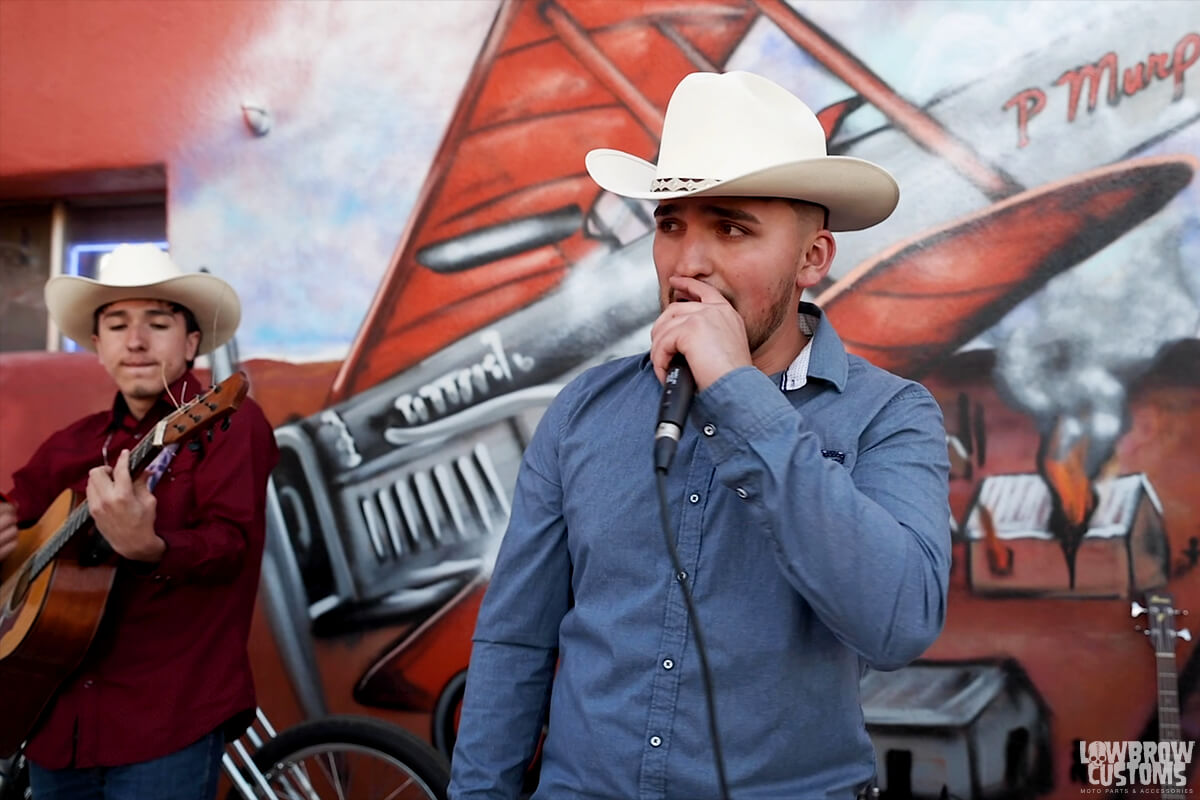 Listen to some "La Bamba" in the video from the Mariachi band.
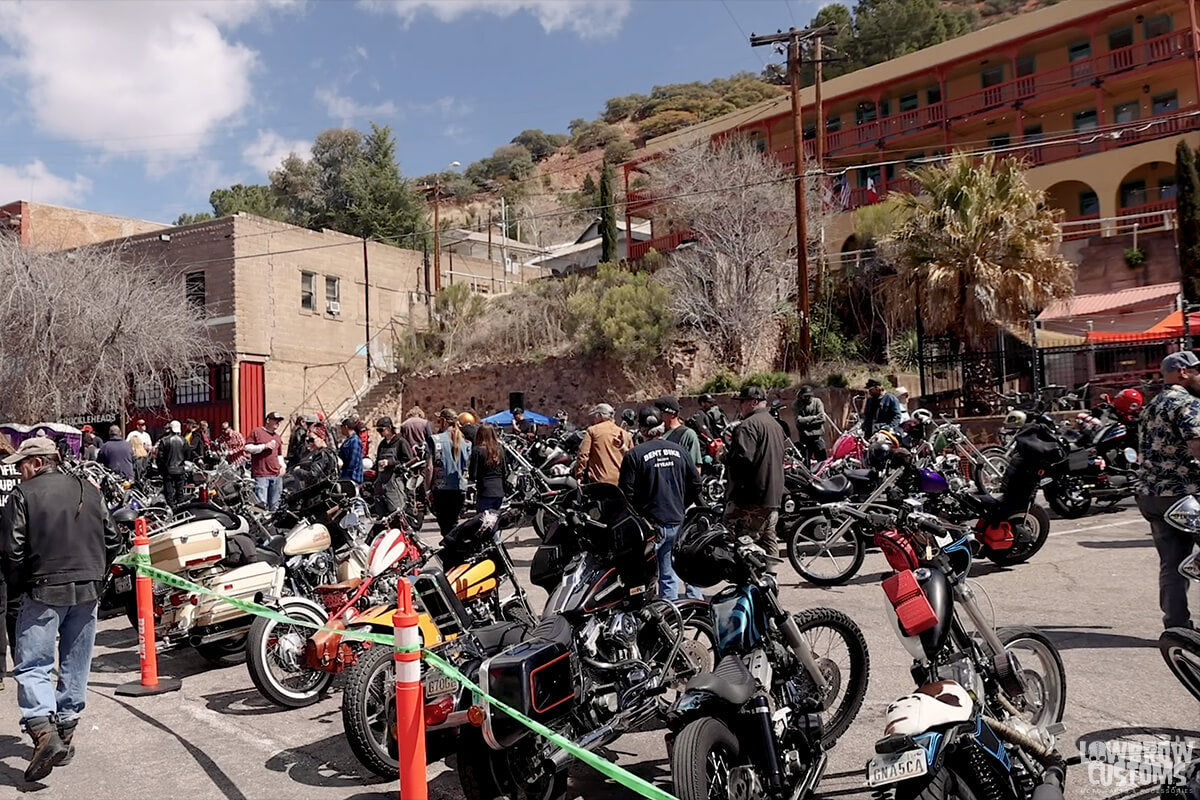 Part of the parking situation in "The Gultch"
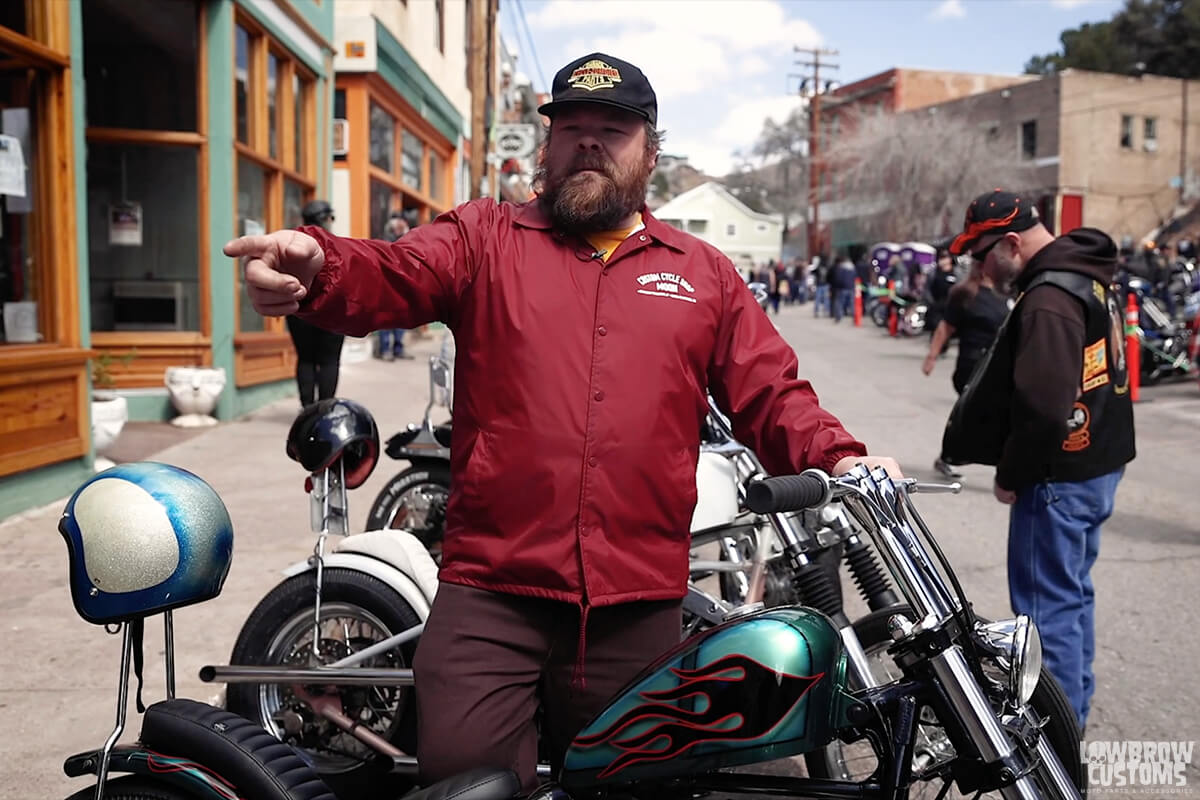 Nick Turner pointing at his Sidekick Mikey who pained his bike.
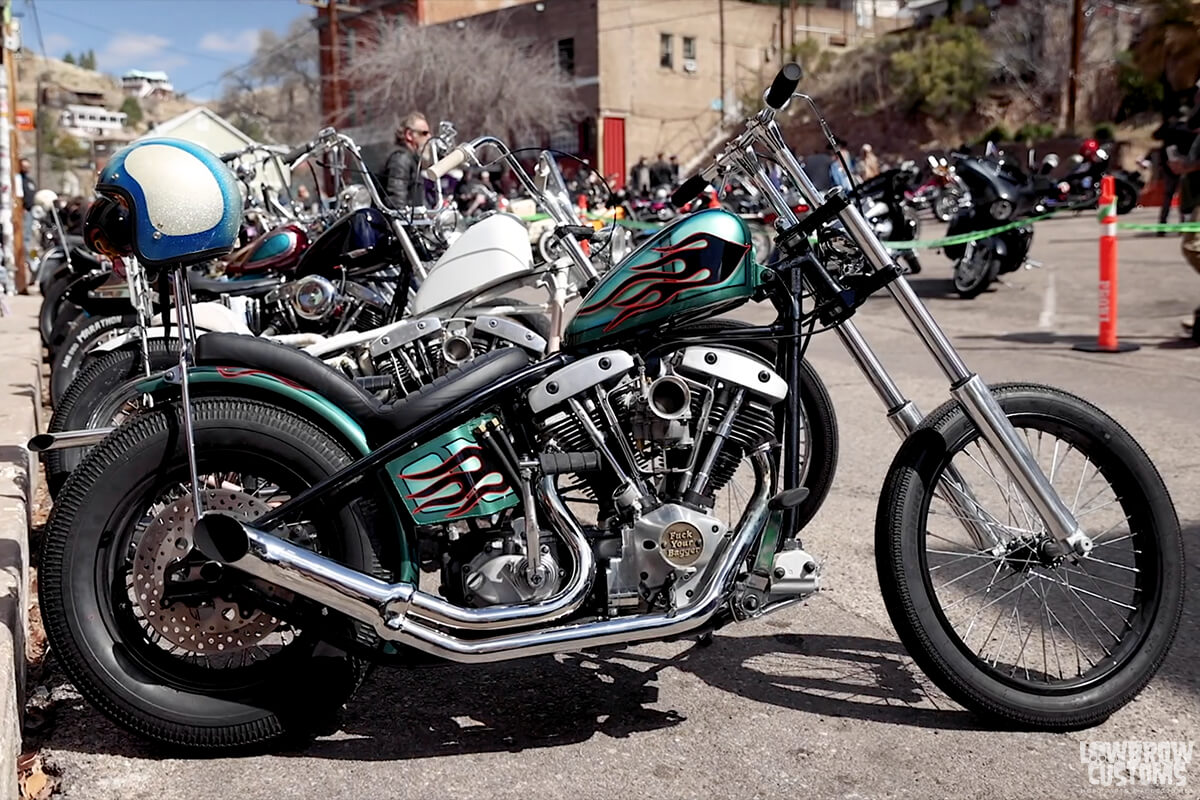 Lowbrow front wheel, trailer fender, headlight, gascap, bungs, tabs, Gasbox oil tank and so much more. Just a tough as nails Shovelhead.
 The man, the myth, the legend, Chris Huber
 This panhead was insane.
 Ran into Mike Ellis' old scoot. Always cool to see this one in person.
 This was a really neat Evo Chop.
 Classic Shovelhead with Magneto, what a beautiful bike.
 Couldn't stop drooling over this Panhead.
 Katie Loftus and her "Freda Machine" Sporster.
 Absolutely love anything Chicken and a Biscuit paints.
 Bisbee, AZ from the sky.
 Meeting up at Chris Hubers to ride down to Bisbee. Photo courtesy of Biltwell / Geoff Kowalchuk
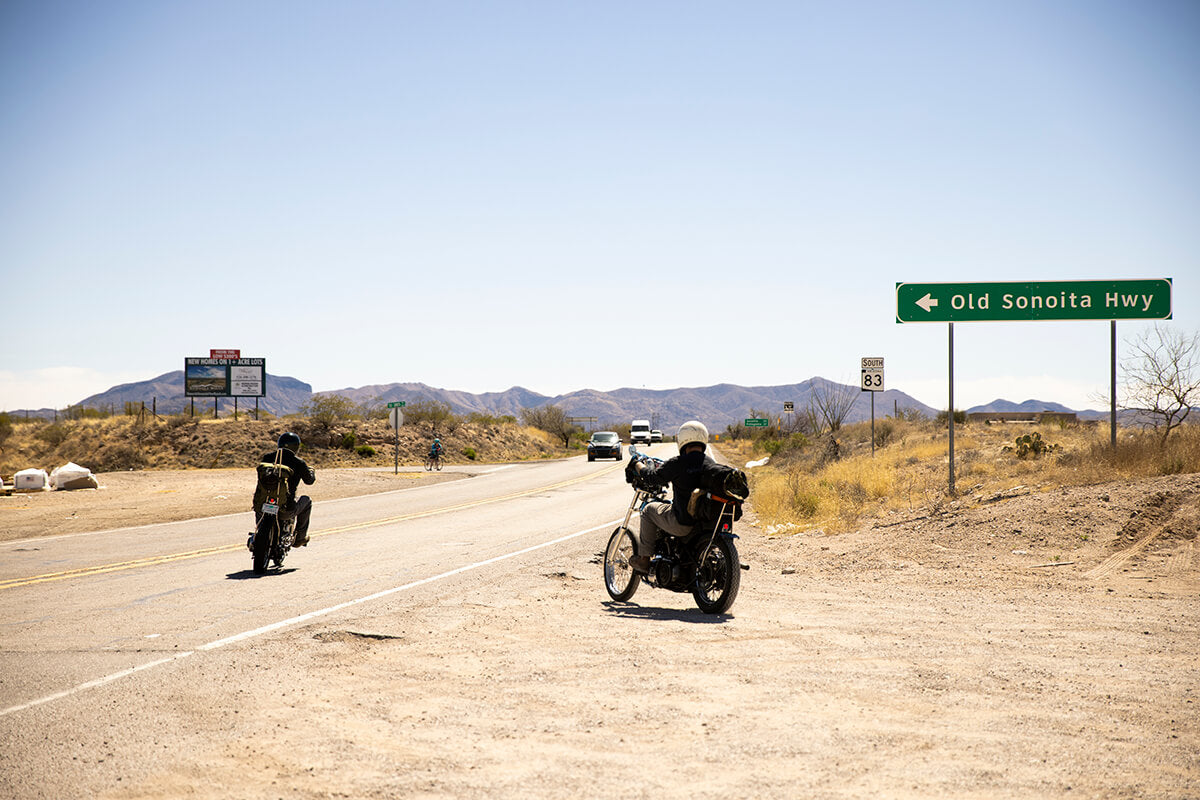 South on a 83. Photo courtesy of Biltwell / Geoff Kowalchuk
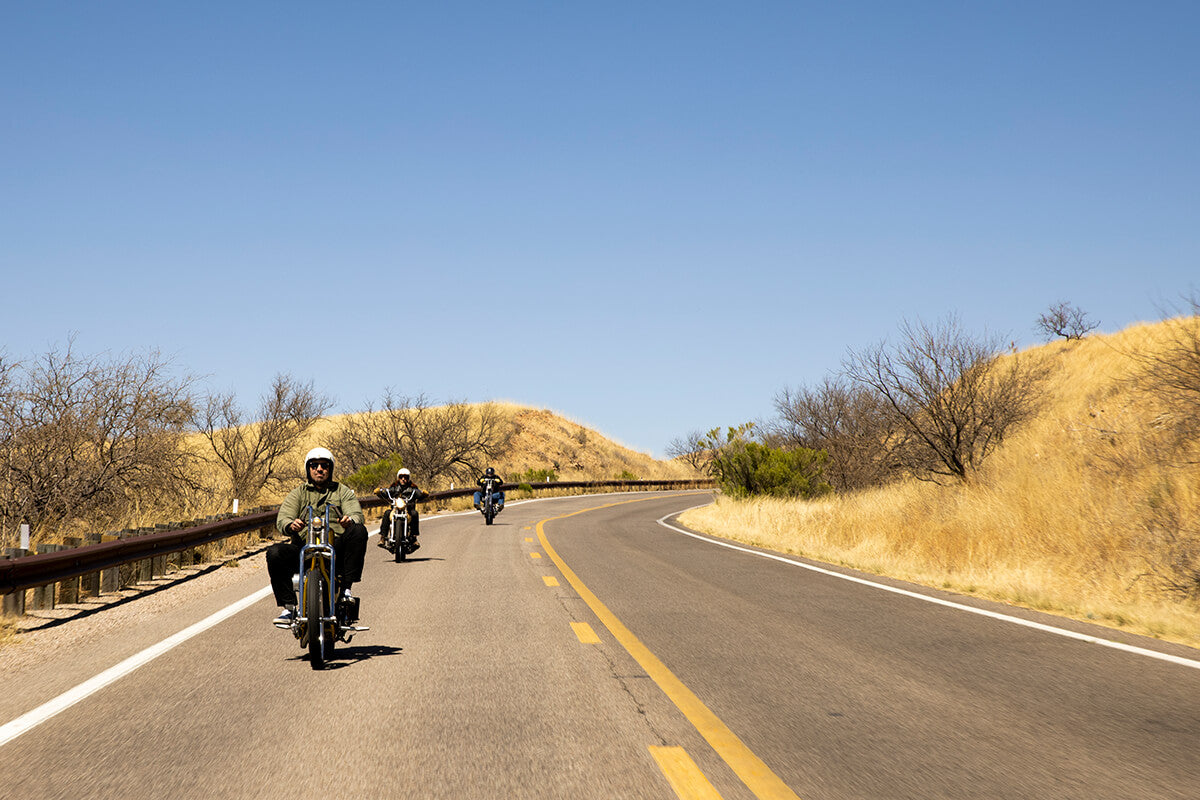 Rollin, rollin, rollin. Photo courtesy of Biltwell / Geoff Kowalchuk
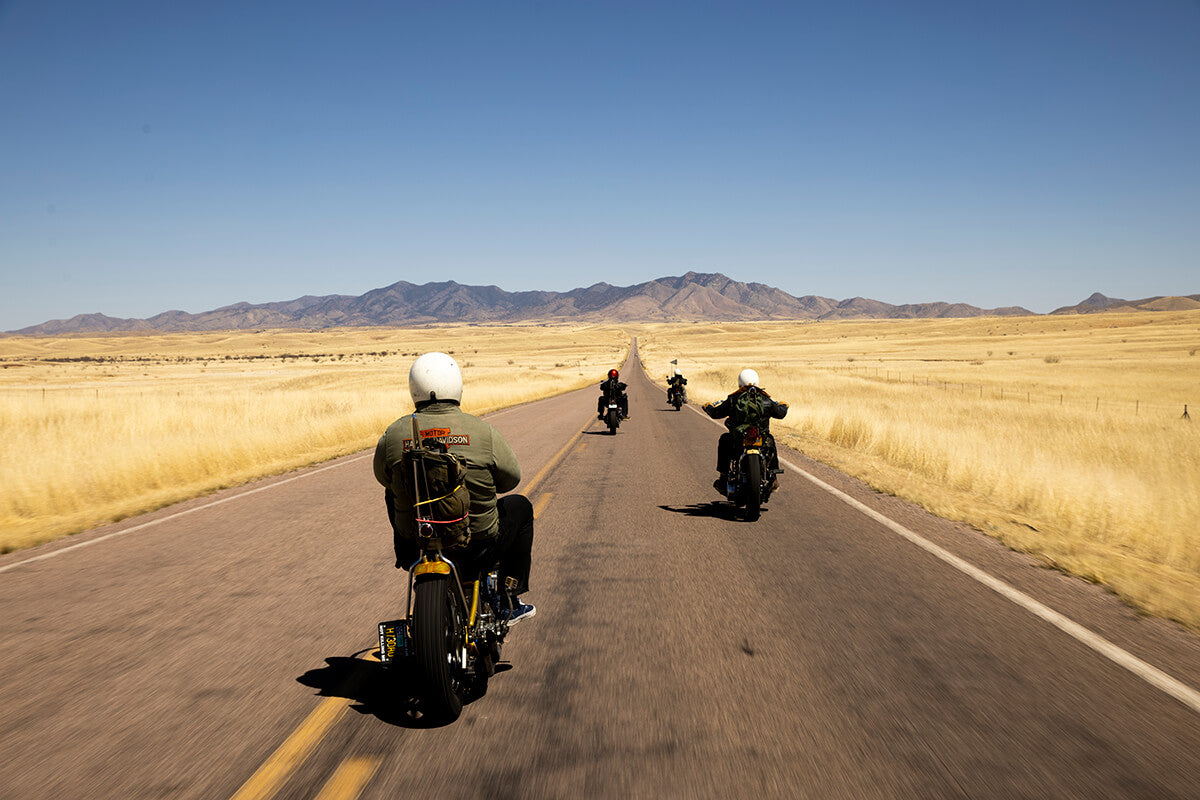 Stunning views on the way south. Photo courtesy of Biltwell / Geoff Kowalchuk
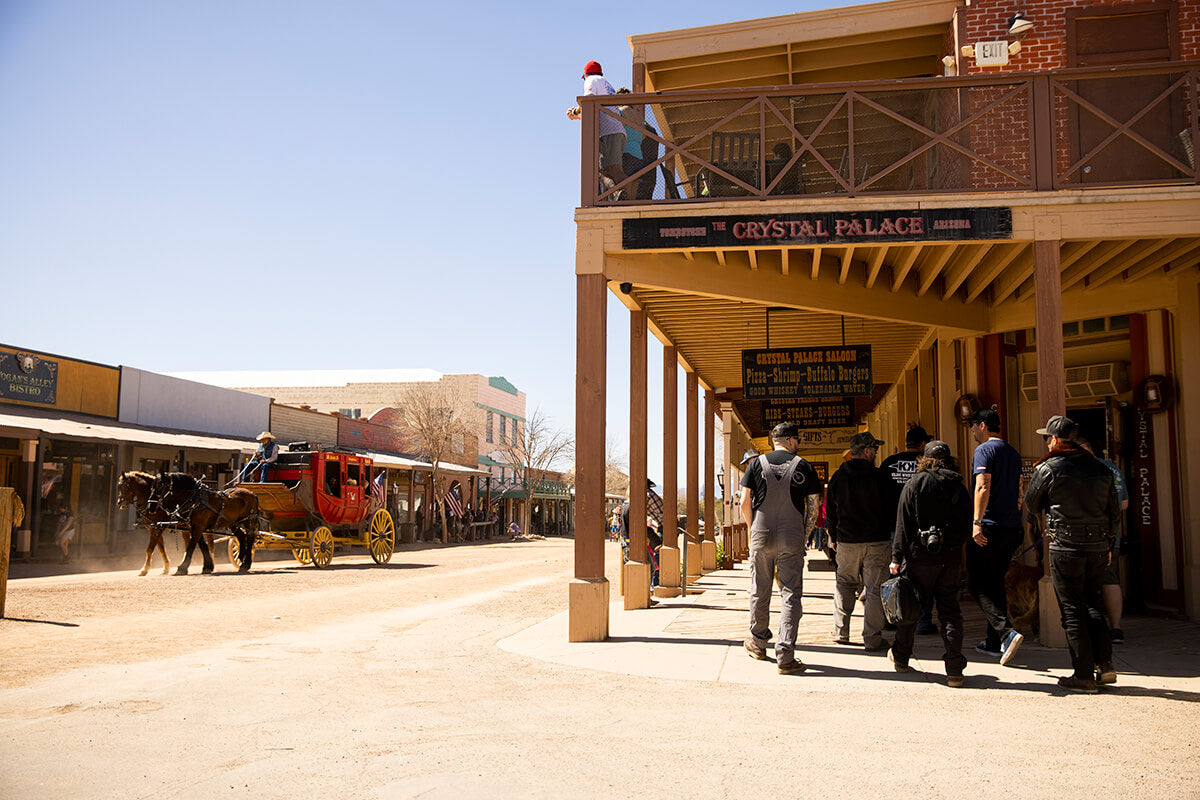 Little group stop to Tombstone, AZ on the way. Photo courtesy of Biltwell / Geoff Kowalchuk
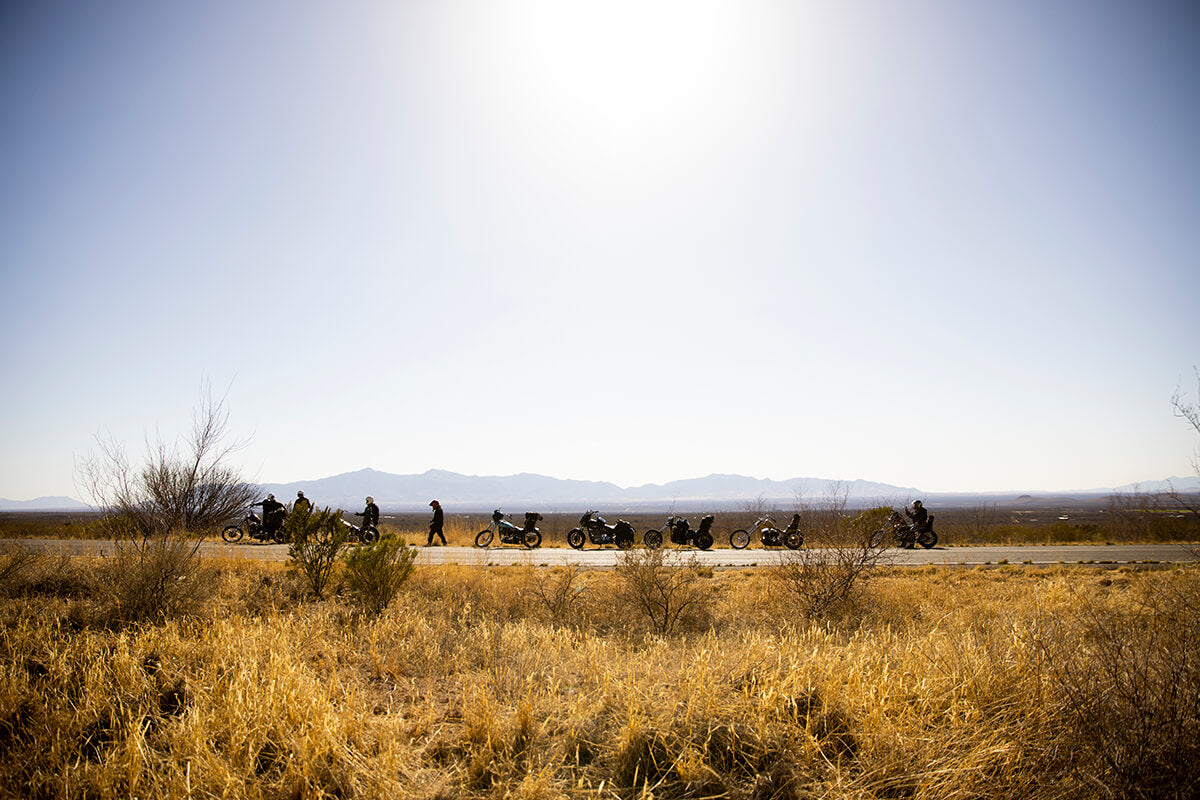 Wouldn't be a proper chopper run with out a breakdown or two. Photo courtesy of Biltwell / Geoff Kowalchuk
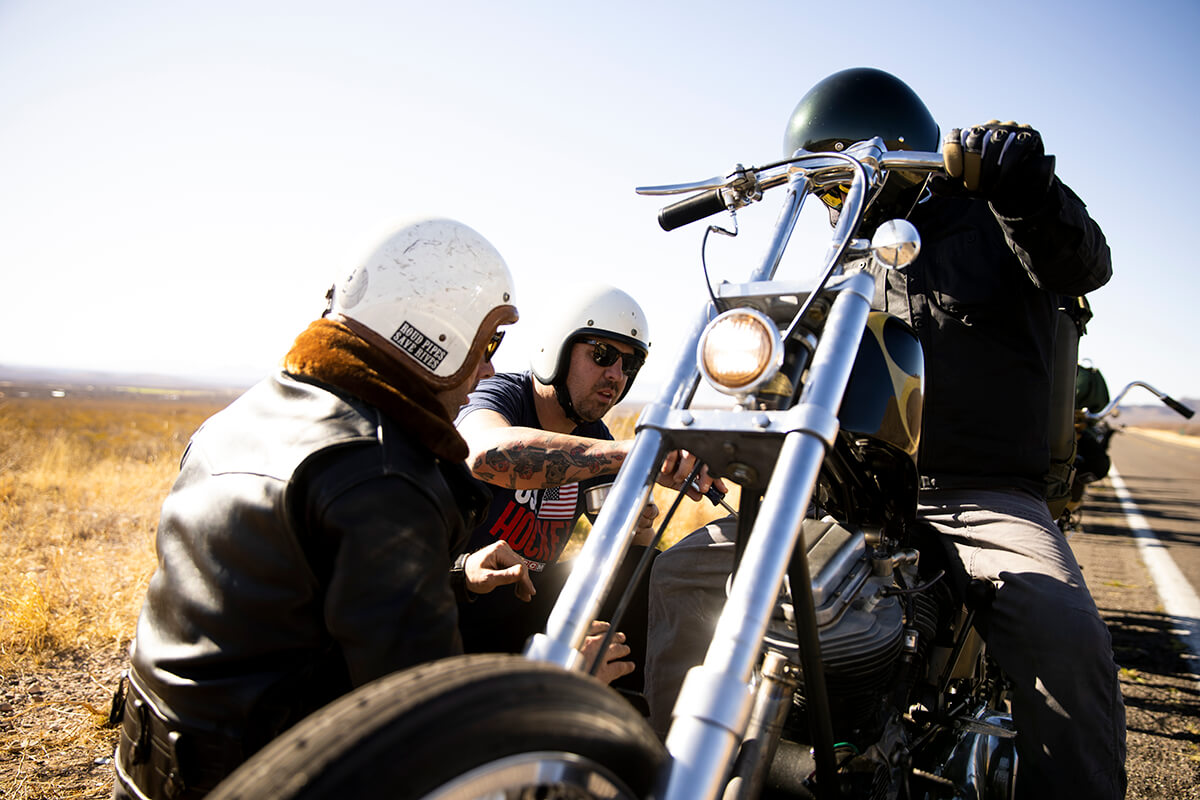 Wick the throttle... Carb tuning on the side of the road. Photo courtesy of Biltwell / Geoff Kowalchuk
 Tunnel love... Photo courtesy of Biltwell / Geoff Kowalchuk
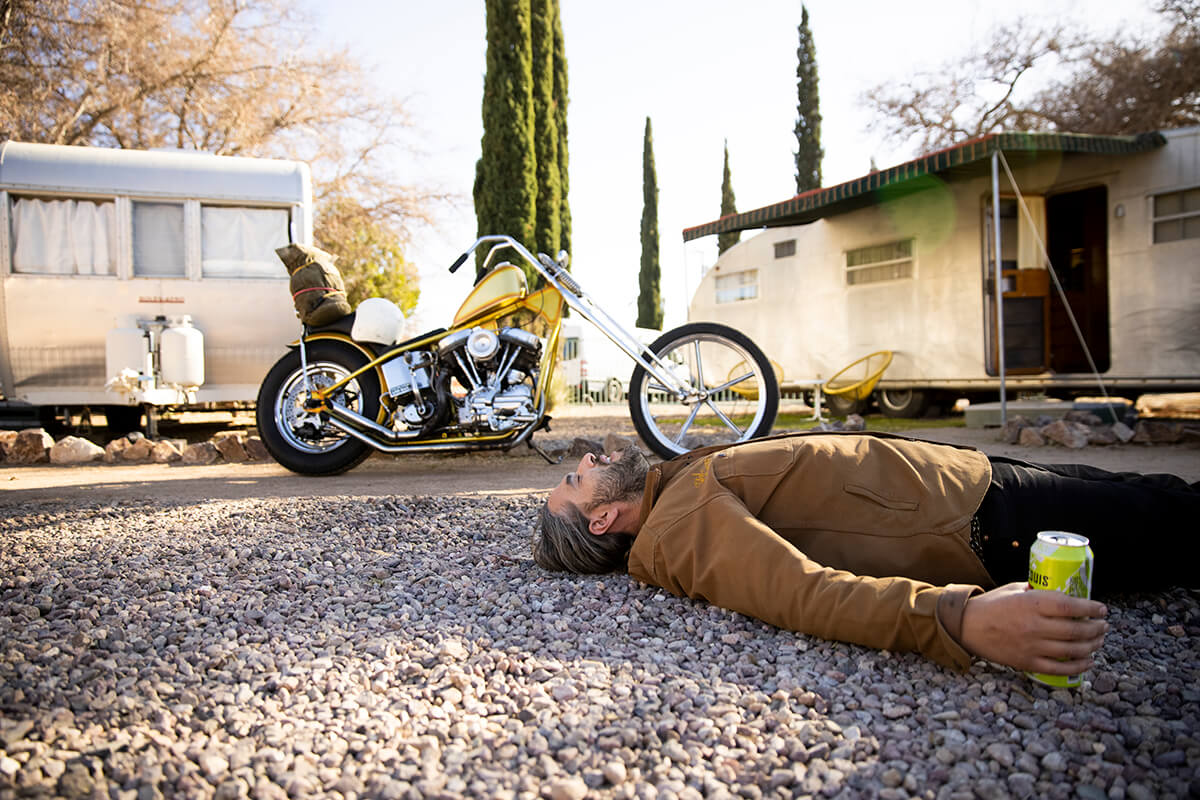 The feeling when you made it. Photo courtesy of Biltwell / Geoff Kowalchuk
 Welcome to The Shady Dell! Photo courtesy of Biltwell / Geoff Kowalchuk
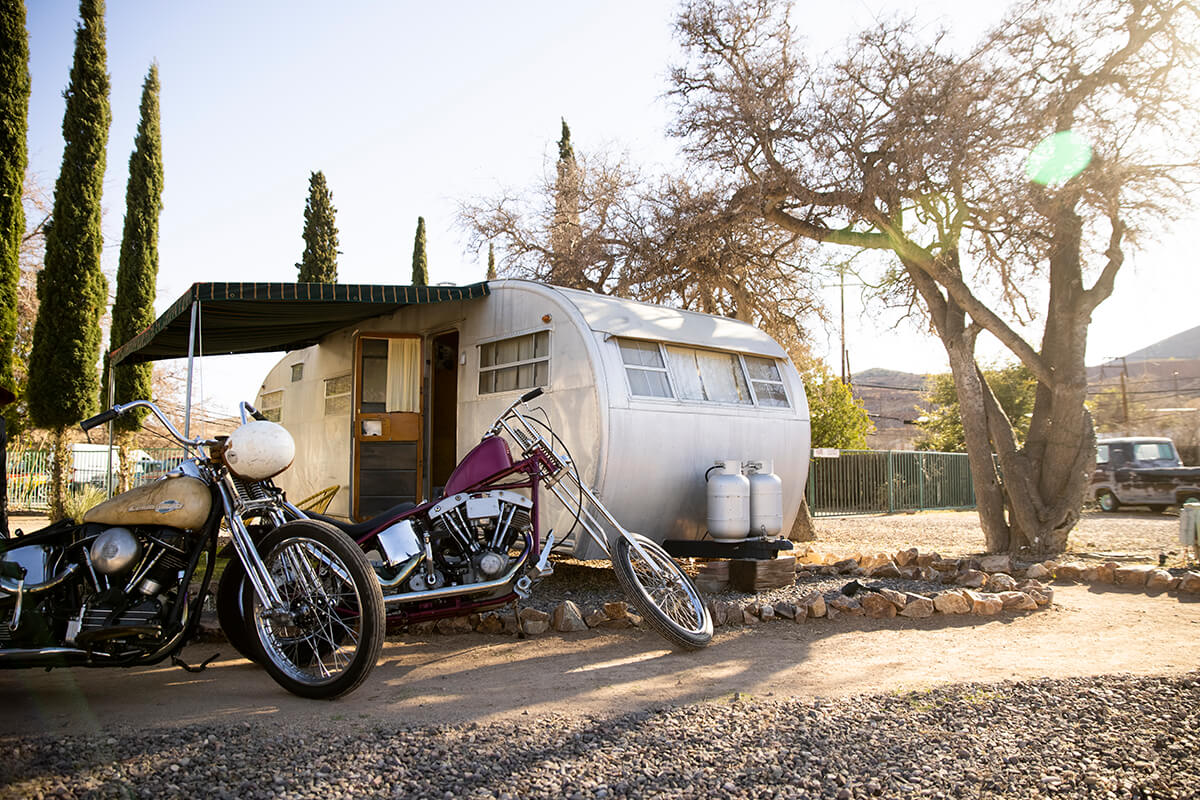 The Shady Dell has some interesting vintage trailers to stay. The choppers fit right in. Photo courtesy of Biltwell / Geoff Kowalchuk
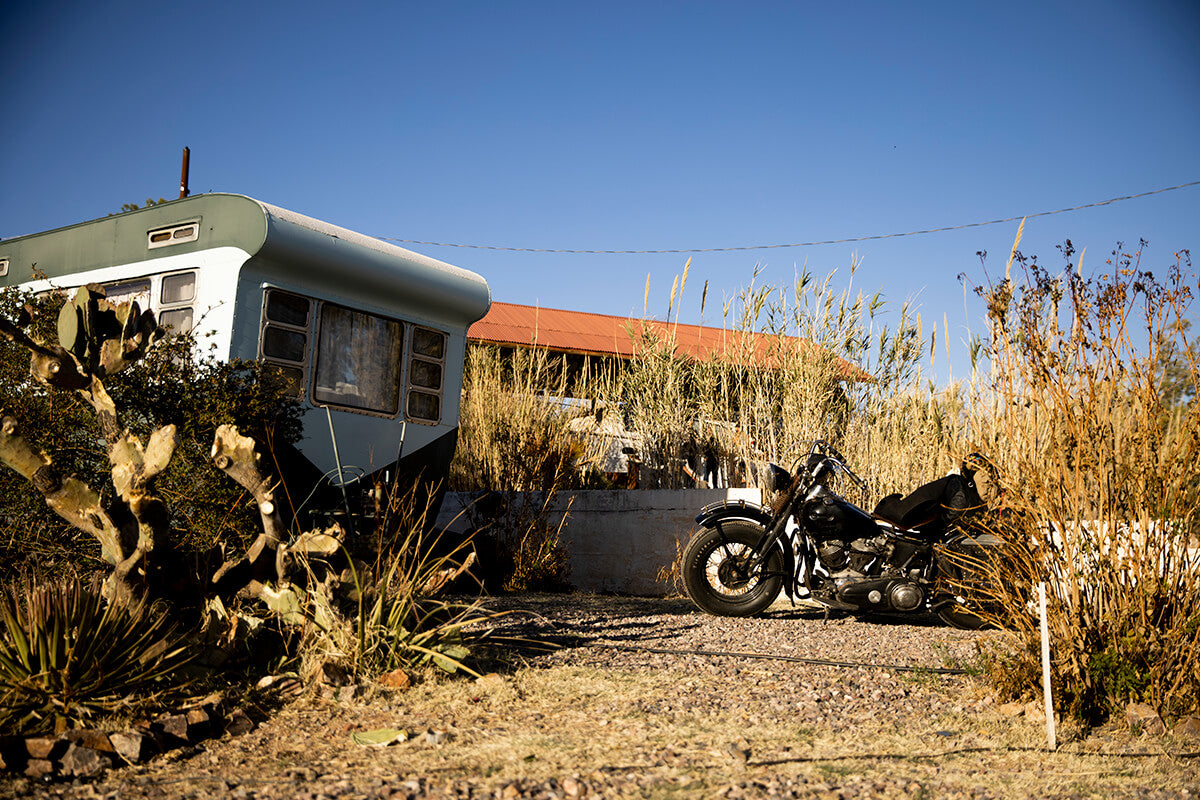 In the weeds of cacti lies a Shovel and a trailer. Photo courtesy of Biltwell / Geoff Kowalchuk
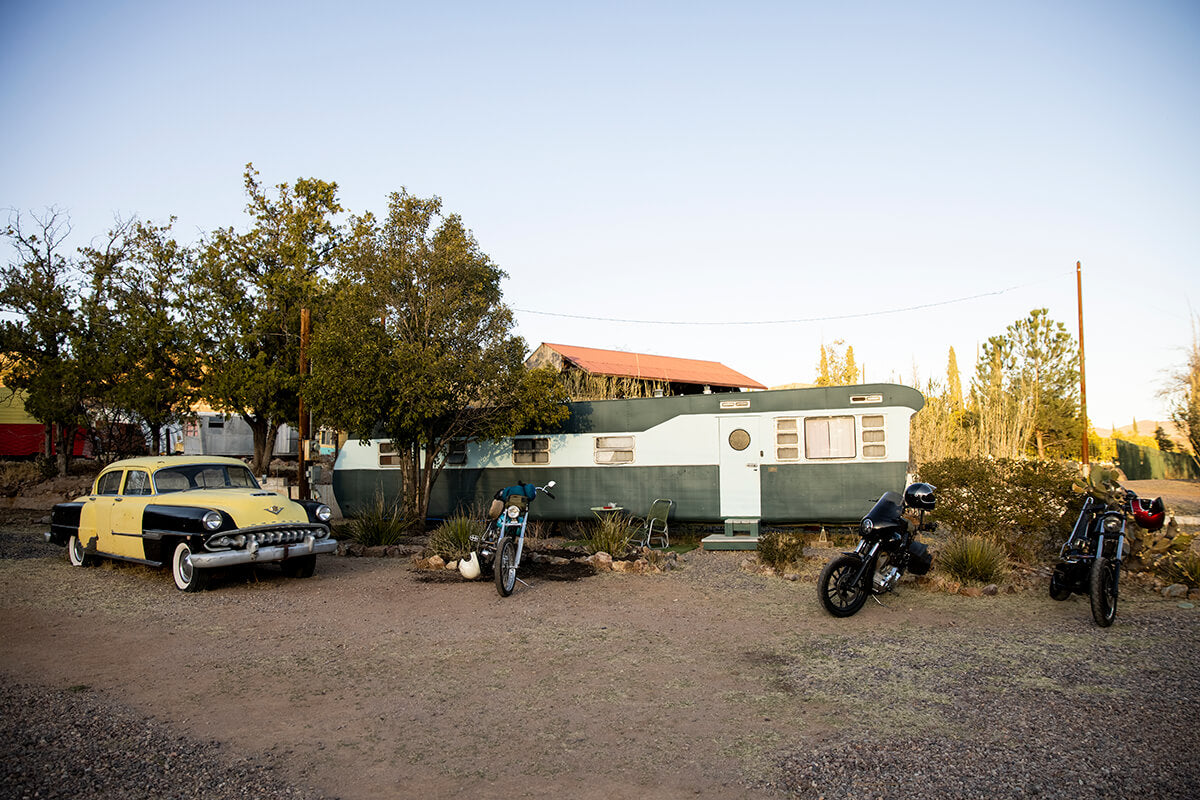 Everything is just so rad at The Shady Dell. Photo courtesy of Biltwell / Geoff Kowalchuk
 Who knew choppers and old trailers went so well together. Photo courtesy of Biltwell / Geoff Kowalchuk
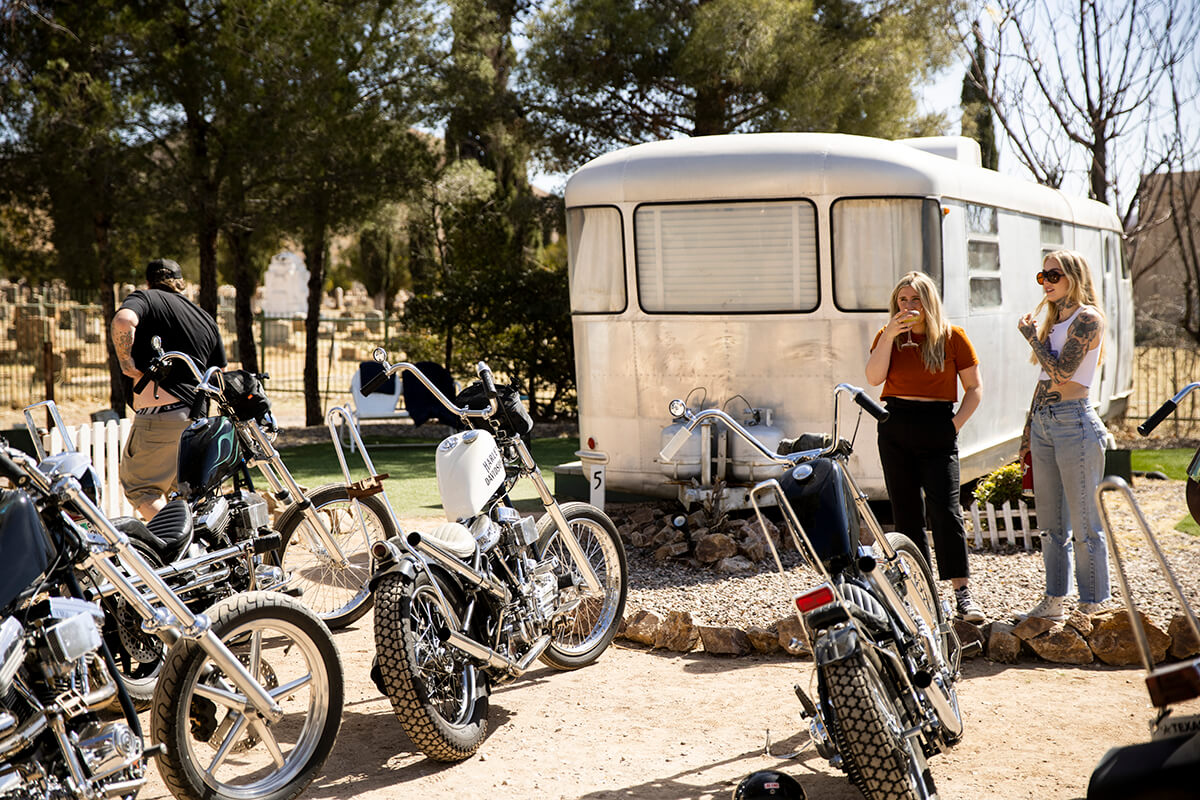 Little margarita, some choppers, and a whole lot of fun. Photo courtesy of Biltwell / Geoff Kowalchuk
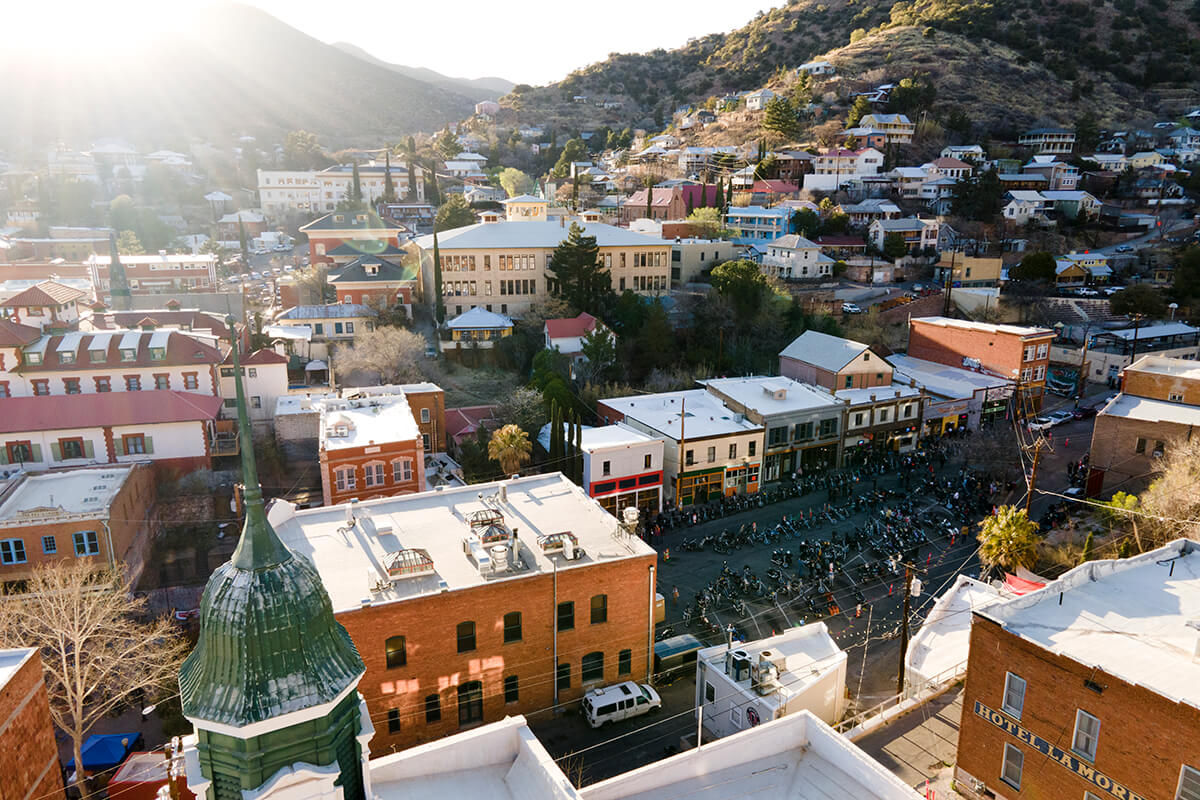 Droning, The Prowl takes over the entire town. Photo courtesy of Biltwell / Geoff Kowalchuk
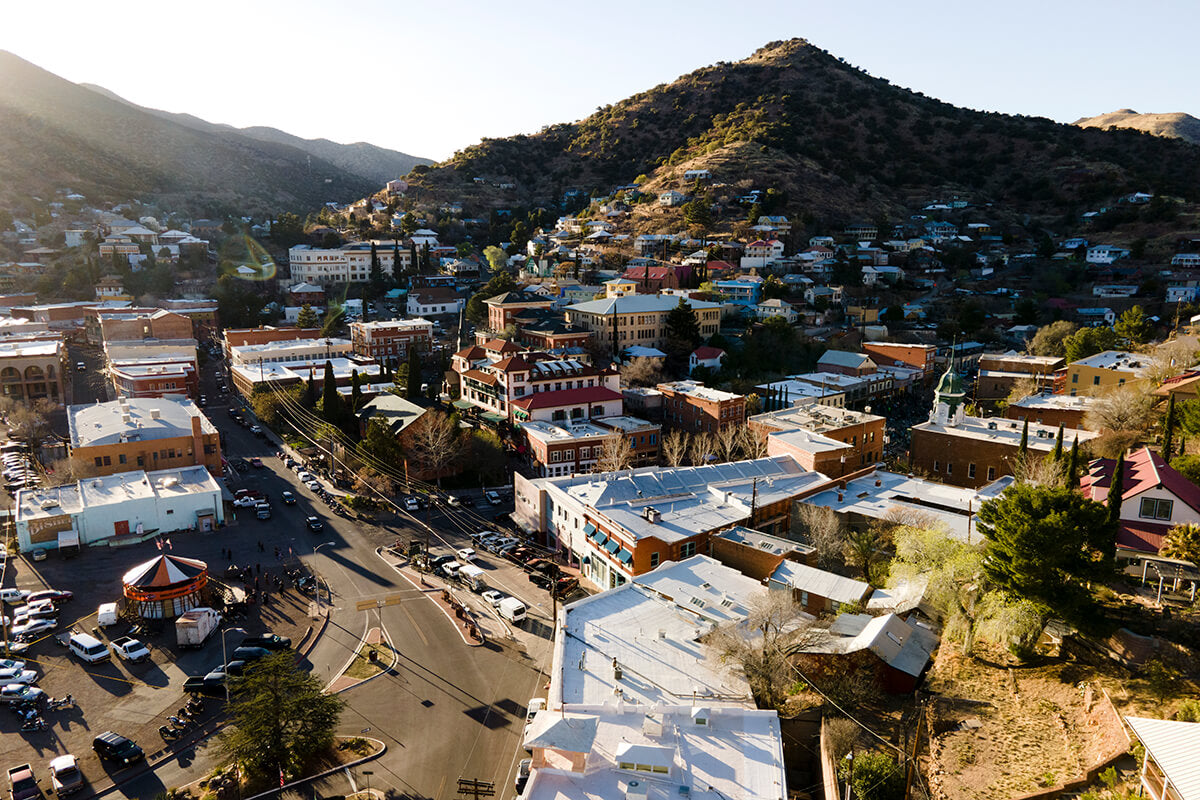 They even got the wall of death set up for the day! Photo courtesy of Biltwell / Geoff Kowalchuk
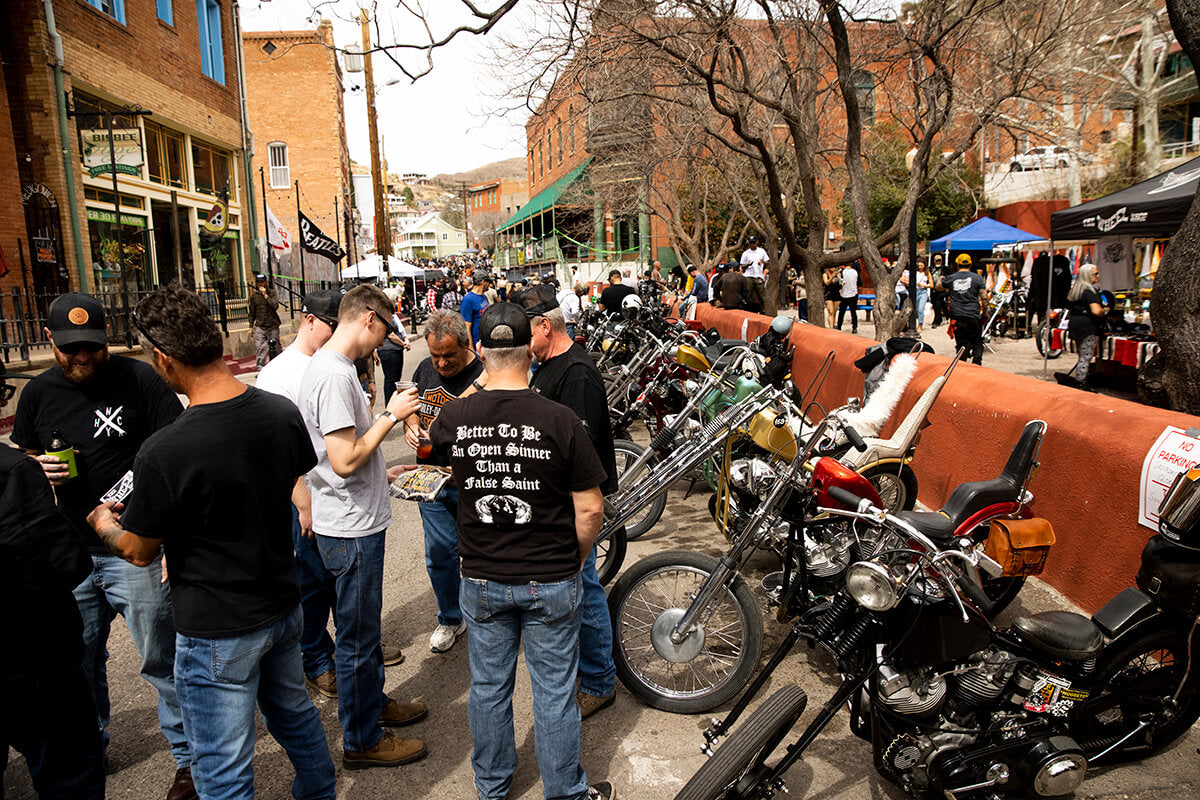 The streets were filled. Photo courtesy of Biltwell / Geoff Kowalchuk
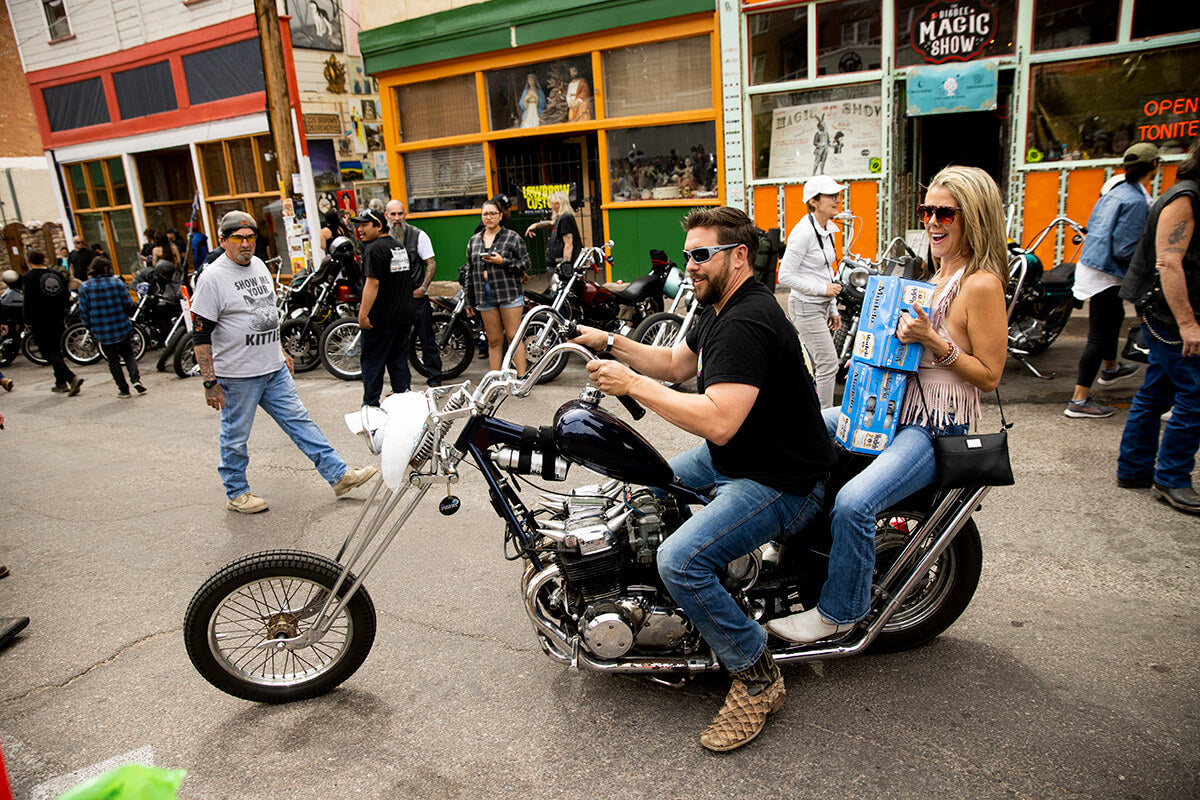 Rollin in with the party on a CB750. Photo courtesy of Biltwell / Geoff Kowalchuk
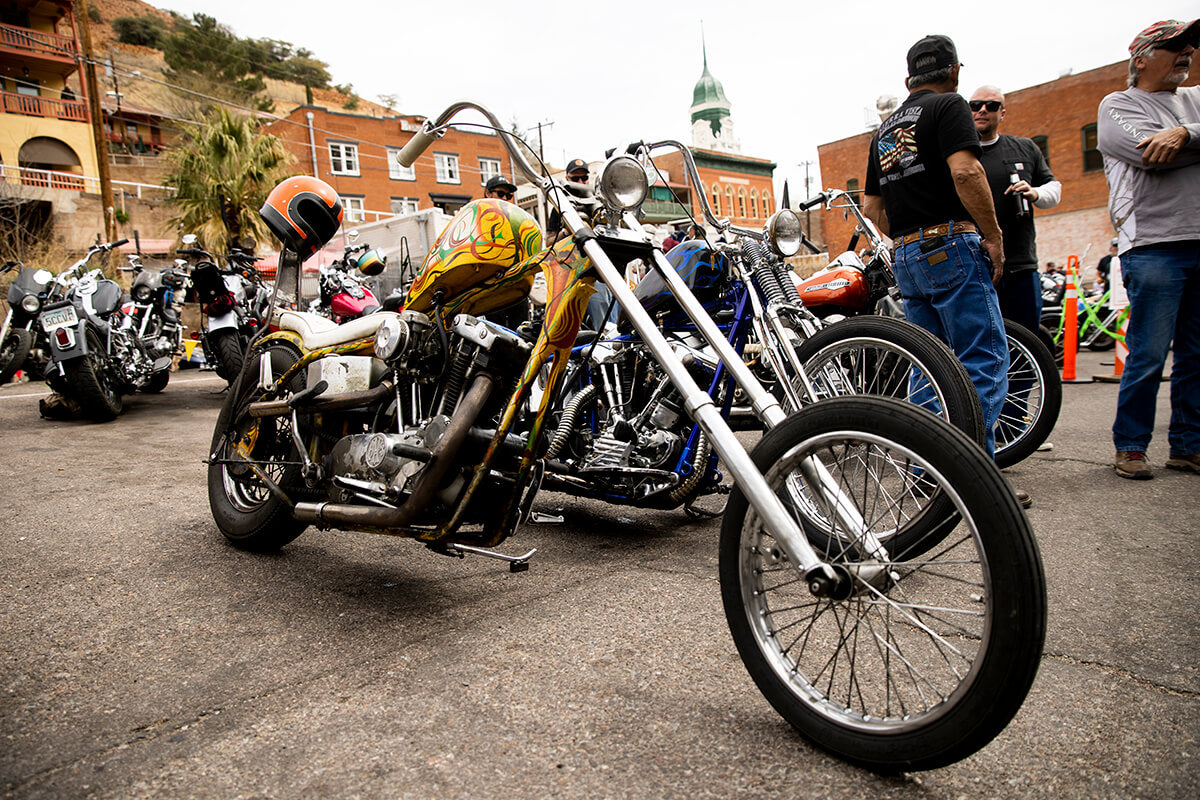 Check out this killer Ironhead chop. Photo courtesy of Biltwell / Geoff Kowalchuk
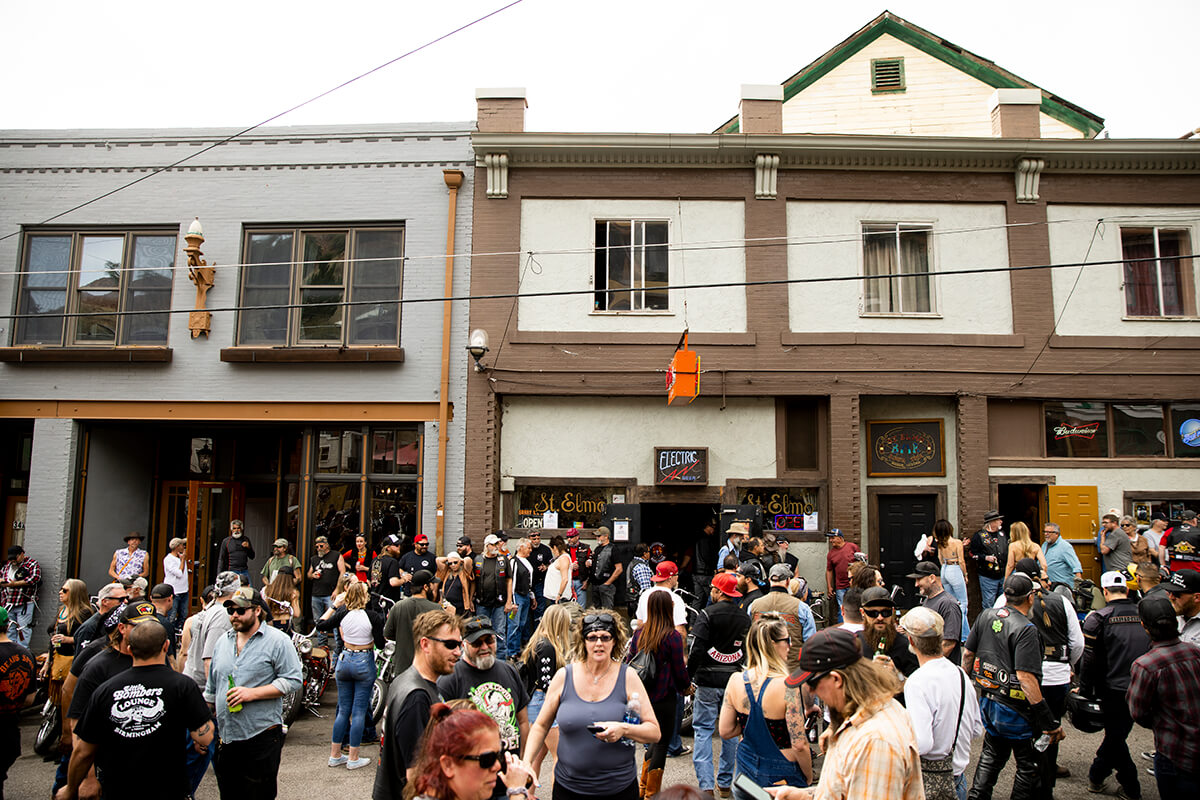 Lots of cool little bars in Bisbee and there were a ton of people at the show. Photo courtesy of Biltwell / Geoff Kowalchuk
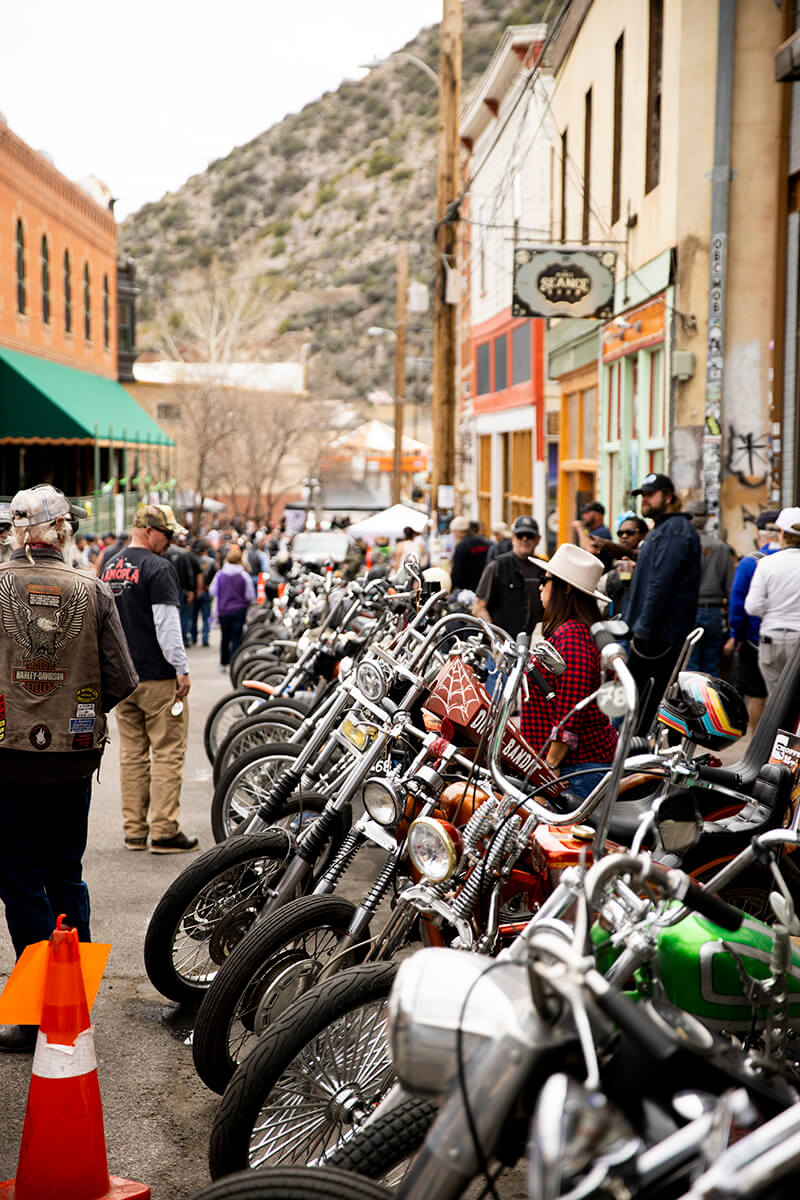 Chopper parking only! Photo courtesy of Biltwell / Geoff Kowalchuk
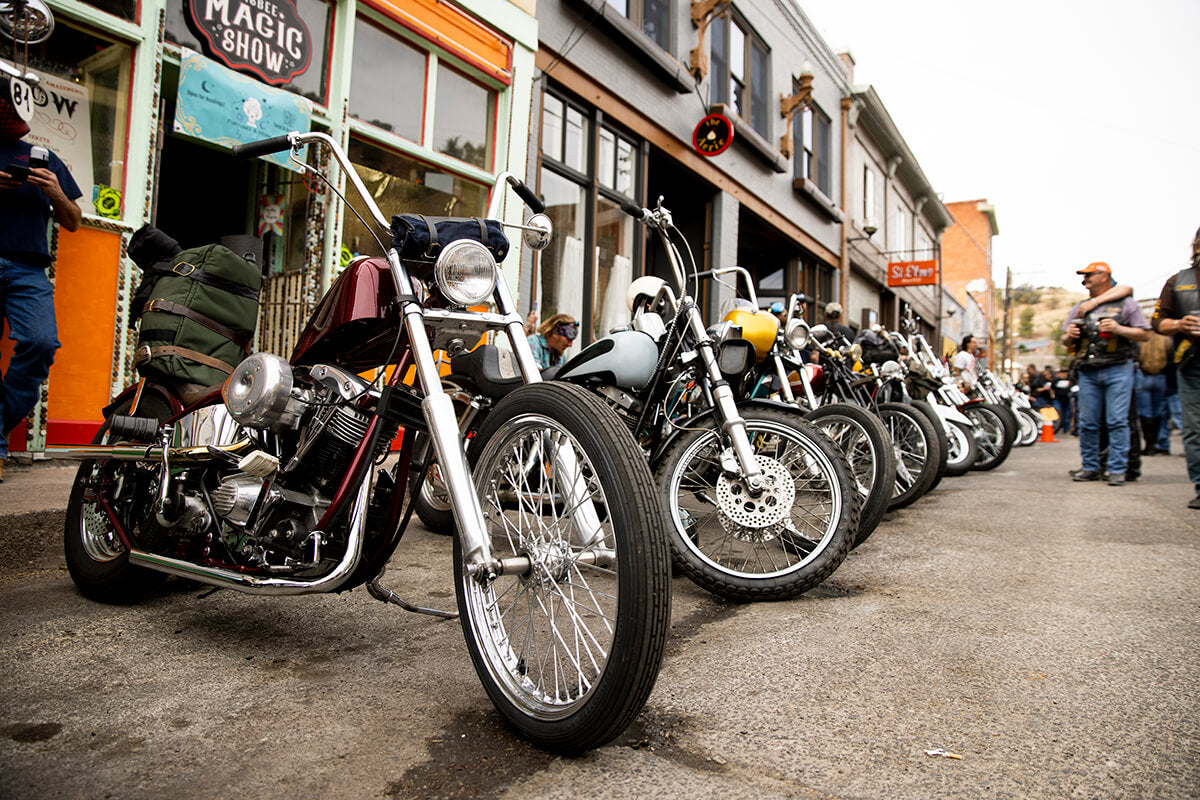 The conezone. Photo courtesy of Biltwell / Geoff Kowalchuk
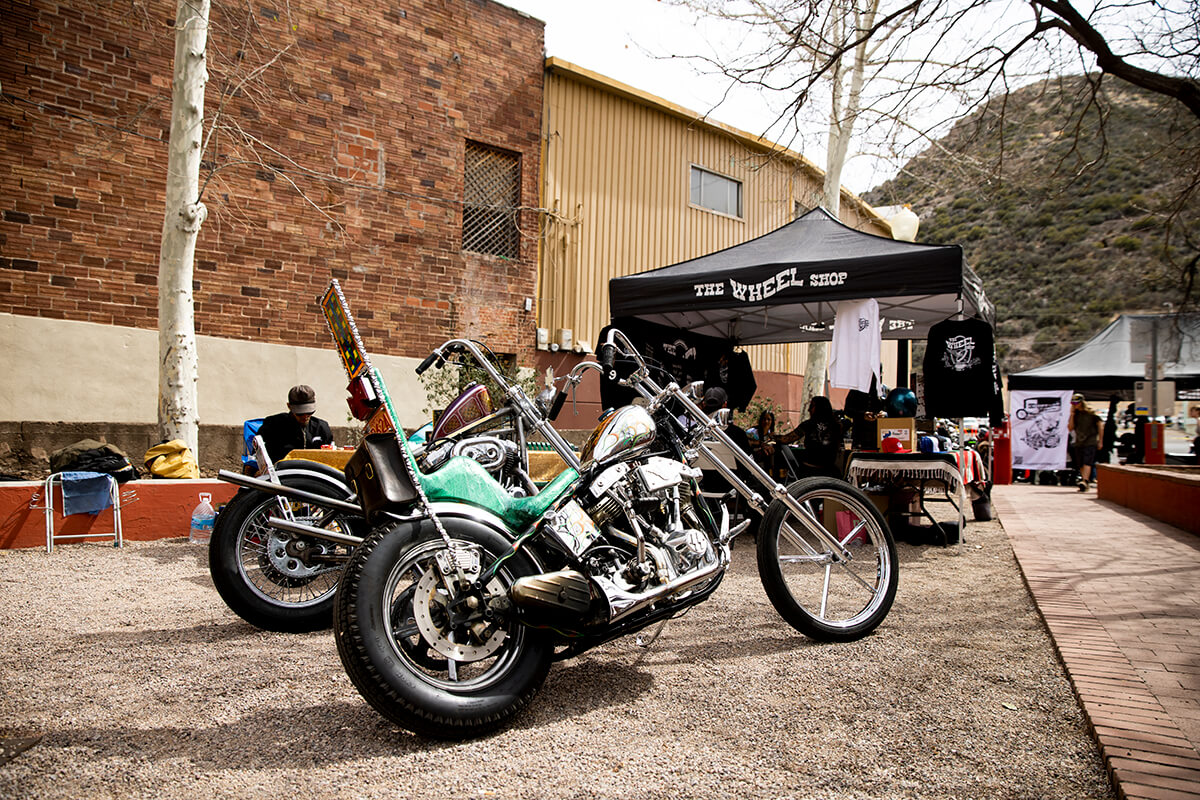 Theres also a vending village surrounded by more bikes! Photo courtesy of Biltwell / Geoff Kowalchuk
 The wall of death is always a good time! Photo courtesy of Biltwell / Geoff Kowalchuk
 Take that money! Photo courtesy of Biltwell / Geoff Kowalchuk
 A sea of choppers. Photo courtesy of Biltwell / Geoff Kowalchuk
 Genuine smiles for miles. Photo courtesy of Biltwell / Geoff Kowalchuk
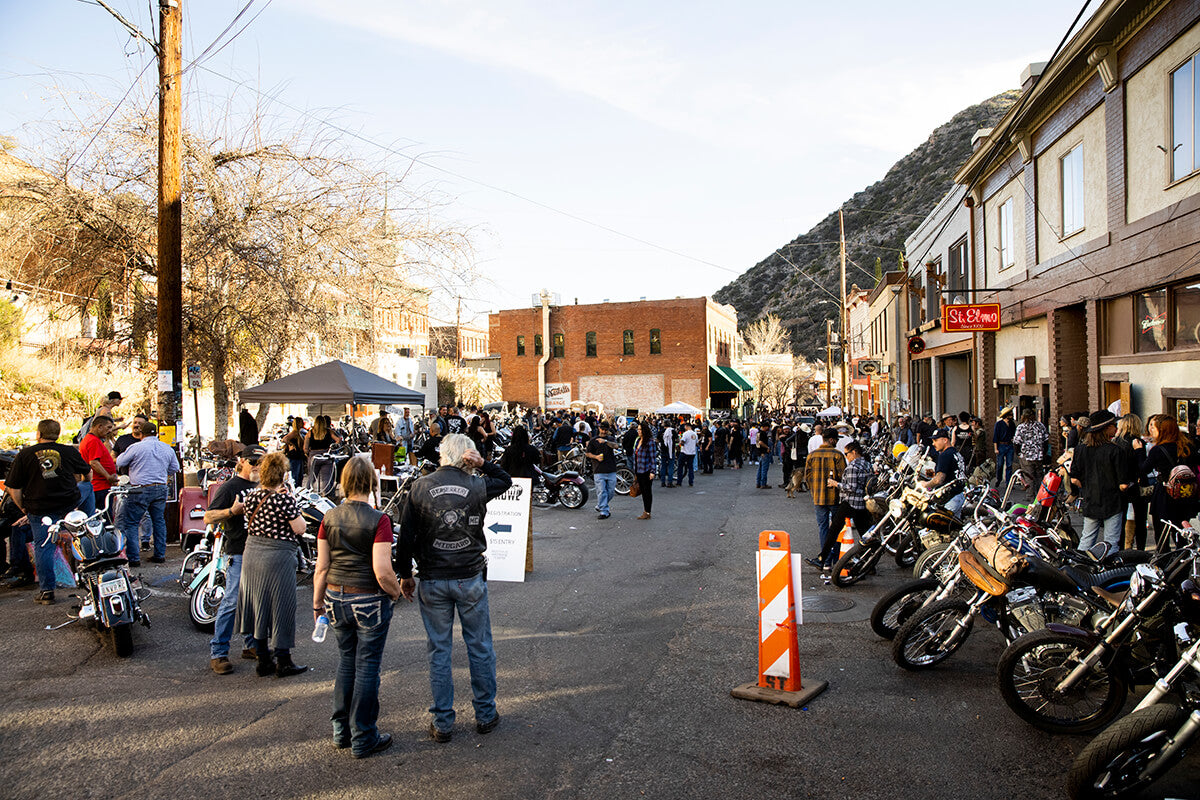 The coolest town surrounded by mountains. Photo courtesy of Biltwell / Geoff Kowalchuk
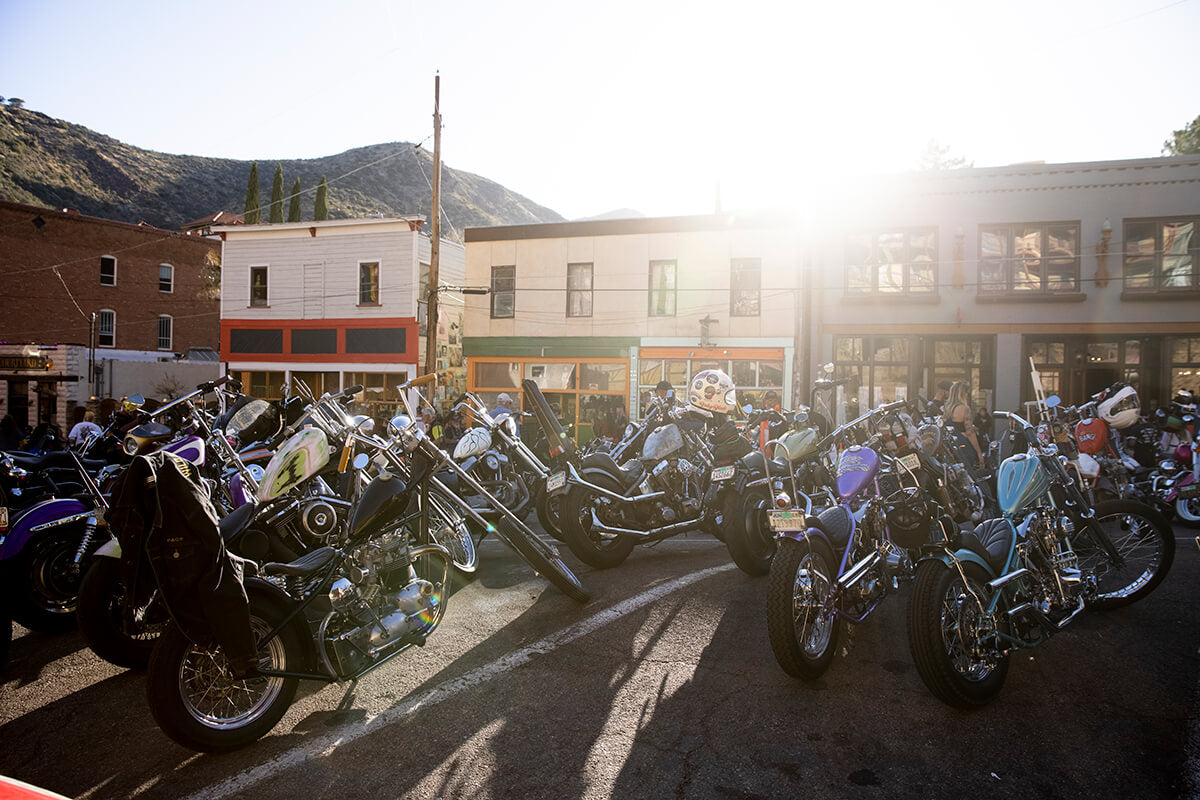 So many great choppers at this show! Photo courtesy of Biltwell / Geoff Kowalchuk
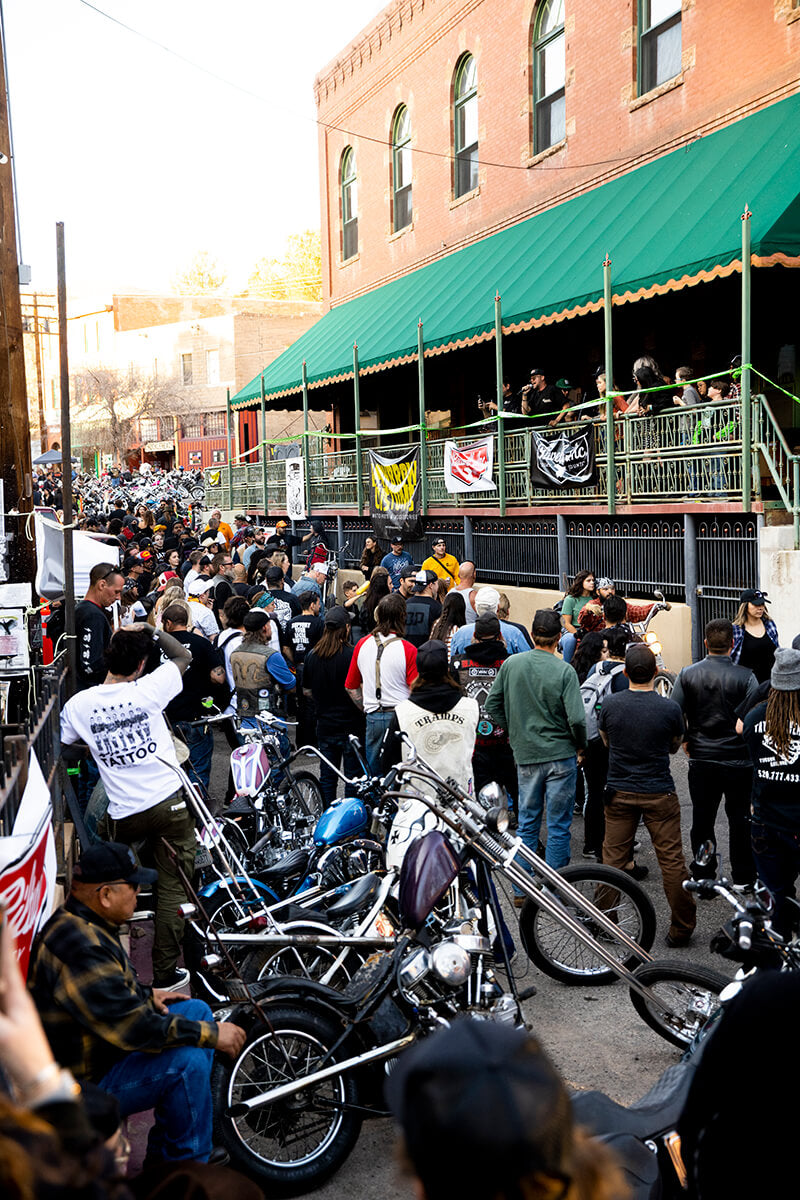 The Prowl, taking over Bisbee, AZ. Photo courtesy of Biltwell / Geoff Kawalchuk
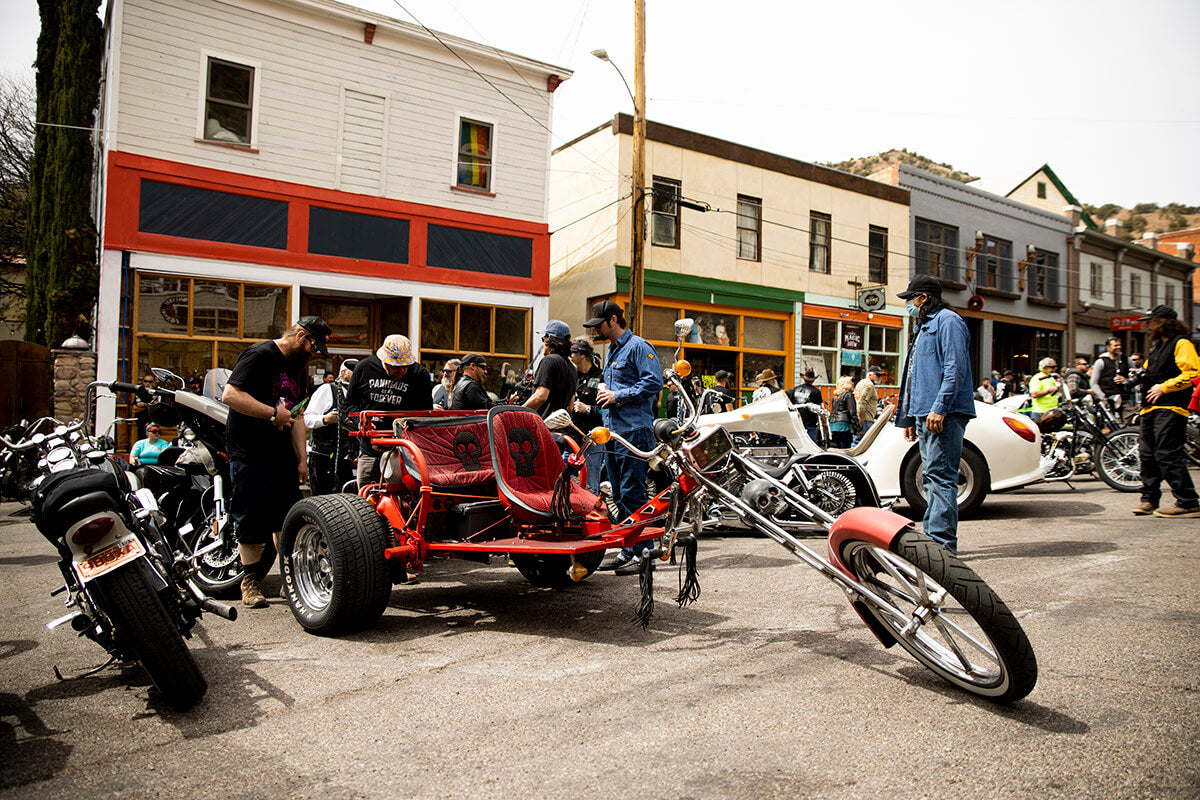 Getting wild with this trike! Photo courtesy of Biltwell / Geoff Kowalchuk
 Hope to see you all there! Photo courtesy of Biltwell / Geoff Kawalchuk
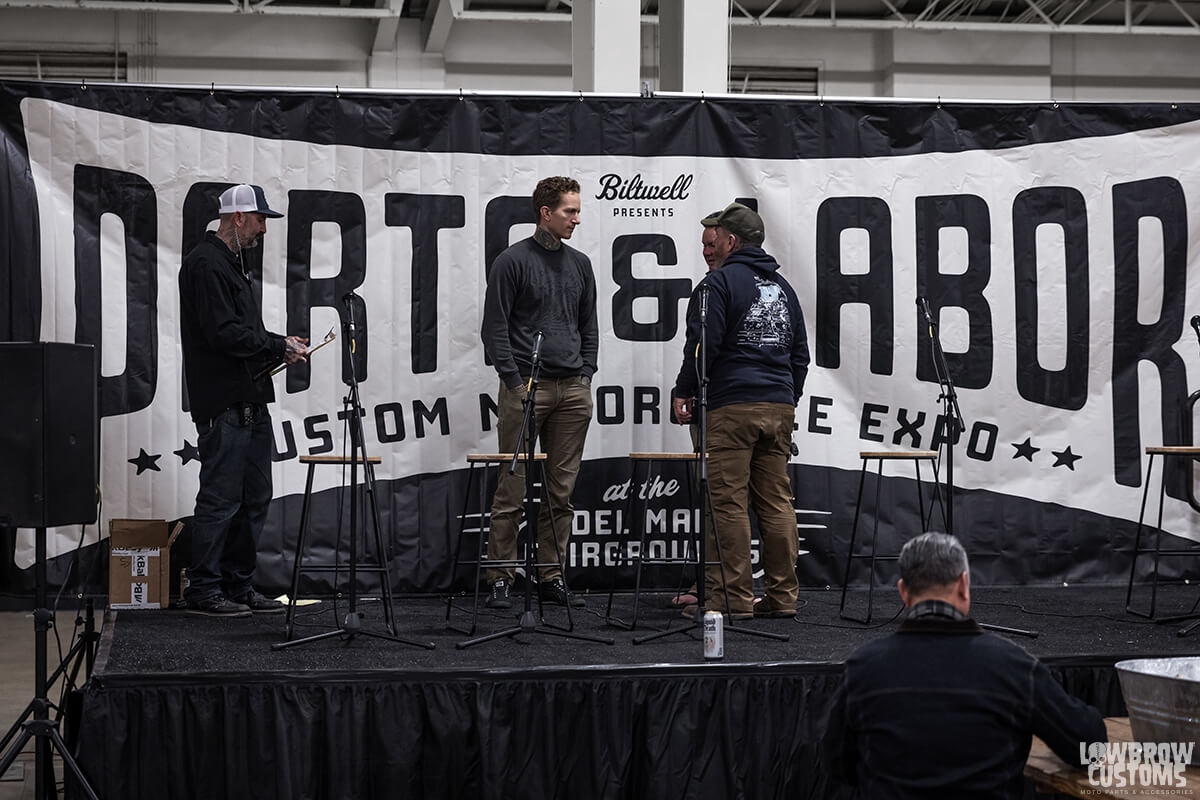 The guys getting ready for the B2B talk on the Parts and Labor Stage.
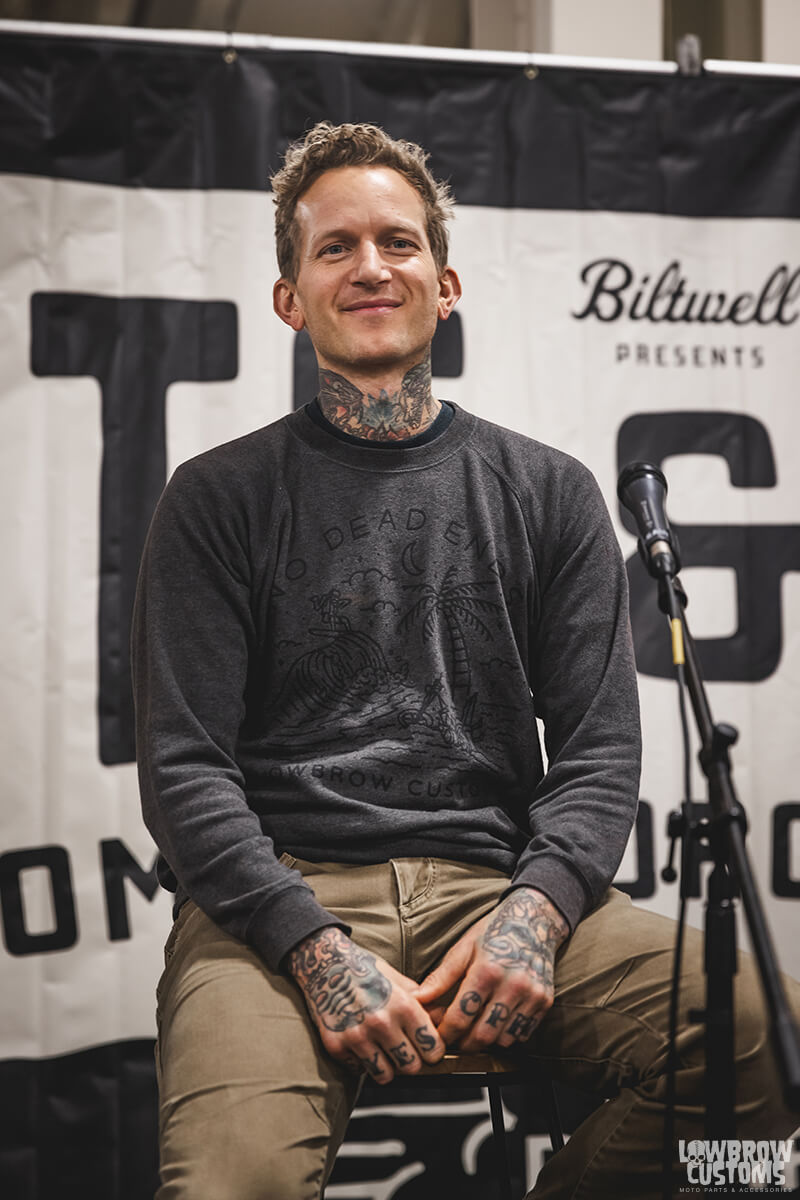 Portrait of Tyler on the Parts and Labor Stage.
 Otto making jokes.
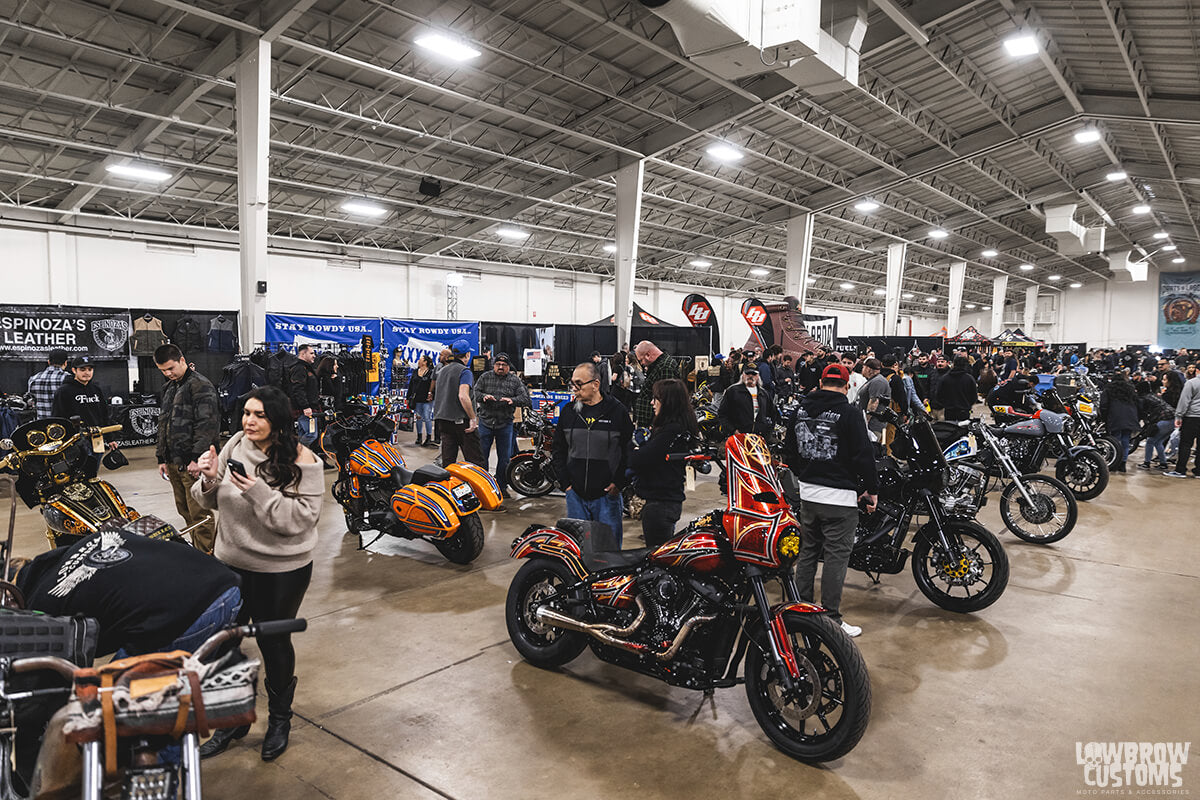 The show full throttle.
 Tyler's pick for best chopper. Built by Lorenzo Cisi
 Panheads, Knuckleheads, Oh my!
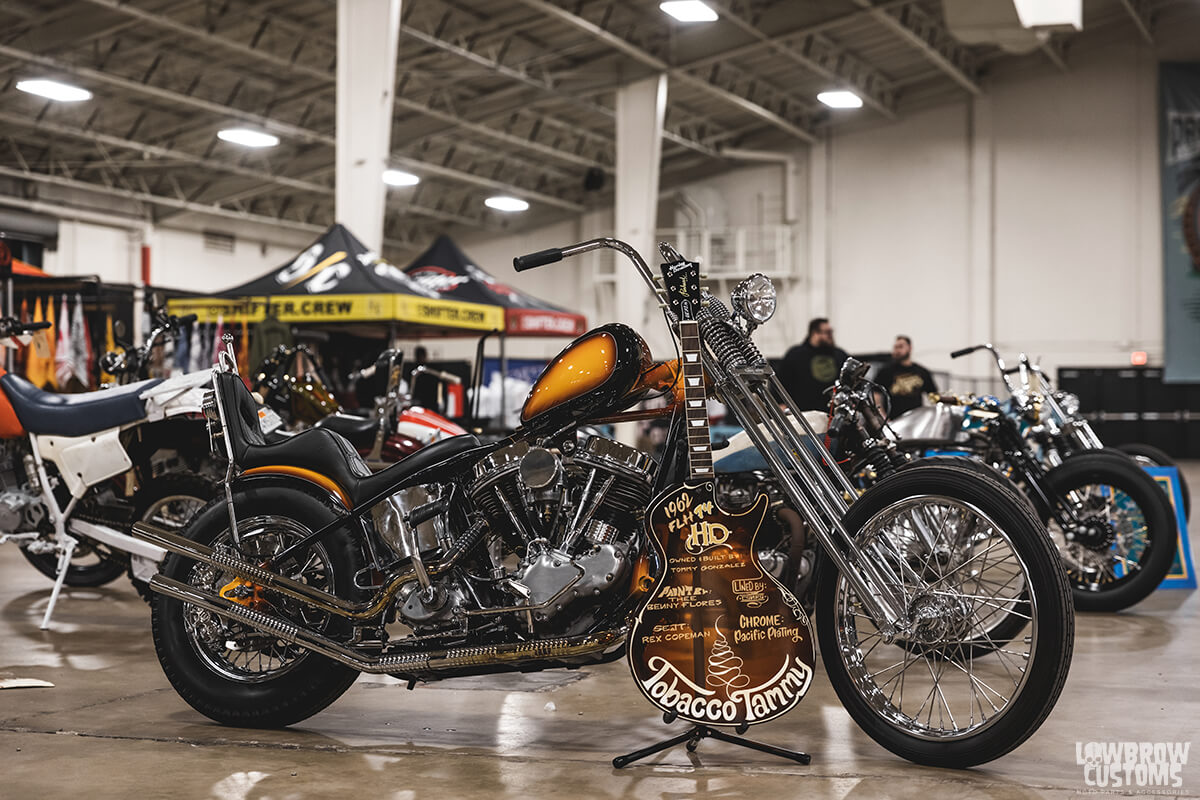 This 1962 Harley-Davidson FLH Panhead Chopper was built by Tommy Gonzalez
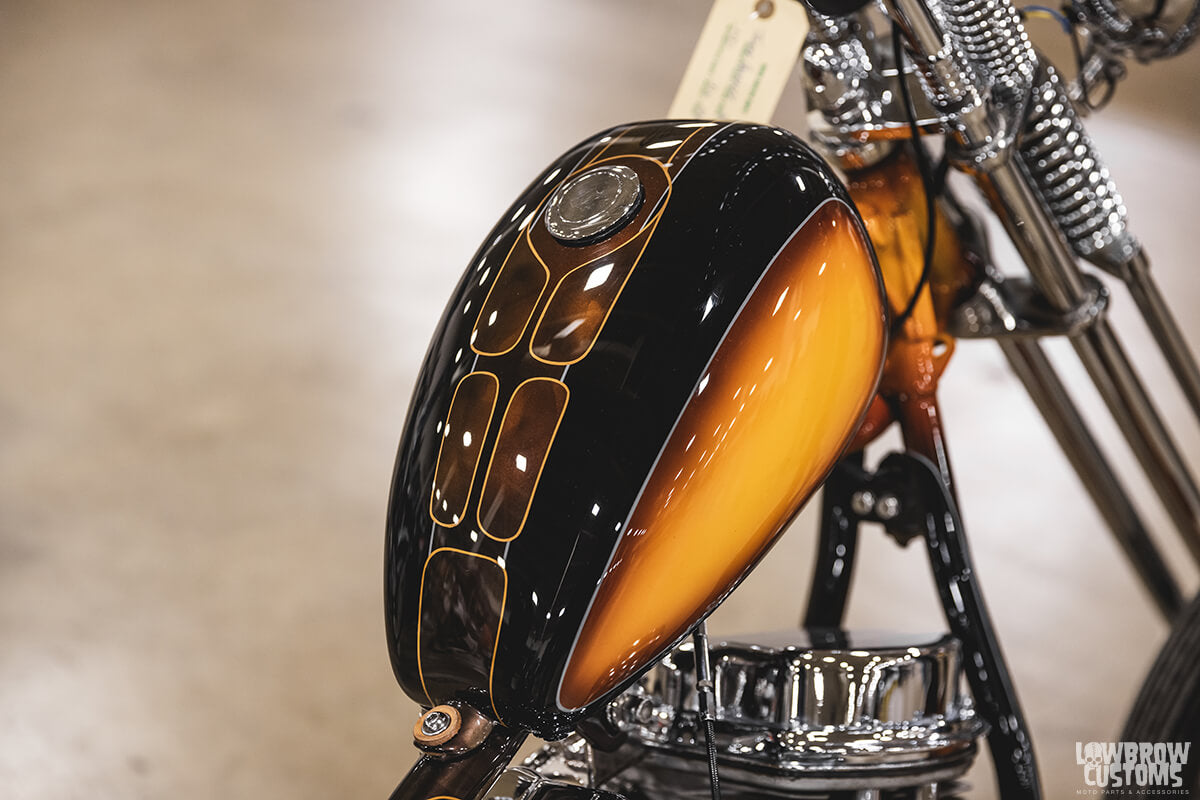 The paint on that Friscoed P-nut, sheesh.
 Oh and Kit picked up the Salt Ghost for us to show off as well. Always good to see that bike back in person. We will be bringing her back to Ohio very soon.
 This Zero Frame Knuckle with our Stingray fender and Frisco Sporty tank looked killer. Build by: Matt Lyons
 Lots of Kustom Tech bits on this build too.
 This 1976 Ironhead was rad as hell. Build by Fury
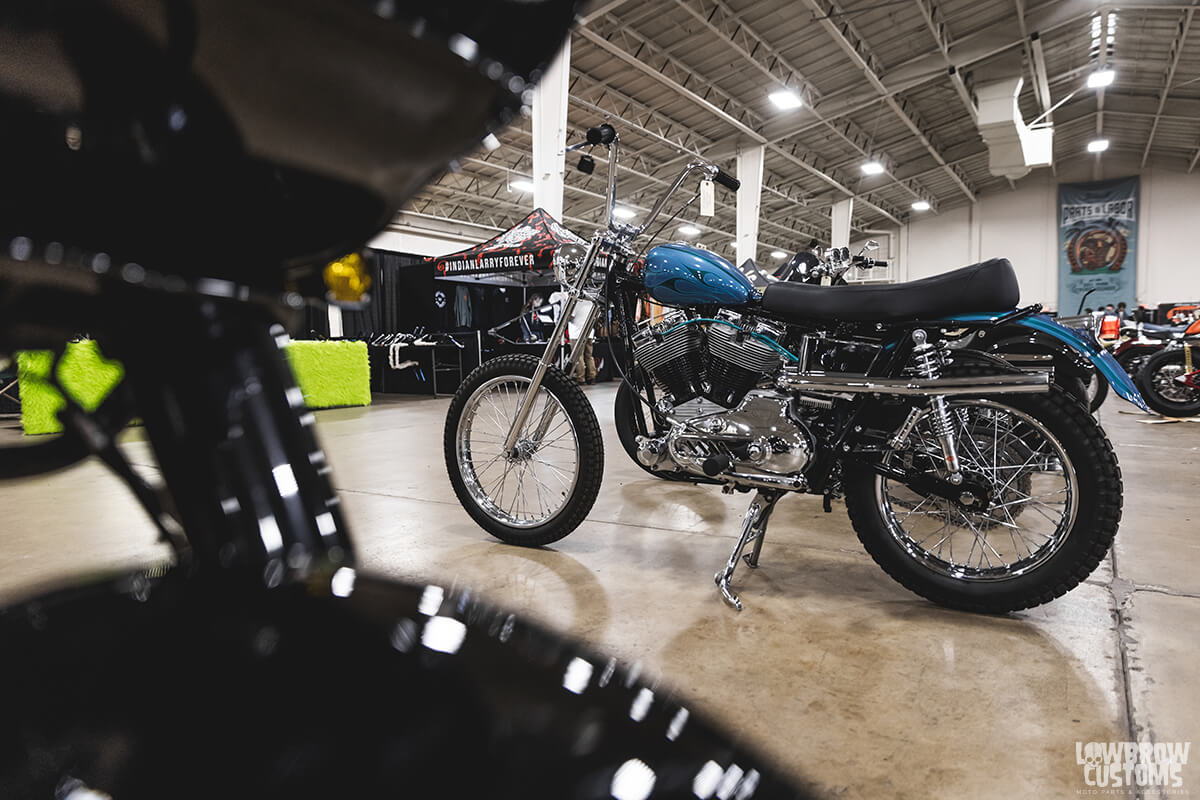 Just a really amazing piece of machinery.
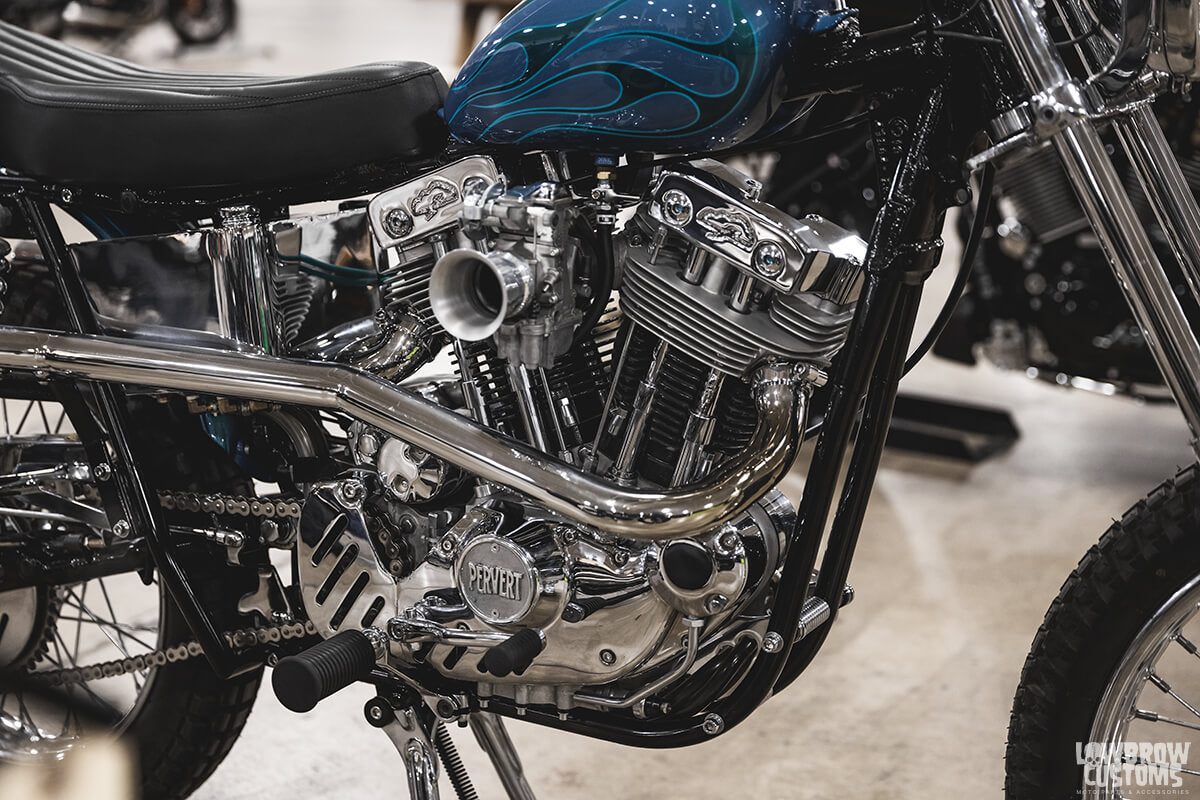 So much detail in the motor.
 Check out this 2003 Sportster Chopper by Michael Uelarde.
 The rear Sprotor threw me for a loop.. What a cool ass idea! This bike also rocking a Led Sled Invader 21 Wheel on the front! This is a really rad bike.
 Also had a custom FNA Custom Pancake Headlight.
 Steady crowd through out the day.
 Vendor village had lots of diverse small businesses and some large ones.
 I got to hang with my friend Rob from MotoStuka for a bit. Always good seeing him.
 If you don't have a set of his gloves yet, you should probably get on that.
 Here's a sick tracker with our Tsunami Fender on it.
 Take us to the cone zone! John Mulldoon's 1978 FXE chopper is fire.
 Forever 6 wheels.
 Sean Mazza's 1967 FL is really amazing. In love with the small brake lights on the bottom of the axle plates.
 Sacred Steel's crazy digger. The etch work on the motor was insane.
 '69 dudes!!!
 Zach Gosteli 1969 FLH chopper was one of my top favorites. Classic styling and tough as nails.
 Loved the patina paint job on Tod Petty's 1950 Panhead Chop.
 Even the left over gas rules.
 A little Honda in your life never hurt nobody.
 More of Lorenzo's sweet Shovel.
 Would ya just look at it. The molding is so rad.
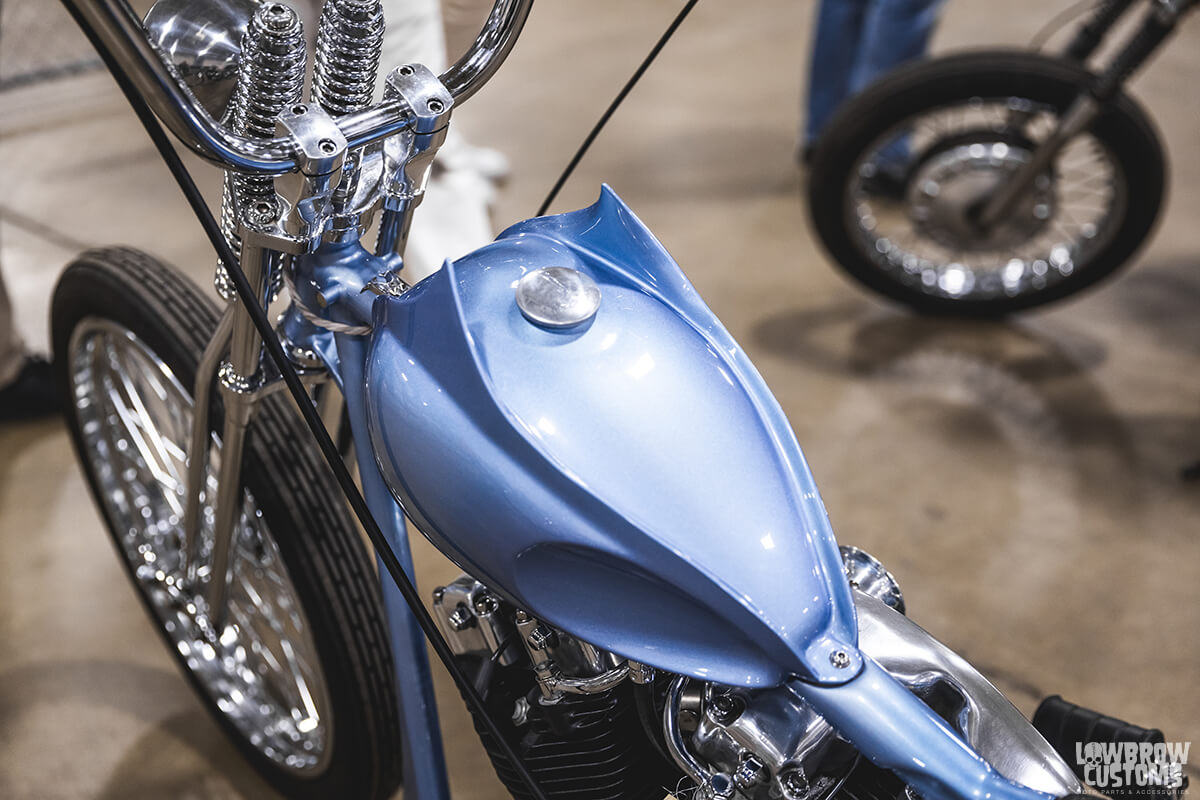 The devil in blue.
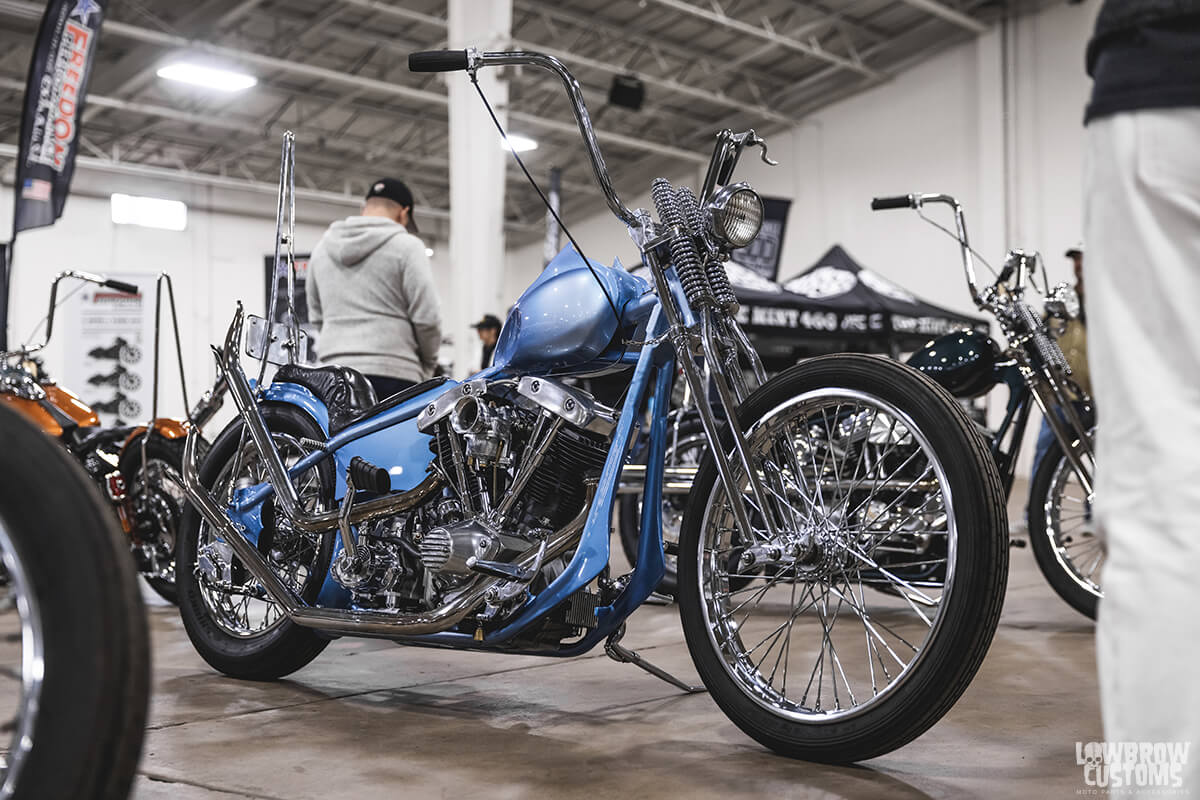 A real piece of rolling art.
 Bionic Dogo!- Davin Wirtanen's shovelhead.
 You can do anything if you put your mind to it. Yeah thats right, thats a goldwing motor in a dyna frame.
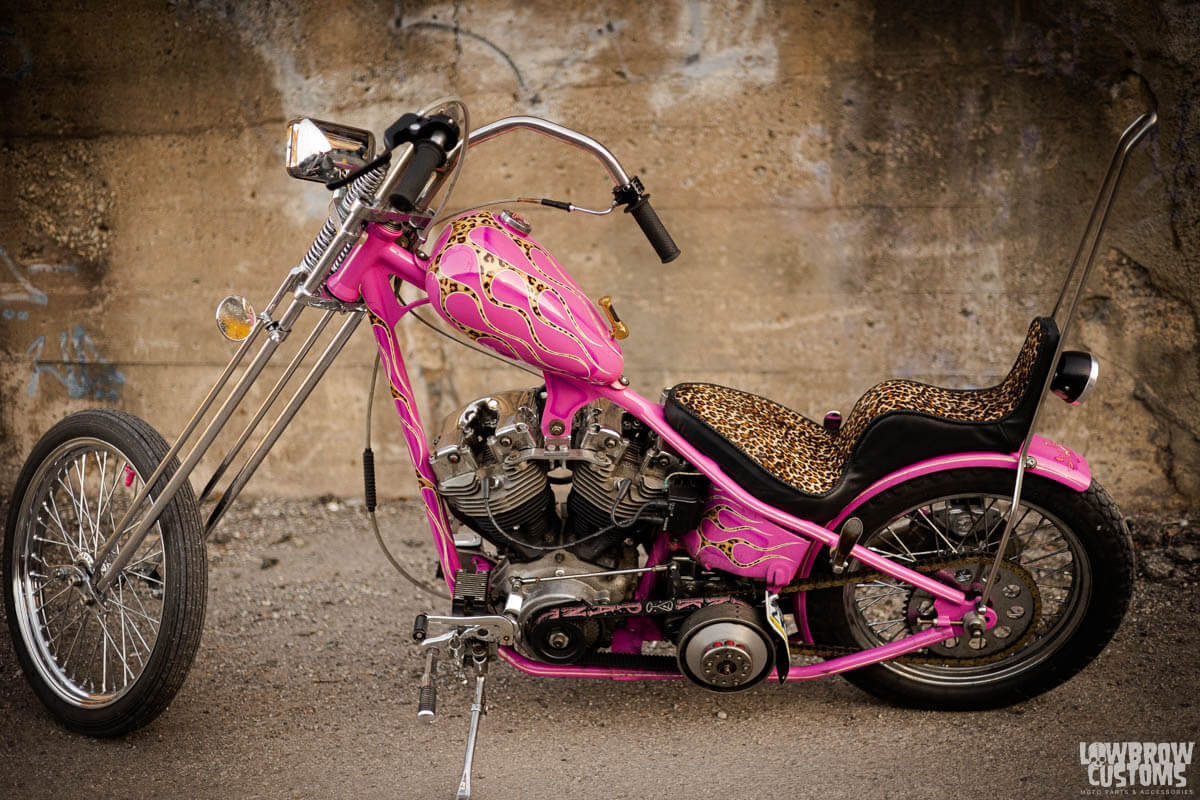 Single down tube on the frame.
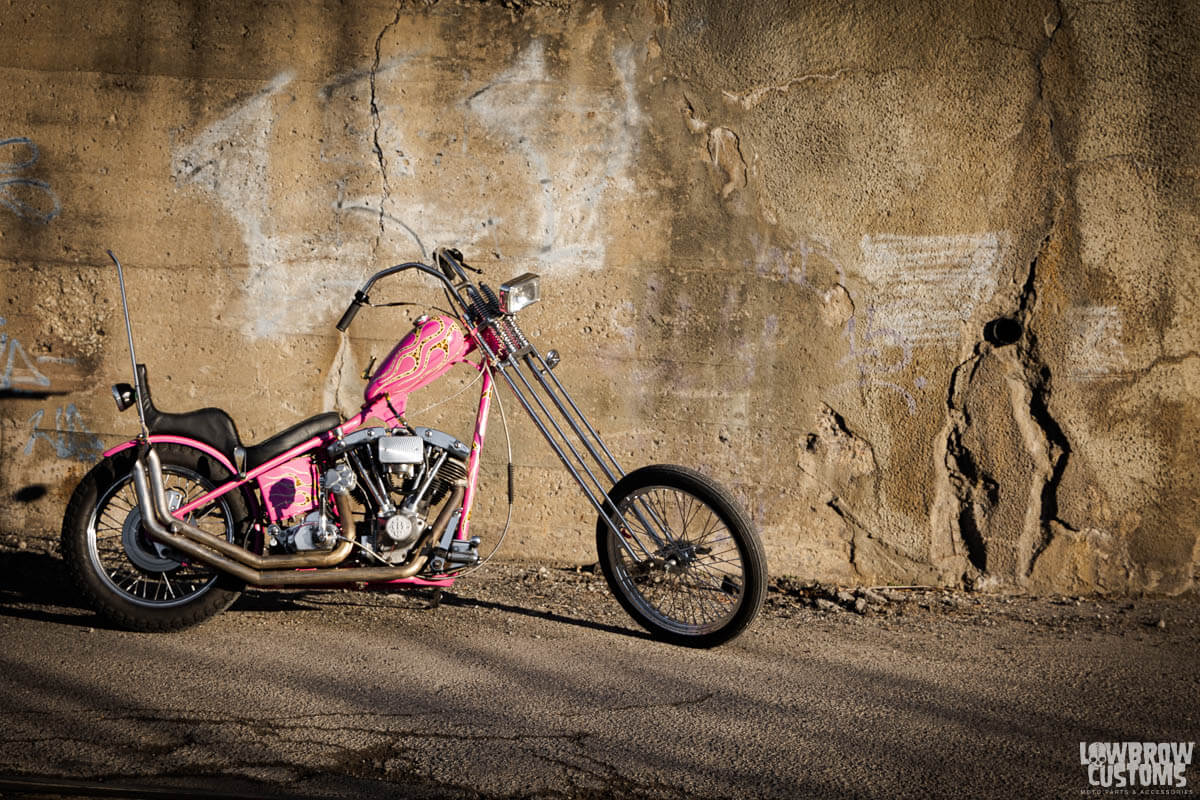 Check out that springer!
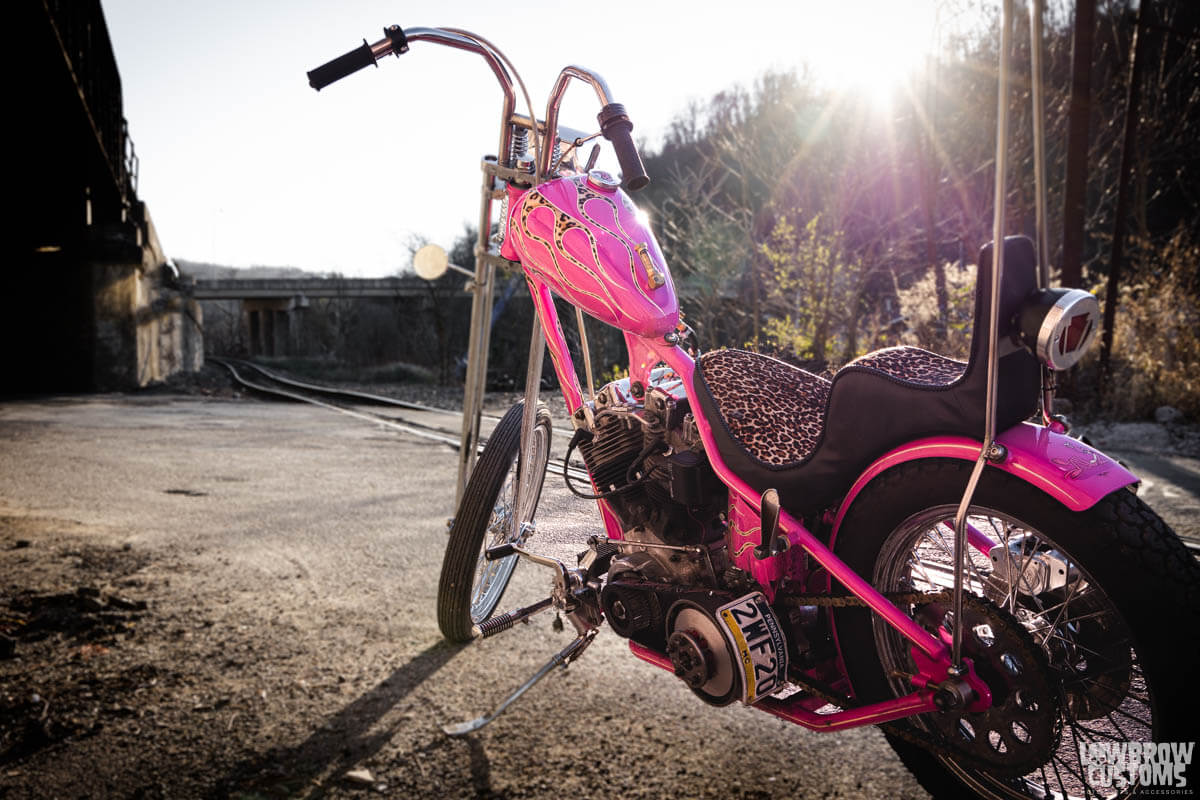 The paint by TE Customs
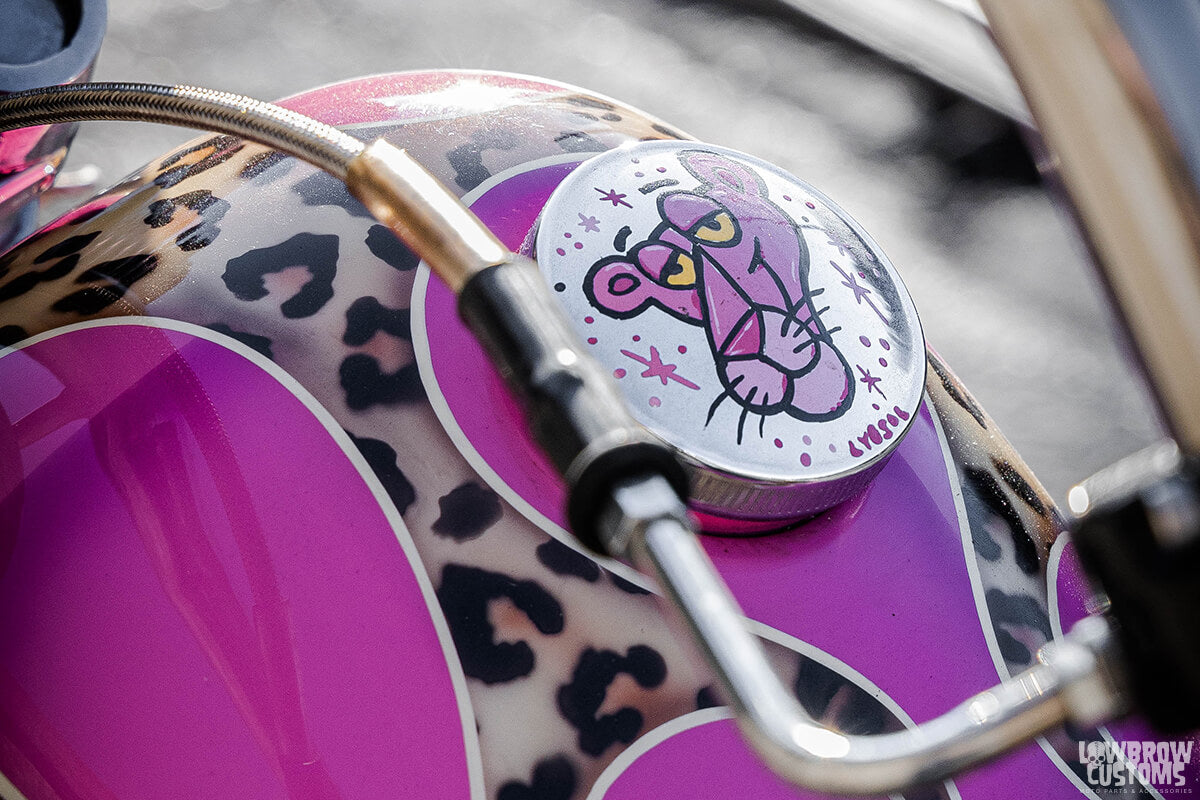 Hey that's the Pink Panther!
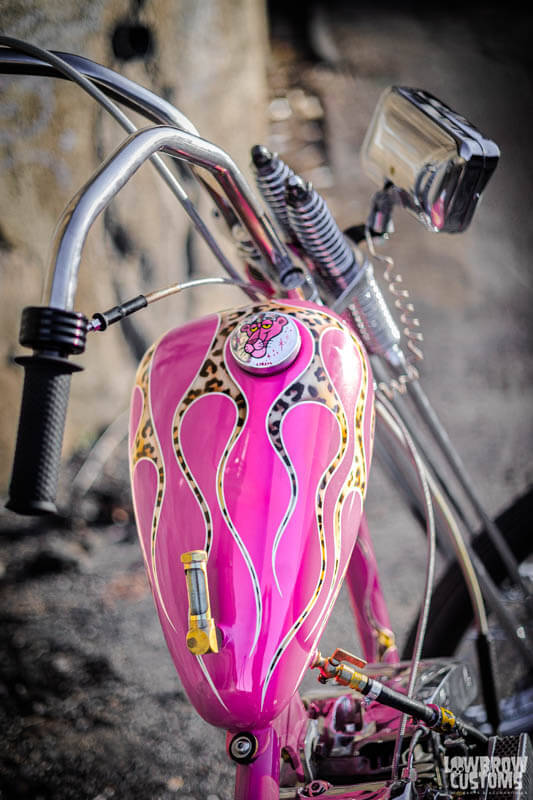 Narrow Alien Tank with custom fuel sight gauge rocking this wild TE Customs paint job!
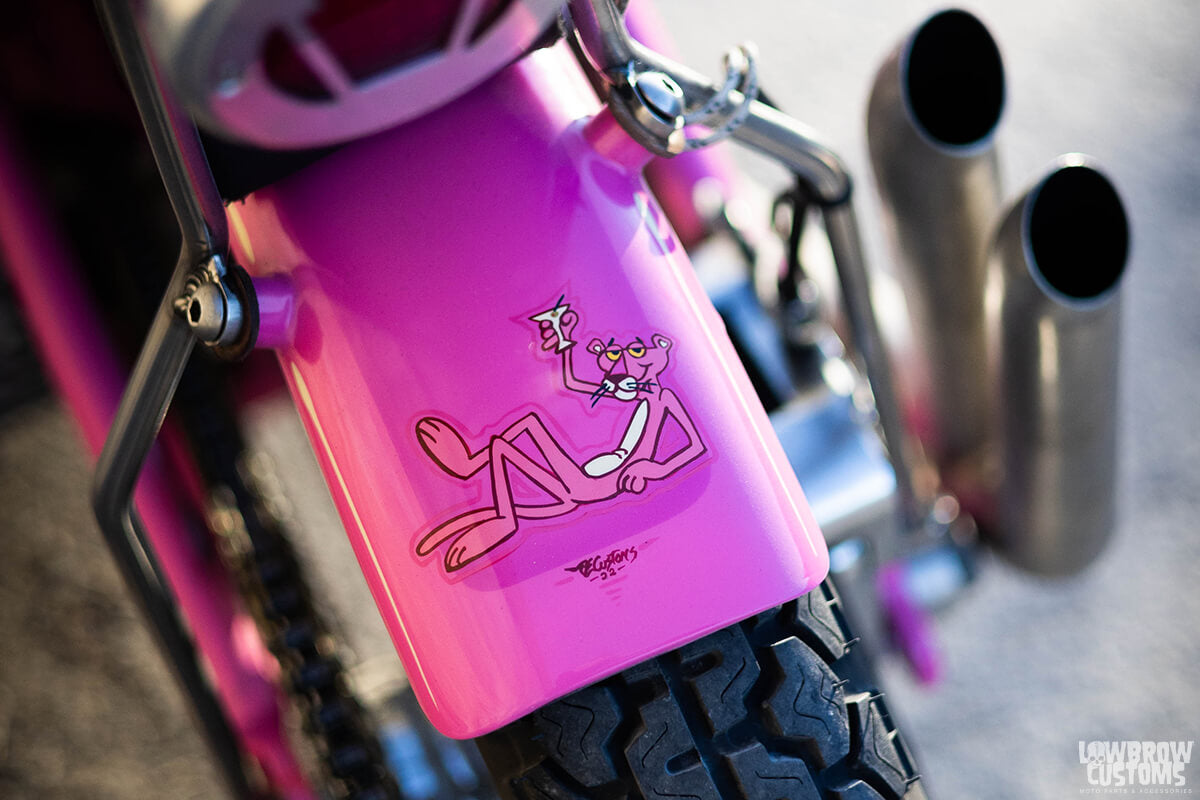 The Pink Panthers chillin' on the rear fender.
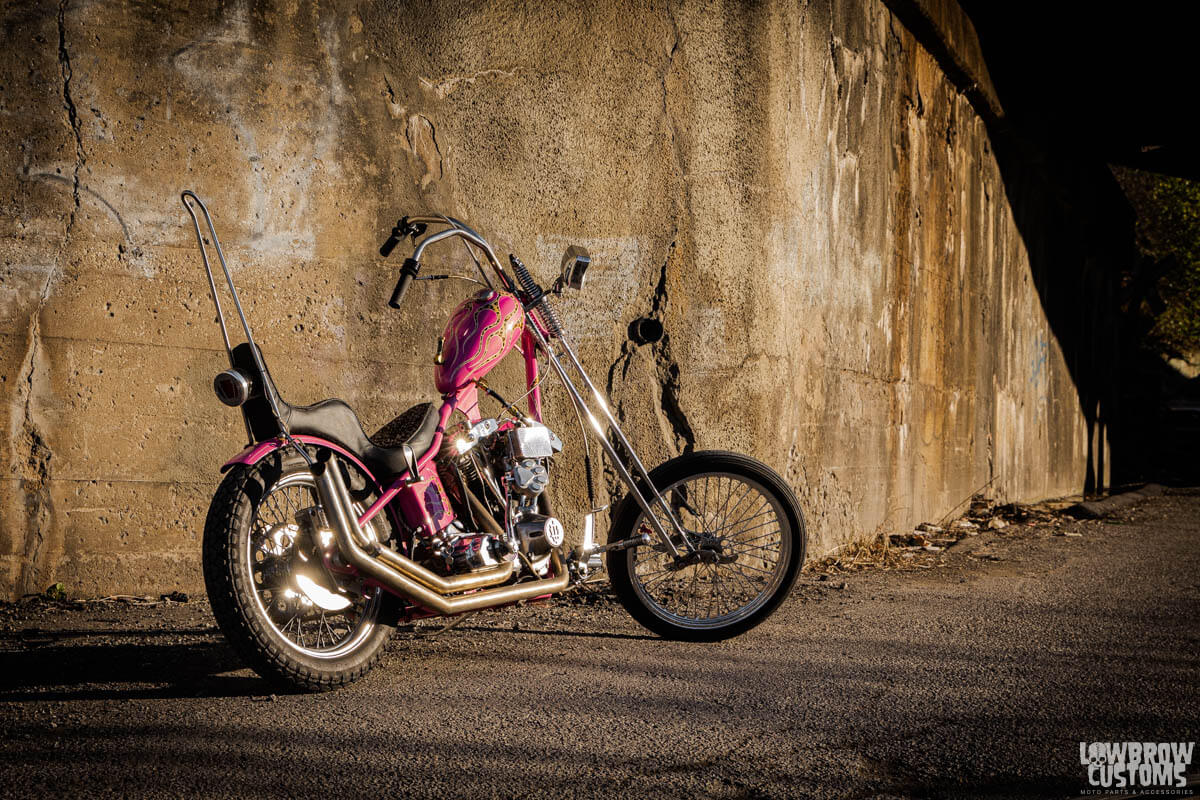 Glistening in the sun.
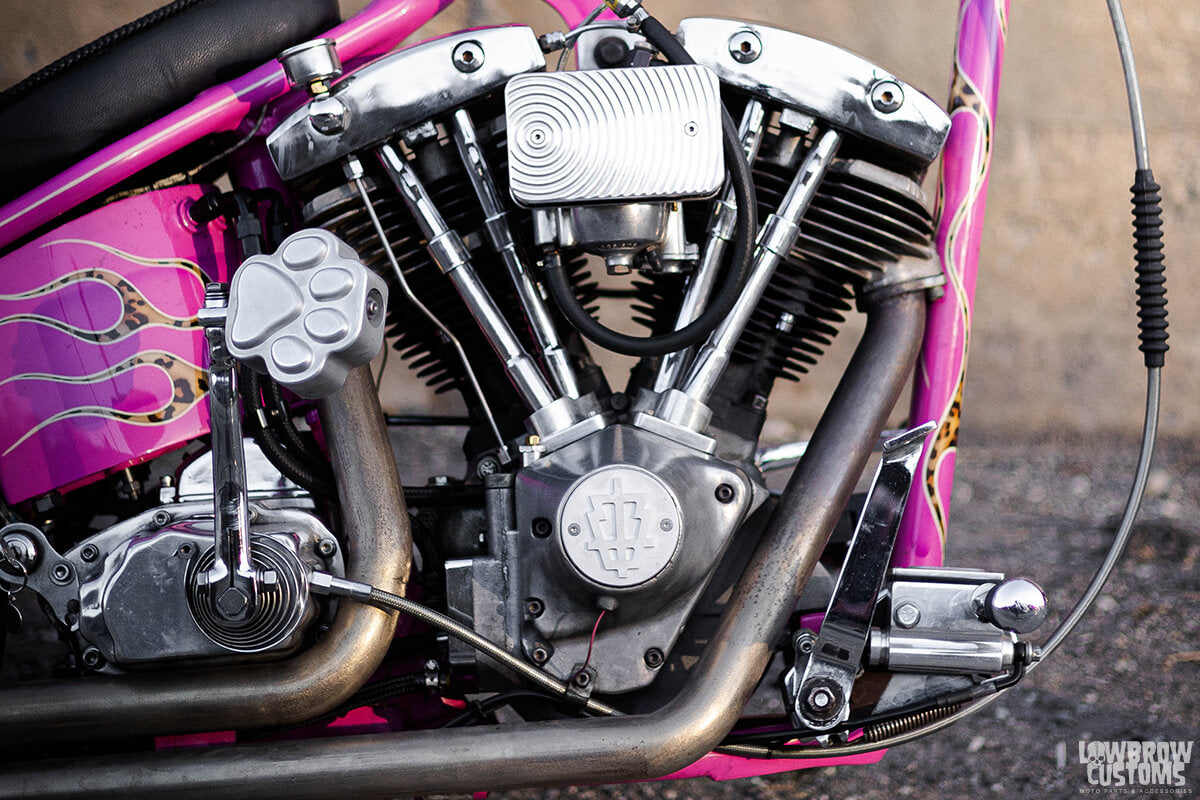 Check out that Paw kicker pedal!
 Lowbrow Customs 21" Spool hub wheel with Avon Speedmaster 21" tire.
 18" Hardline Wheel with 18" Dunlop K70 Vintage Tire
 Just killer paint work from TE Customs
 Dixie sqaure headlight from the basement.
 Classic meets wild, a horseshoe oil tank, pink with leopard flames.
 That kicker pedal doh.
 Trident Mini Lunch Box air cleaner is super rad.
 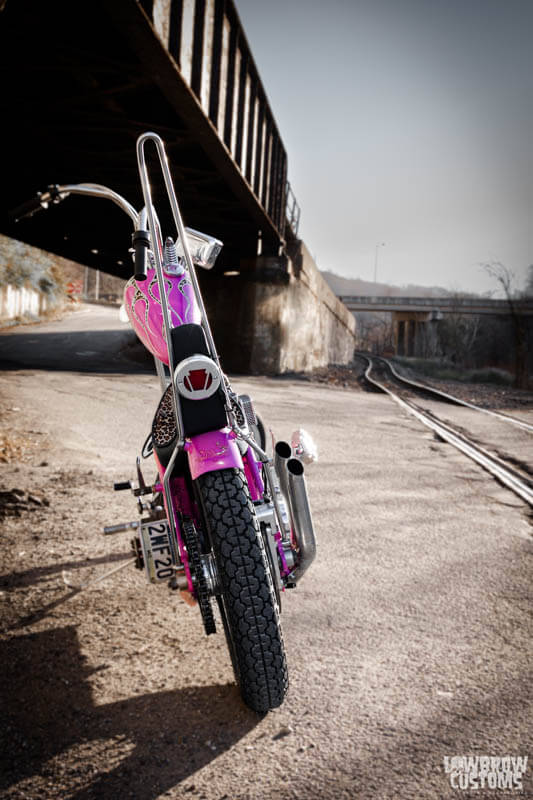 Super skinny and long.
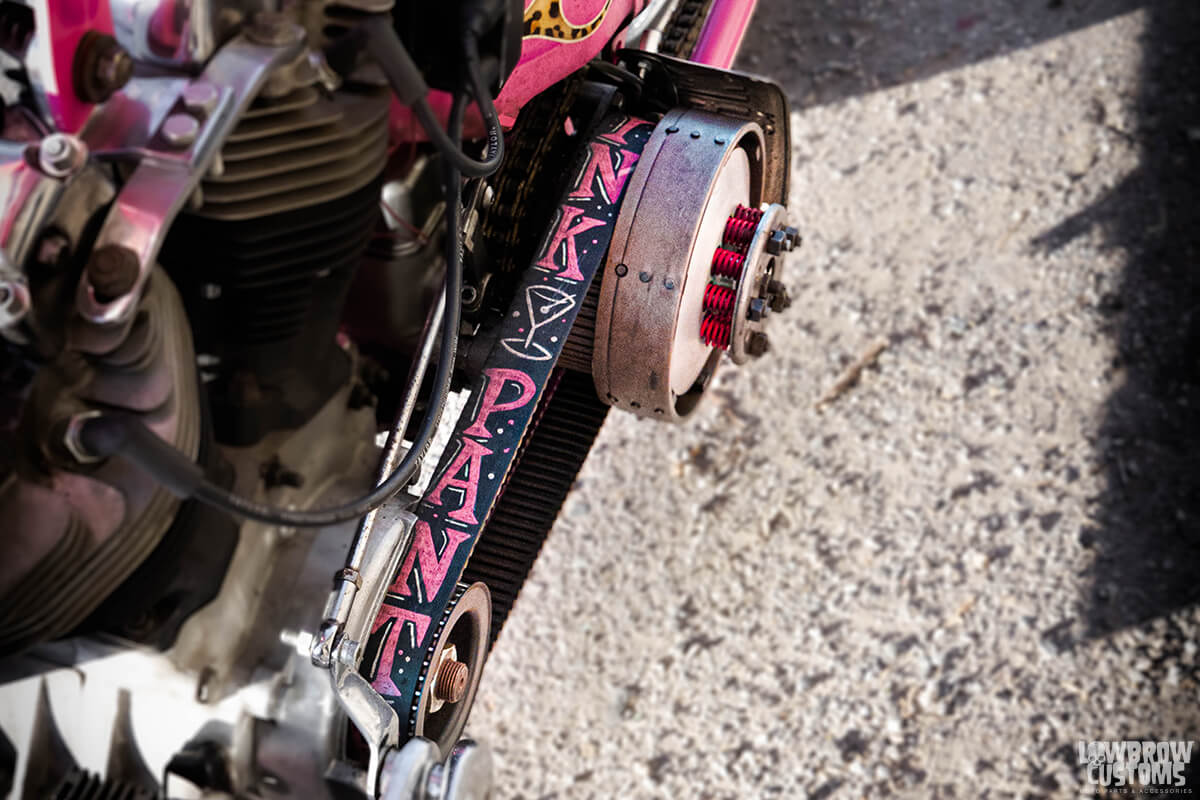 Even put Pink Panther on the belt drive.
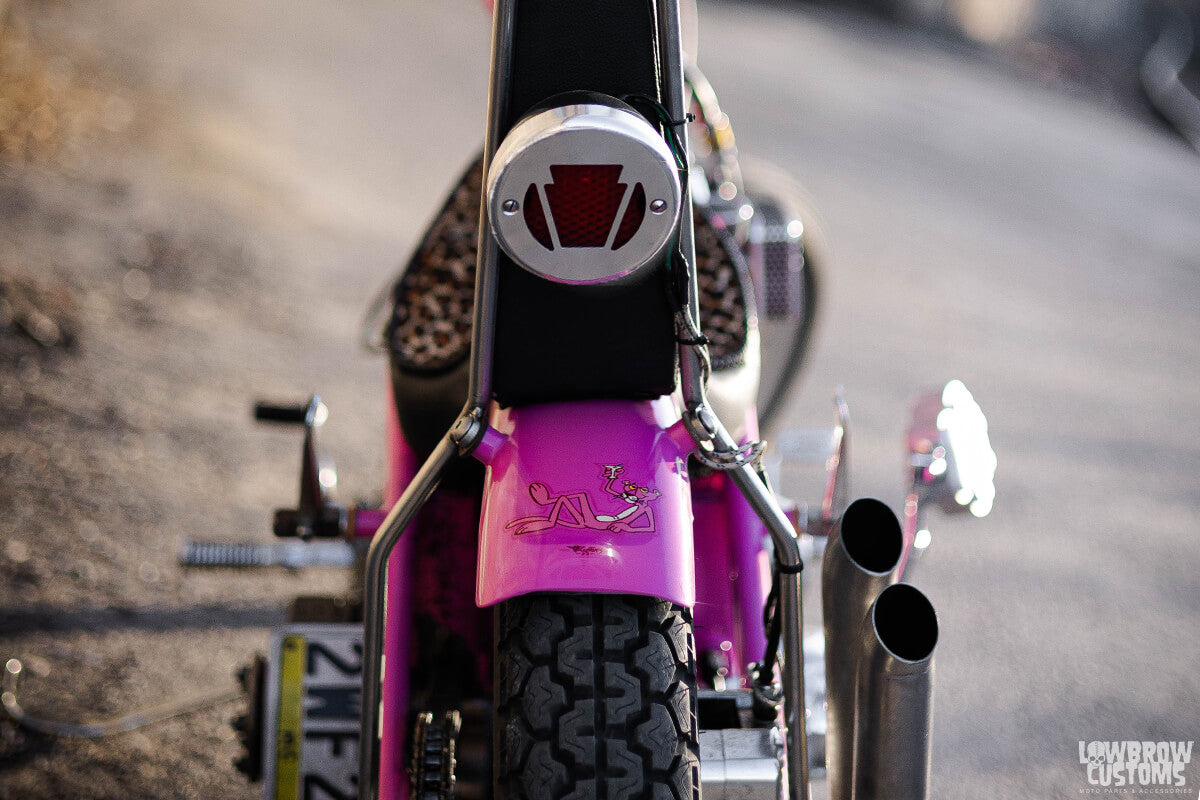 33 Ford Tail Light replica with a custom PA cover from Uptahn.
 There seems to be a dinger on your
 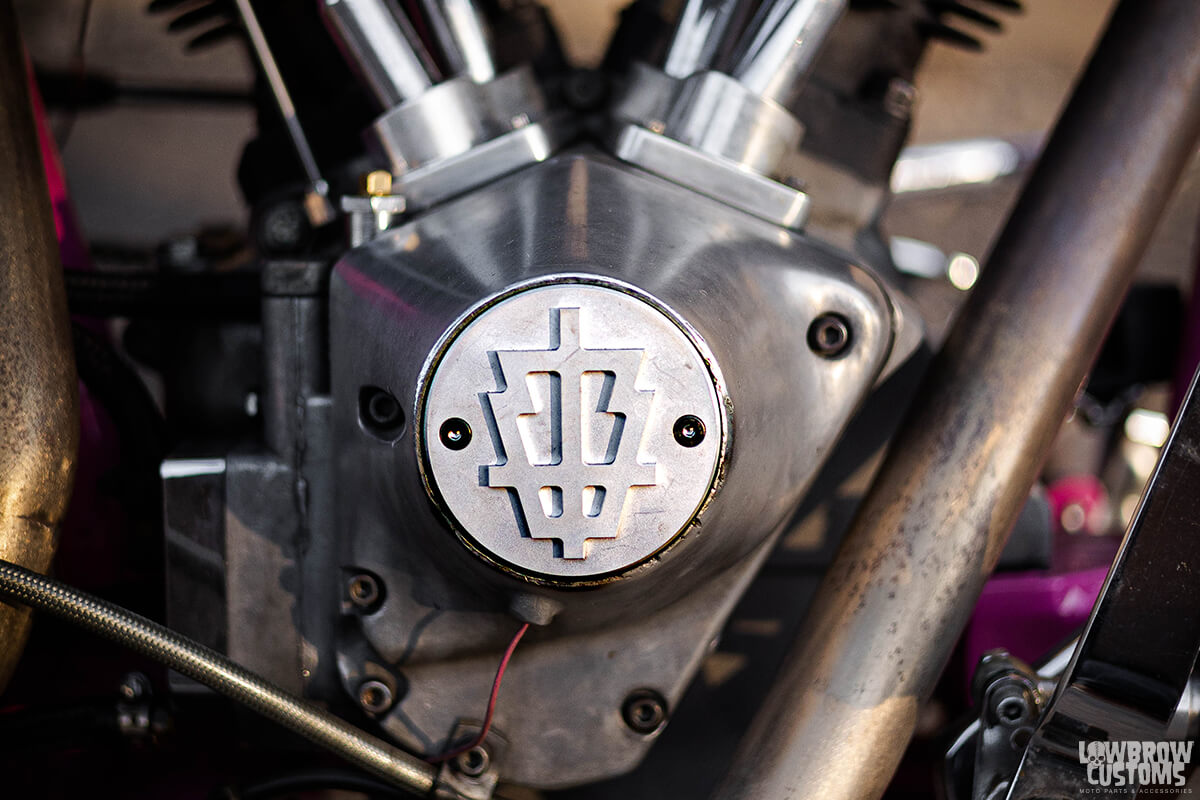 More PA goodness from Uptahn
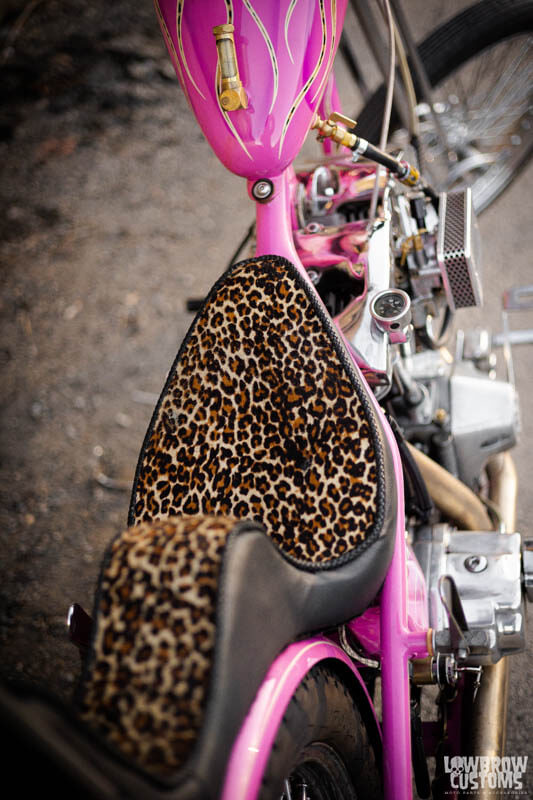 Full cheetah print seat.
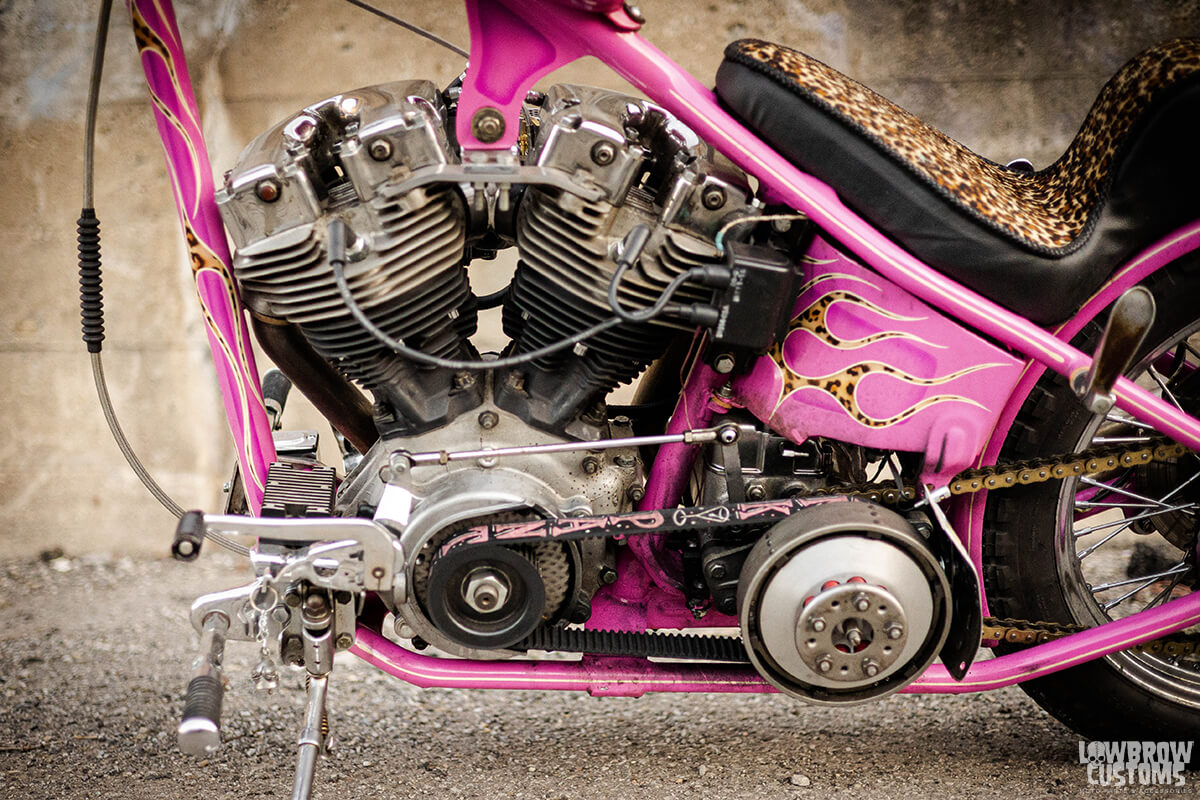 Open primary
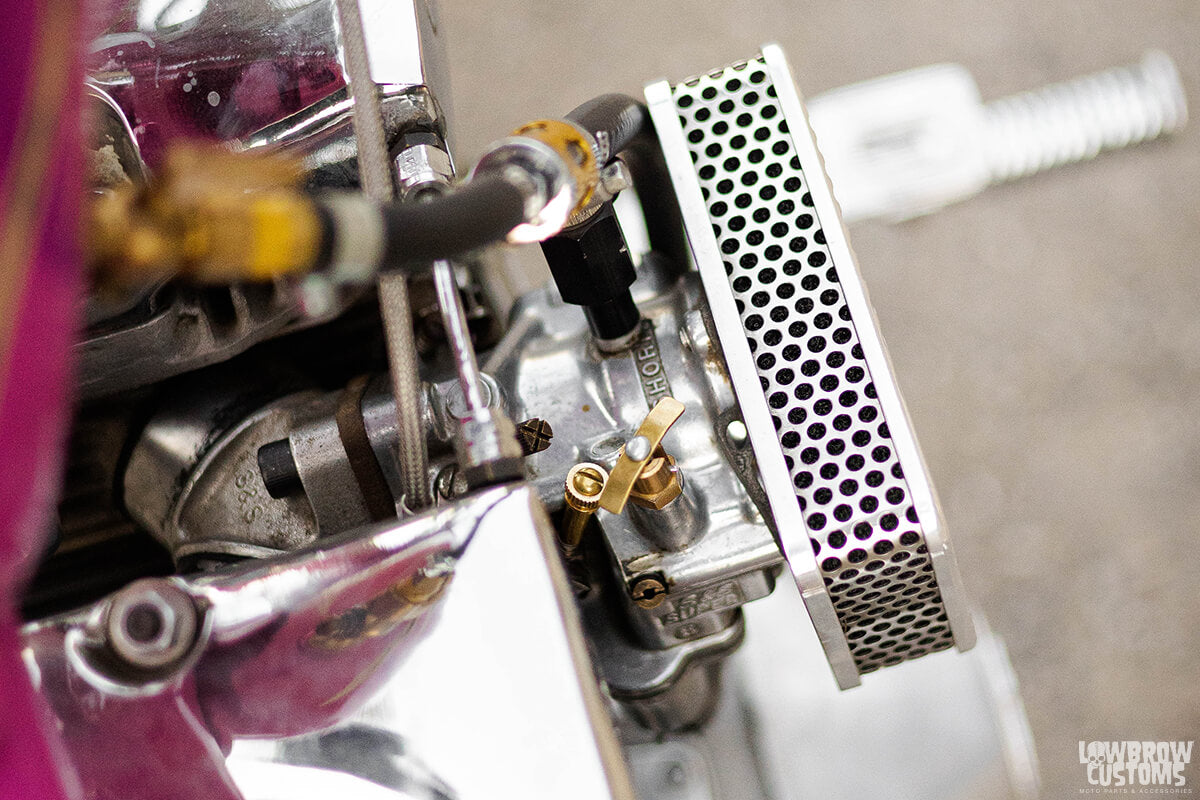 Good look at the carb and Trident min box air cleaner.
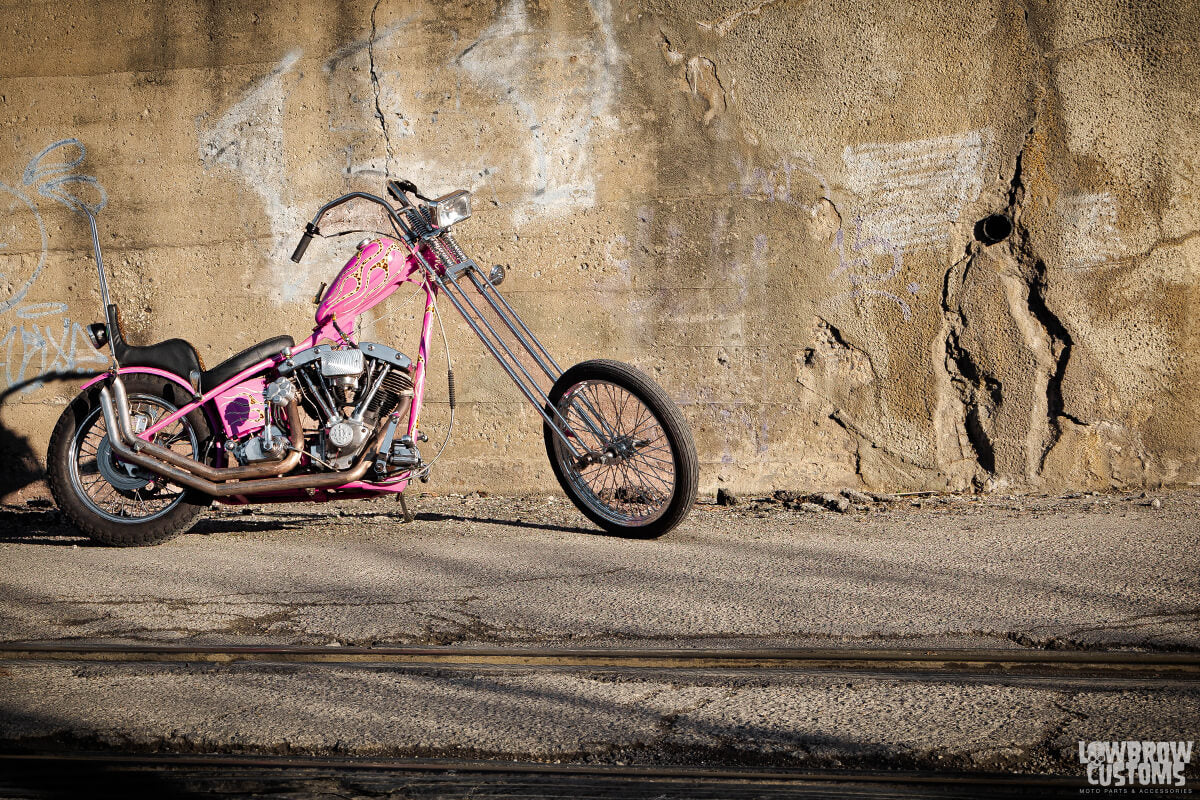 Choppers man!
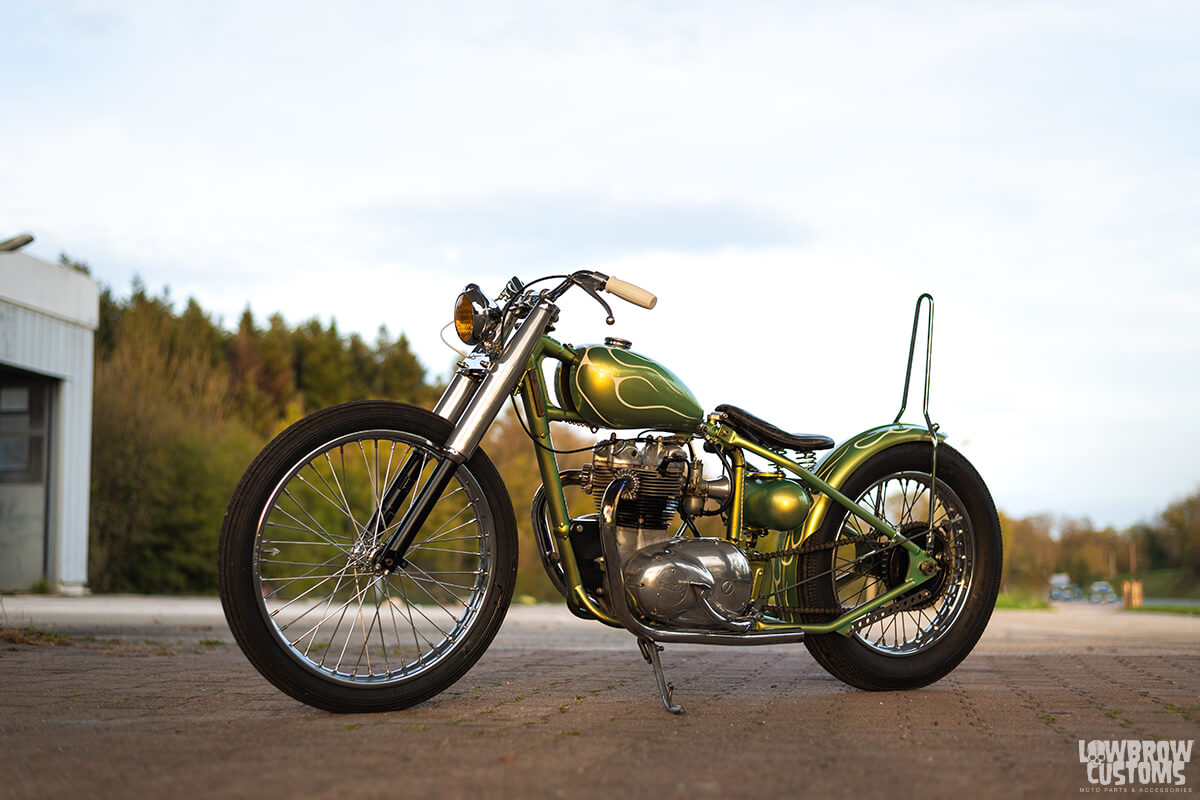 Perfect stance and super clean lines.
 1970 Triumph T100 Chopper
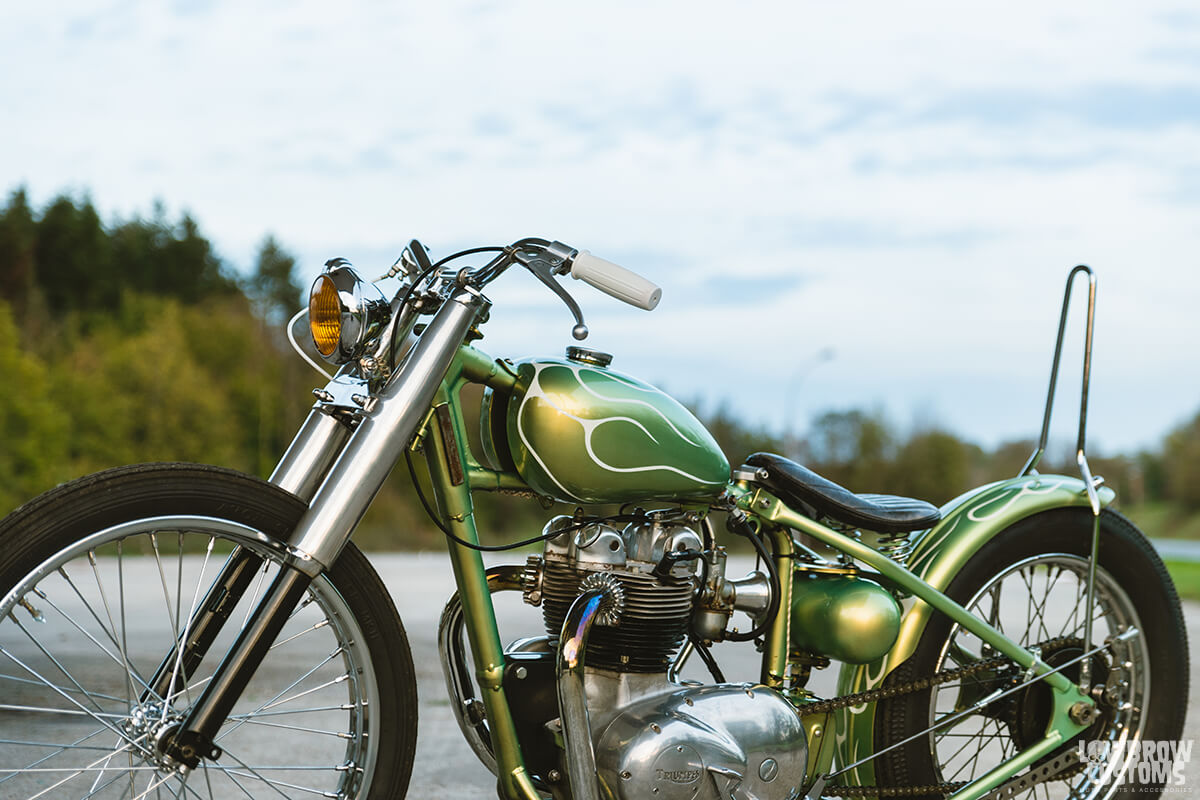 Fork Shrouds making this front end look proper.
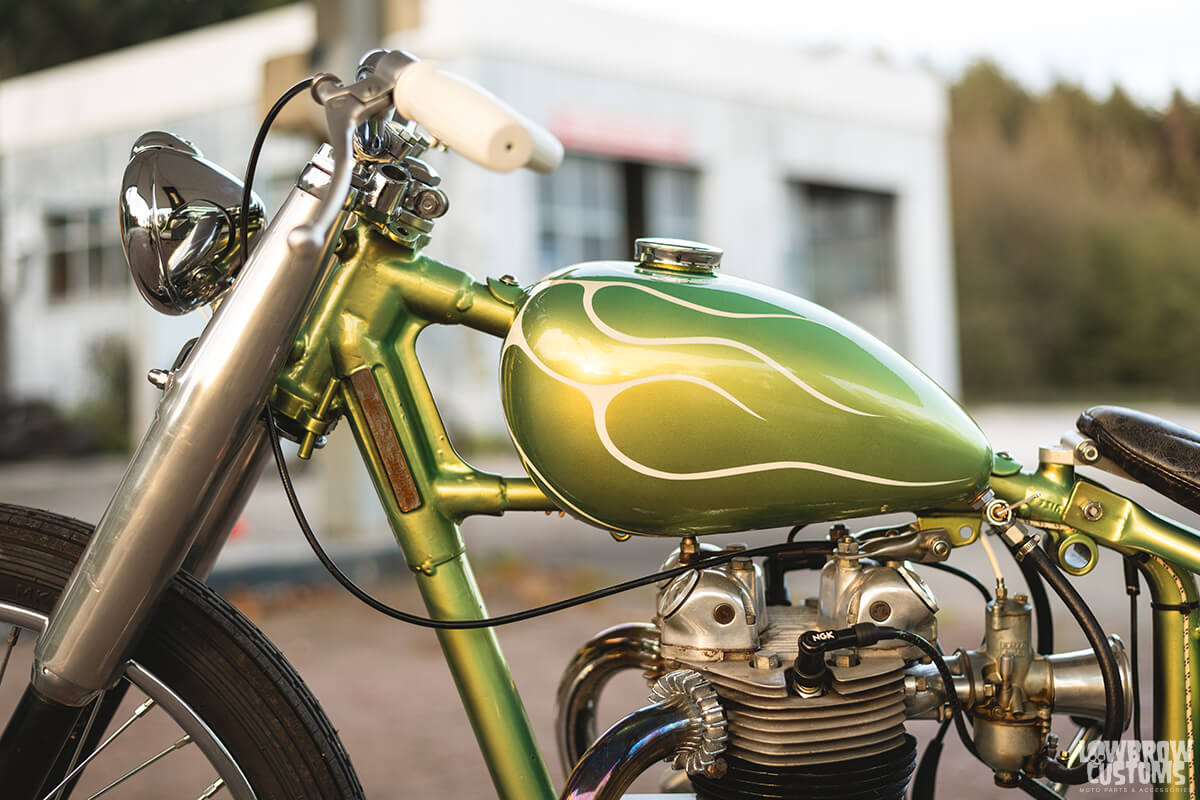 Pearl Green paint and white pin striping by Jon.
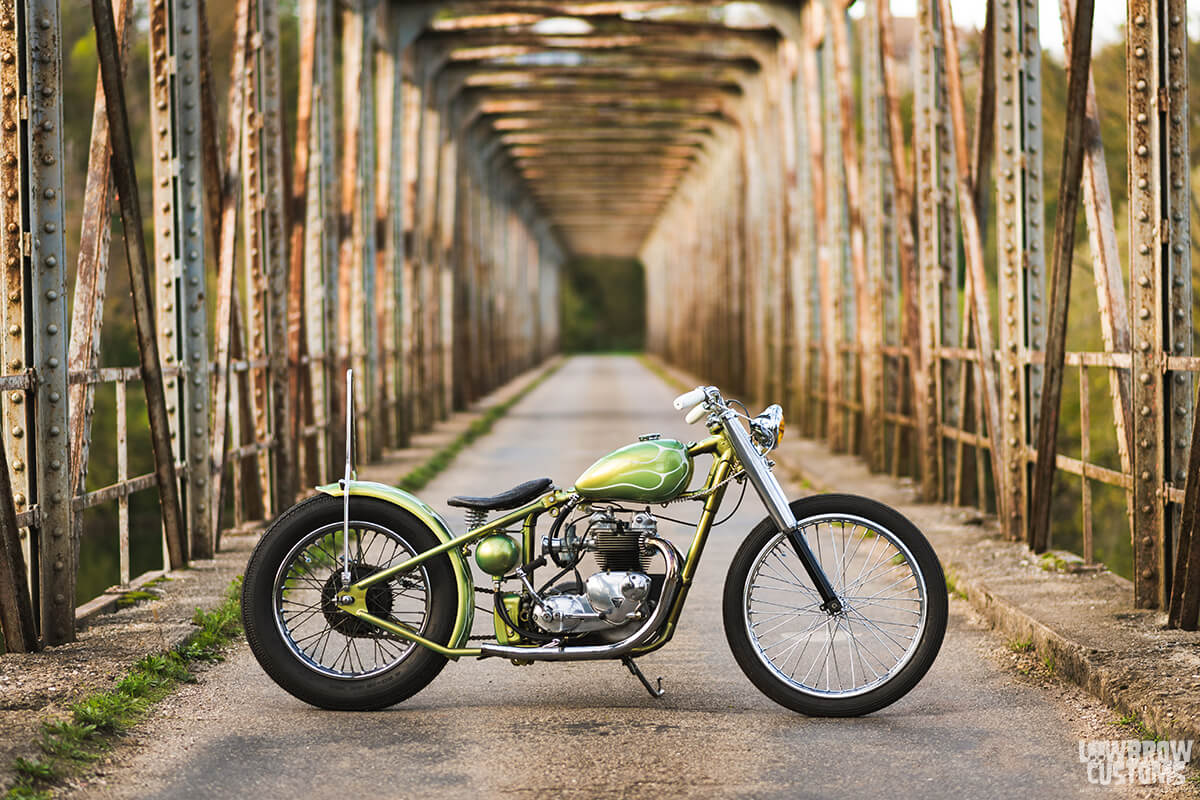 It has that classic 1960 chopper vibe.
 500 cc Triumph T100
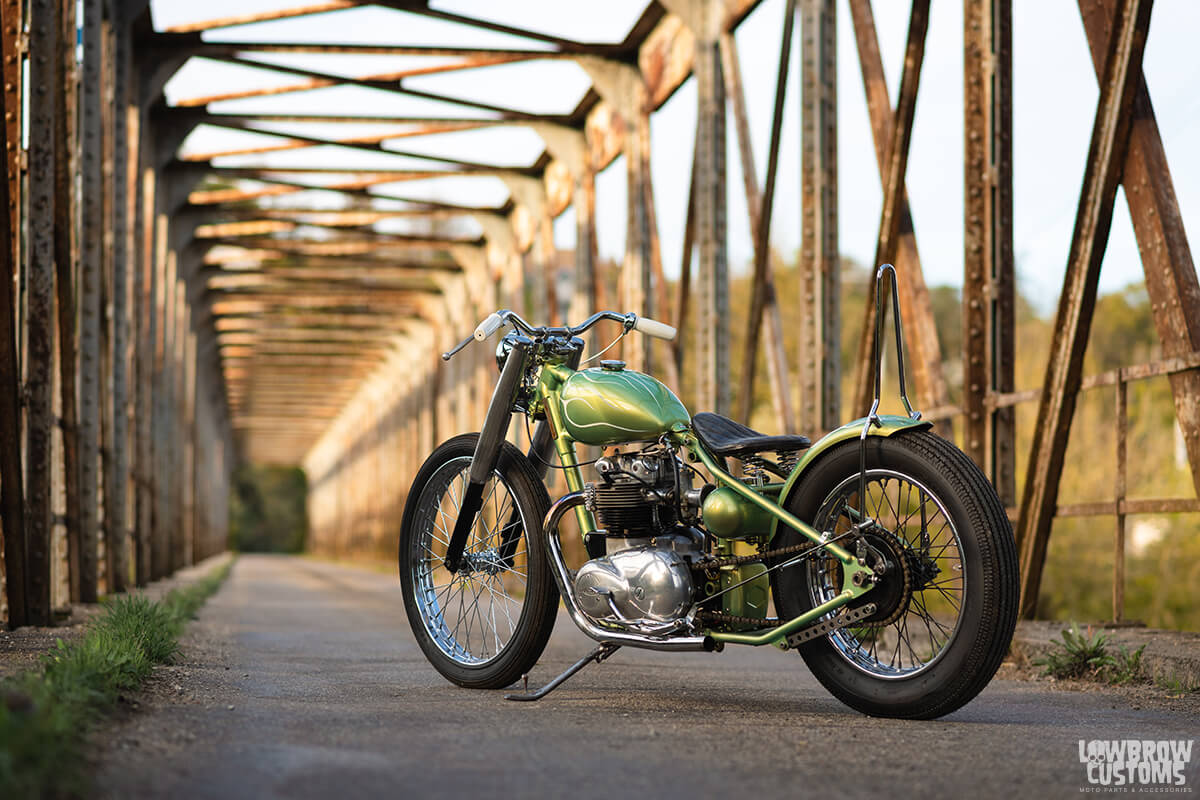 Lowbrow Customs Bolt-on Hardtail is extremely easy to install and allows to keep all original motor mounts.
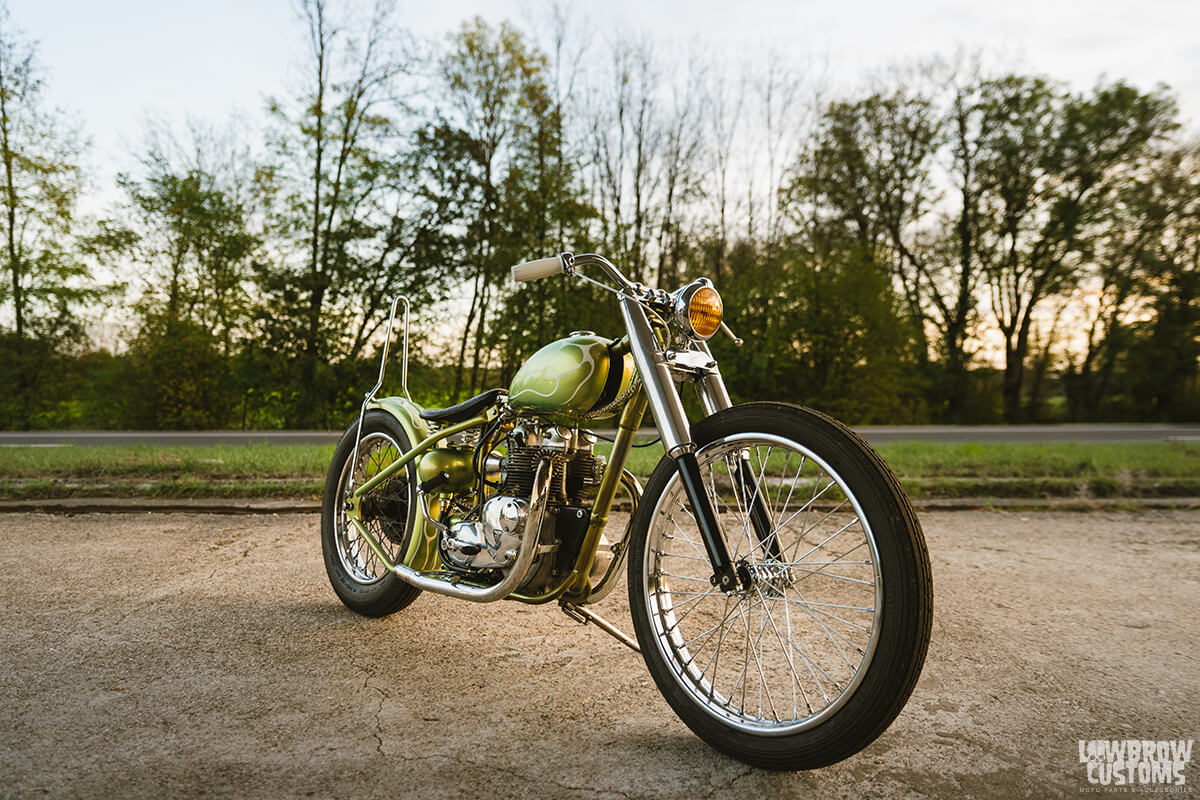 Would ya just look at!
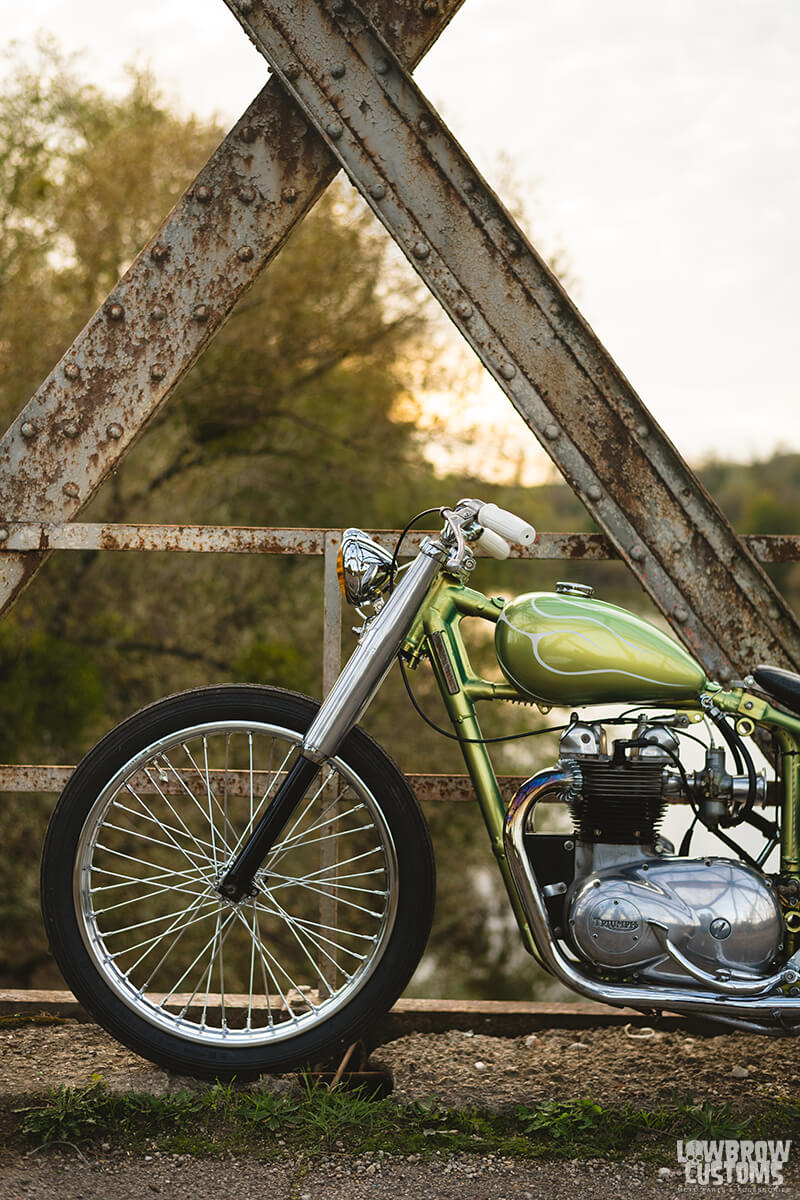 Front wheel: Harley 21" with Avon Speedmaster 3.0 21" tire
 Rear Wheel: 18" Harley wheel with Shinko Classic 270 4.0 18" tire
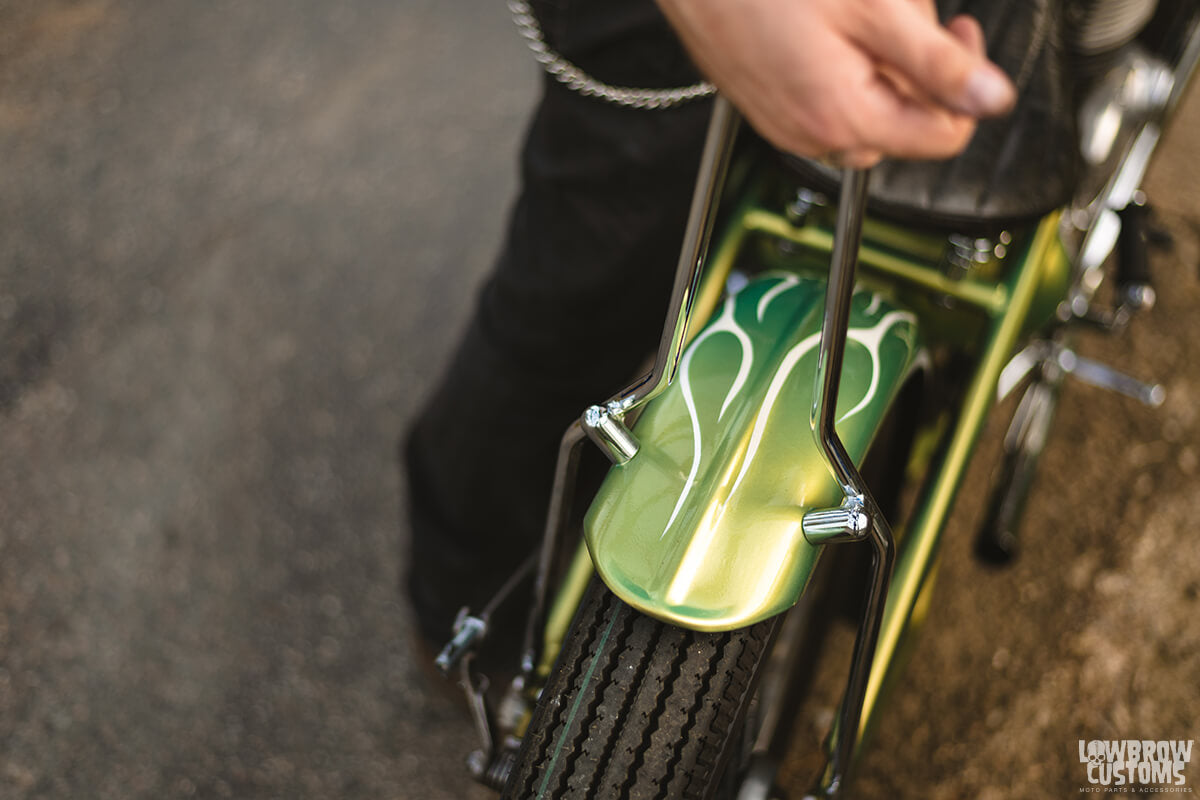 Hand pinstriped.
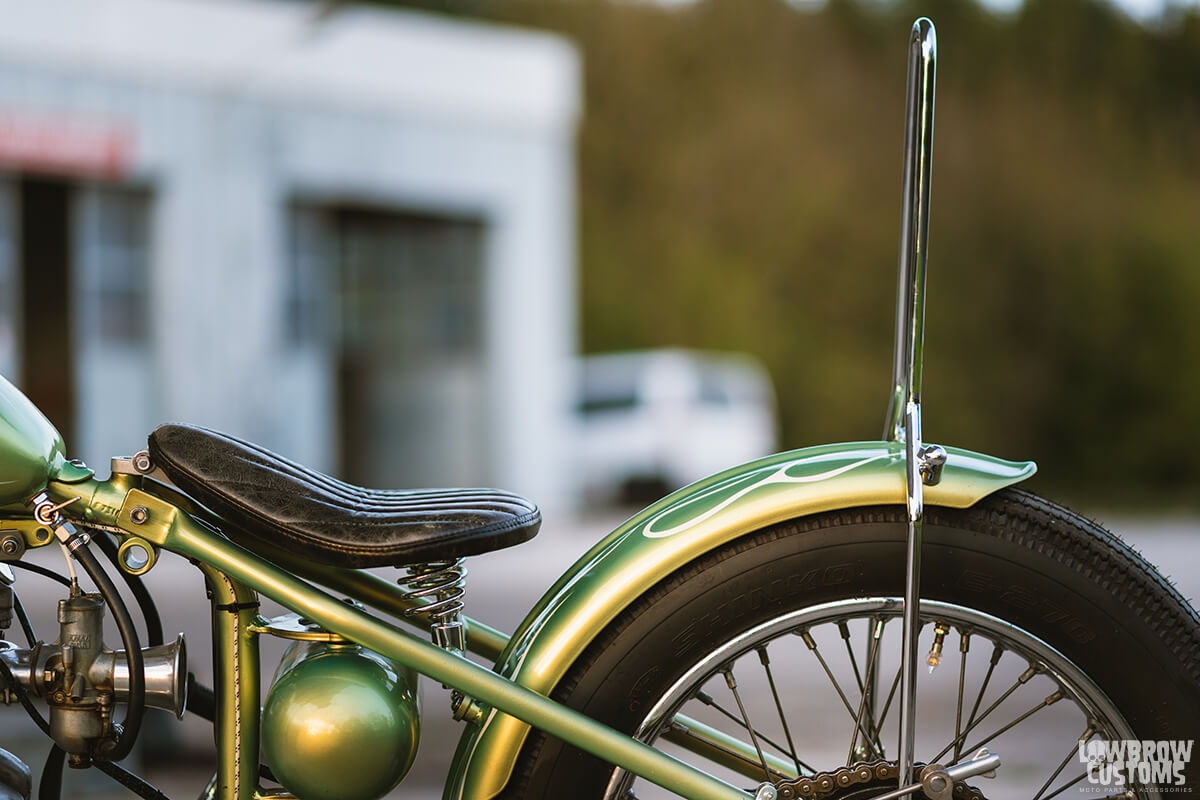 Miller Seat attached using Lowbrow Customs Triumph Solo Seat Hinge
 Talk about night moves
 That orange headlight glow
 Pinstriped flames are sick
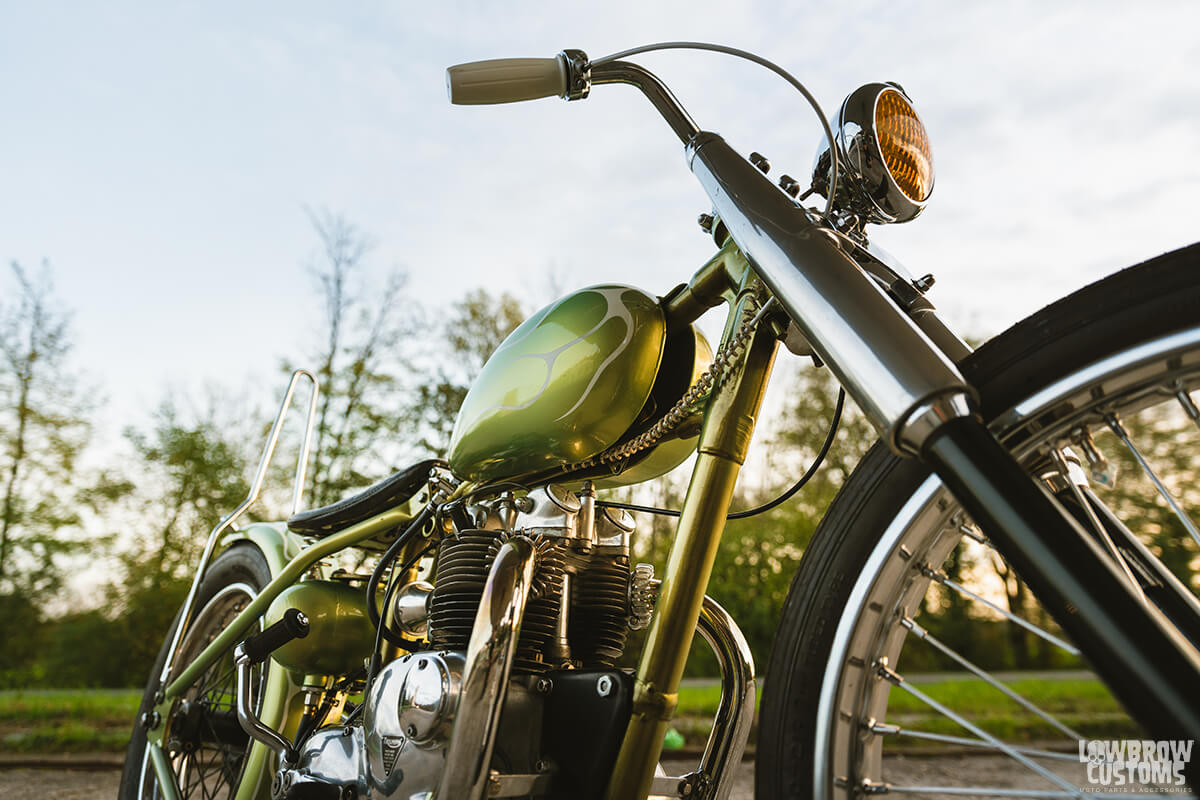 That deep tunnel Peanut, clean as hell. Check out that wiring!
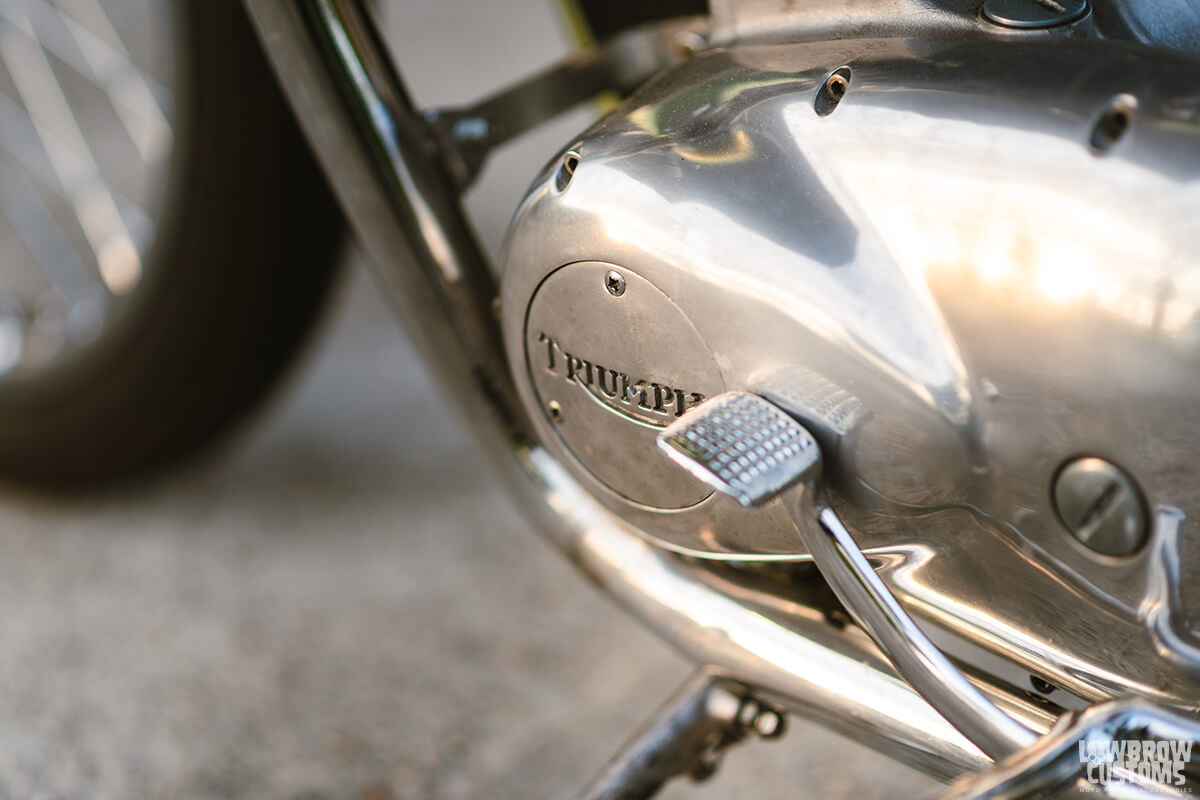 Motor is super clean and rocking the stock foot controls. Remember Brakes on the left on the ole' Triumphs!
 has such a nice stance.
 No troll toll here.
 Skinny as hell.

 Shane's Twin Daughters designed the Harley-Davidson Logos on each side of the gas tank.
 Shane and his dad.
 Front Wheel 19" Morris 7 Spoke
 Rear Wheel 18" Morris 7 Spoke
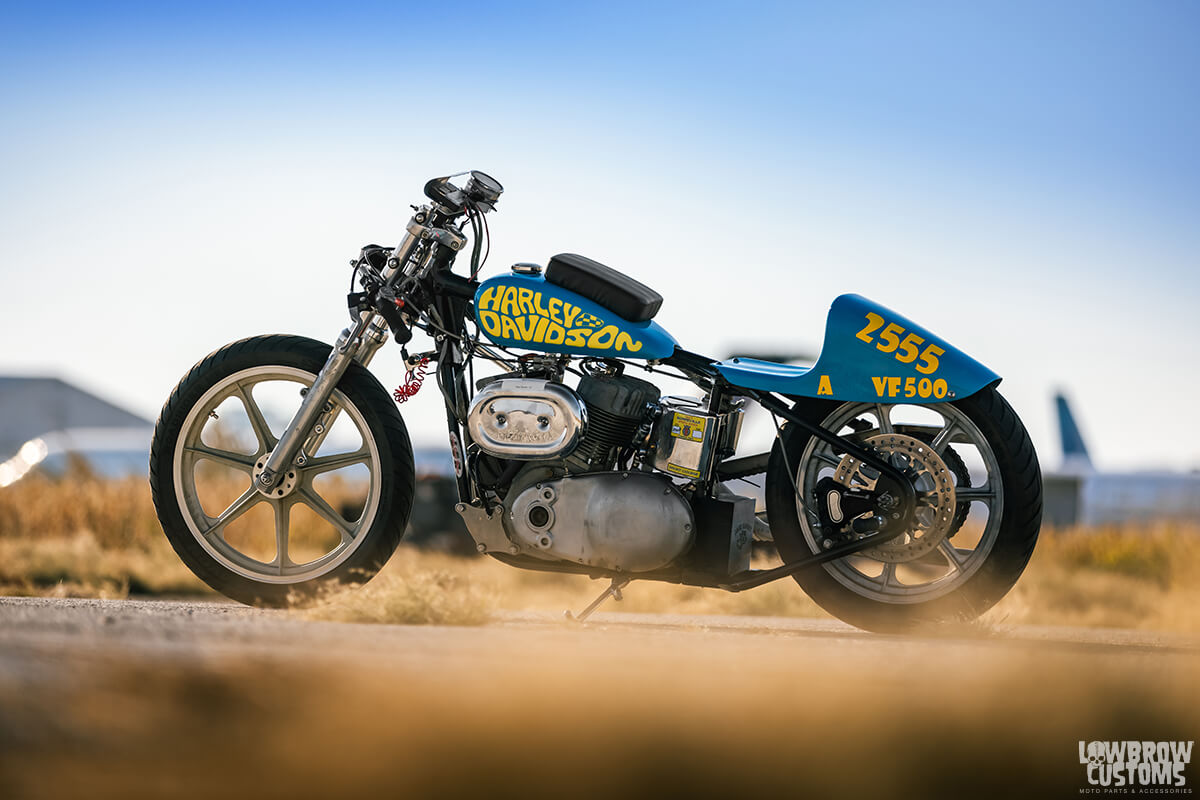
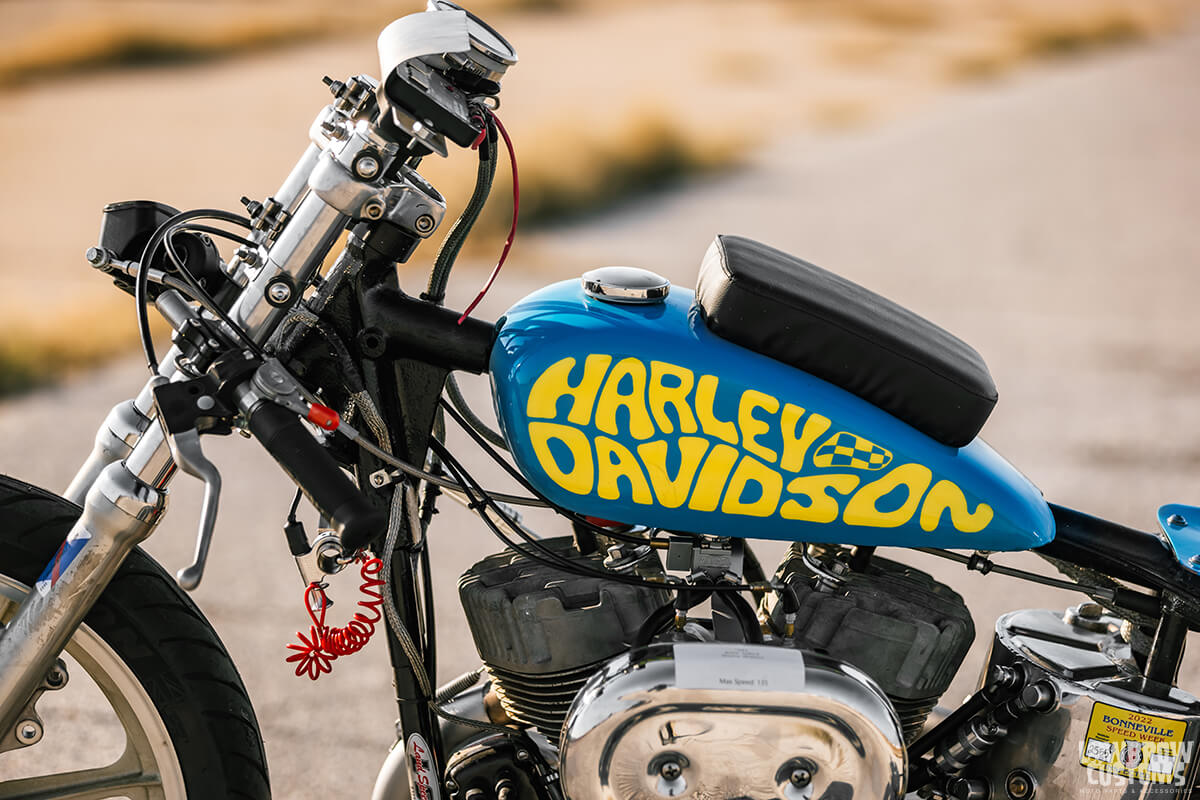


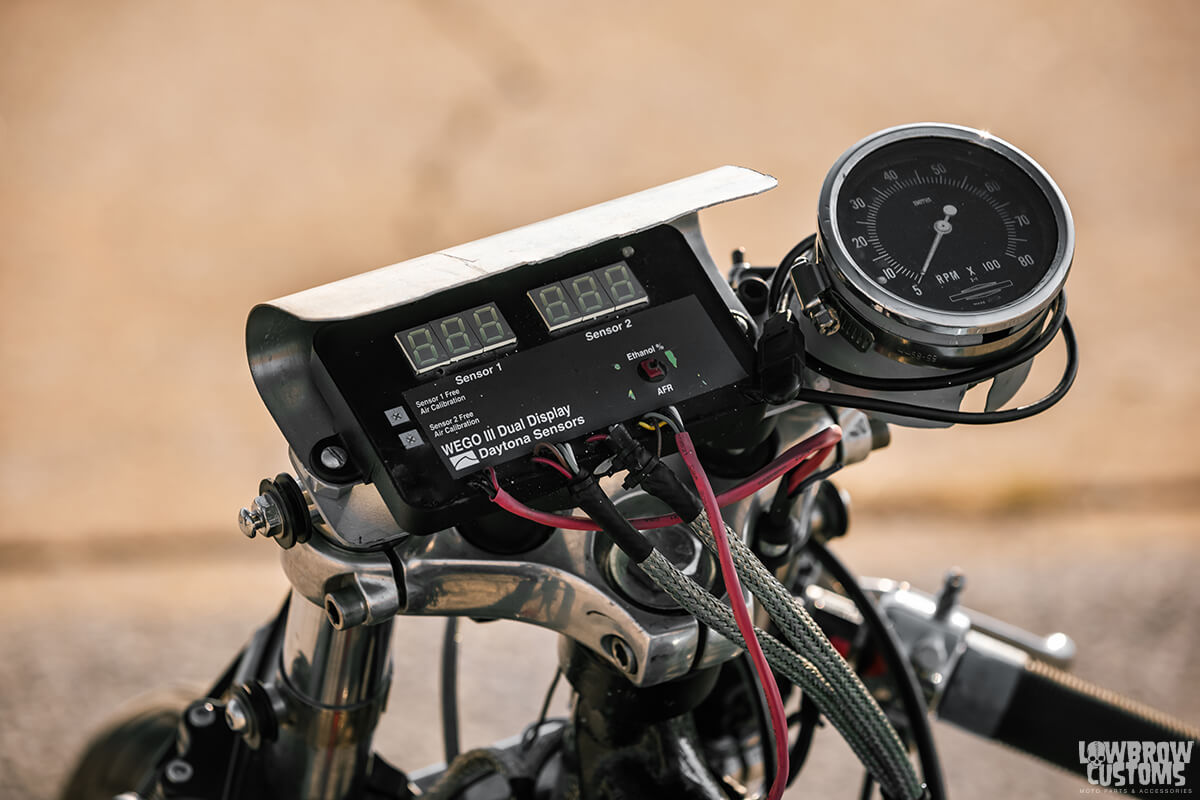
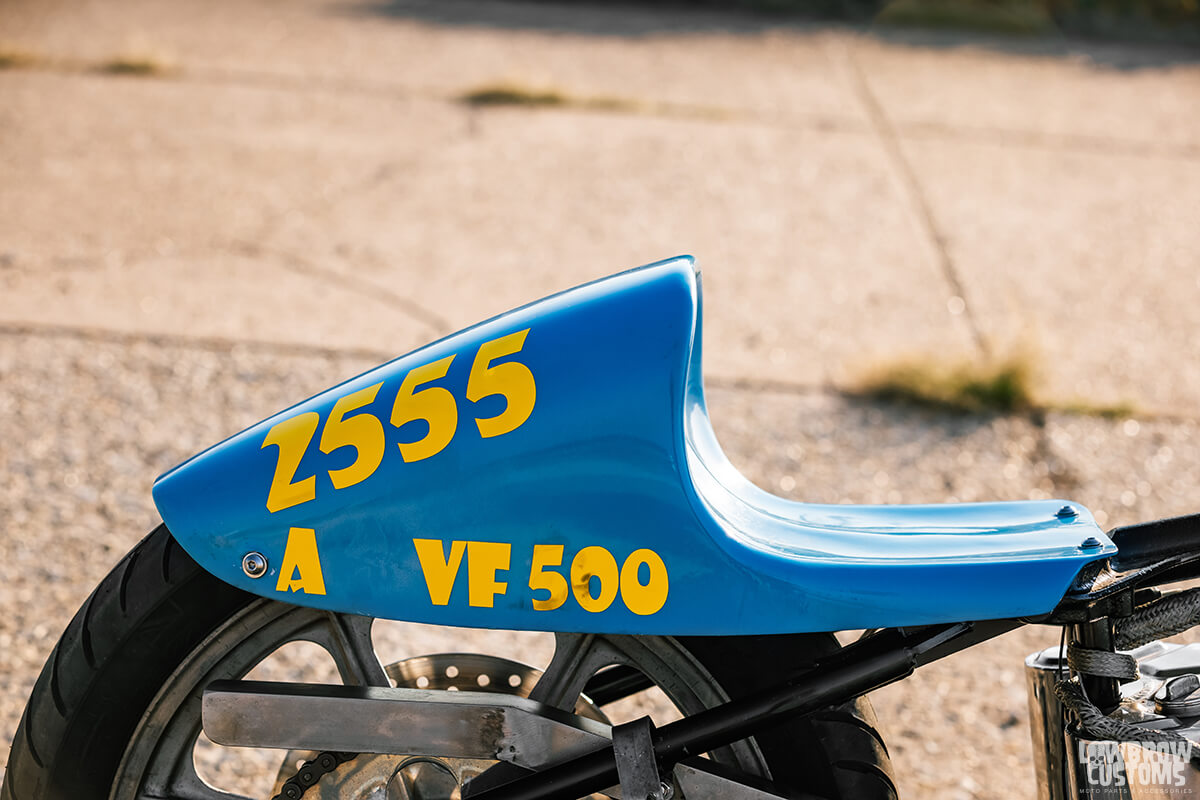
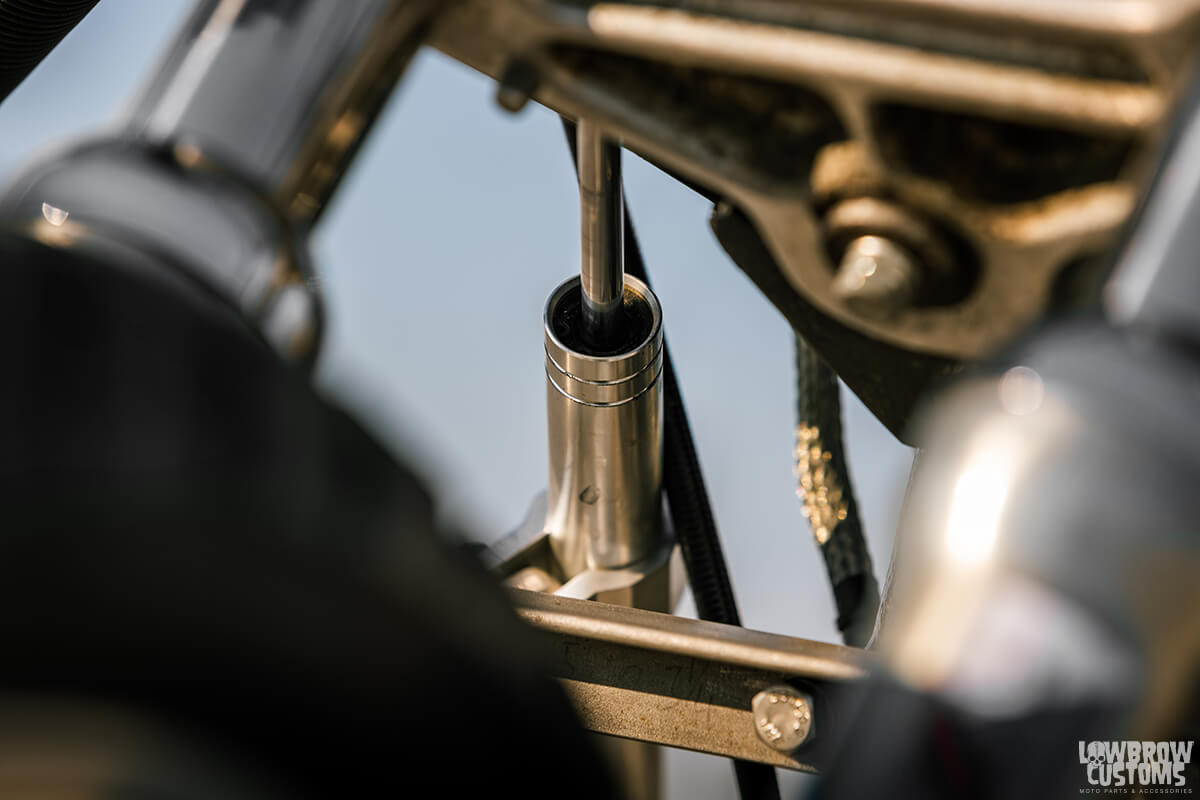
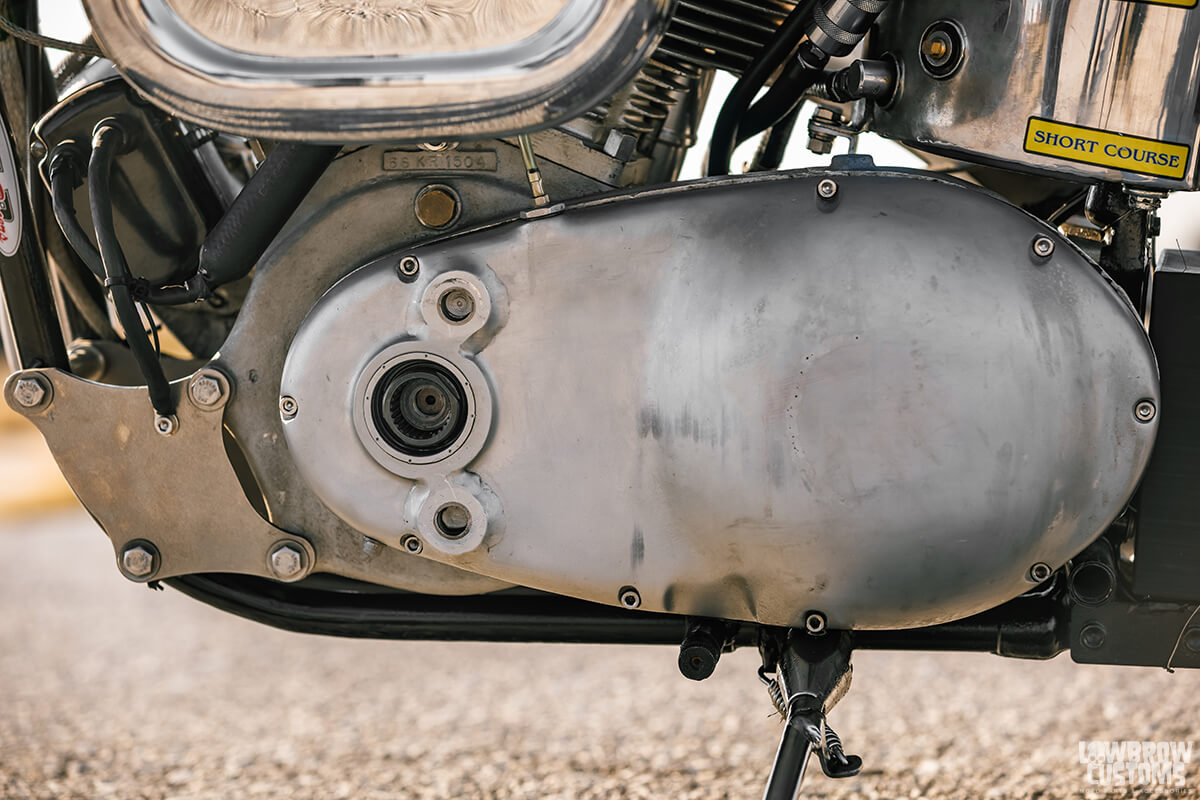

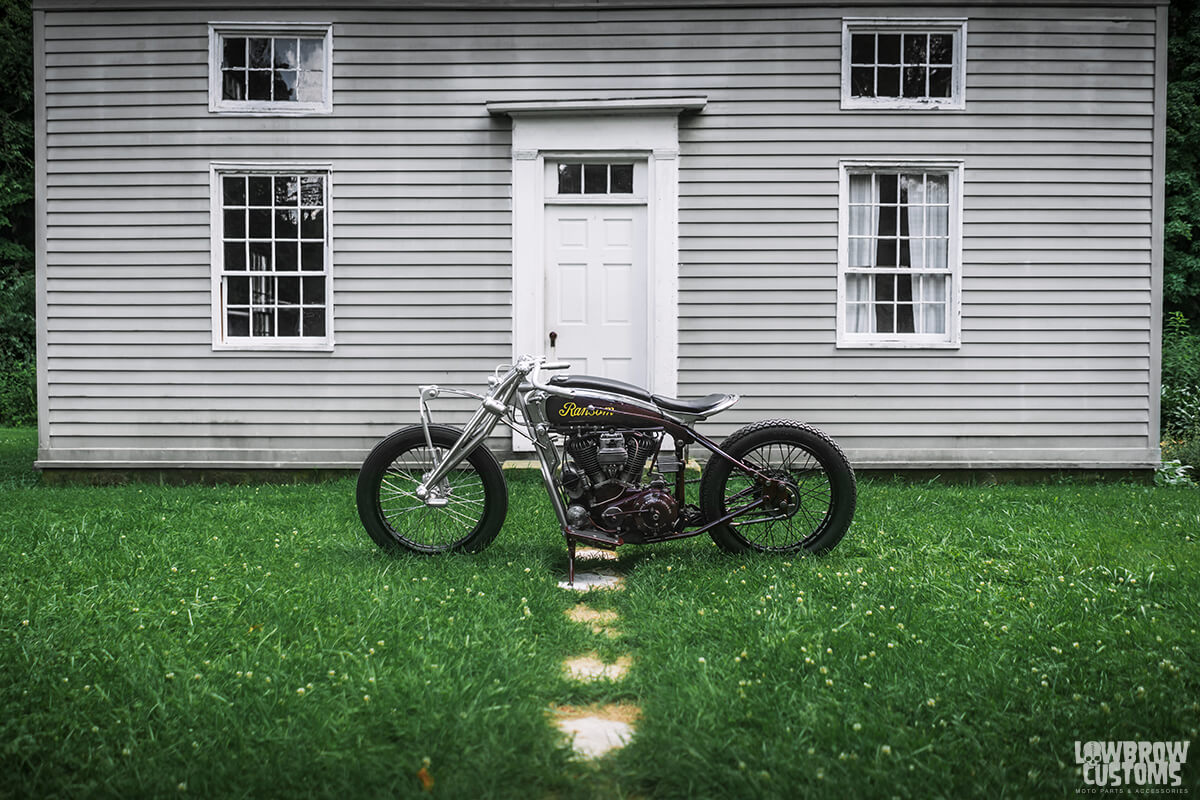
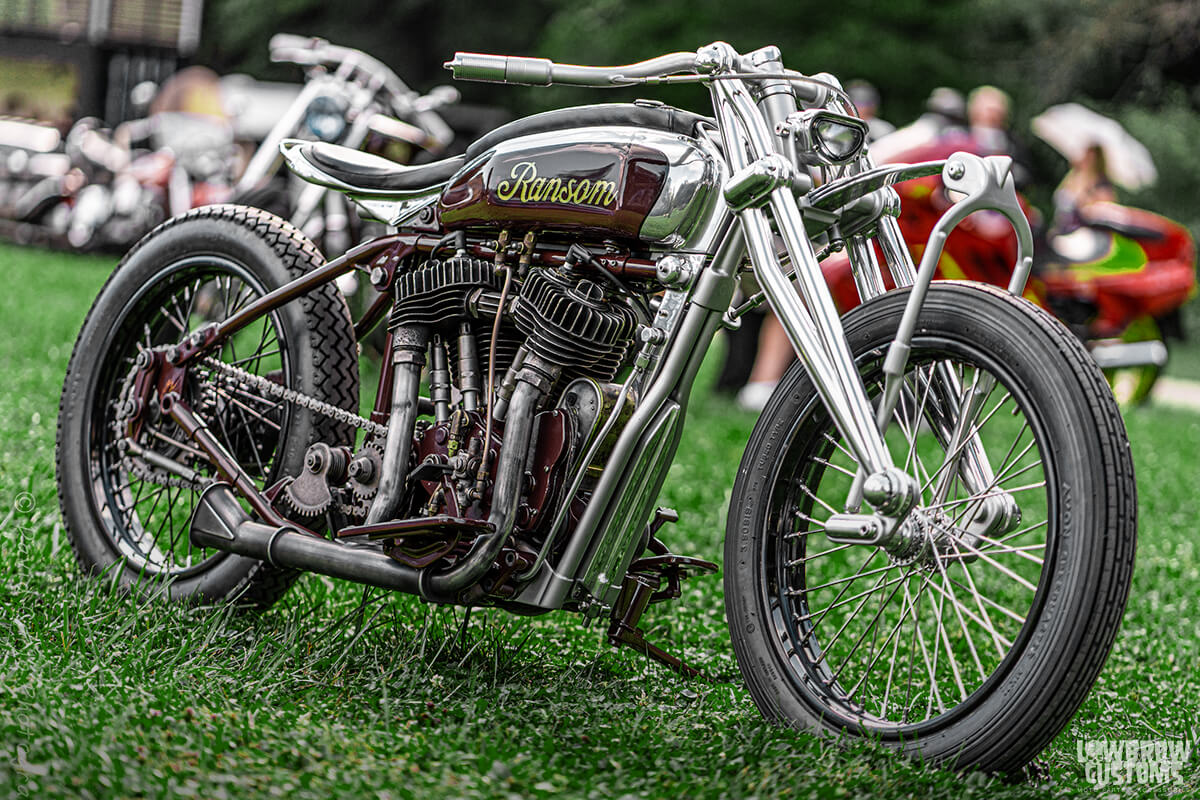 Photo by David Carlo
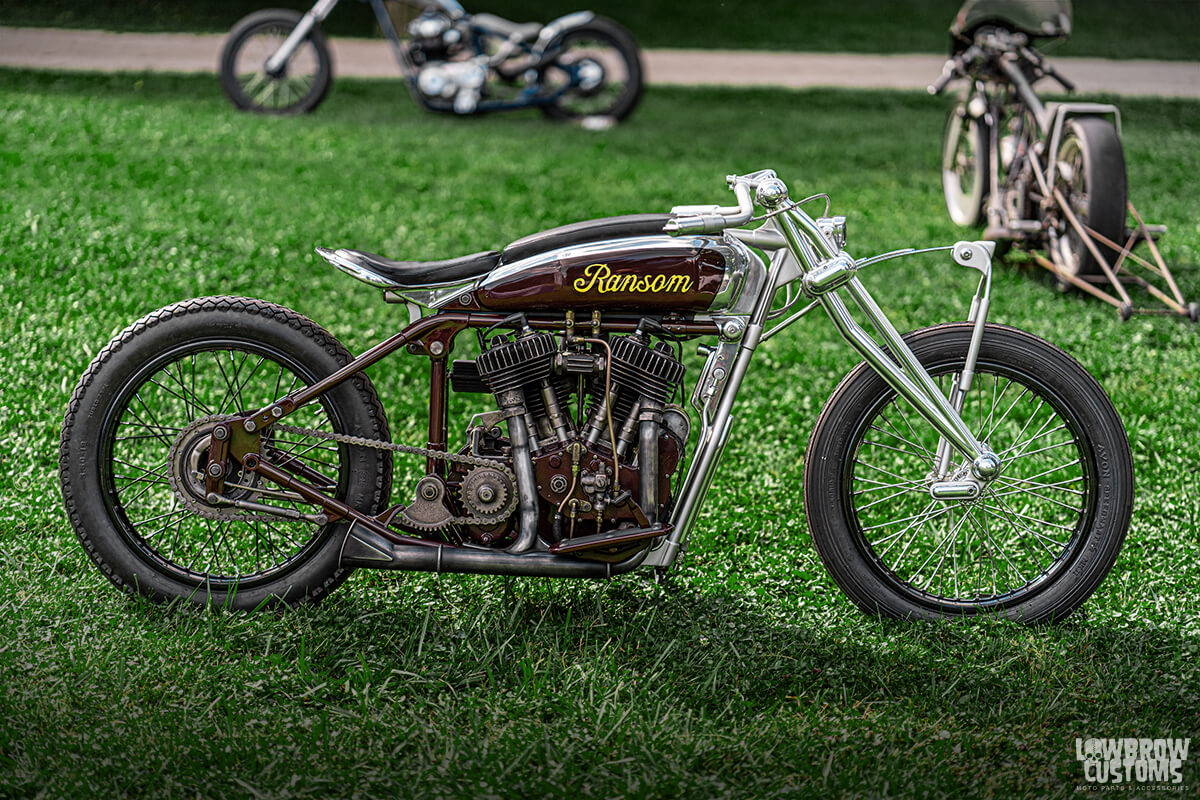 Photo by David Carlo
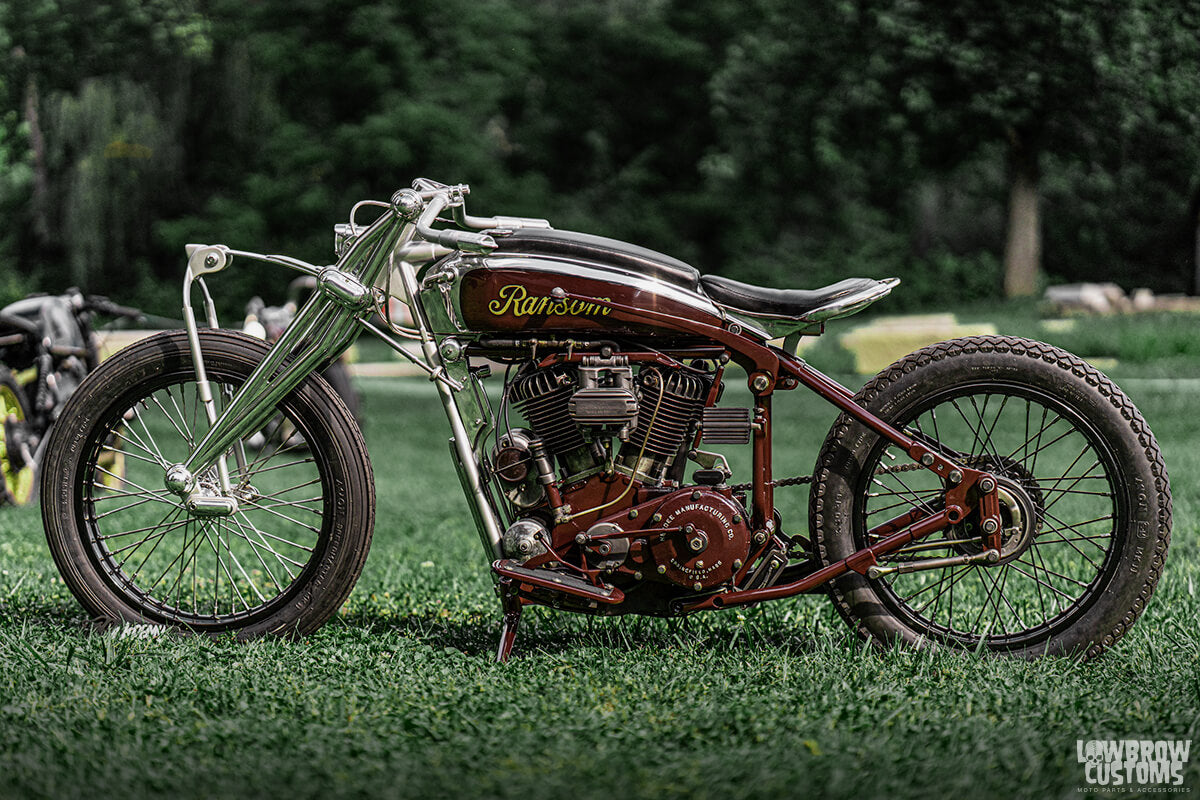 Photo by David Carlo
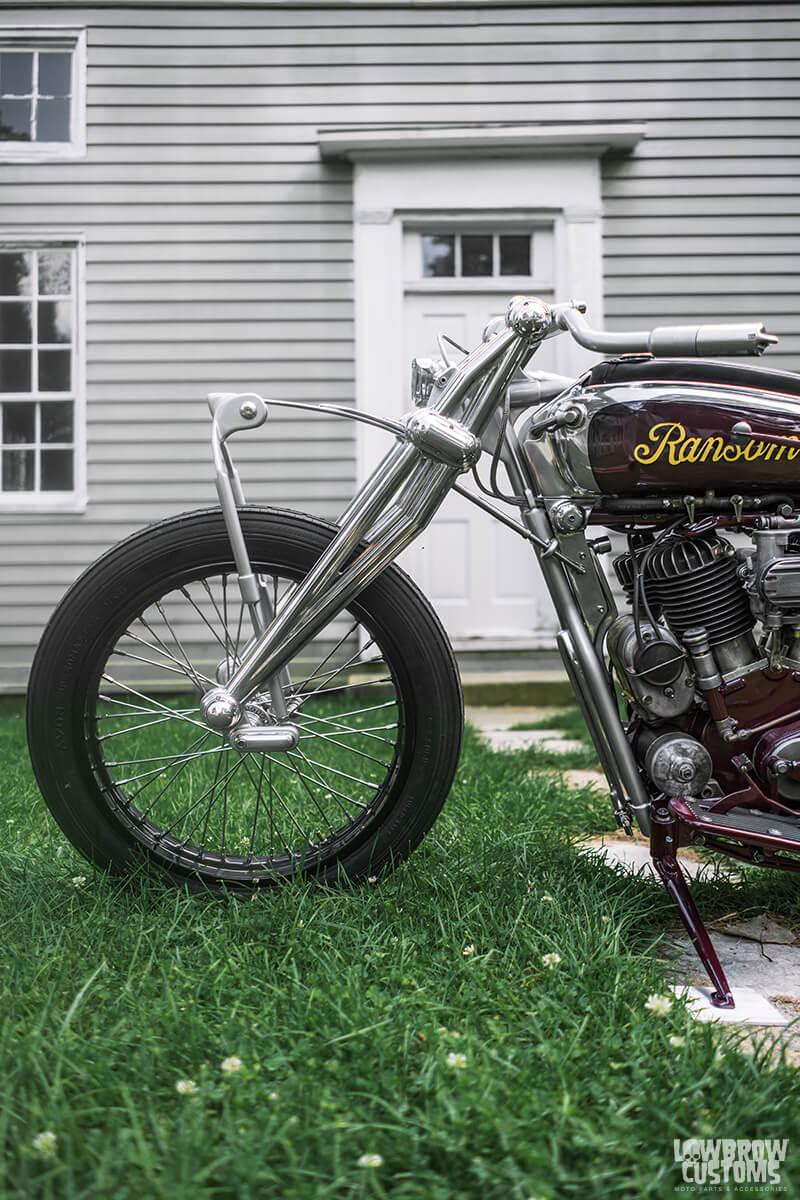
 Rear wheel 19"
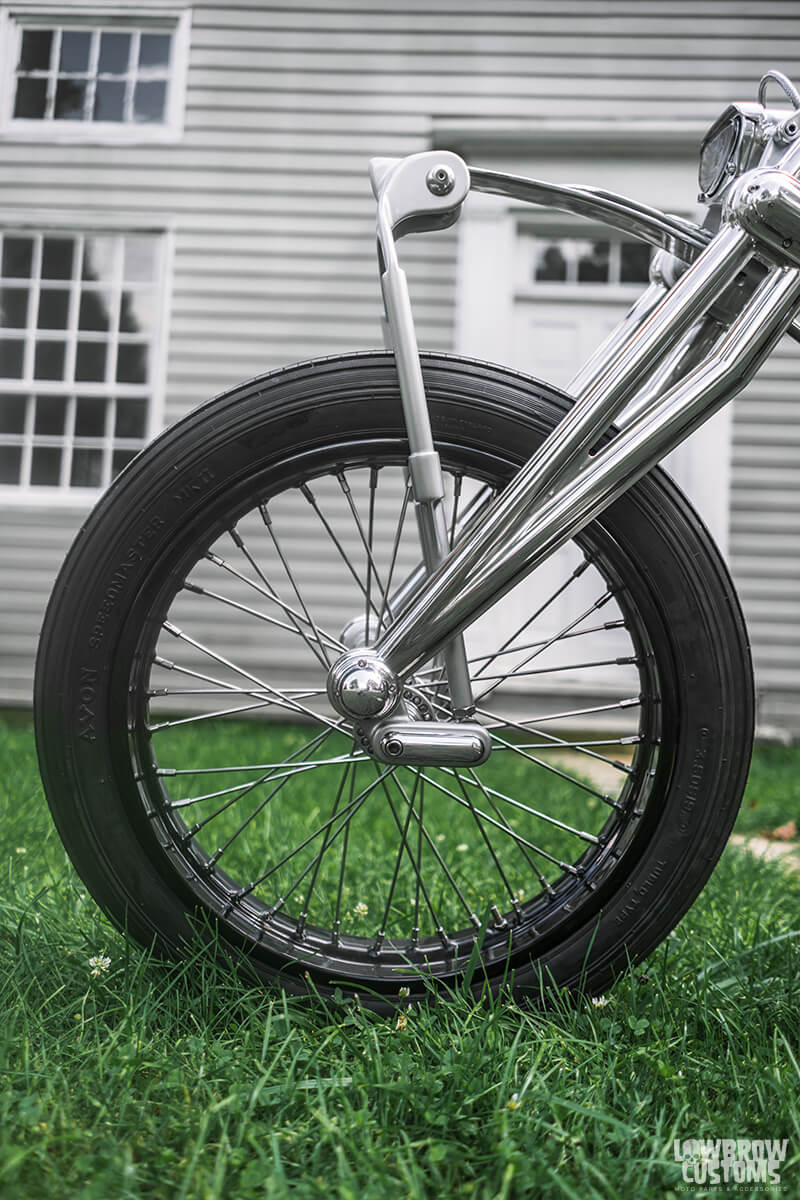 Front Wheel 19"
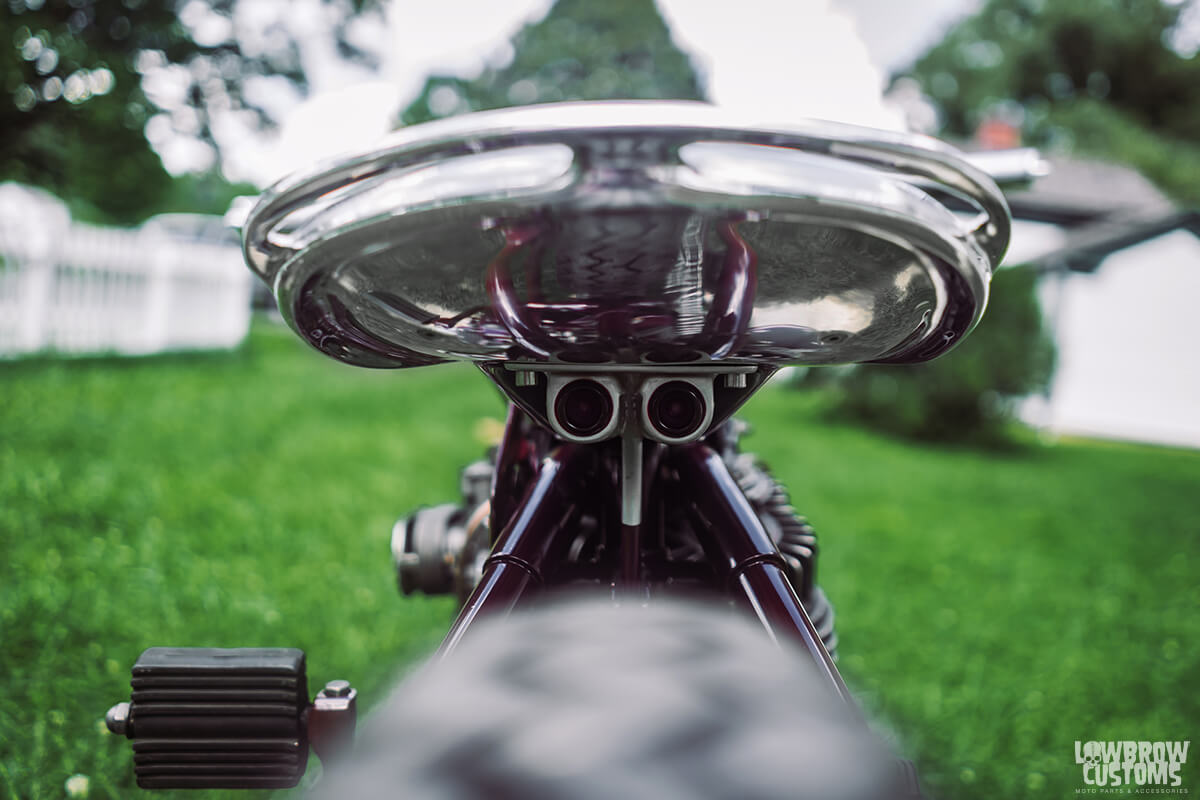
 4 cell Antigravity Battery and
 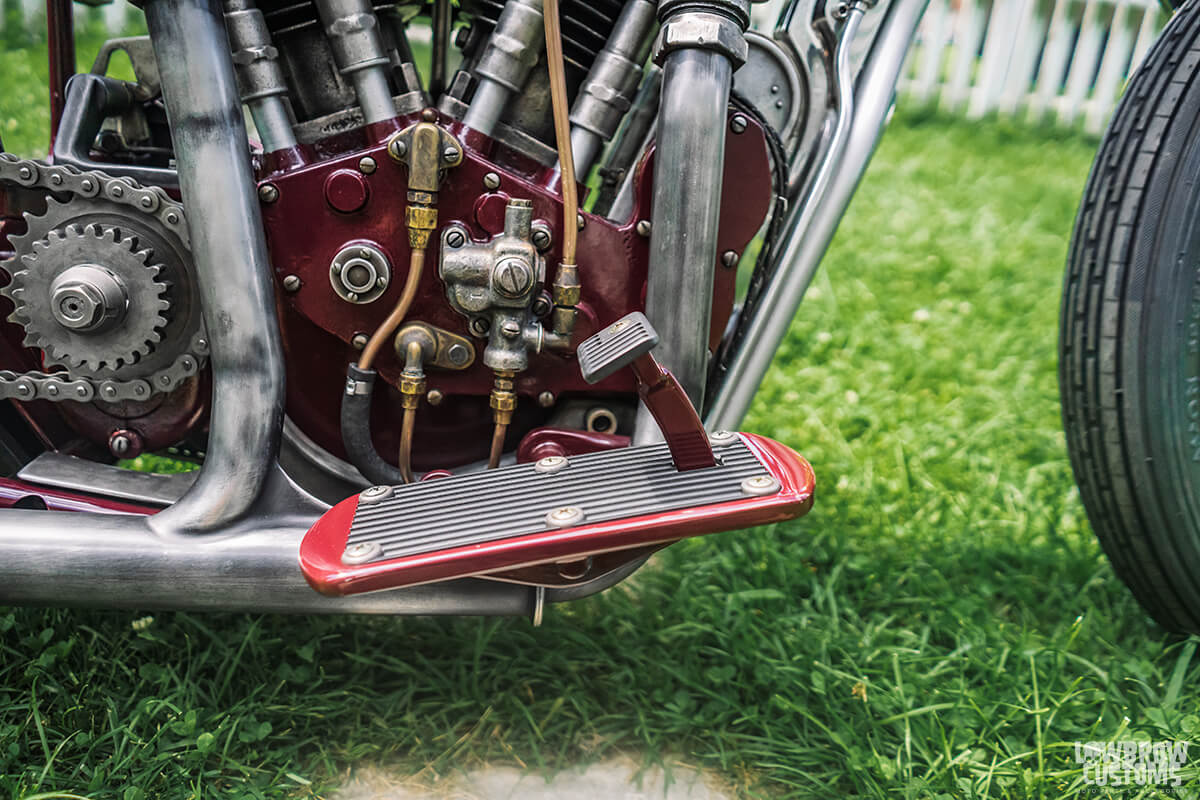 The integrated foot controls in the floor boards are so cool!
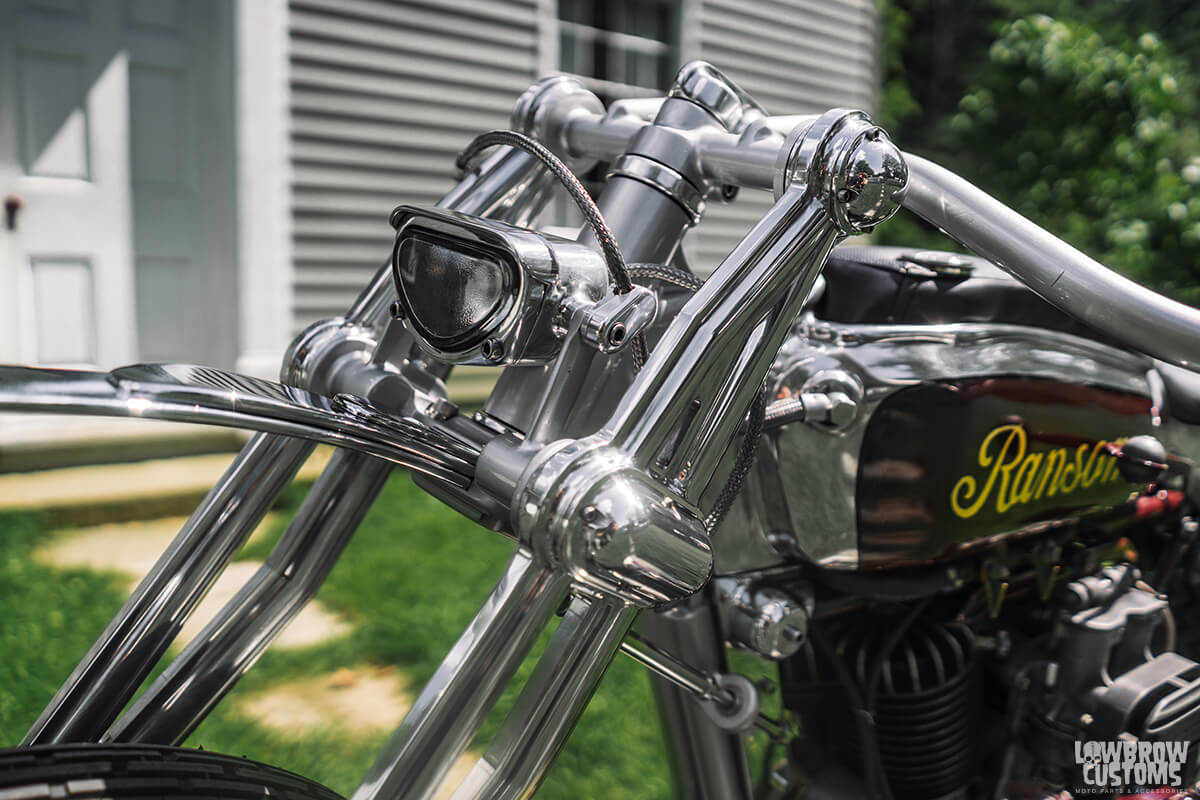 Check out that custom headlight.
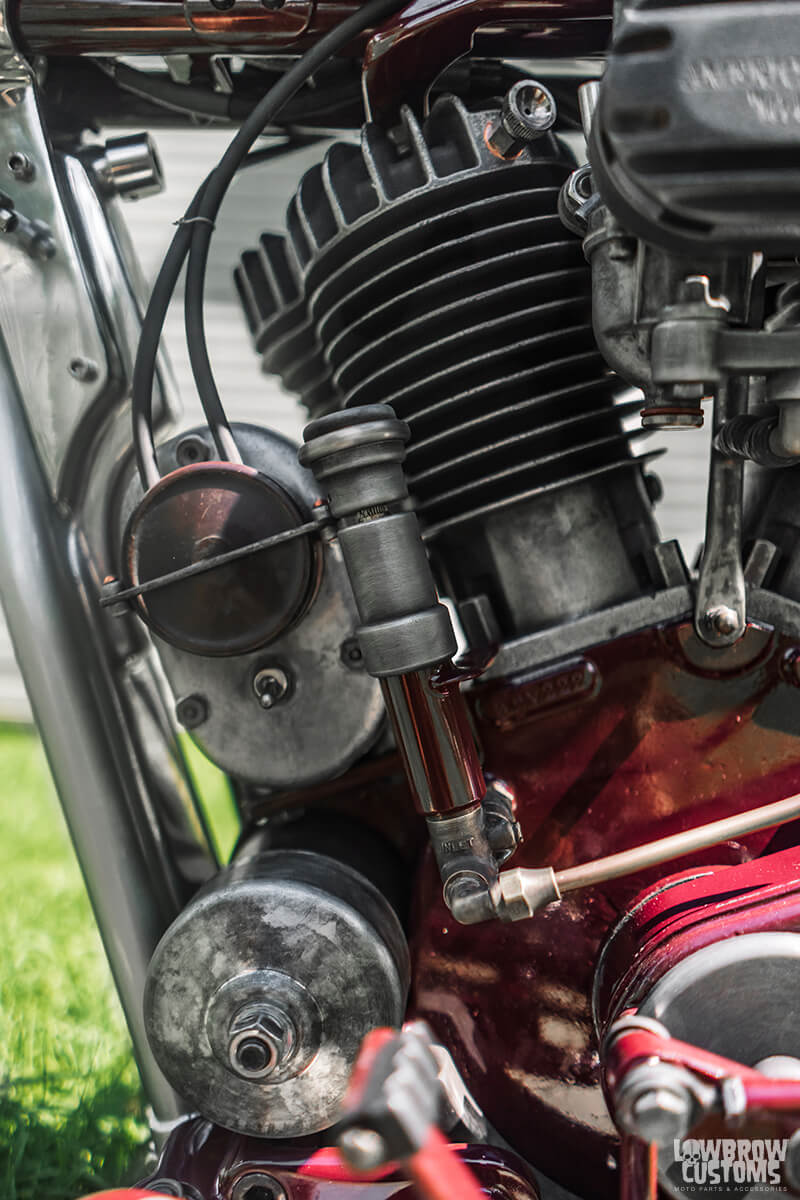 Lots of stuff jammed in that magneto, 12 volt electric ignition and coil.
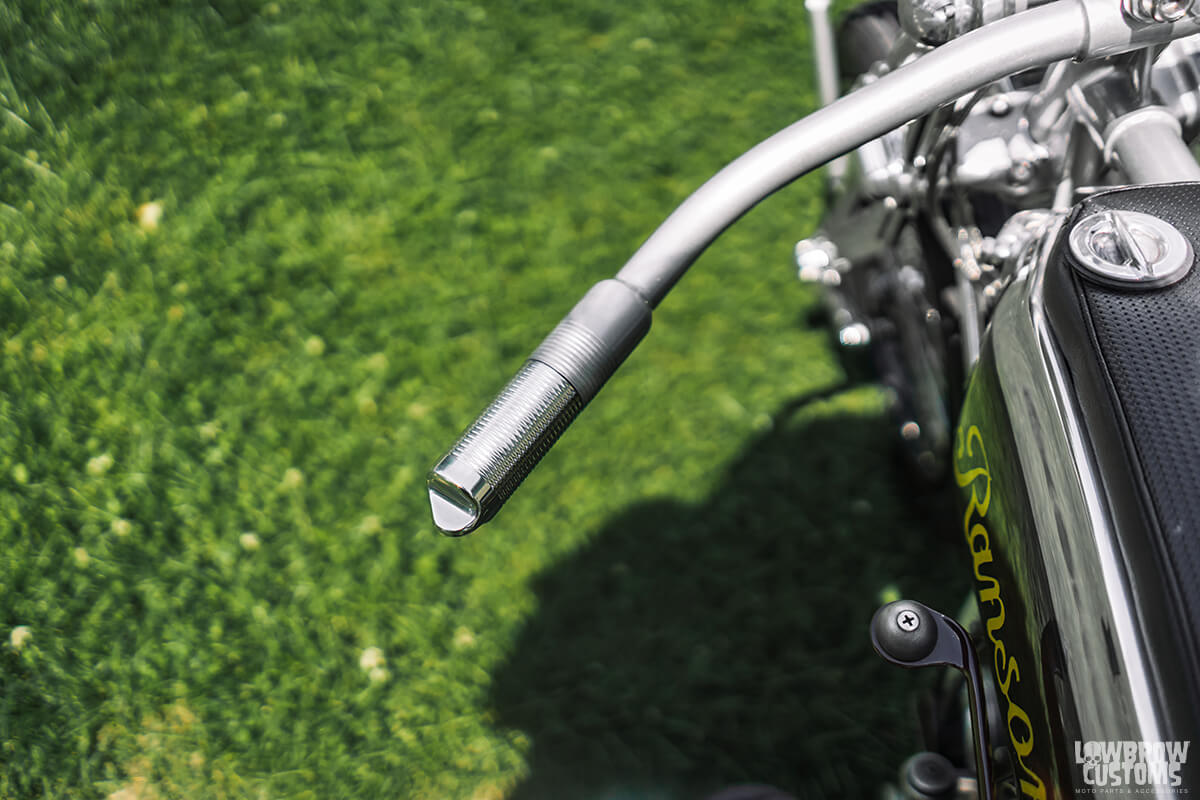 Beautiful custom grips
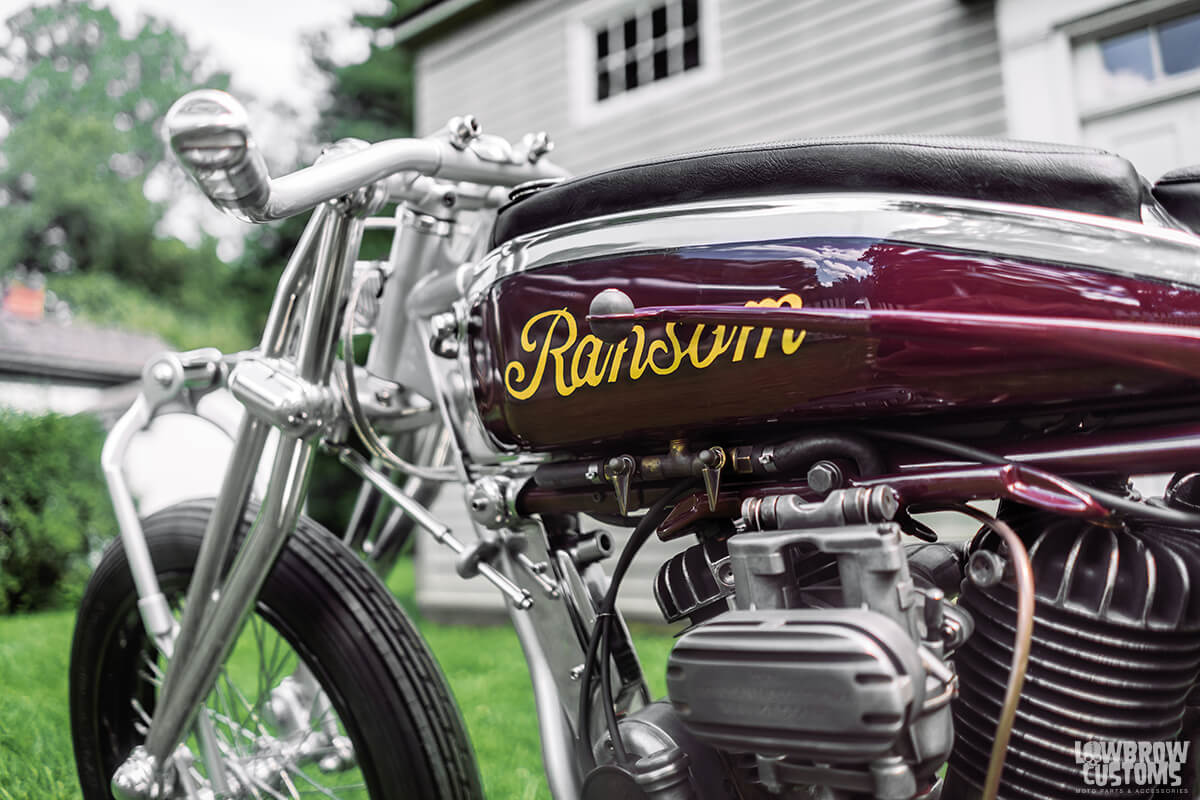 "Ransom"
 That stance.
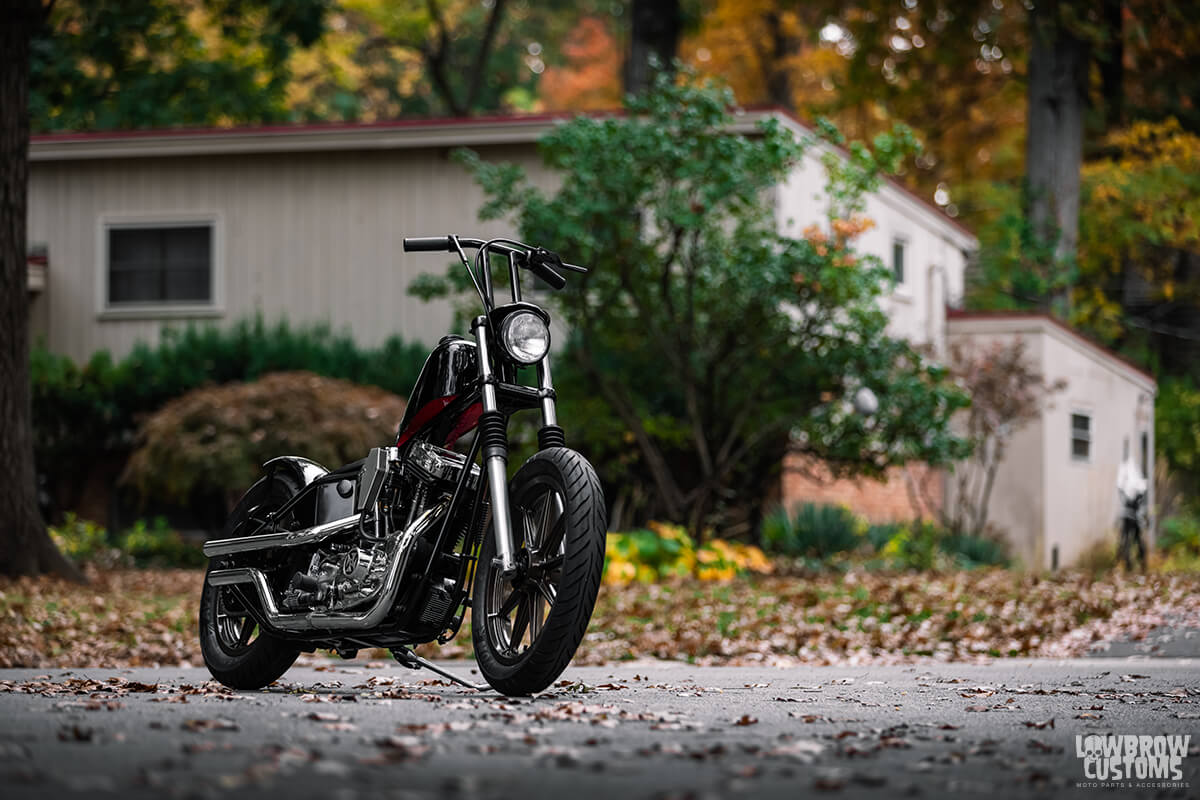
 XLH 1100 topped off with some really nice pipes by The Gasbox.
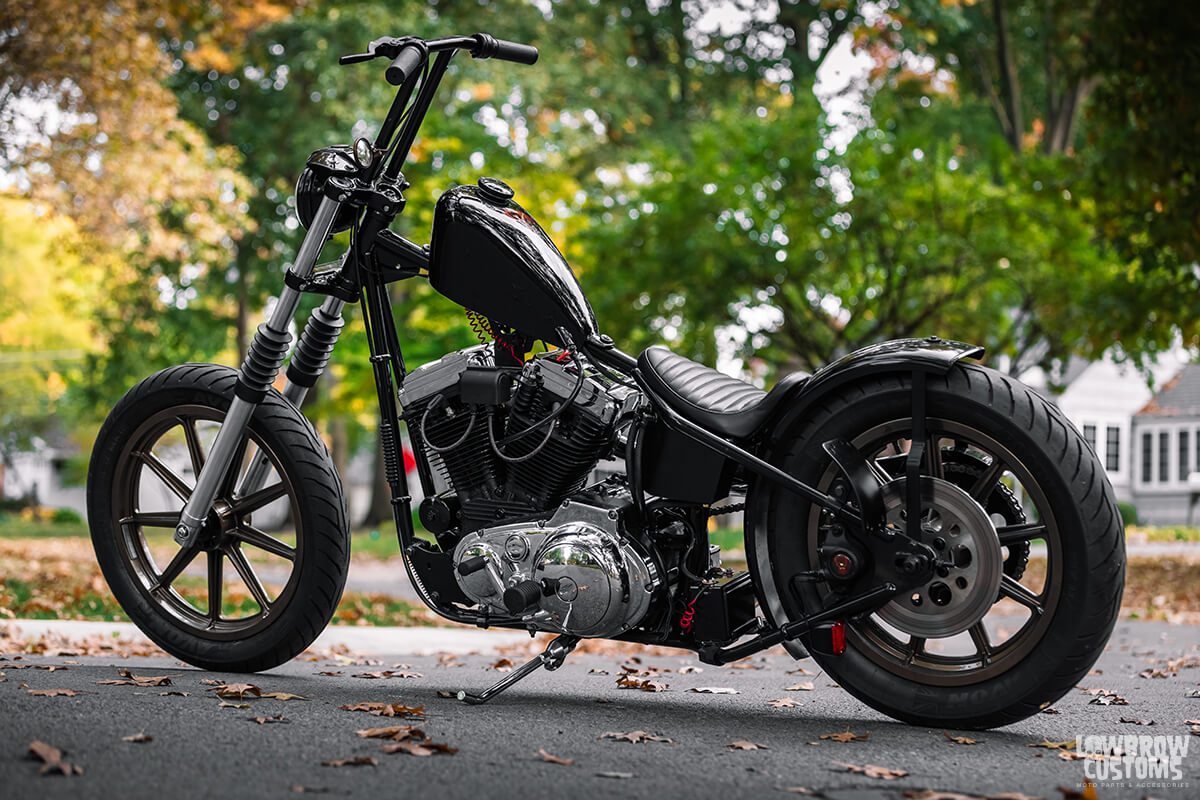 Gasbox 3" up full frame for 86-03 Harley-Davidson Sportsters
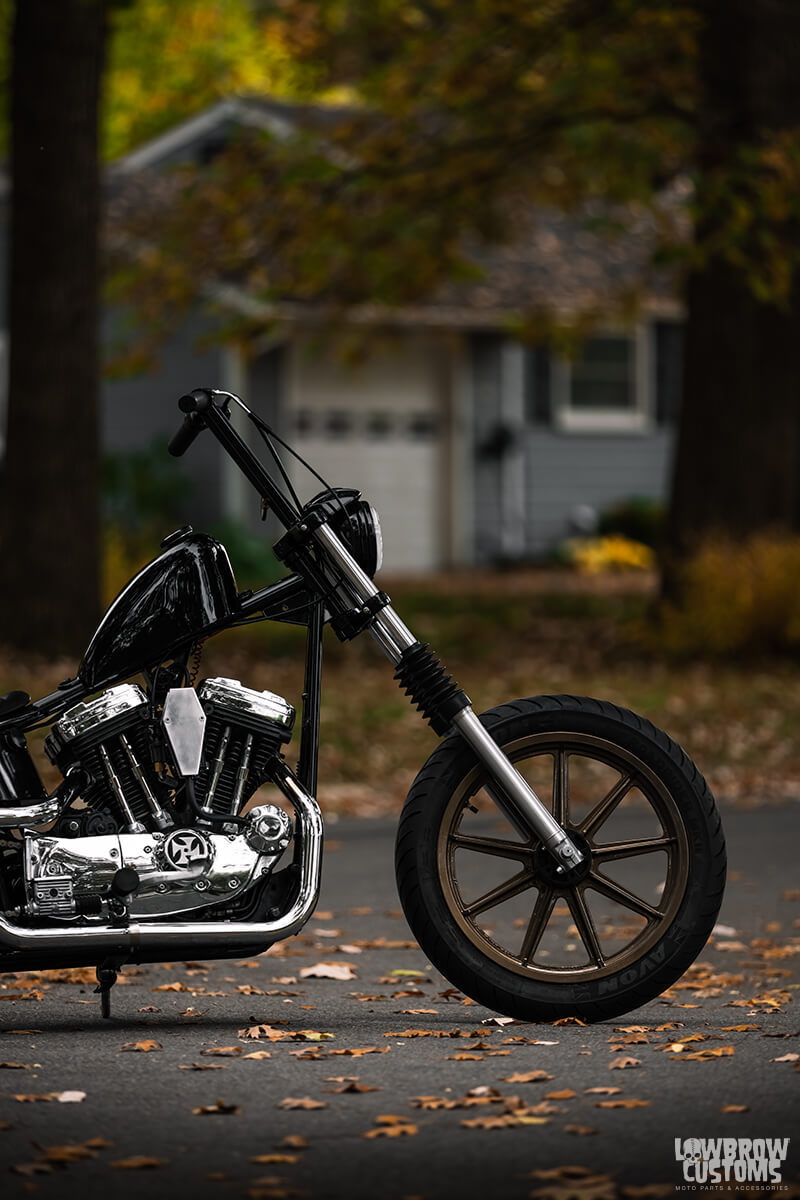 4" over works really well with this 3" up frame.
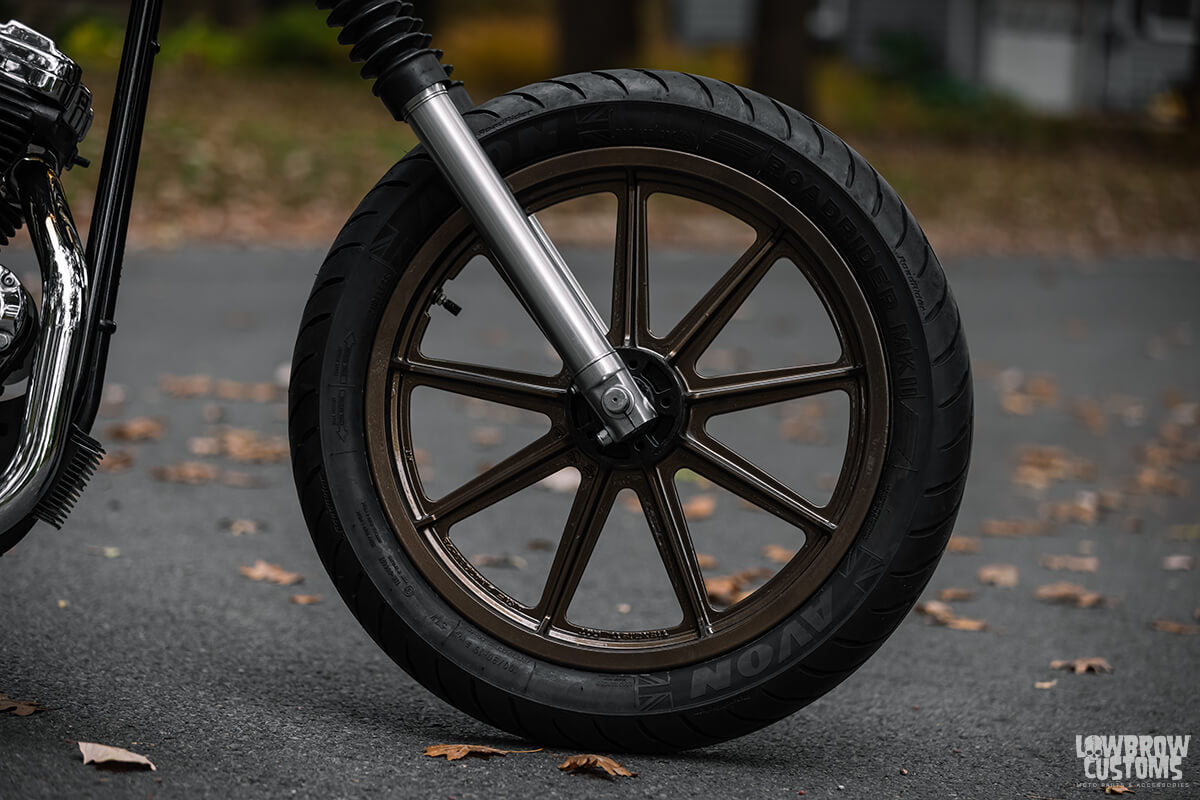 19" front 9 spoke mag wheel.
 18" rear 9 spoke mag with Lowbrow Customs Chain Conversion Kit
 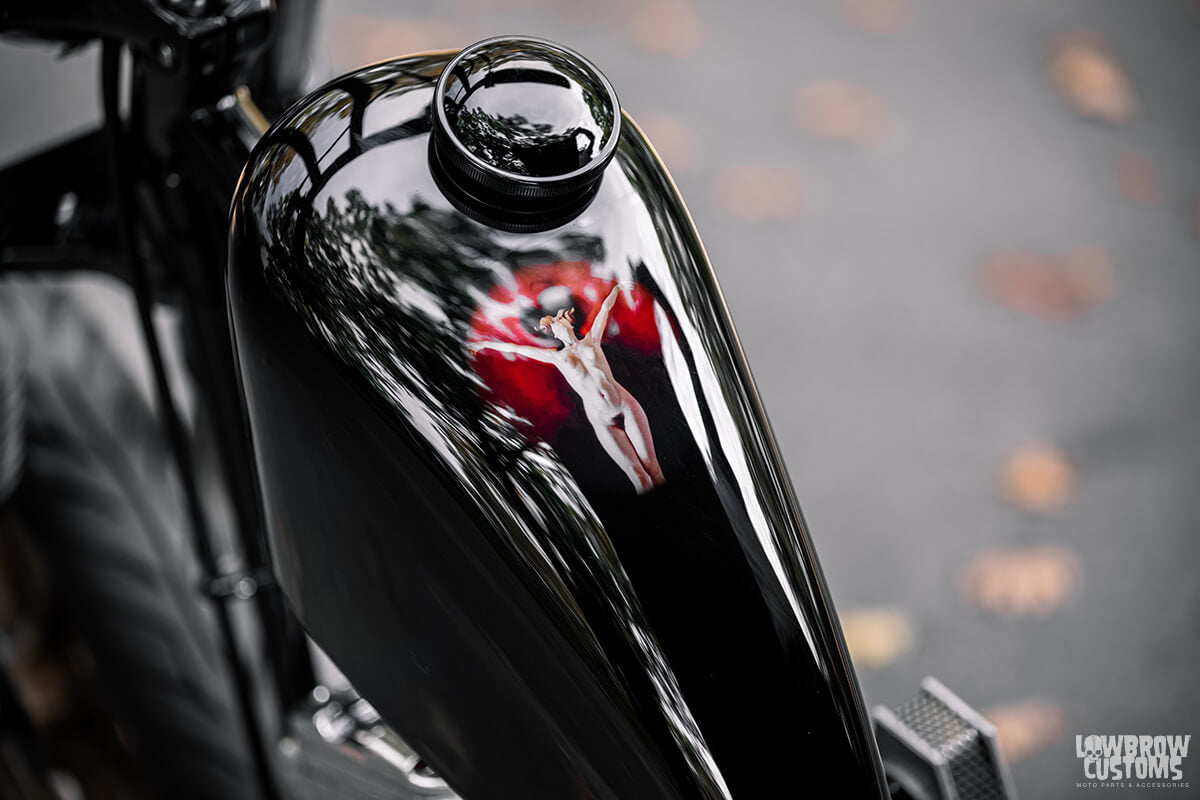 Tank painted by Time Bomb Kustoms
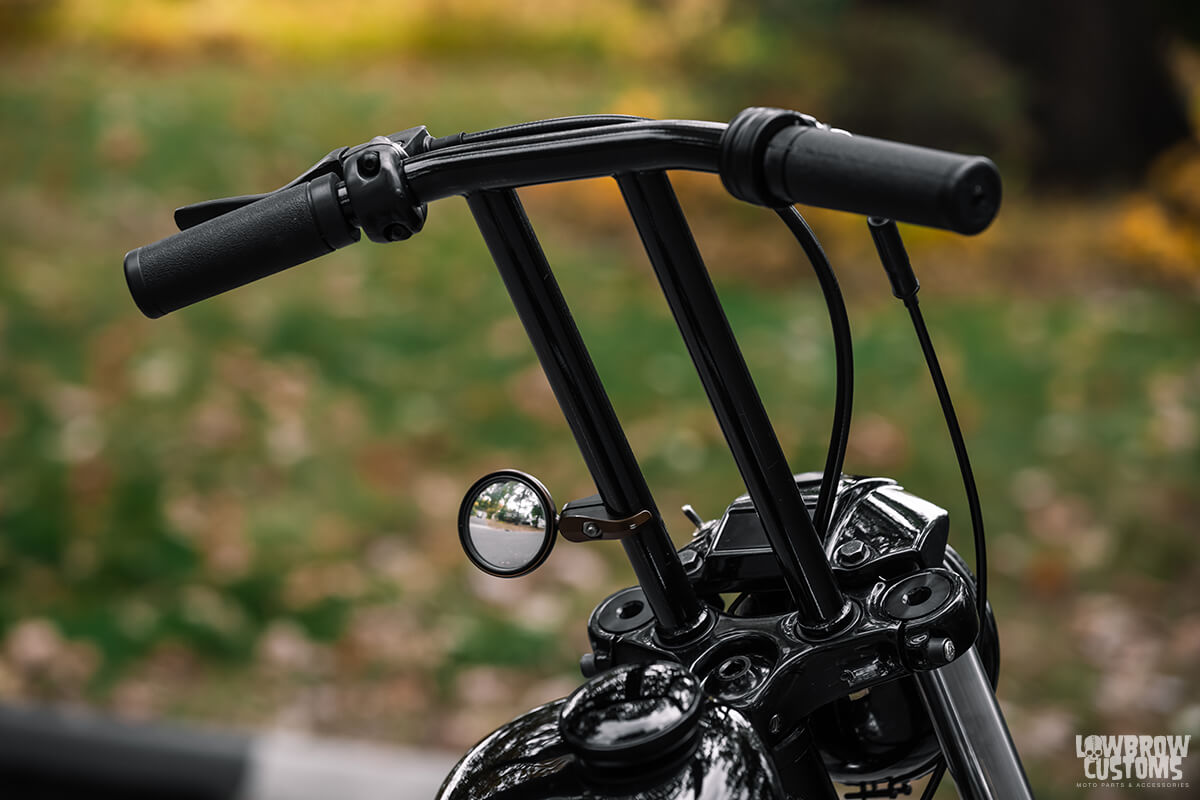 Zylstra Cycle Bars and Pangea Speed Mirror
  Custom seat...
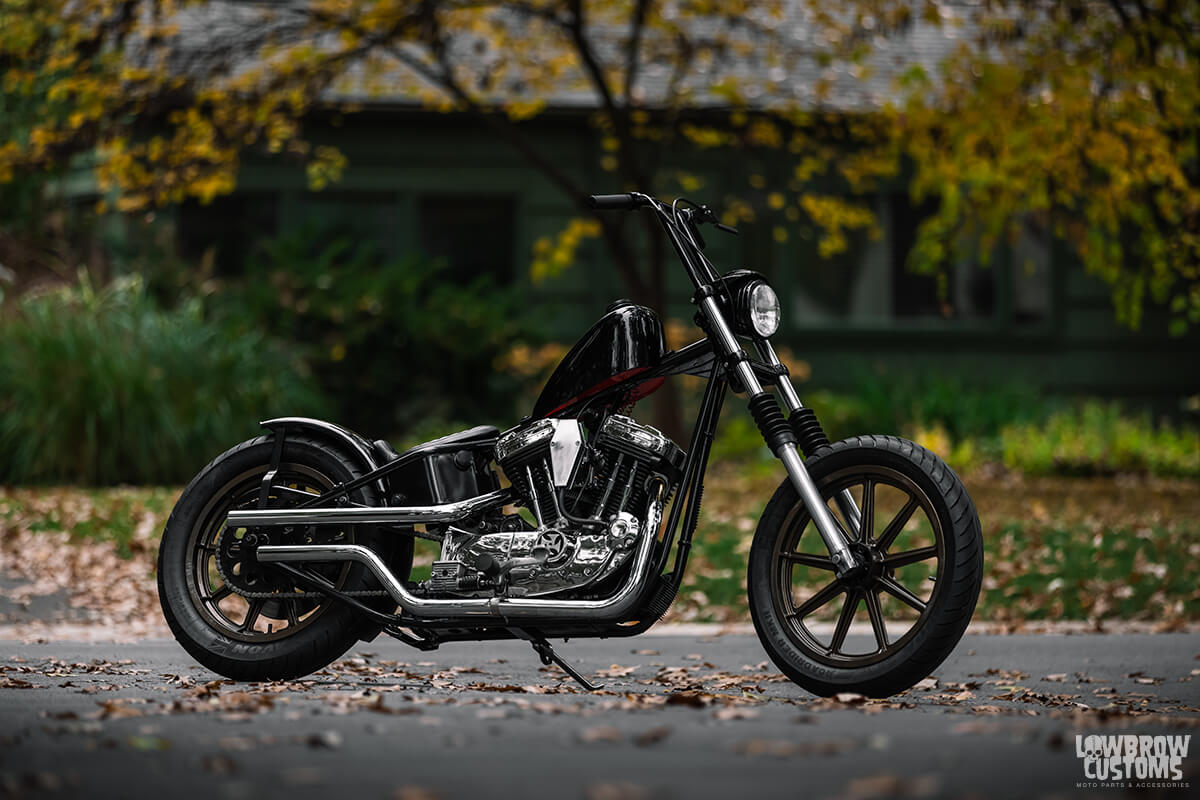 If looks could kill.
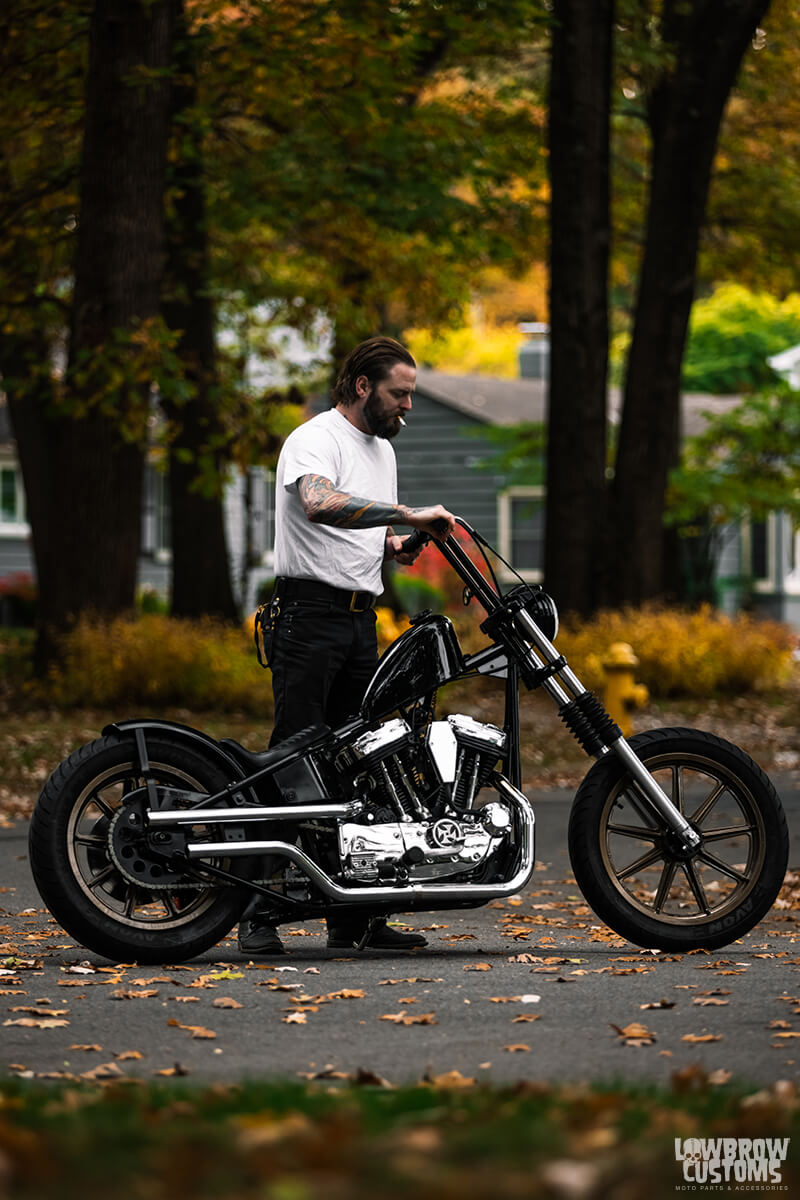 "Car, Game OFF!" - Waynes World.
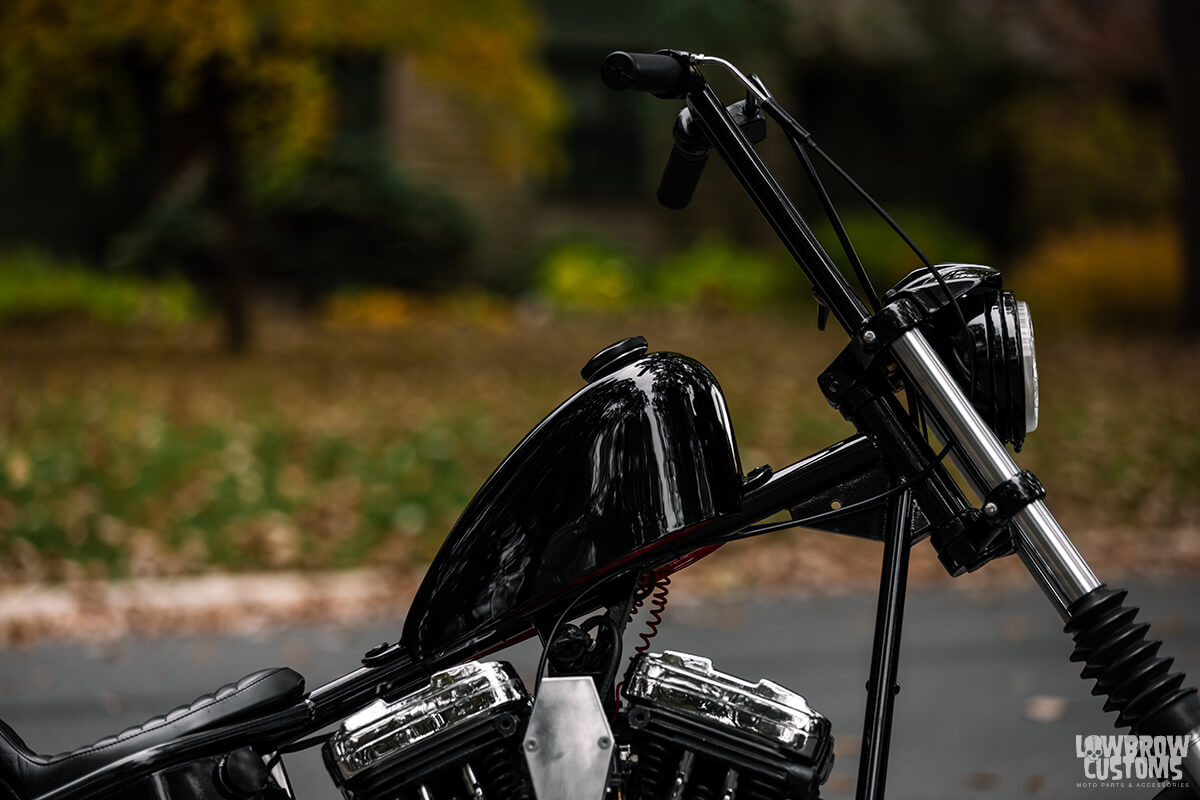 1.6 Gallons will get ya somewhere.
 One of the coolest Air Cleaners by Plumb Cycles.
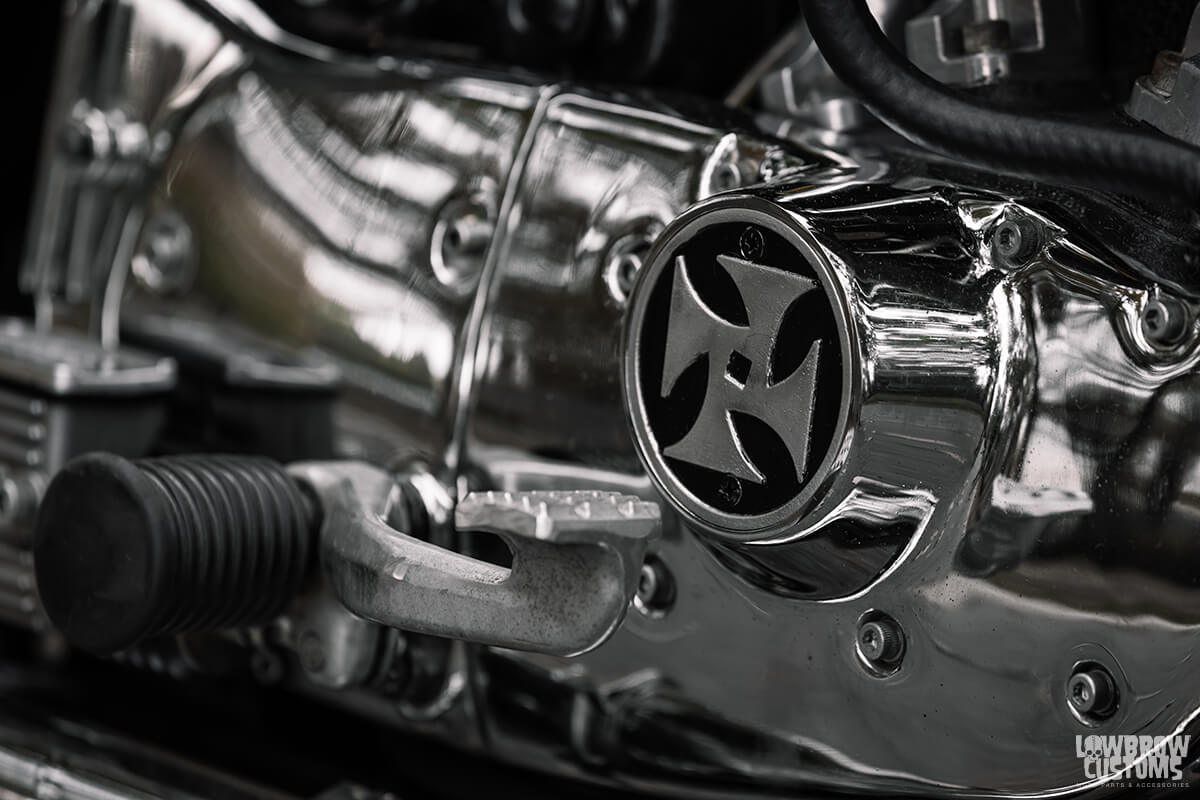 Shortened pegs.
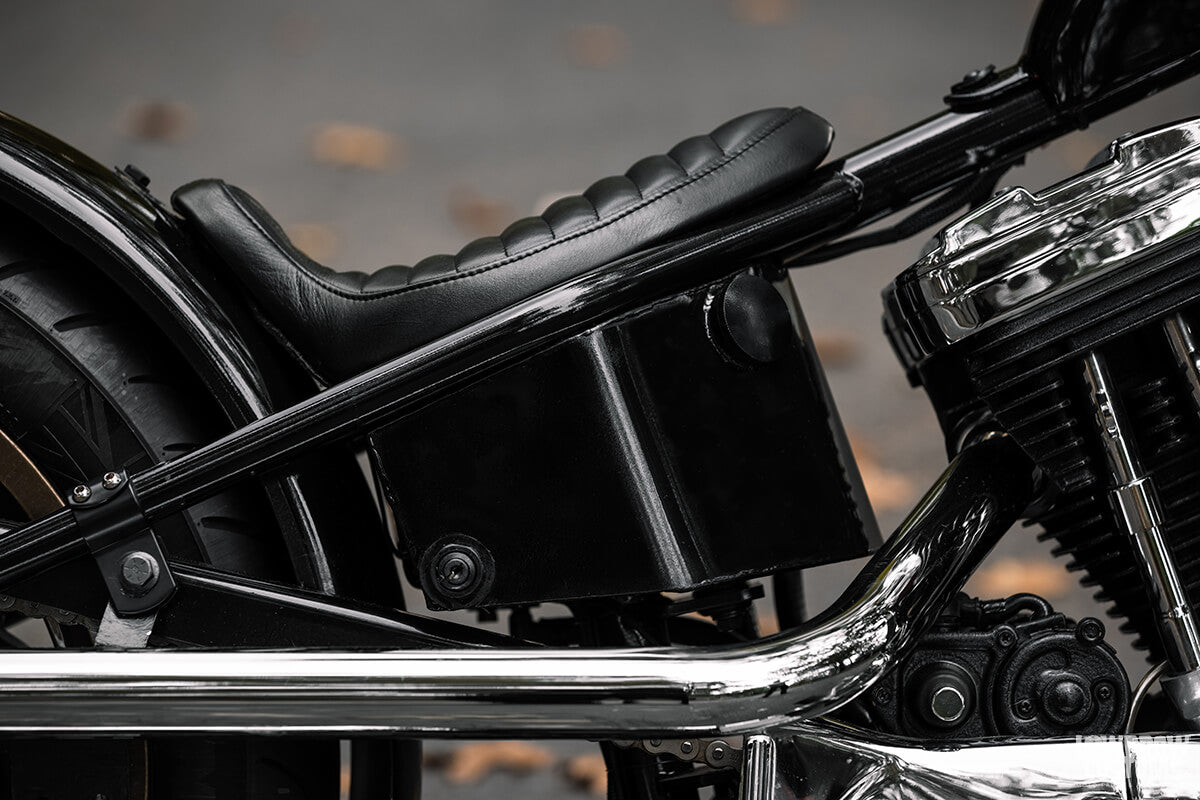 Lowbrow Customs Horseshoe Oil tank. Dan integrated a weather proof ignition switch in it as well.
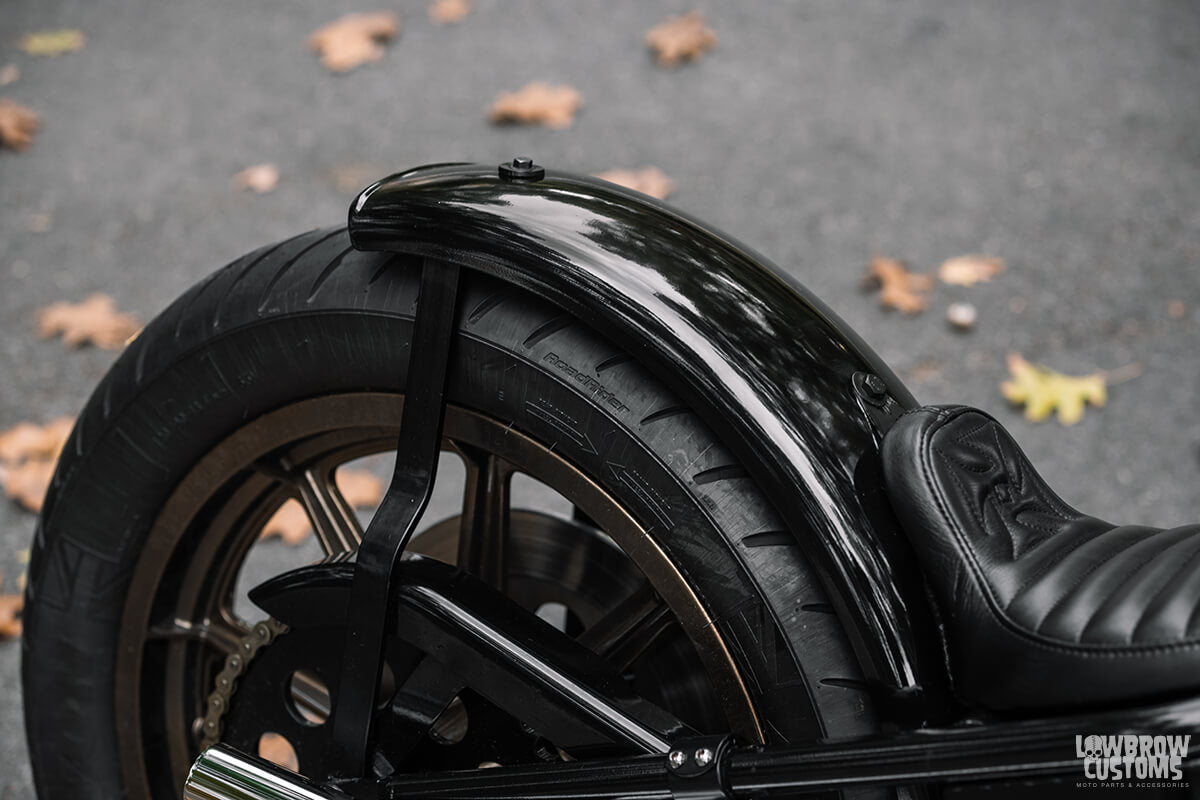 Cycle Standard 5 1/2" smooth radius rear fender.
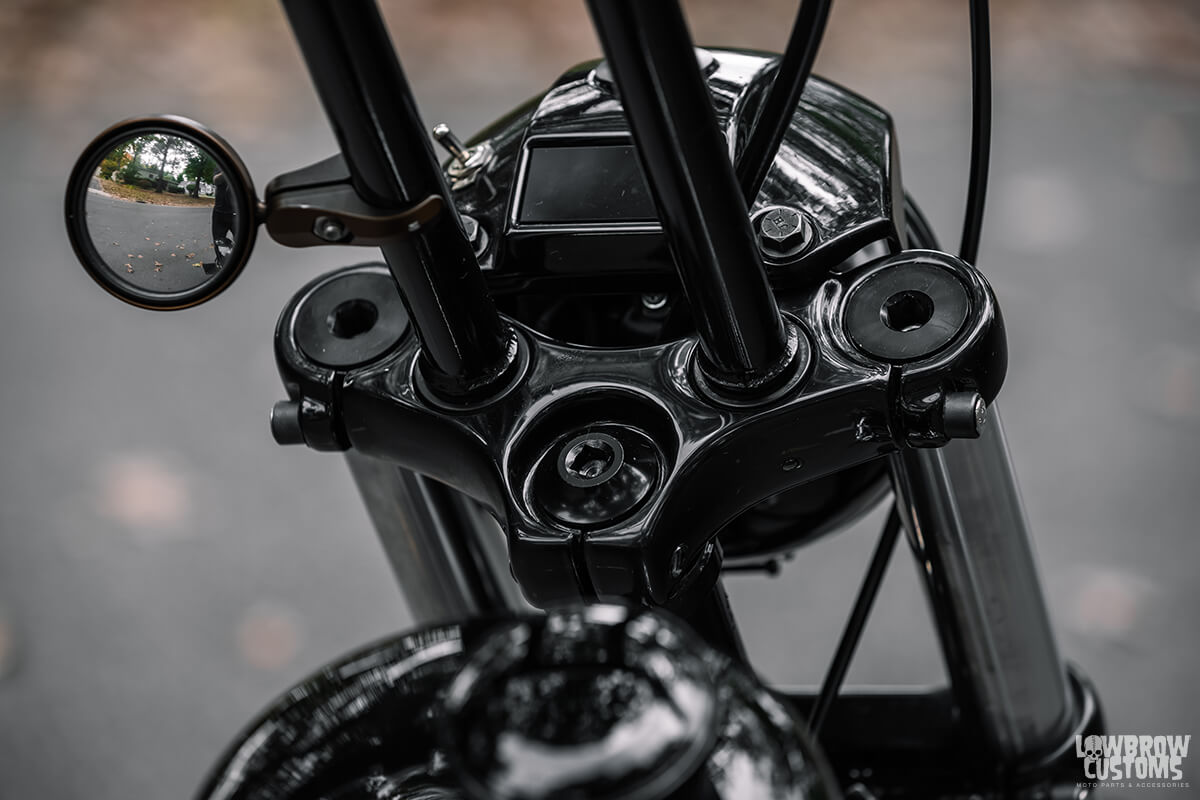 Lowbrow Customs 39mm Low Profile Fork Caps and 39mm Radius Steering Stem Bolt.
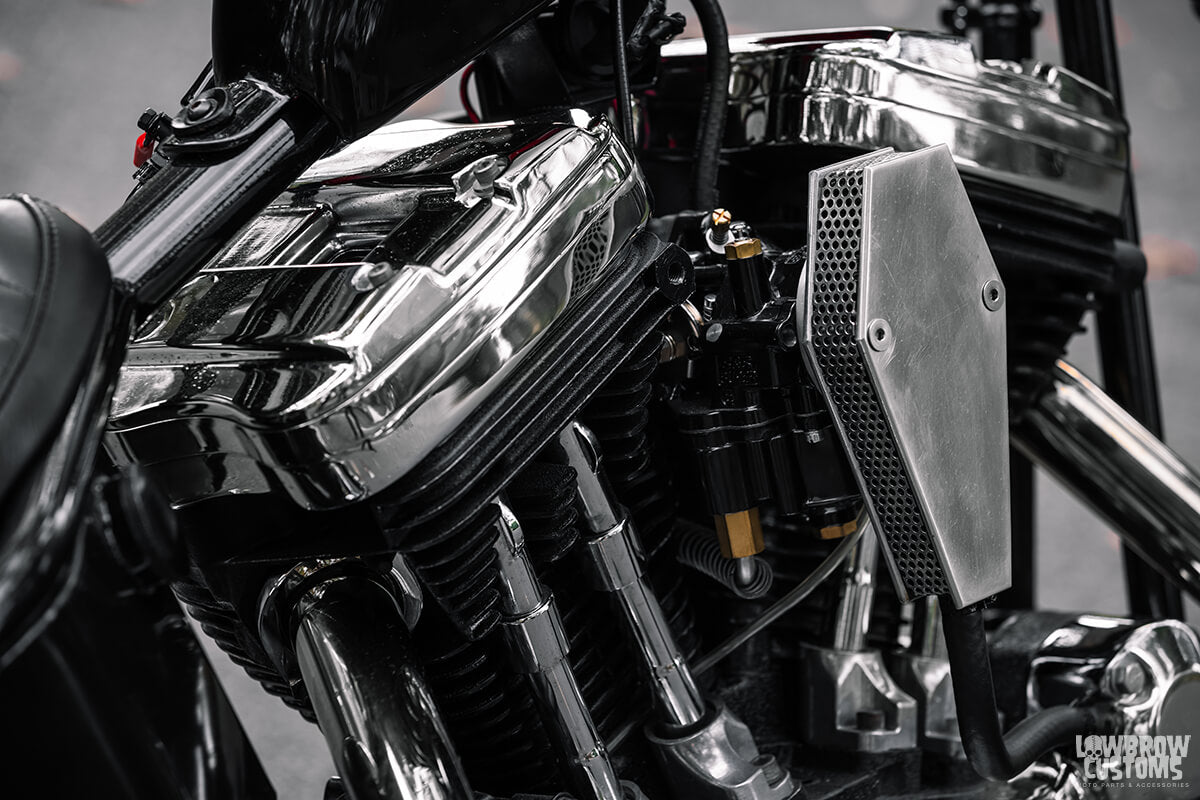 S&S carb.
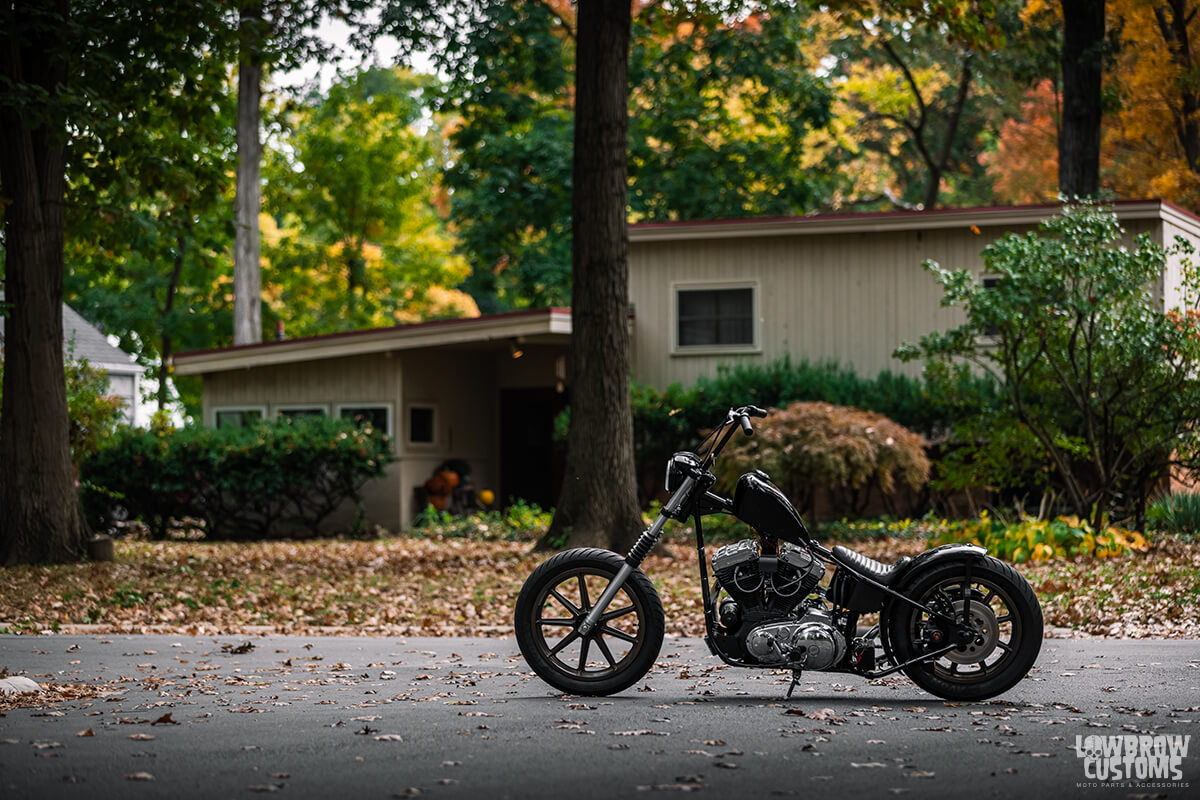 Pumpkin spice and everything nice.
 She's pretty damn skinny.
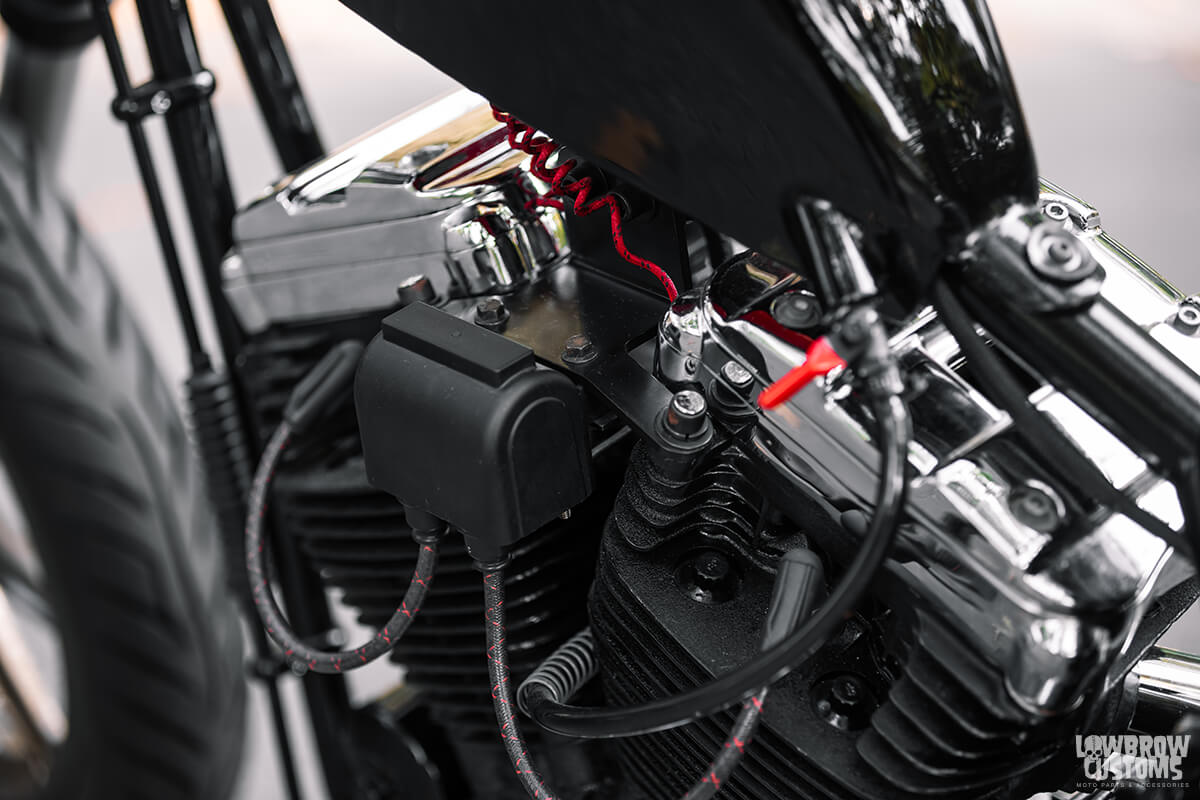 The Gasbox Coil relocation and top motor mount with Lowbrow Customs Spark plug wires.
 Just a little classic HD branding.
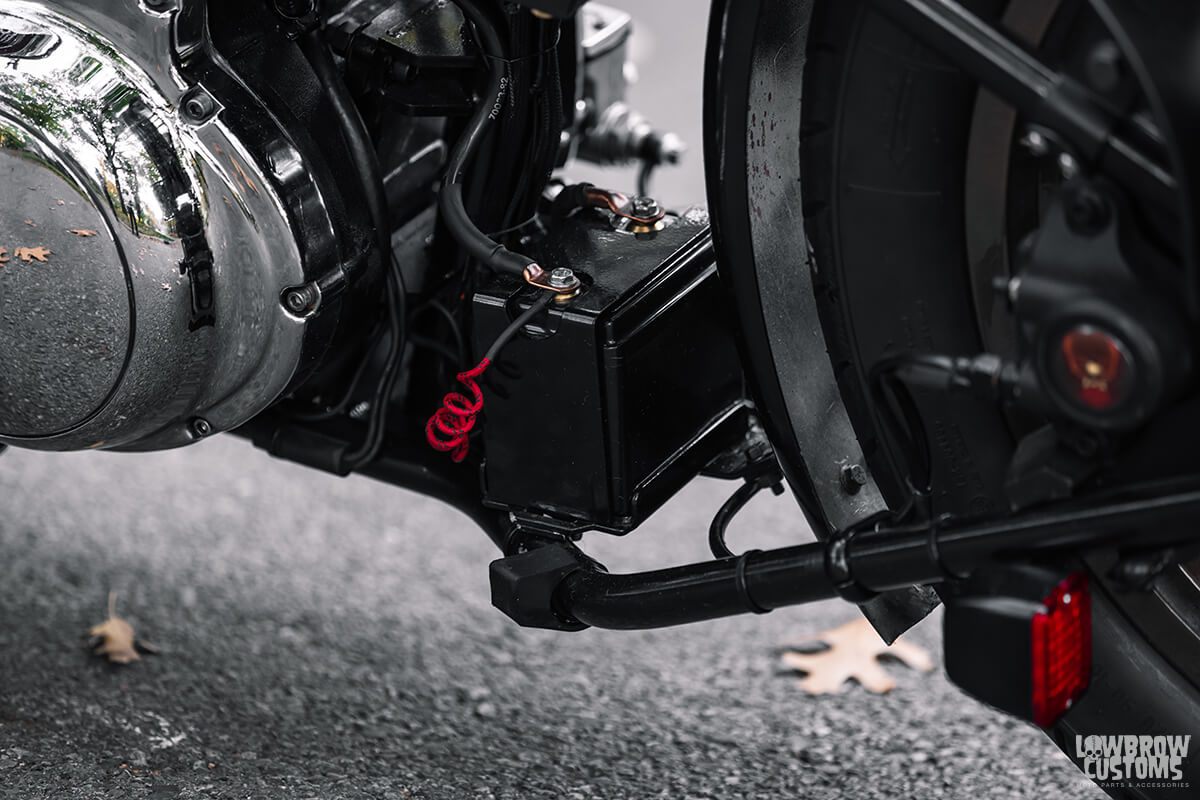 The Gasbox Battery box housing an Antigravity 12 cell battery.
 The man himself DeathcoDan....
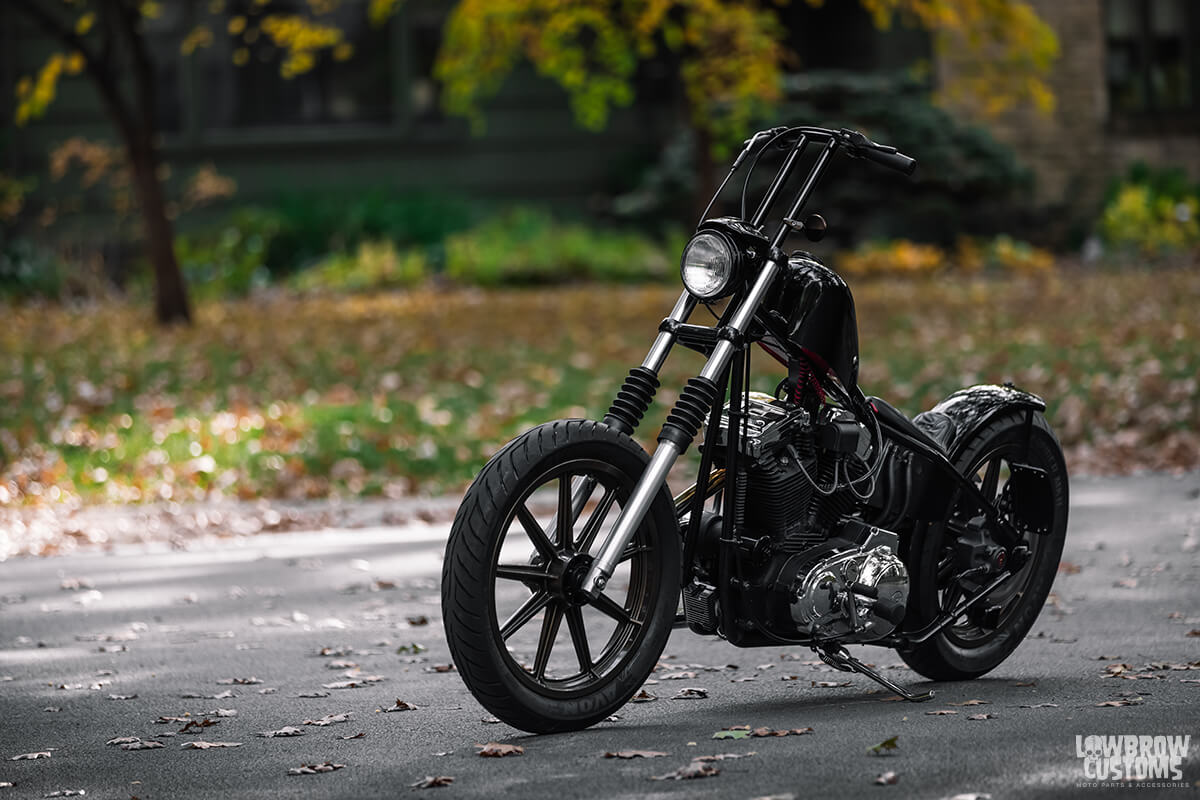 Midwest tough.
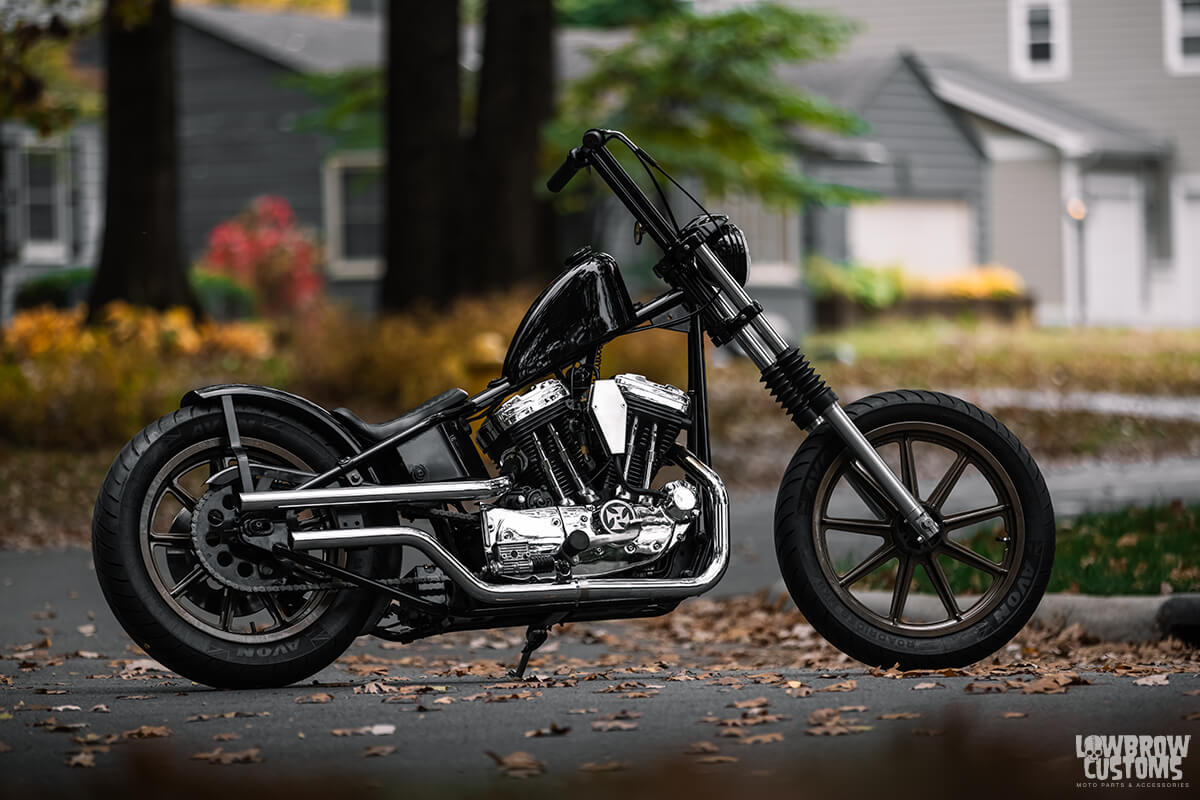 Choppers man, choppers.
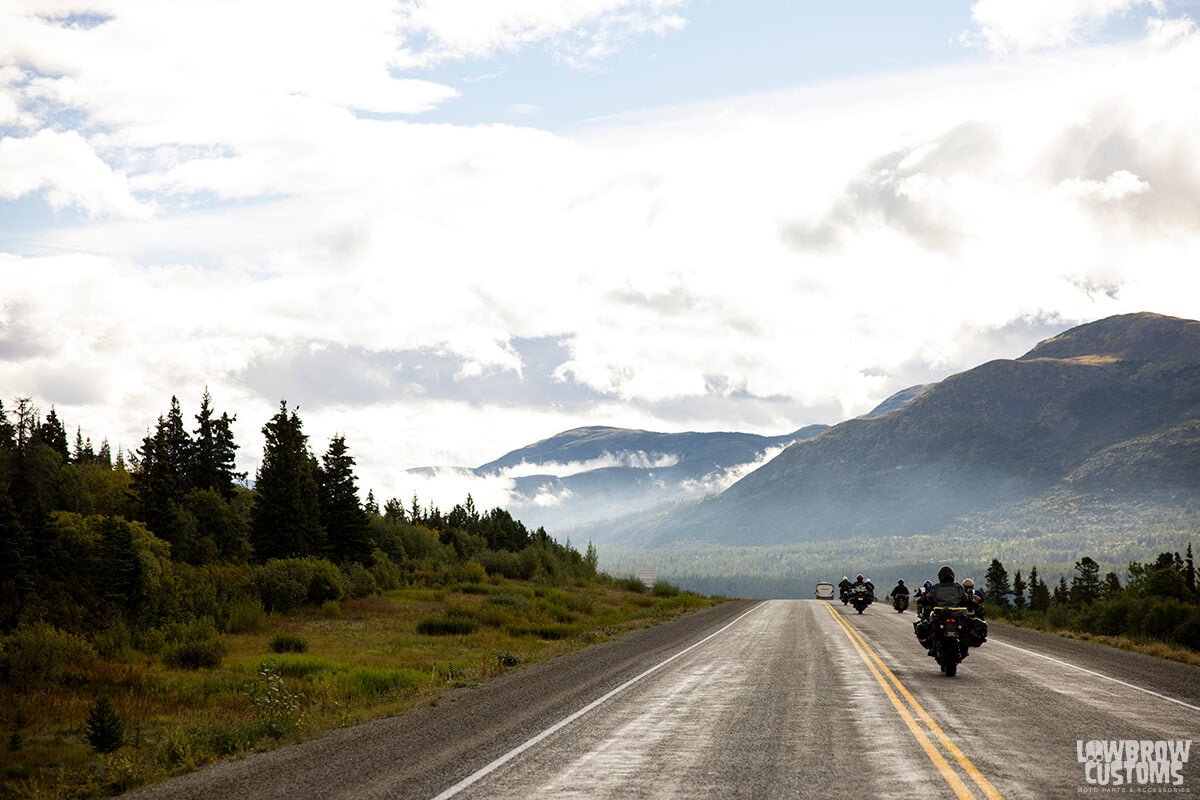
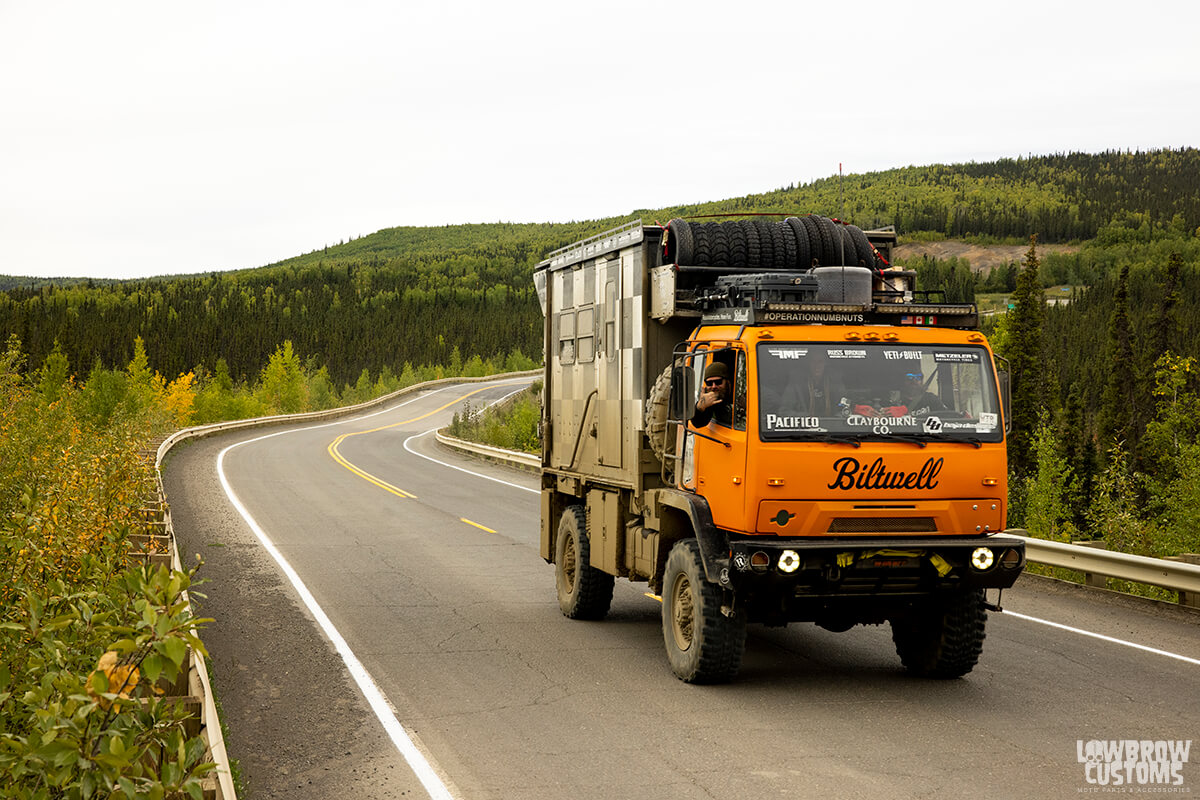 The Pig
 On some Harley-Davidson PanAmericans
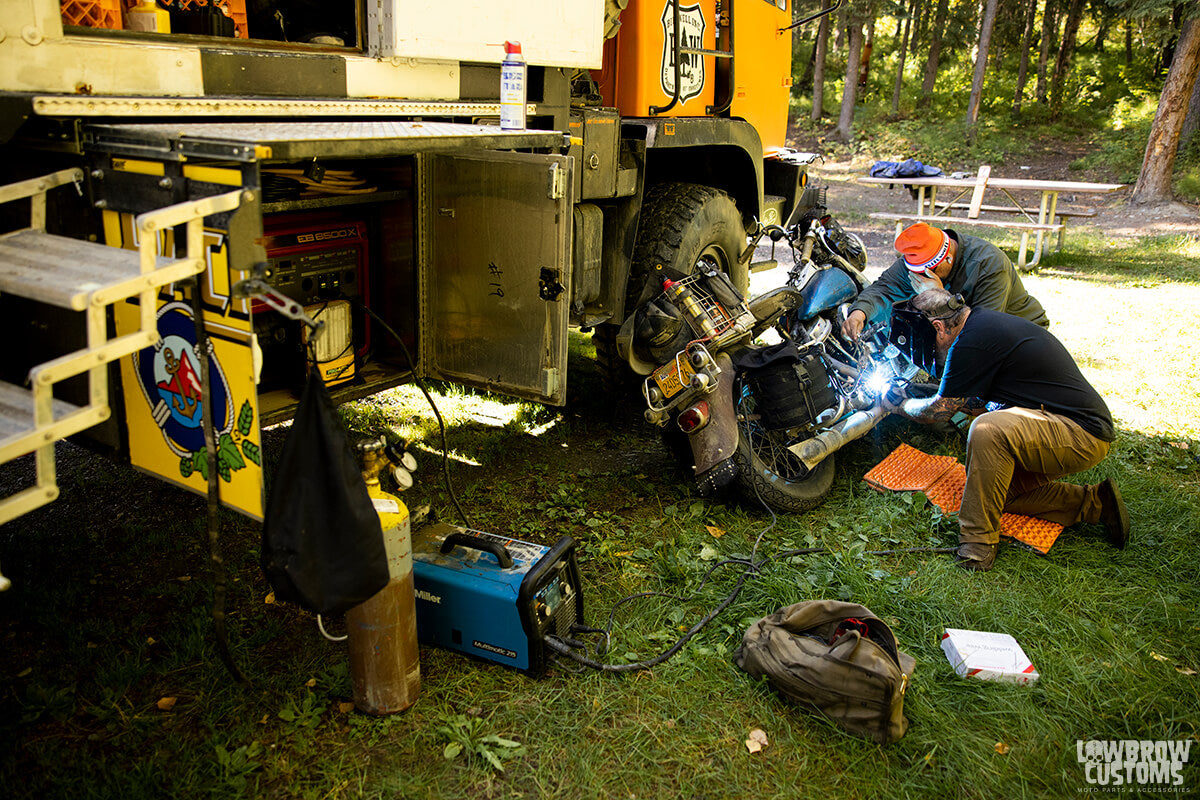 The Pig helped out a ton. In the middle of no where how else could you do a weld fix?
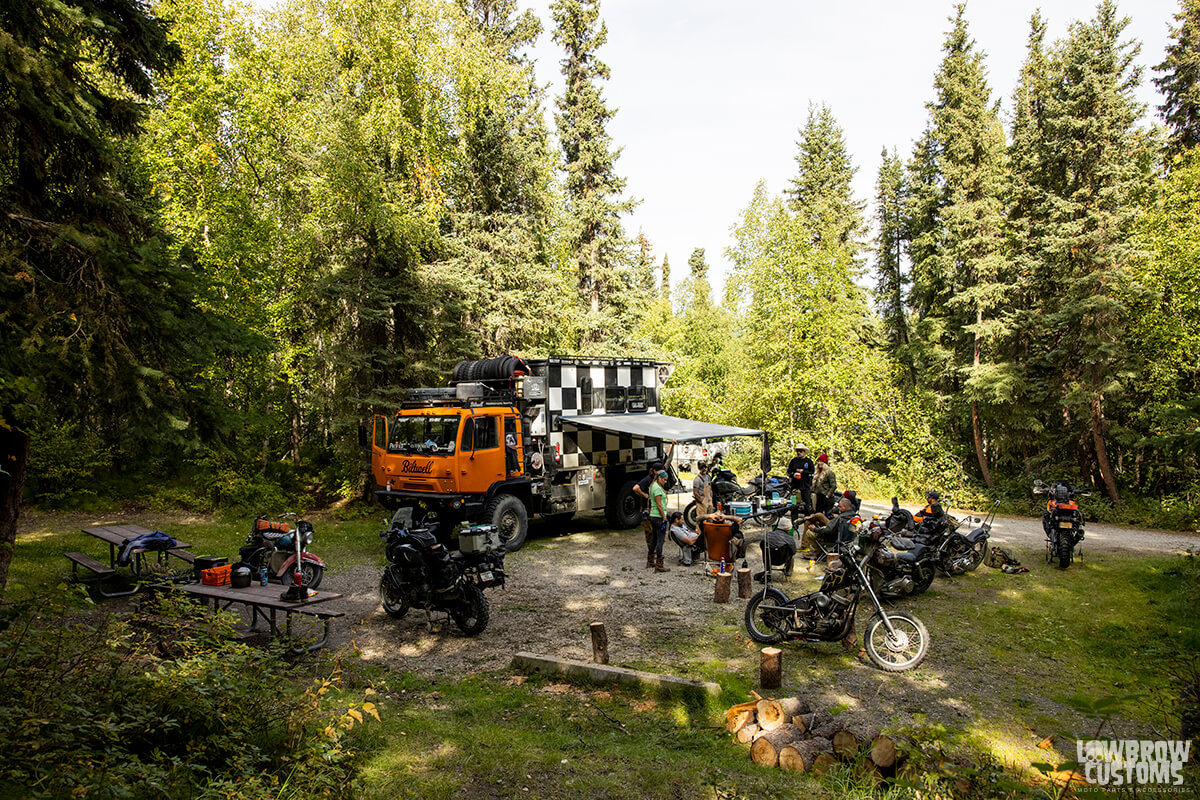 Camp Biltwell
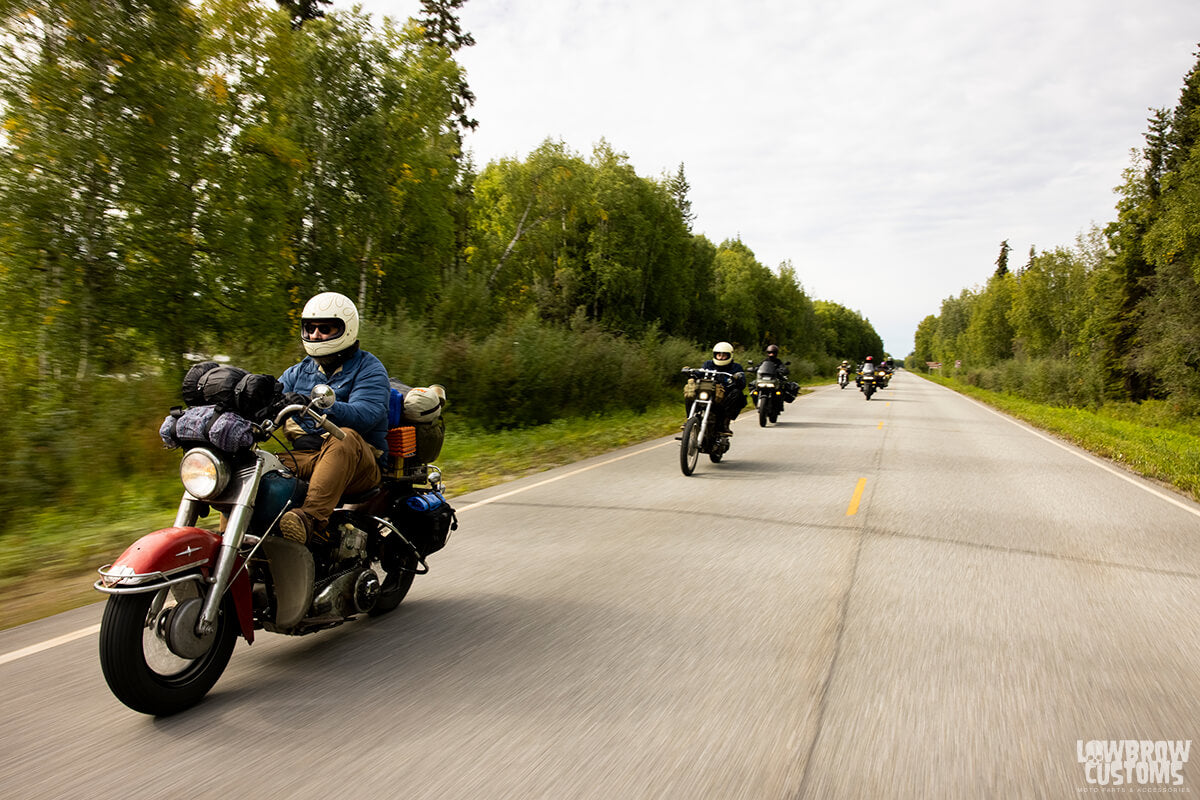


 Tiniest stroker motor we've ever seen.
 15" rear with a drum brake.
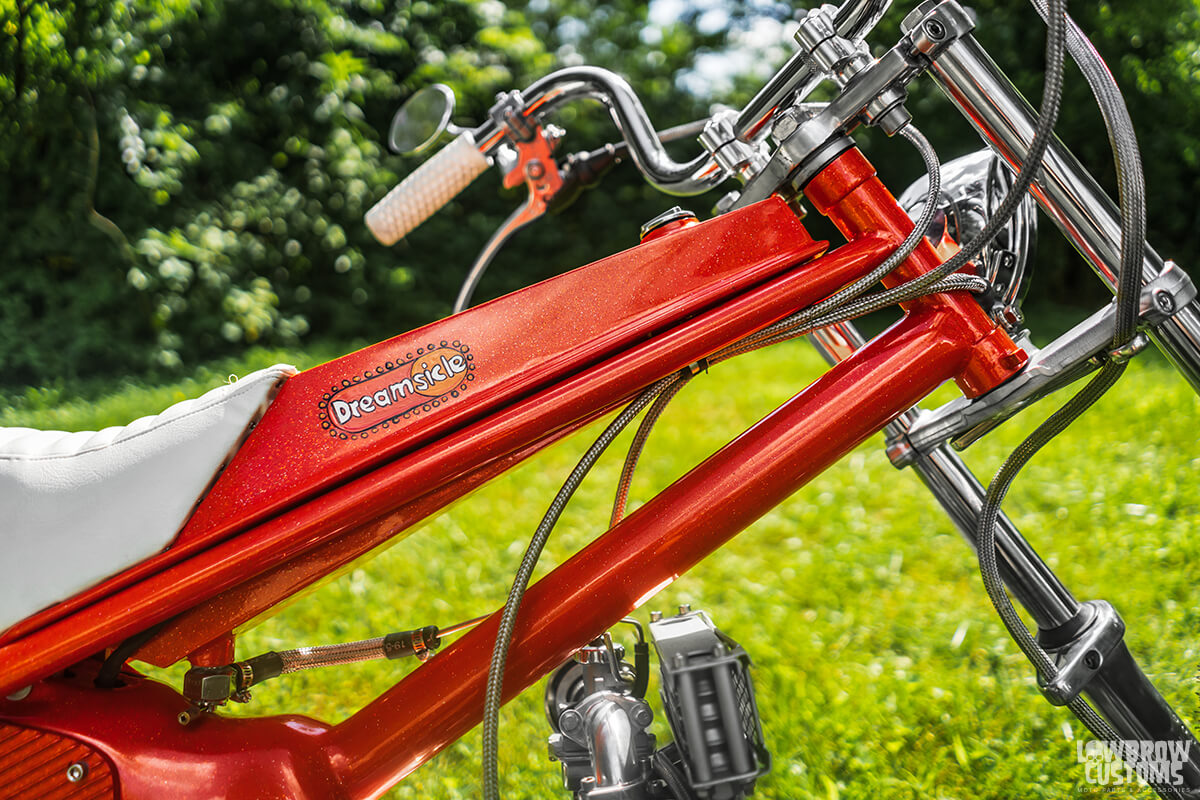 Would ya just look at all that flake! woooo
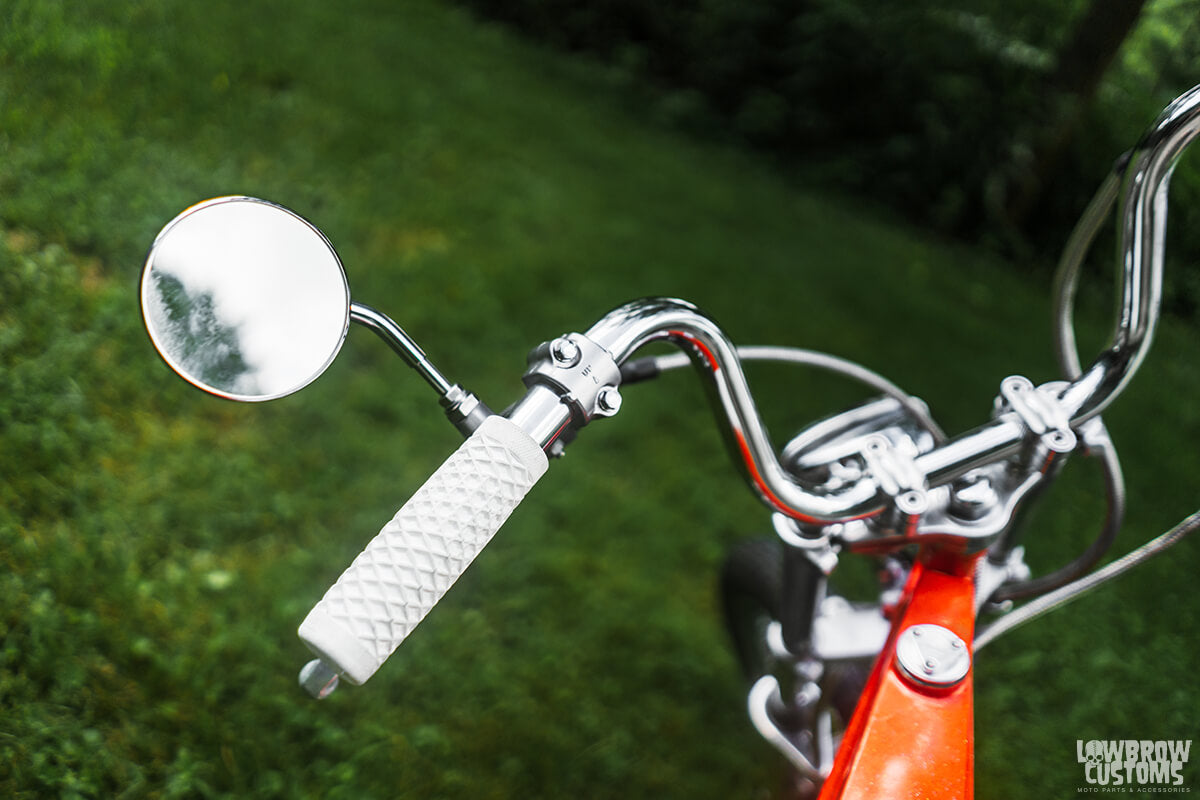 Lowbrow Customs Spot mirror and Vans x Cult White Grips.

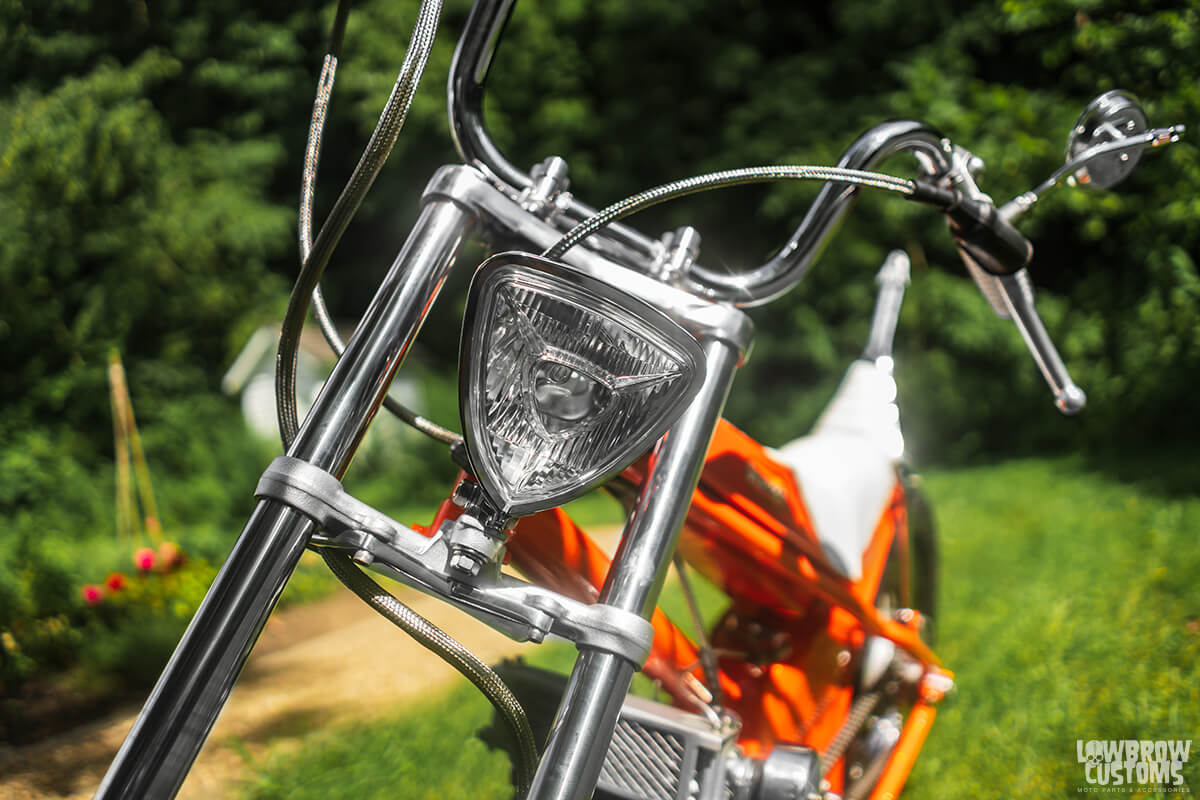
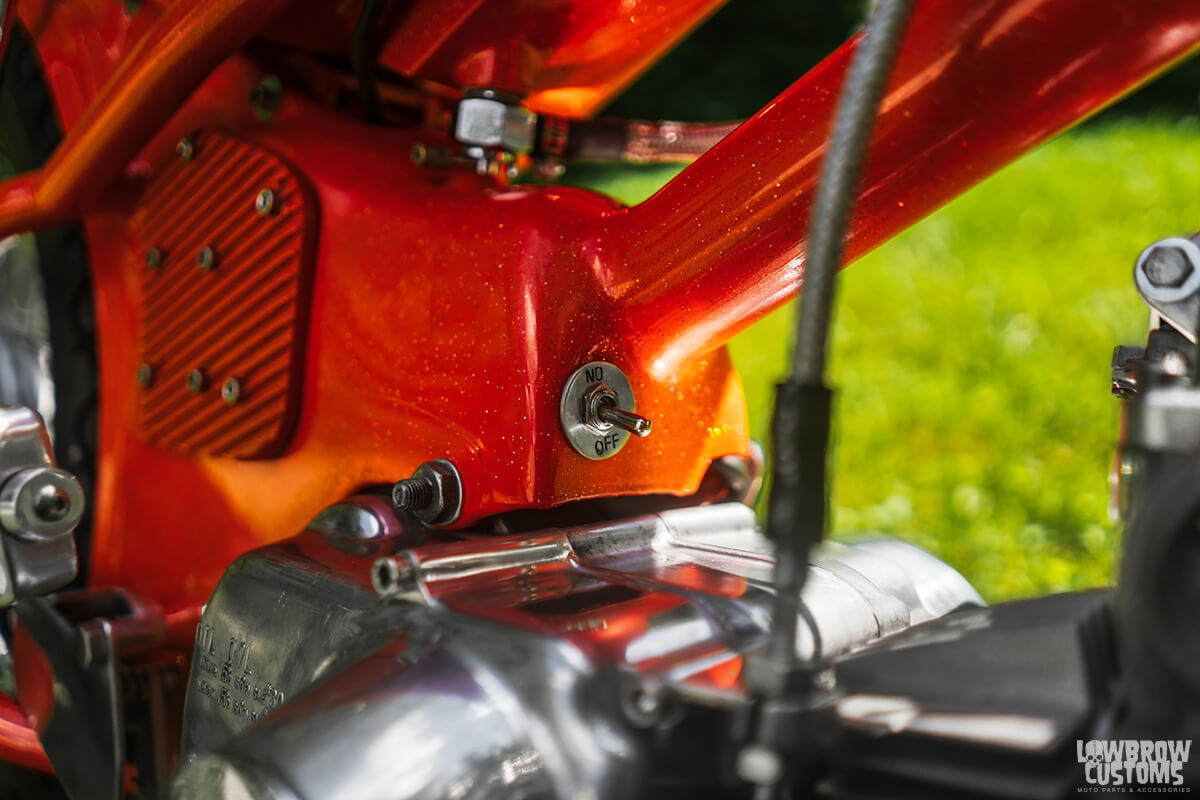
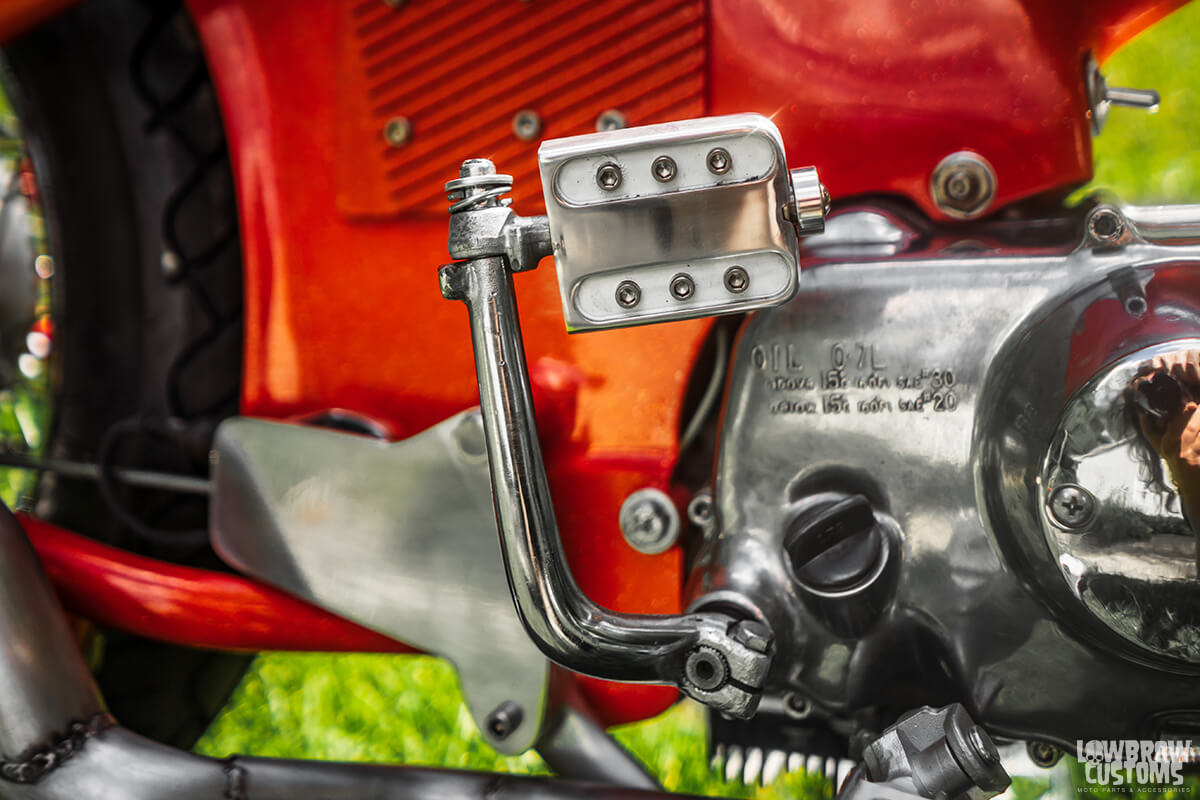
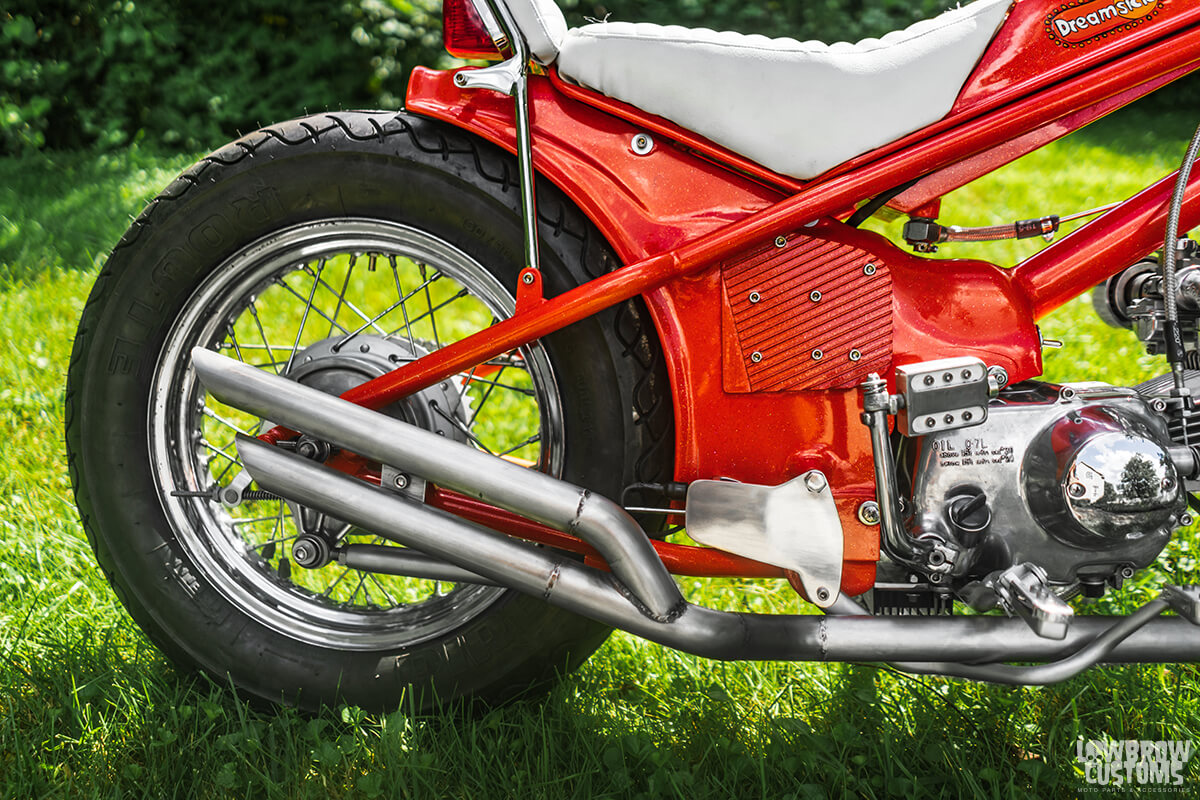
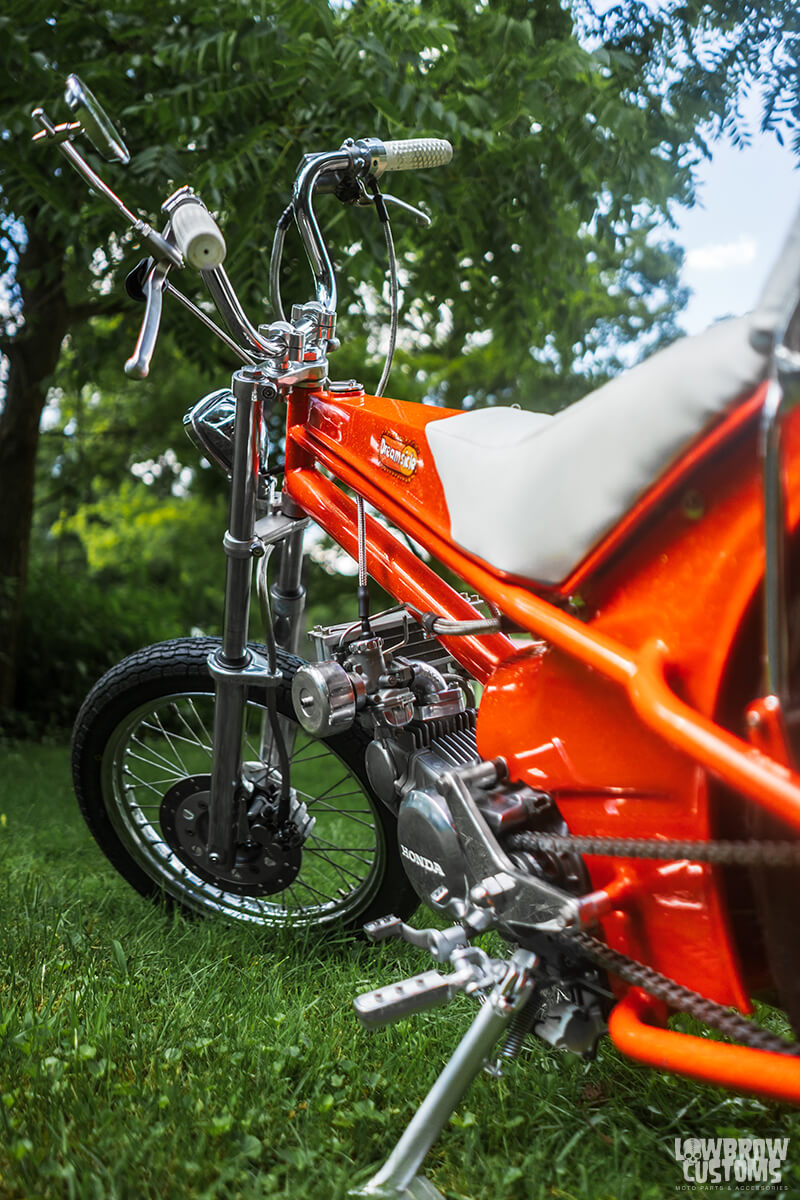
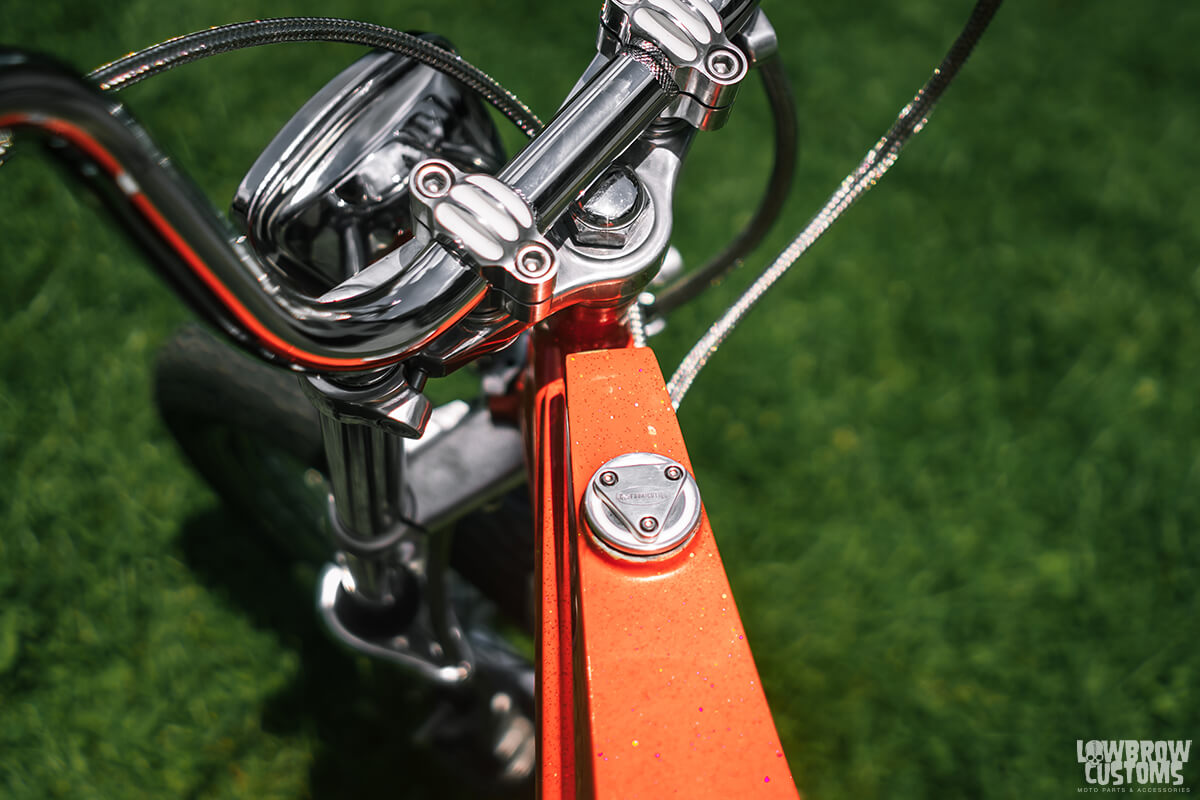
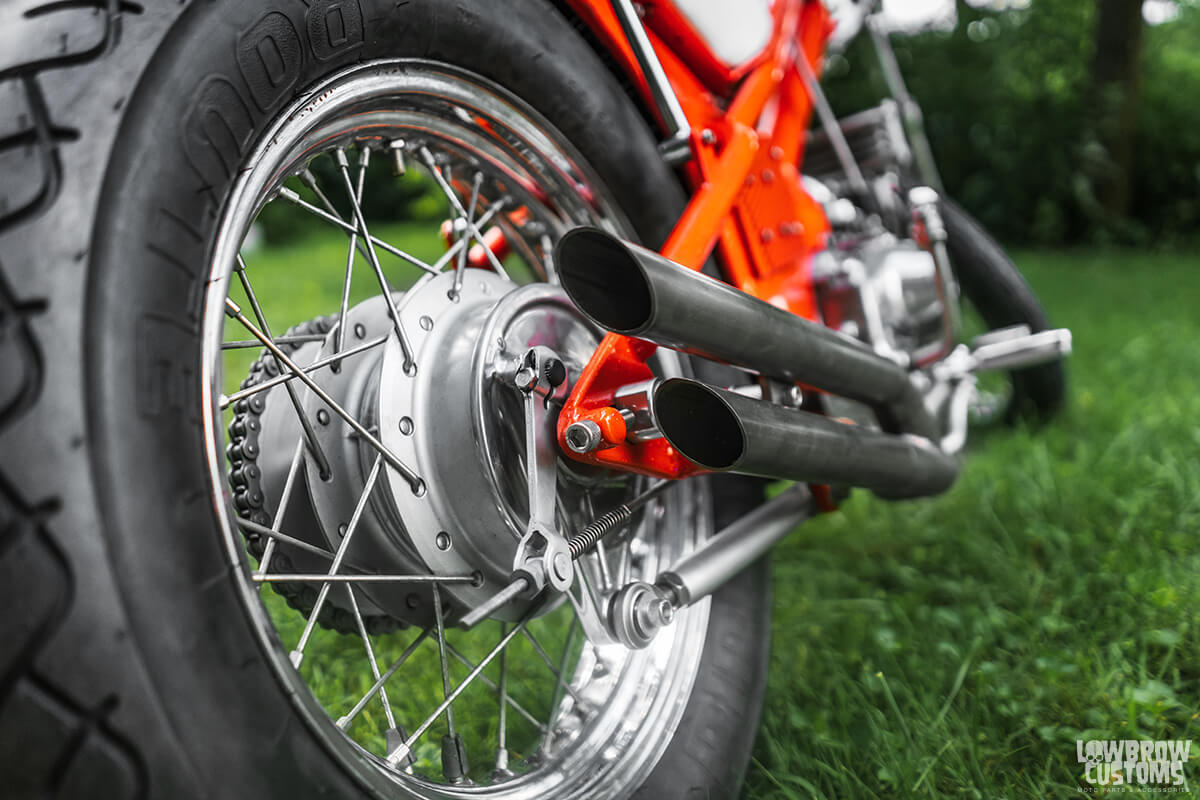

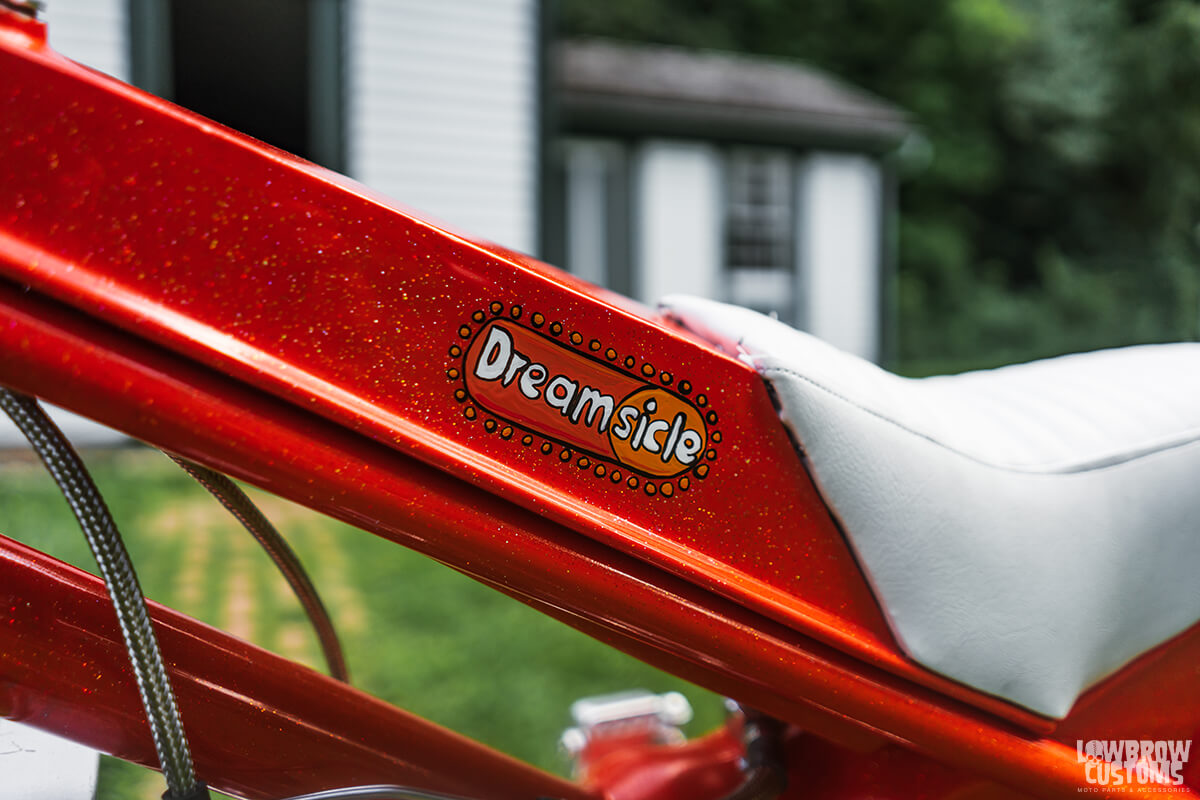
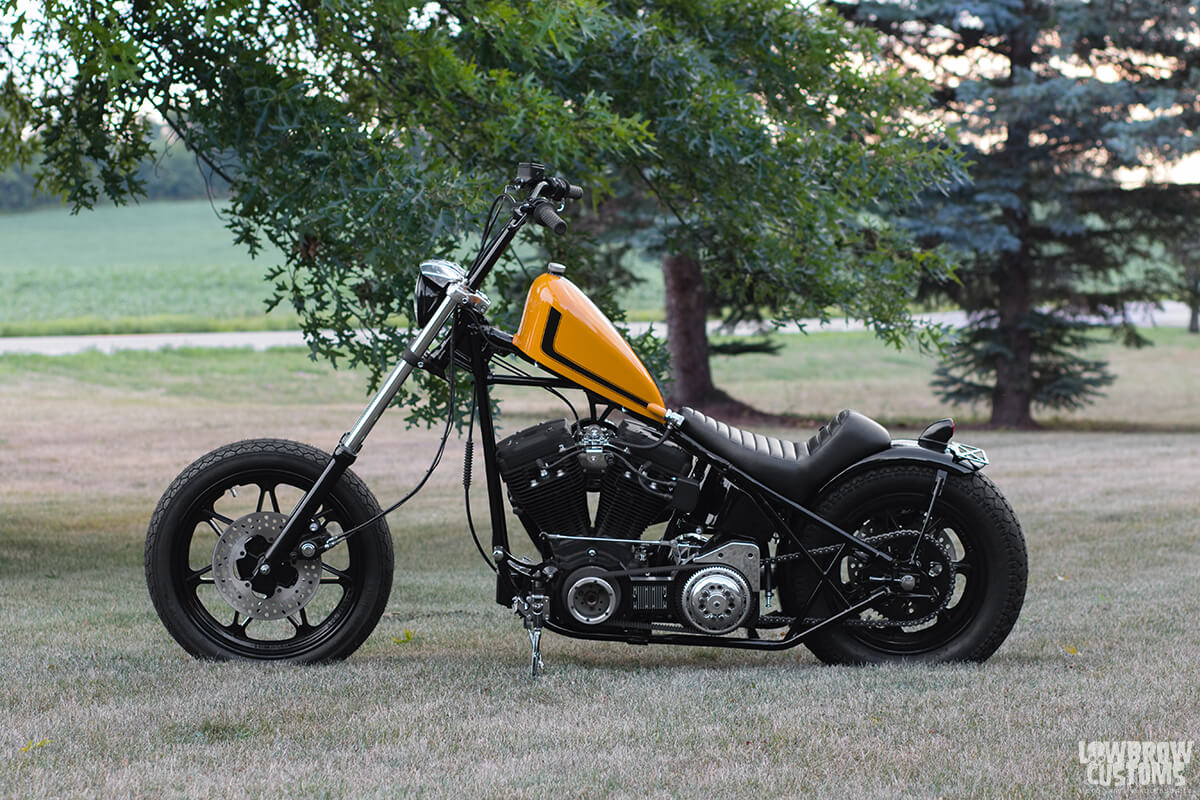
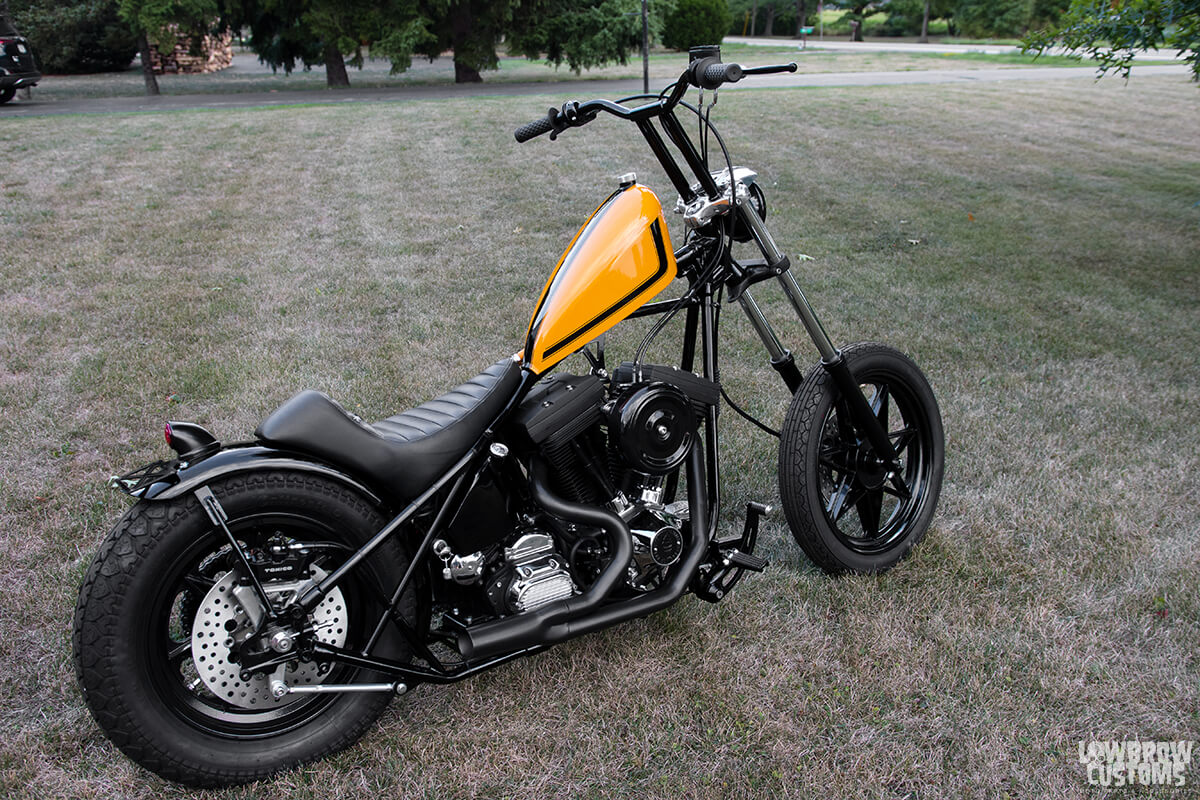
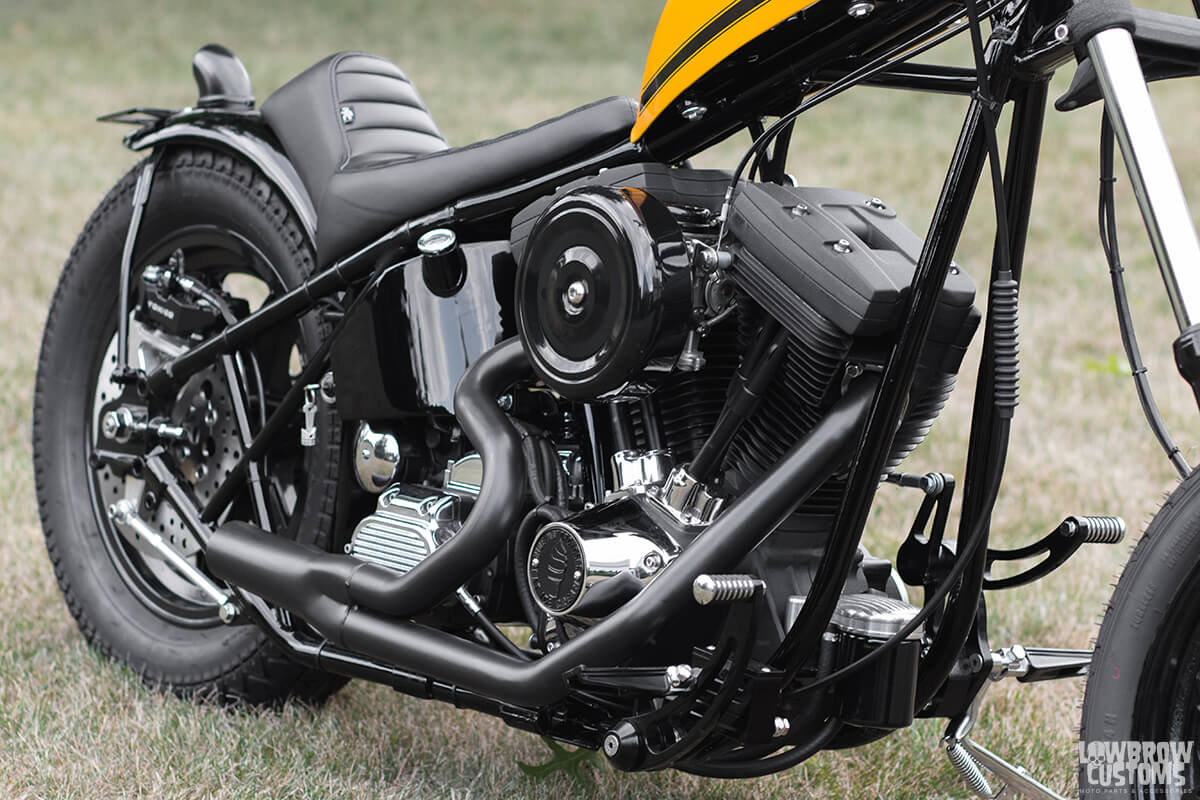
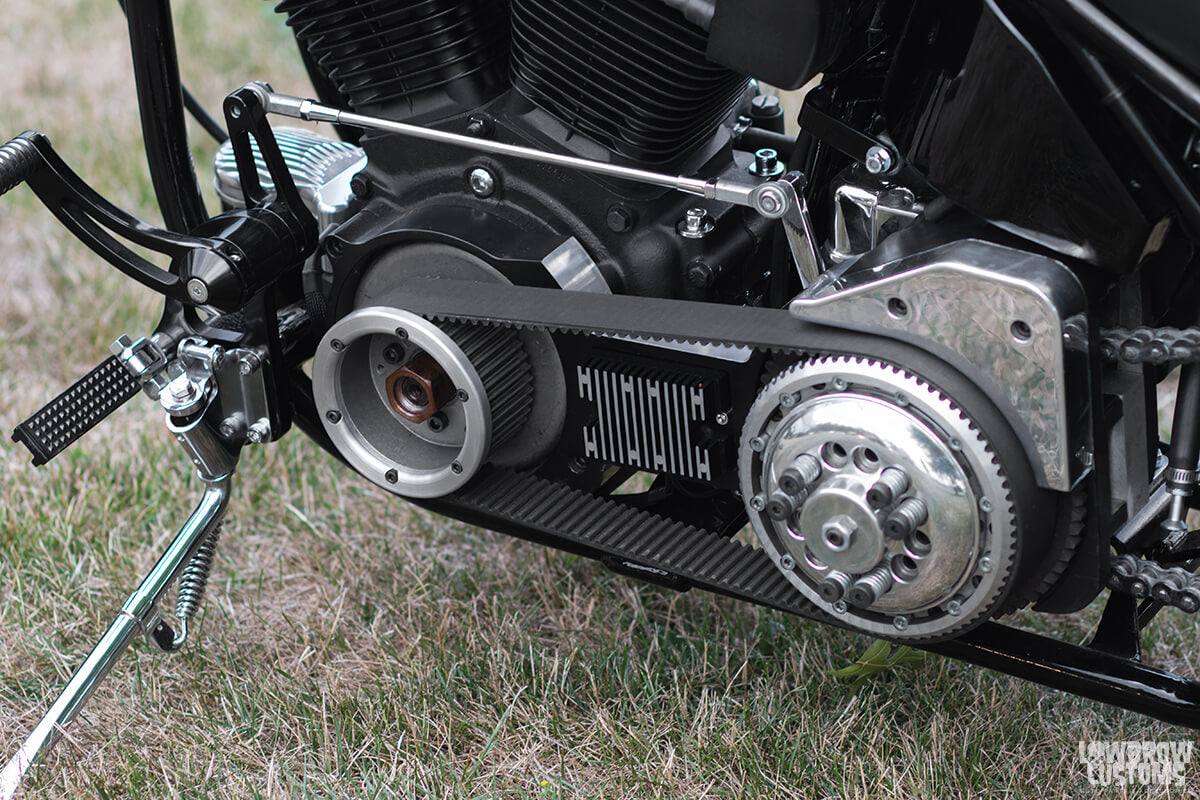
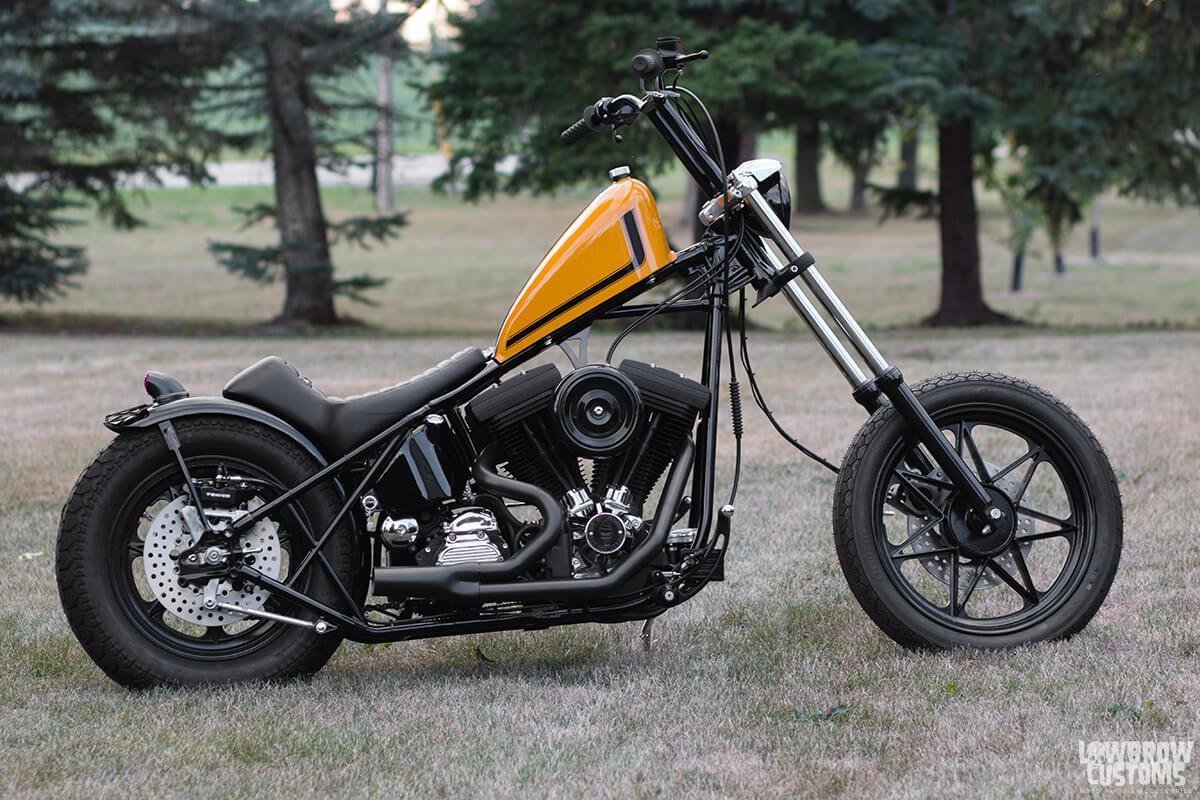
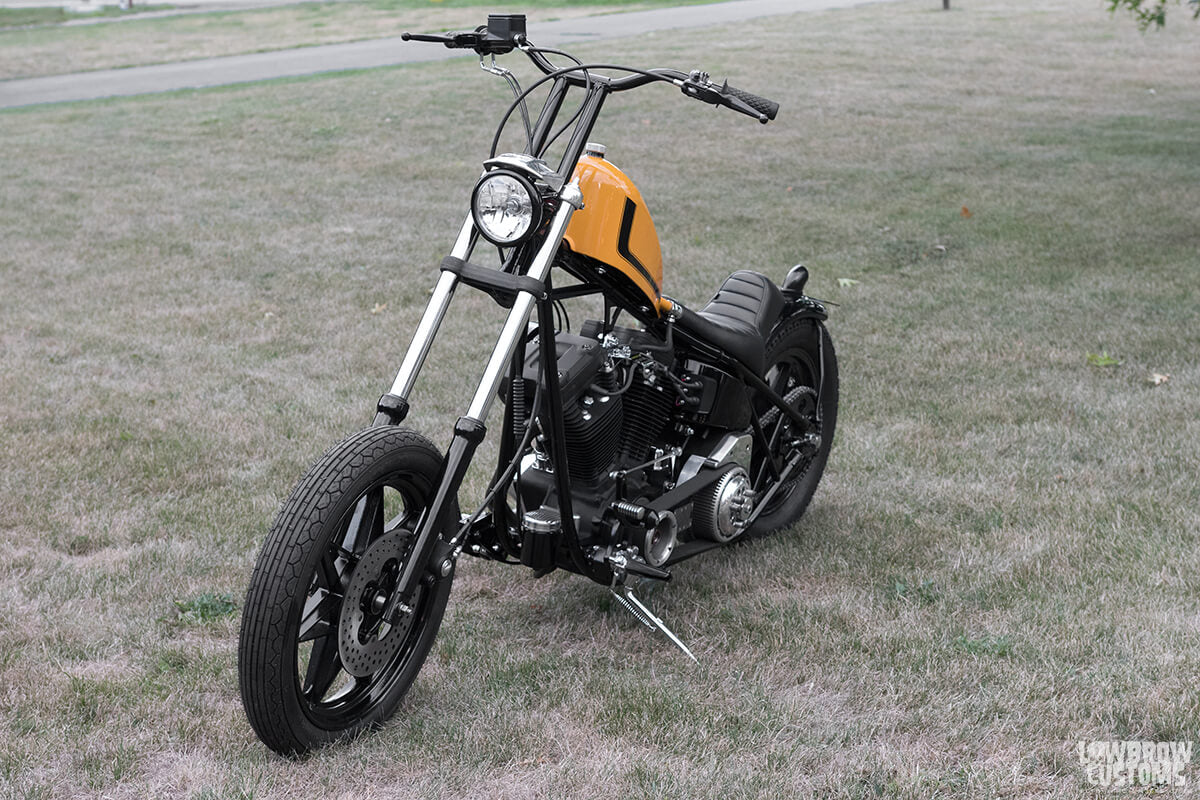
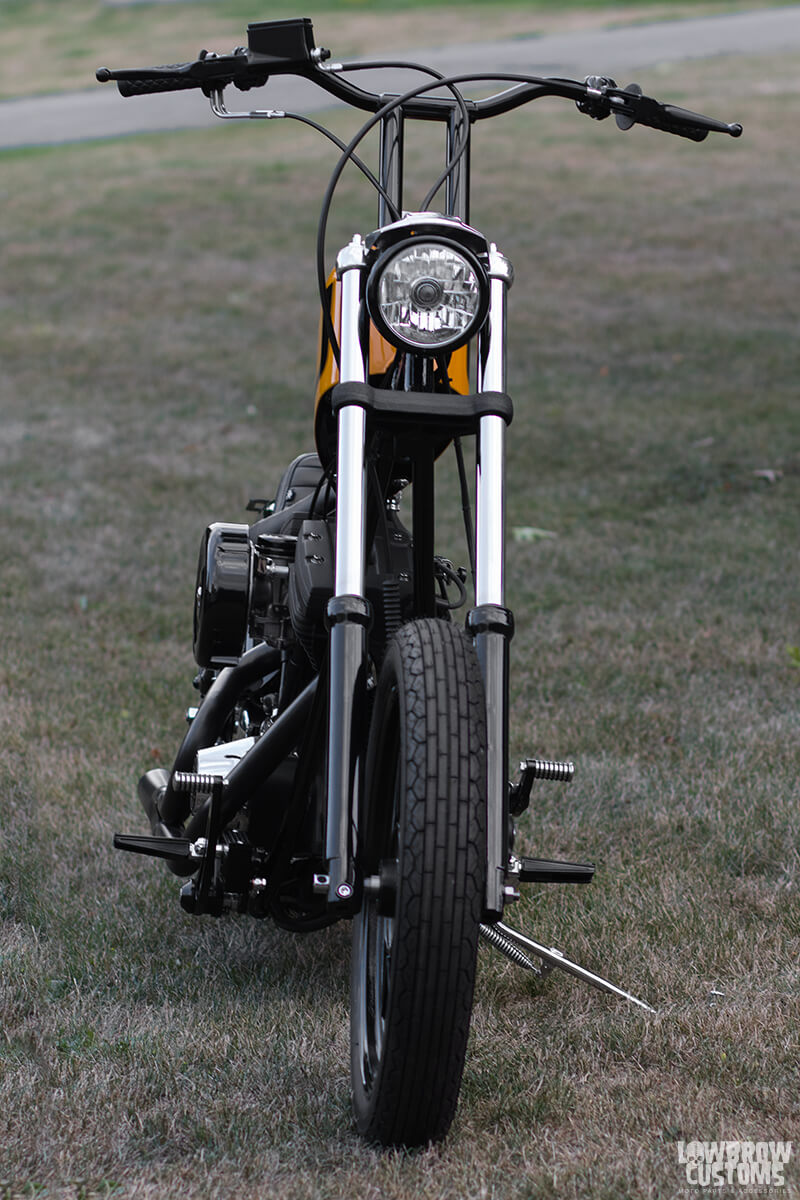
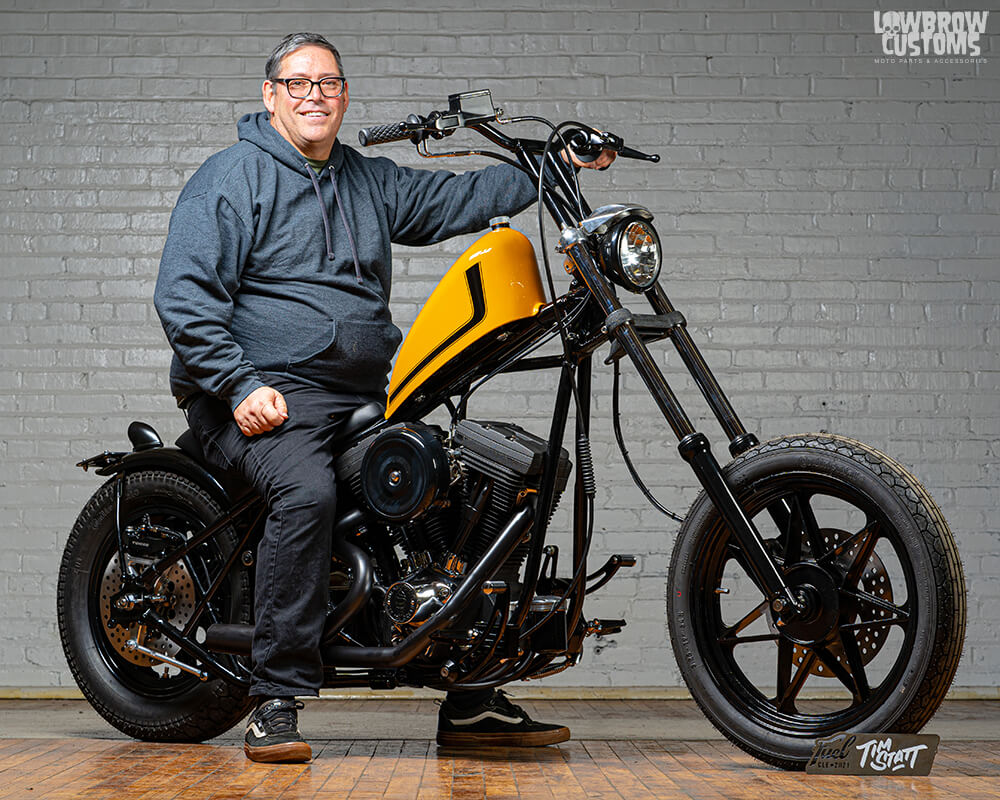 Photo by David Carlo at Fuel Cleveland 2021
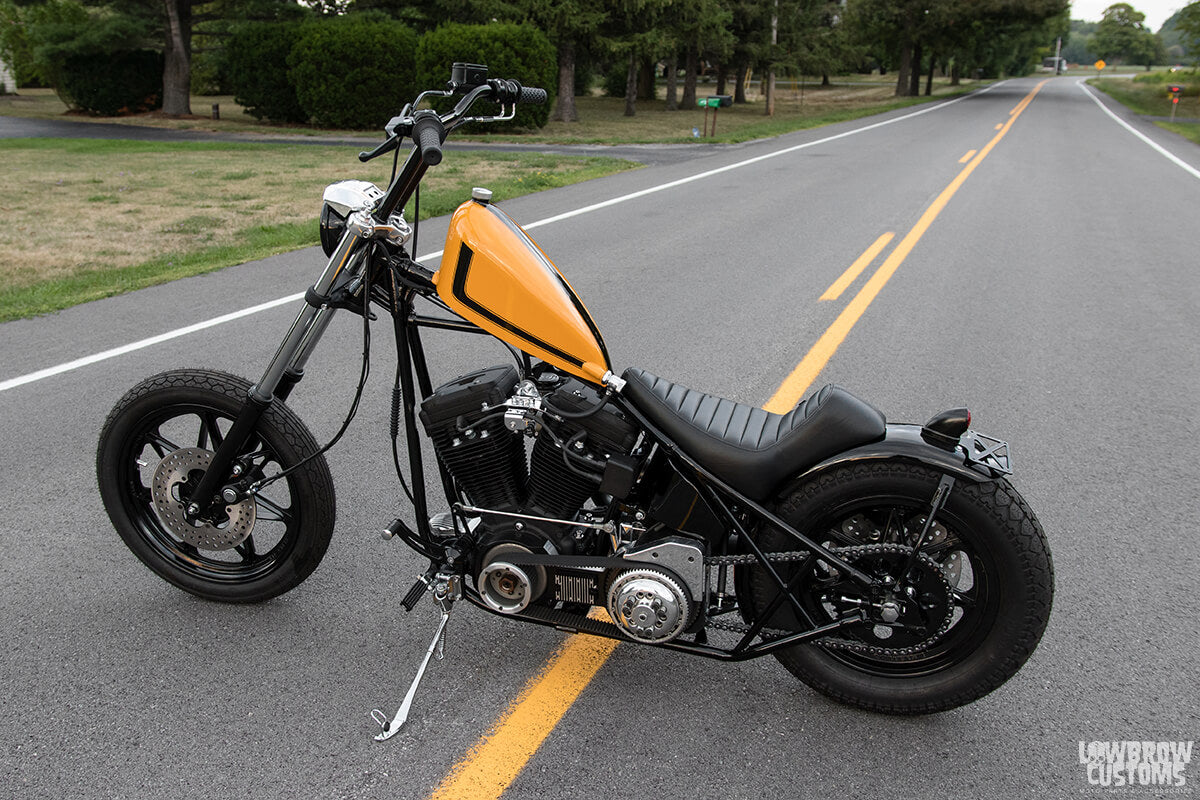
 Grip it and rip it!
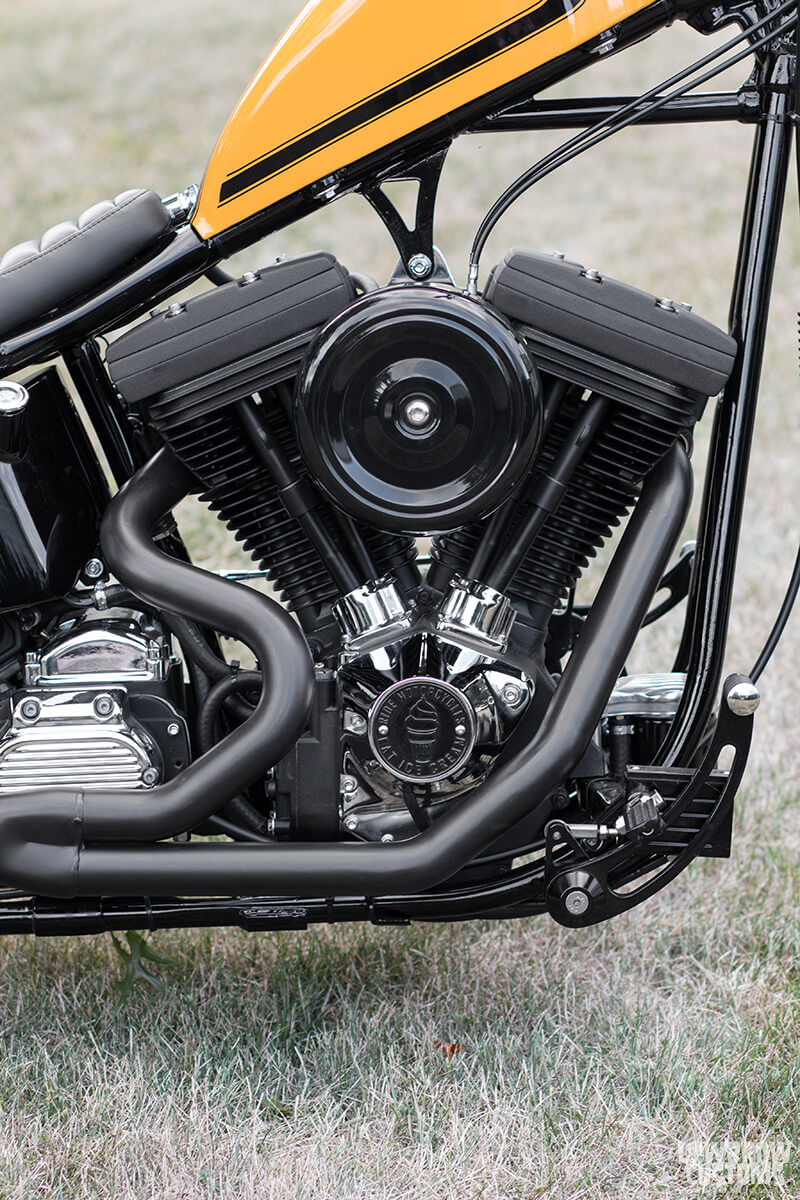 Ride Motorcycles Eat Ice Cream
 Full Custom hard tailed frame by 47 Industries
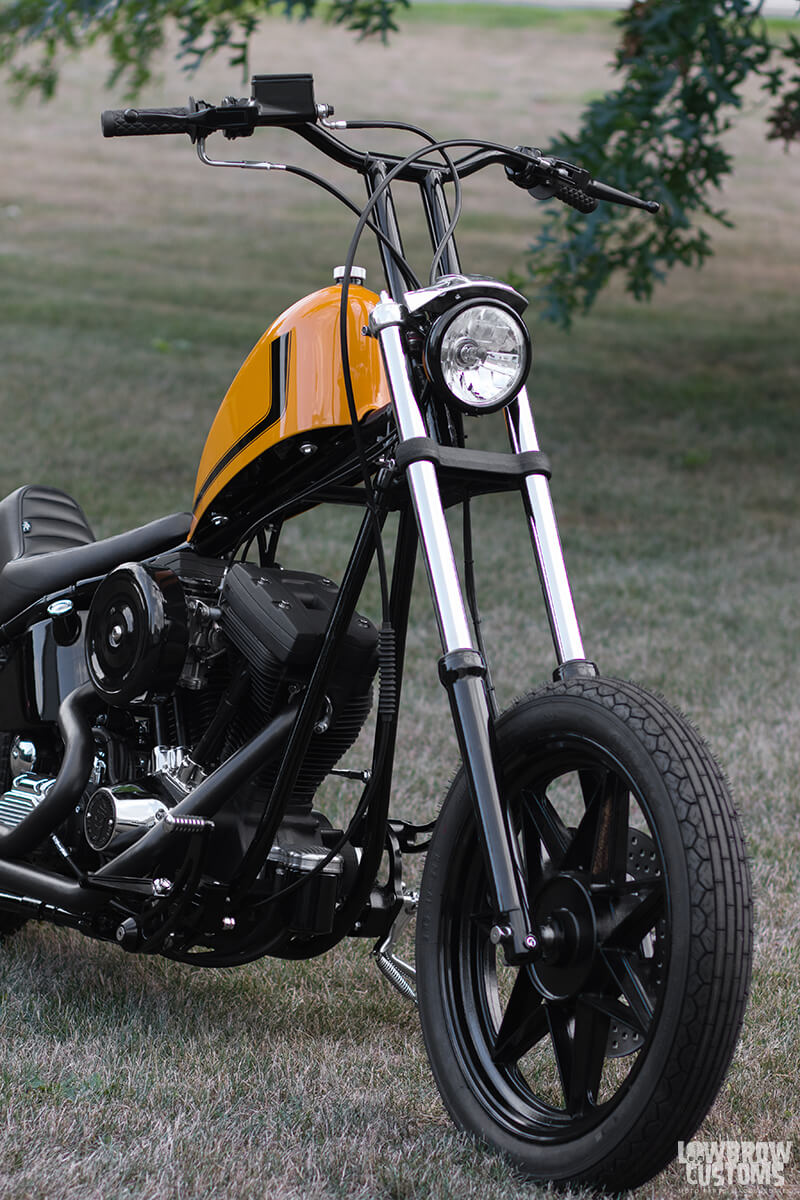 6" over 39mm front end, Narrow Glide
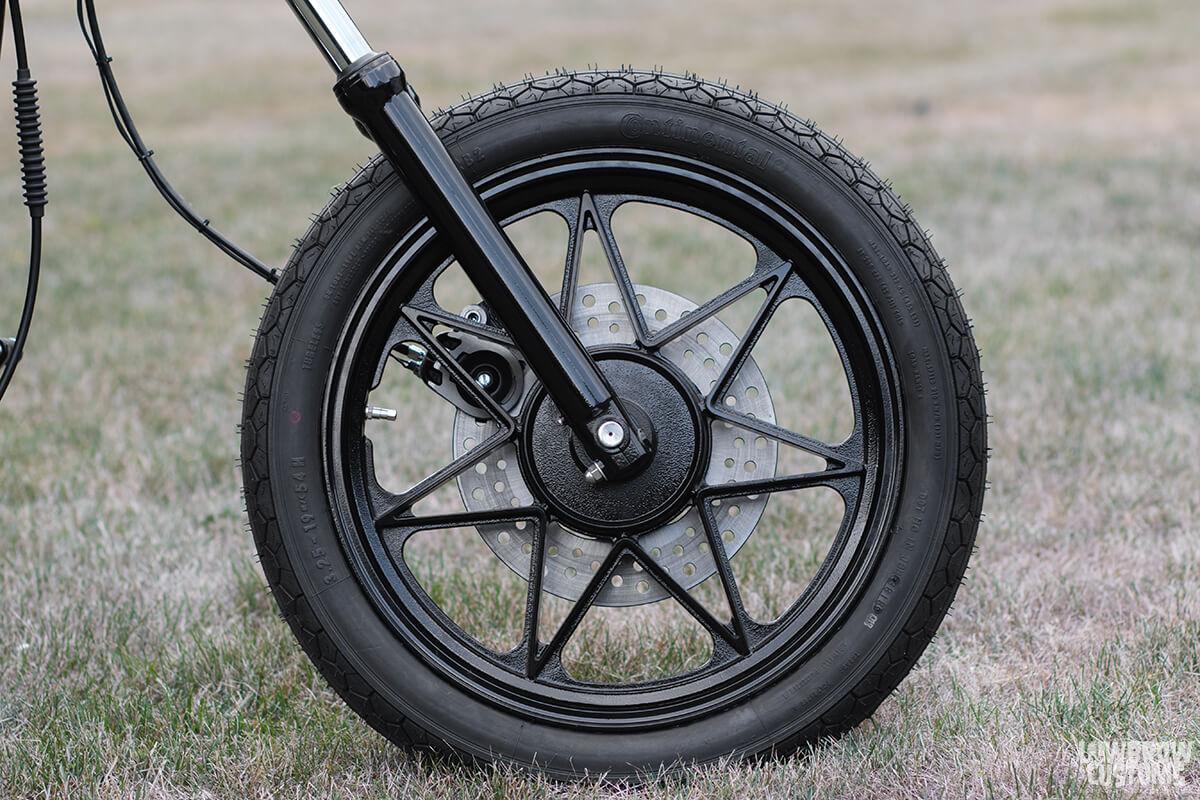 19" NOS Henry Abe with Continental Tires
 16" NOS Henry Abe with Continental Tire
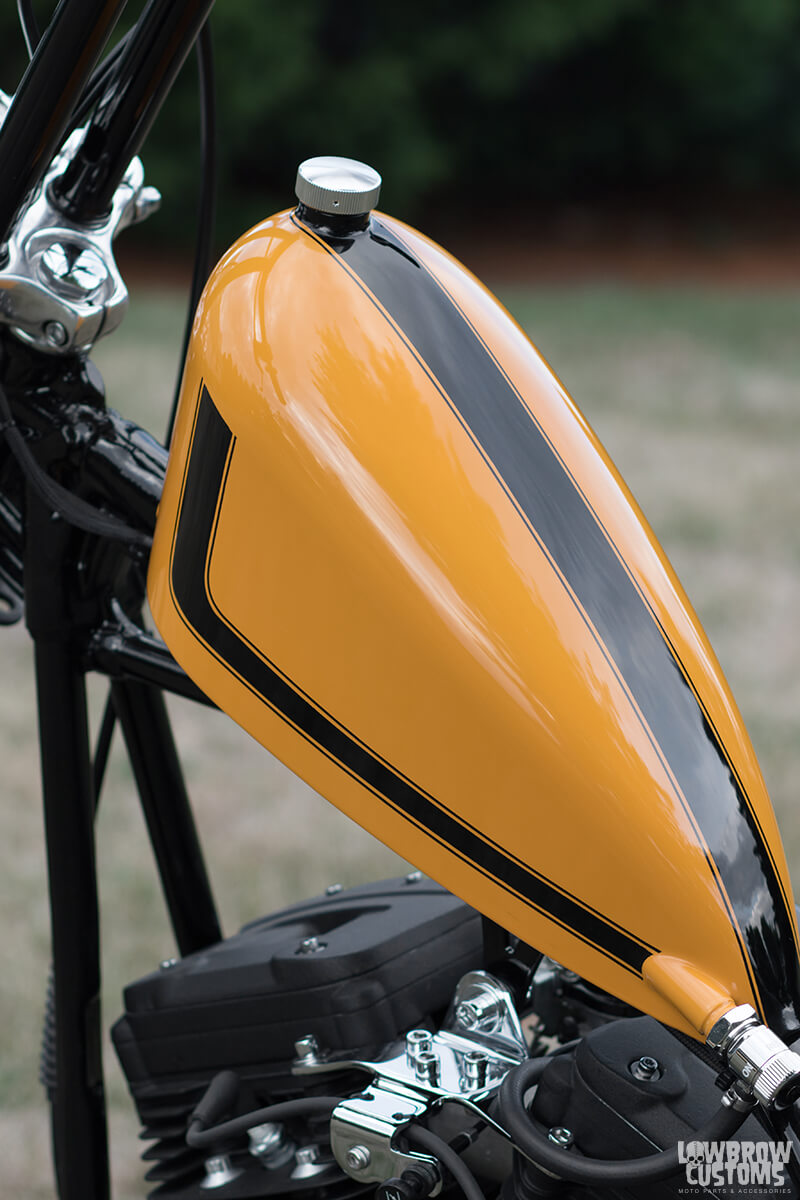 That Boss Yellow paint
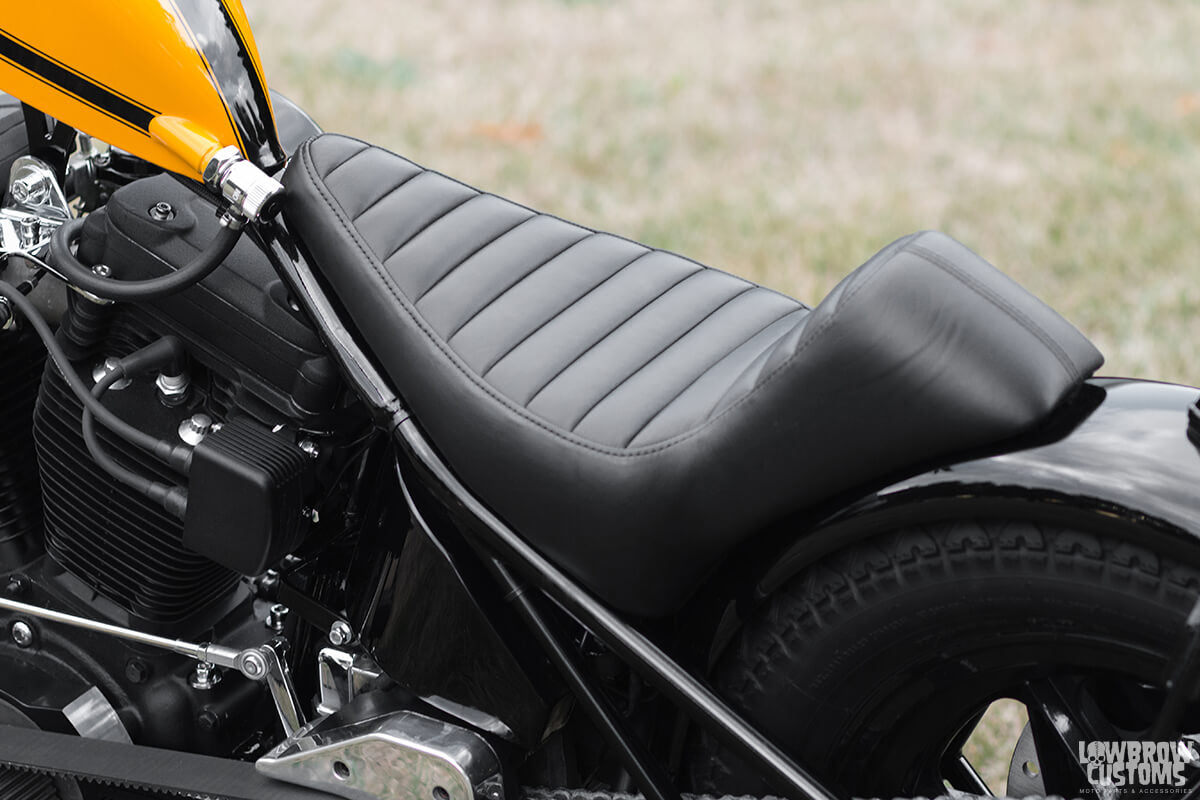 Counterbalance Cycles with the seat!