


Let me take you back to the summer of 1995. I was living the life down in Myrtle Beach, South Carolina. Waiting tables in the morning at the Hilton, bussing tables at night at Damon’s Grill, sleeping on the floor at my buddy’s sister’s house and taking in a steady diet of McDonald’s cheeseburgers.
By the end of the summer, I had saved up enough money to put a down payment on my first motorcycle, a 1996 Harley-Davidson XL1200C Sportster. I had a lot of adventures on that motorcycle over the next ten years and racked up over 70,000 miles on the clock before moving on to various other bikes. Even then, I kept the Sportster around for sentimental reasons, figuring I’d do something with it sooner or later.
Well, it’s taken almost 24 years, but sooner or later has finally arrived and I’ll be using my old Sporty as the basis for my first chopper build. I’ll be detailing the entire process here on the Lowbrow Customs blog, so you can see just how easy (hopefully) it is to build a badass chopper using many Sportster custom parts available directly from Lowbrow without breaking the bank in the process.
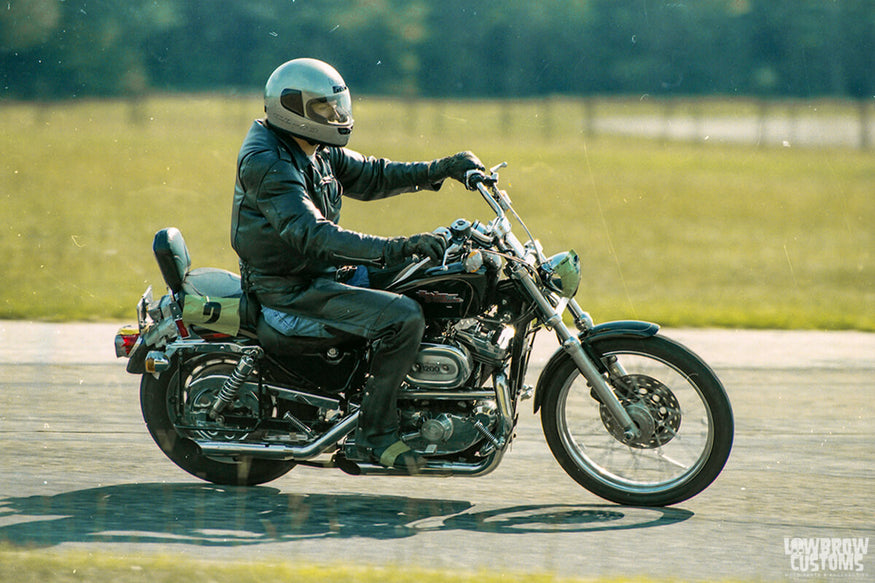
Ripping around the track at Keith Code's Superbike School in the late 1990’s.
Now, the first thing I discovered when I started researching how to build a custom bike was that it’s actually pretty easy to end up with a horrible Sportster. Either you completely fail at getting the lines right or you just dump way too much money into it that you will never be able to recoup.
Just do a Google search for “Sportster choppers” and you’ll see exactly what I am talking about. So, my plan is to keep everything clean and simple. I want to hide as much wiring, cables, fasteners, etc as possible and just have a basic stripped-down chopper.
To insure that I got this right the first time, I spent hours combing through Instagram until I finally spotted a bike with the right stance. Then I reached out to the owner and got some basic details on his build. I think this approach will help insure that I am headed in the right direction.
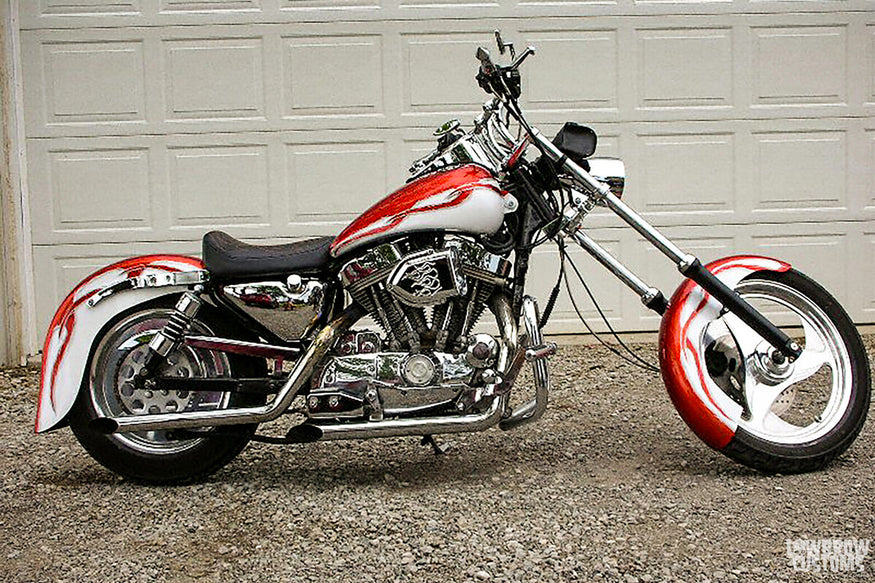
This Sporty chop got the “Big Twin” treatment, never a good idea…
Once I had an idea of the geometry I wanted, the next step was to figure out what to do with the frame. A lot of people opt for a weld on hardtail which does save time and a lot of hassle at the DMV since you retain your original neck with the VIN number stamped into it, but I just couldn’t bring myself to cut my original frame. Who knows, one day when Sportsters are highly sought after collector’s items, I may want to restore it back to stock…
So instead I picked up a complete frame from Paughco. Specifically it is a S120EA , which has 0 stretch and a 35 degree rake on the front end (basically the same dimensions as stock, but with 5 degrees more rake). The frame is already set up to accept my motor and frontend and has a lot of the mounts I need already welded on from the factory, which will be a big time saver.
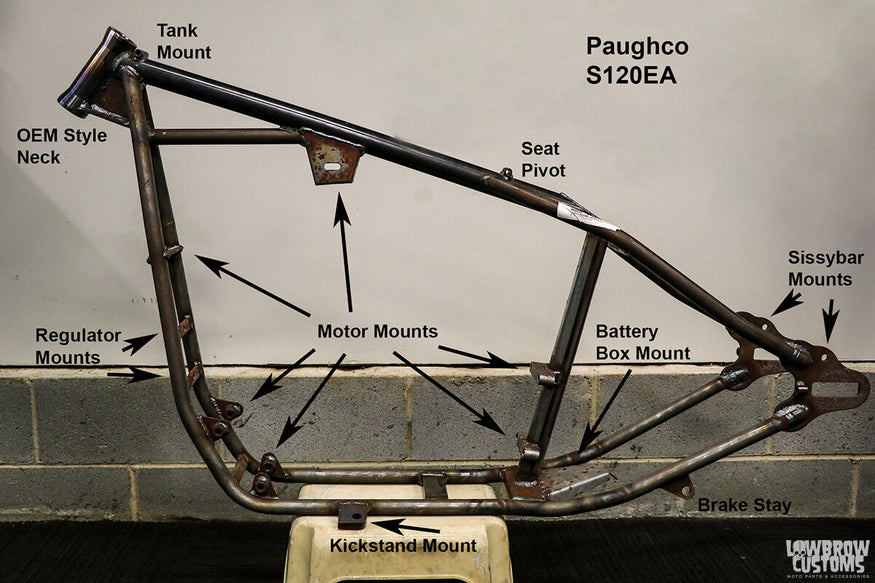
It doesn't have every mount you'll need, but it comes pretty close.
On the sheet metal end of things, I’m going with a Lowbrow Customs P-Nut Frisco Shallow Tunnel gas tank to help open up some space around the top of the motor. It holds 2 gallons of fuel, which means more gas stops, but I really like how it looks, so I am willing to trade cool looks for longer range.
I’m storing the slippery stuff in Lowbrow’s Dimpled Steel oil tank which is already plumbed, comes with all the necessary threaded bungs to mount it solidly to the frame and works with their weld on frame mounts for easy installation. Sure I could weld up my own tank, but why reinvent the wheel just to say you built your own oil tank. I’m skipping on the front fender completely and will just be running a 21” front rim with a skinny 275-21 Firestone Classic ribbed tire.
Out back I’ll be using a 6” Lowbrow Customs Stingray ribbed steel fender. It is just the right size to wrap around my Firestone Deluxe Champion 5.00-16 tire, and the ribbing adds extra strength for when I need to load it down with gear for long trips.
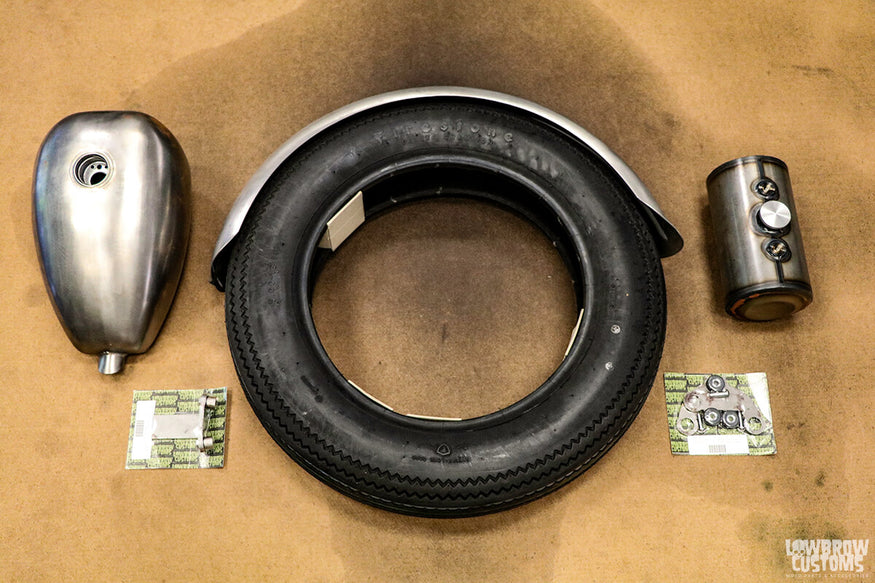
Starting with new well-made sheet metal will save on headaches down the road.
There is a lot of electrical that needs to be trimmed down and I’ll lose a lot just by ditching the OEM ignition and switching to a much simpler Dyna S system that is completely self contained. I’ll also be removing all the stock marker lights in favor of hand signals and a pair of Prism Supply’s ripple tail lights.
I’m mounting the tail lights directly to a Gasbox DIY sissybar kit, along with the license plate to keep the backend nice and narrow. You can consider using license plate brackets & mounts to ensure a secure and stylish placement for the license plate, enhancing the overall look of the bike. I’ll keep the stock headlight, but all the handlebar buttons will be going in the bin with the lights. I’m still thinking about how I’ll handle the starter button and hi/lo beam switch, but the plan is to integrate them into the motorcycle in a way that they are unseen.
The battery will be moved below the oil tank and I’ll be using an Anti-Gravity model to save space and weight.
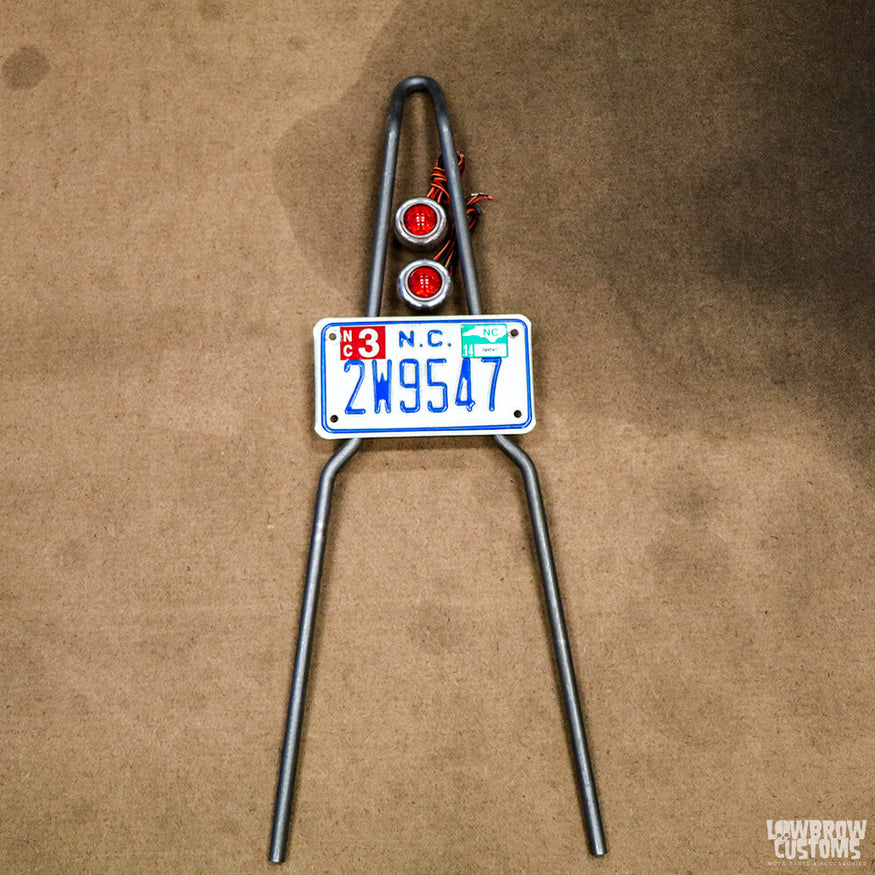
I'm still not 100% sure about mounting the license plate on the sissybar, it may find its way somewhere else.
To provide comfort on the road, I’m using a Haifley Brother’s Bates style Tuck-N-Roll seat and matching p-pad. The motorcycle seat comes in both 2” and 1” thicknesses and I opted for the 2” version knowing that after a couple hundred miles that I am going to be so thankful for that extra 1” of memory foam. It is a lot narrower than I am used to, but maybe I can use it as an excuse to drop some pounds. I’ve got long arms and legs, so I’ll keep the forward controls so I can stretch out a little and go with a set of mini apes to keep my arms at a comfortable level.
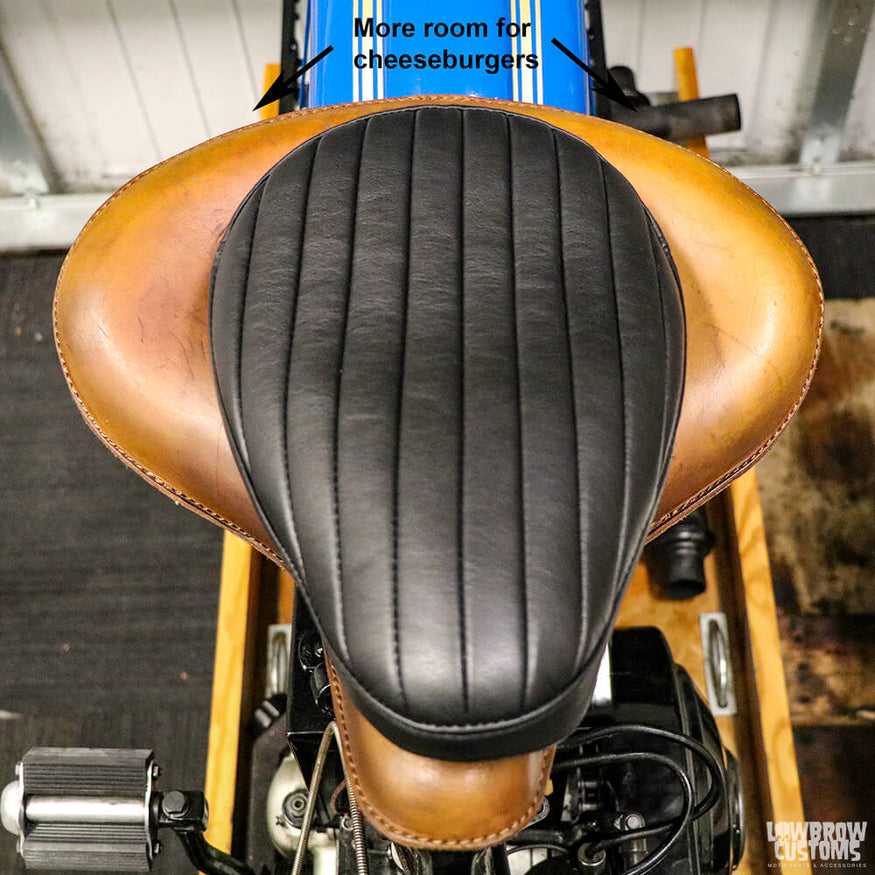
Comparing the Haifley Bros. seat to my VL seat makes me think that a lot of salads are in my future.
The right side of the motorcycle is in for a big transformation, featuring a custom-made exhaust, a switch to a chain-driven system, and some tweaks to the cam cover to shed excess weight. The old ham can air cleaner will be replaced with a round Louvered Air Cleaner set up, I’ll relocate choke cable and install a new breather system for the heads.
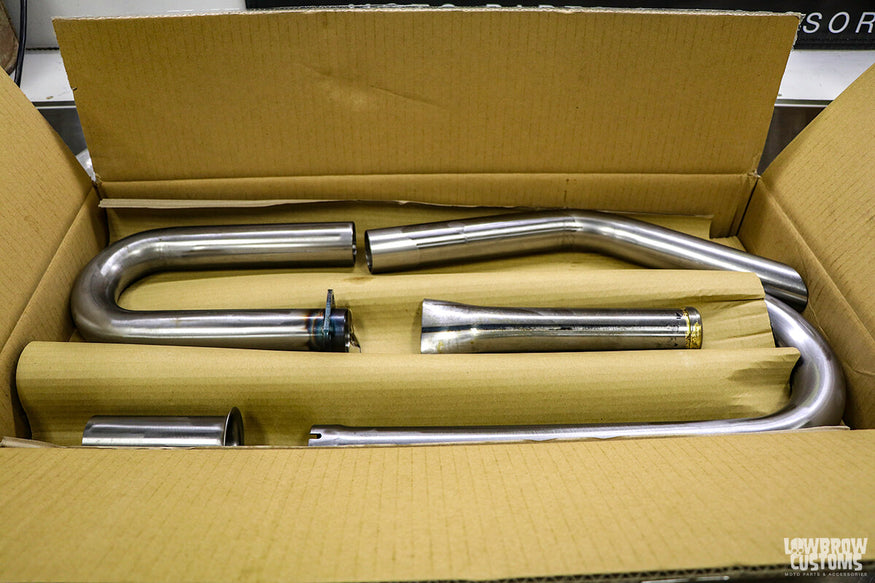
Turning this into a set of upswept fishtails is going to be a challenge.
So that is high level vision of this build. There is going to be plenty to do over the next few months to turn this stock Sportster into a chopper and I’ll be keeping you up to date with my progress as I go. The main goal for this series of articles is to provide an in depth look at what it actually takes to do a complete ground up chopper build, so I won’t be leaving out any of the gory details. To stay on top of when new articles are getting posted and more insights on the build, follow me on Instagram (@panhead_jim).
Words and Photos by: Panhead Jim
FAQs
Q: How does using a Paughco complete chopper frame affect the title and registration process compared to keeping the original Sportster frame?
A: Switching to a Paughco frame means the original Sportster's VIN is no longer the bike's legal identity. The Paughco frame ships with a Manufacturer's Statement of Origin (MSO), which you submit to your state DMV along with documentation for the engine (bill of sale or transfer from the original title) and other major components. The state issues a new title based on the Paughco frame's serial number. The original Sportster frame, without an engine, becomes a parts-only frame and is typically scrapped or sold separately. Research your specific state's process before starting — some states require a VIN inspection on new custom frames before issuing a title.
Q: What is a realistic total budget for a build like Panhead Jim's, and how does choosing a new frame affect cost versus a weld-on hardtail?
A: A complete build with a Paughco frame and quality parts like those described runs $10,000–$18,000 total, including the donor bike. The Paughco S120EA frame itself costs approximately $900–$1,200. Key Lowbrow parts (Frisco tank, Dimpled oil tank, Stingray fender, sissy bar kit, seat) add $800–$1,500. Engine work, if needed on a 30-year-old Sportster, adds $500–$2,000. A weld-on hardtail approach keeps the original frame (saving $800–$1,200) but requires either welding skills or paying a fabricator ($300–$600 labor), and retains DMV complexity around frame modification. The new frame approach actually simplifies DMV paperwork in many states despite the higher upfront parts cost.
Q: Why does Panhead Jim choose the Dyna S ignition to replace the stock Sportster ignition system?
A: The Dyna S is a self-contained electronic ignition that replaces the stock breaker-point ignition with a Hall-effect sensor, eliminating the need for breaker points, condenser, and the associated timing drift as these components wear. On a 1996 Sportster, the stock ignition module and associated wiring adds bulk and complexity that runs counter to the clean, simplified chopper aesthetic. The Dyna S is a single compact unit that is straightforward to install, needs no ongoing adjustment, and has been proven reliable in the custom scene for decades. It also allows Jim to simplify the wiring harness significantly by removing the stock ignition module circuit.
Q: How does the 2-gallon capacity of the P-Nut Frisco tank affect practical ridability for long-distance riding?
A: A 2-gallon tank on a Sportster 1200 (which gets approximately 45–50 mpg at highway cruising speeds) gives a range of roughly 90–100 miles between fill-ups. That is adequate for local and weekend riding but requires careful fuel planning on long trips — gas stations more than 80 miles apart become a concern. Jim acknowledges this tradeoff directly and accepts it for the visual result. Builders who want more range with a similar Frisco look can explore slightly larger tunnel tanks from other manufacturers, or accept the frequent fuel stop as part of the chopper riding experience.
Q: What should happen to the original 1996 Sportster frame once it is removed from the build?
A: The original frame retains the motorcycle's original VIN stamp on the steering neck, which means it has documentation value even without an engine. Options: sell it as a project frame to someone building a stock-configuration Sportster (these frames have a market among riders needing a replacement for a crashed or damaged original); donate it to a vocational school welding program; or scrap it for metal recycling. It should not be registered or titled separately without the engine, as most states issue motorcycle titles to frame-plus-engine combinations. Confirm with your DMV whether the separated original frame needs any paperwork before disposing of it.


Related Products


