


Before mouting your rear fender, make sure you radius the fender properly. There are many ways you can mount a rear motorcycle fender, this is just one of them. I wanted to make strong mounts as the .125" aluminum fender needs to support the weight of a passenger as that is where the rider sits on this purpose-built race bike.
I wanted to give ample clearance between the rear fender and tire, so I used a piece of 1" rubber garden hose, cut and taped to the tire so it would give equal clearance all the way around. Also, I moved the tire forward in the axle slots so that I would never have any issues when adjusting the wheel to take up chain slack as the chain wears.
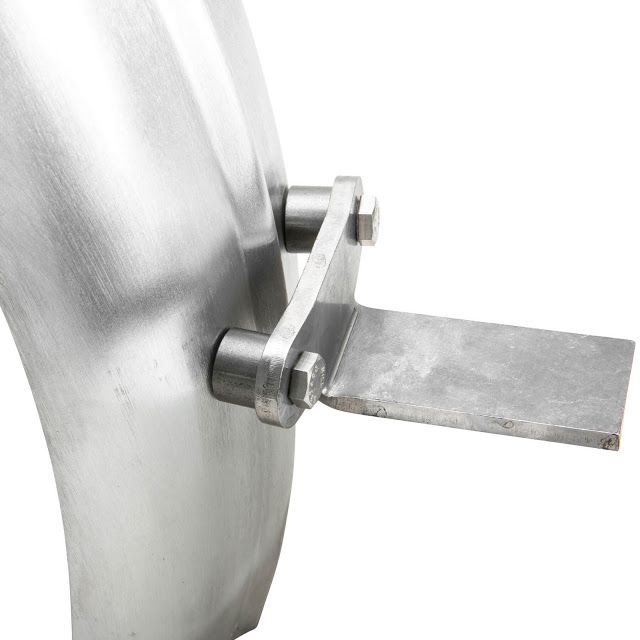
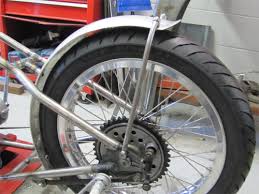
I set the fender onto the tire after radiusing it to fit just right (see the How To Radius a Motorcycle Fender DIY Tech Tip). I then cut a piece of 1" tubing, the same .120 wall DOM tubing used to make the hardtail frame, and coped one end of it to fit onto the existing cross member. I did this a simple, quick and dirty way by clamping the tubing in a vice and drilling through it with a 1" step bit. I then cut it to the proper length to be a tight fit against the fender.
I took a hair off the length at a time using a lathe, but you can use a grinder to get it in the ballpark then use a hand file to get the proper length. I then used a threaded steel bung with a .75" outside diameter that was tapped and threaded for a 3/8"-16 bolt and chamfered the edge of it.
The bung is a nice sliding fit into the tubing, and I then TIG welded it up, just fusing it with no filler rod. You can also MIG weld it up, of course. The benefit of having a lathe once again reared it's head as I chucked the piece back up and faced it, taking off just enough material to give a nice finished surface.
Once you tack your first fender support in place, you can carefully mark and drill your fender and bolt it in place. Then follow the same steps to fabricate your bottom mount, again carefully lining up the fender before drilling. Now all that is left to do is make some fender struts to finish the sturdy mounting of our fender. Check out our next step to fabricate some fender struts or a sissy bar that will hold up the rear of the custom fender.

FAQs
Q: Should I finish and paint the fender before or after fabricating and welding the mounts?
A: Always complete all welding and metalwork first, then paint. Welding near painted or powder-coated surfaces burns the finish, requires grinding back to bare metal, and creates inconsistent surface prep. The correct sequence is: fabricate and fit the fender mounts → test fit with the fender → final weld all mounting tabs and frame attachment points → grind and smooth → media blast or chemically strip the frame and fender → prime → paint or powder coat → final assembly. Attempting to weld after painting is both a quality shortcut and a fire risk from paint fumes near heat.
Q: How much clearance should I leave between the rear tire and the inside of the fender?
A: A minimum of 3/4 to 1 inch of clearance between the tire's maximum inflation diameter and the inside of the fender is a practical street standard. This allows for tire flex under load, the fender's flex under vibration, and small misalignments that develop as the build is completed. On a hardtail with no suspension travel, you can run slightly tighter than on a swingarm bike where the axle moves during suspension compression. Always check clearance with the bike at ride height under the rider's weight — the loaded position is what matters, not the unloaded bench height.
Q: What is the difference between mounting a fender directly to the frame versus using fender struts, and which is better?
A: Direct-mount tabs weld to the frame or hardtail and the fender bolts directly to them — clean, rigid, and minimal. Fender struts are angled braces running from near the axle area to the rear of the fender — they support the fender at its trailing edge where the leverage from road impacts is highest. For a bobbed fender that is short and light, direct tabs at the front of the fender are often sufficient. For a longer fender that extends well past the tire, struts at the rear prevent flex and eventual cracking at the mounting tabs. Most custom builds use both: tabs at the fender front, struts at the rear.
Q: Can fender mounting be done without welding using bolt-on solutions, and how reliable is that for street use?
A: Bolt-on fender mounting is practical for applications with existing mounting provisions — sissy bar-mounted fenders, fenders with integrated strut systems, and production-style bolt-on fenders for specific bike models. For custom applications where the fender position must be precisely placed on a one-off frame, bolt-on solutions typically require pre-drilled mounting holes in specific locations that may not match your design. Weld-on tabs give unlimited positioning flexibility and are structurally superior for absorbing road vibration over time. Well-designed bolt-on systems using grade-8 hardware with thread-locking compound are adequate for street use — they just require periodic fastener checks.


Related Products


