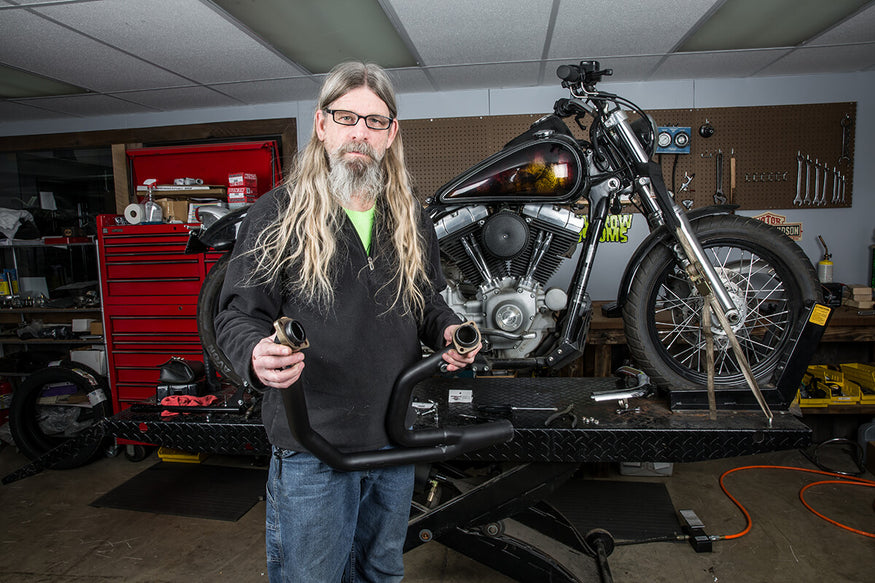
Lowbrow Customs has teamed up with Kerker to bring you an affordable, USA-made, high-performance, 2 into 1 SuperMeg exhaust system for your Harley-Davidson. Our goal was to create an exhaust system we would want to run on our bikes, stripped of all the superfluous covers and branding. Though install is super easy on these and should only take a couple hours to get back on the road we thought it would be a good idea to have Todd walk you through 9 quick steps on getting this motorcycle exhaust system installed onto your bike with ease, in this super detail walk through for installing Supermeg exhaust for Hayley Dyna.
Tools Needed For This Job:
- Flat head screw driver
- 5/16 socket with 1/4 nut driver
- External lock ring pliers
- 2 - 1/2 wrenches
- 3/8 drive ratchet
- 1/2 socket
- Long socket extension
- 5/16 allen socket
- 1/4 allen socket
- 3/16 allen socket
![Remove your stock or other exhaust from your bike. - Lowbrow Customs - 2 into 1 by Kerker How to Install on Dyna](https://cdn.shopify.com/s/files/1/0097/0506/2447/t/15/assets/description_image_Step_1_Lowborw_Customs_Kerker_2into1_install_dyna_7013_875x.jpg?v=1577998017)
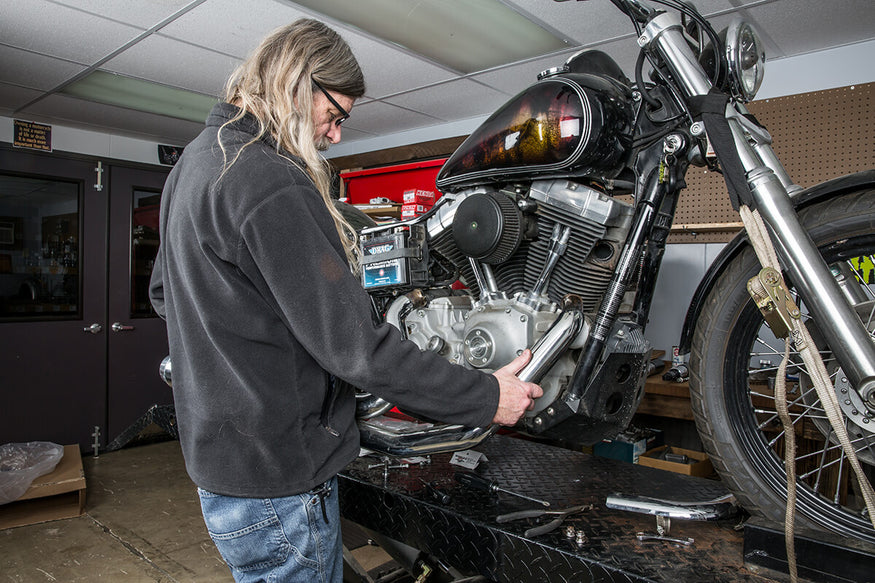
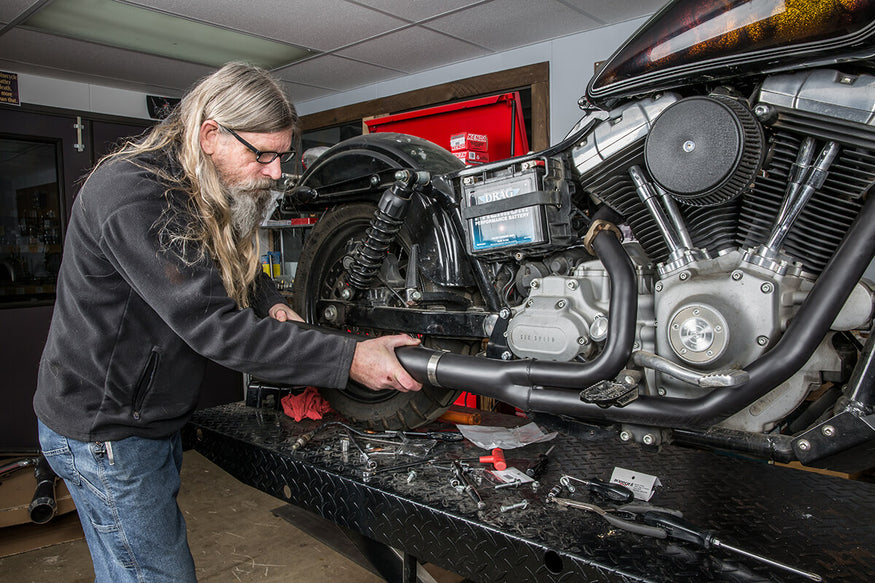
Step 1: Remove your stock or other exhaust system from your bike.
- Remove heat shields using 1/4 drive 5/16 socket on your nut driver which we find easier than a flat head, but if that's all you have, get at it.
- Unplug your 02 sensors if you have them.
- Remove nuts from exhaust flanges located on the cylinder heads with 1/2 inch socket (front & rear). We suggest to spray some penetrating oil or WD40 on each of the studs and let them sit for a few minutes before trying to remove them. The last thing you want to do is break off a stud in your cylinder head.
- Remove bolts attaching the mufflers to the support bracket.
- You now can carefully remove the entire exhaust system in one whole piece.
- Remove the O2 sensors if you have them.
- Remove the mounting bracket from the bike.
![Todd says "Hasta La Vista BABY!" to Kyle's old exhaust system on his 2008 Dyna. - Lowbrow Customs - 2 into 1 by Kerker How to Install on Dyna](https://cdn.shopify.com/s/files/1/0097/0506/2447/t/15/assets/description_image_Step_1_Lowborw_Customs_Kerker_2into1_install_dyna_7015_1_875x.jpg?v=1577998021)
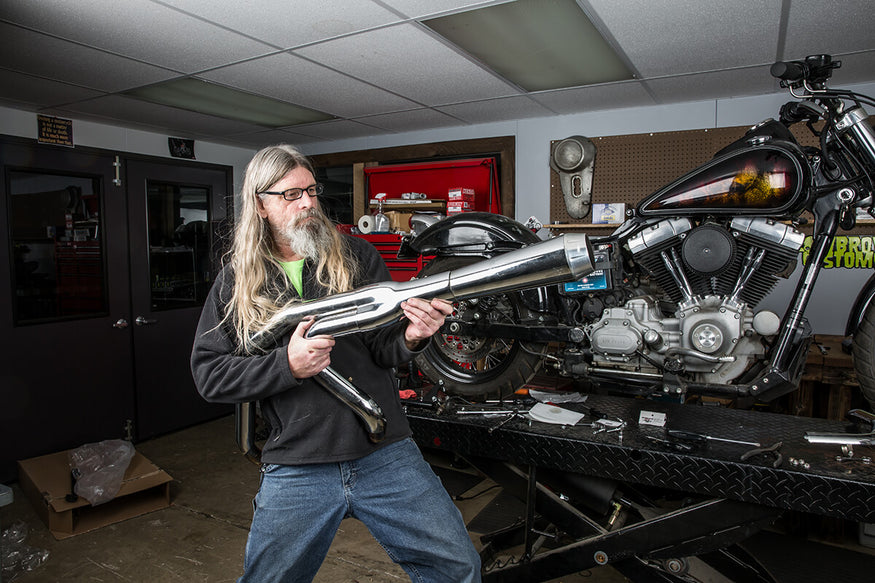
Step 2: Remove retaining rings & flanges from stock exhaust using external lock ring pliers. If the rings are extremely corroded or warped we suggest to use a new set. Re-install the rings and flanges on to the new exhaust. *Note: Make sure the flange goes on first before ring and with the lipped indention facing out.
![Before installing the pipes onto the cylinder heads, make sure the ring is sitting flush into the indent of the flange. - Lowbrow Customs - 2 into 1 by Kerker How to Install on Dyna](https://cdn.shopify.com/s/files/1/0097/0506/2447/t/15/assets/description_image_Step_2_Lowborw_Customs_Kerker_2into1_install_dyna_6994_875x.jpg?v=1577998024)
Step 3: Install the O2 sensors into the new pipes and or O2 sensor plugs depending on your set up. We supply some anti-seize that you can put on the threads of the O2 sensors but be sure not to get any on the actual sensor or you may run into some issues.
Note* These pipes have threaded bungs designed for 18MM sensors, if your bike has 12MM you will need to purchase some adapters. Or you can visit our exhaust pipes collection to explore more options.
![Use a 1/4 allen socket to tighten the O2 sensor plug. - Lowbrow Customs - 2 into 1 by Kerker How to Install on Dyna](https://cdn.shopify.com/s/files/1/0097/0506/2447/t/15/assets/description_image_Step_3_Lowborw_Customs_Kerker_2into1_install_dyna_7007_875x.jpg?v=1577998027)
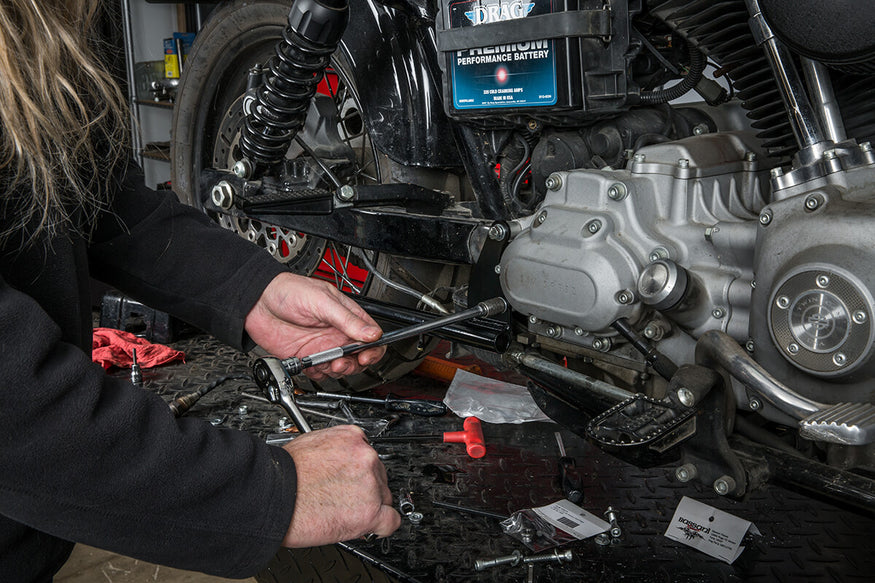
Step 4: Using the correct fasteners from the supplied hardware kit, install the mounting bracket to the left side of the transmission case after removing the stock bolts. Make sure to use the spacers between the trans case and bracket.
![Tighten down the mounting bracket, make sure to use the spacers provided in between the bracket and transmission case. - Lowbrow Customs - 2 into 1 by Kerker How to Install on Dyna](https://cdn.shopify.com/s/files/1/0097/0506/2447/t/15/assets/description_image_Step_4_Lowborw_Customs_Kerker_2into1_install_dyna_6995_875x.jpg?v=1577998031)
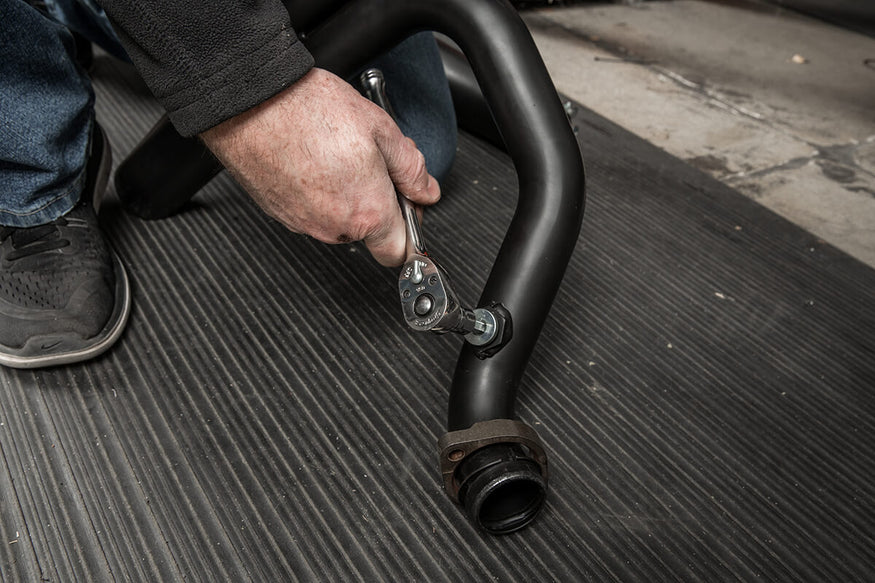
Step 5: Loosely install the 2 into 1 header pipe onto the cylinder heads.
![Pipes man! Pipes! - Lowbrow Customs - 2 into 1 by Kerker How to Install on Dyna](https://cdn.shopify.com/s/files/1/0097/0506/2447/t/15/assets/description_image_Step_5_Lowborw_Customs_Kerker_2into1_install_dyna_7016_875x.jpg?v=1577998034)
![Install the pipes onto the cylinder heads loosely. - Lowbrow Customs - 2 into 1 by Kerker How to Install on Dyna](https://cdn.shopify.com/s/files/1/0097/0506/2447/t/15/assets/description_image_Step_5_Lowborw_Customs_Kerker_2into1_install_dyna_6981_875x.jpg?v=1577998038)
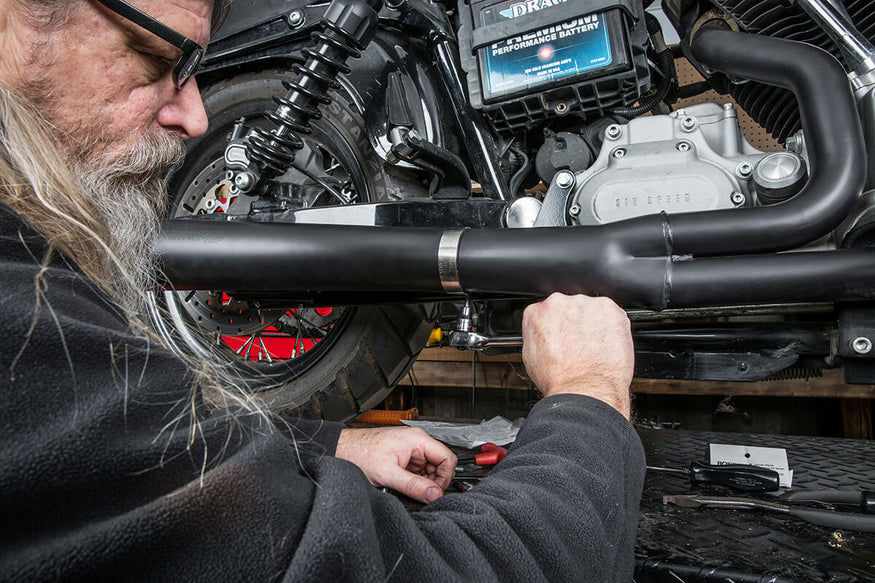
Step 6: Insert the two T-bolts into the channel of the muffler. Slide the clamp over the muffler and Install the muffler on to the 2 into 1 pipes lining up the to T-bolts to the exhaust mounting bracket.
![Slide the muffler onto the header pipe and line up the T-bolts to the exhaust mount bracket. - Lowbrow Customs - 2 into 1 by Kerker How to Install on Dyna](https://cdn.shopify.com/s/files/1/0097/0506/2447/t/15/assets/description_image_Step_6_Lowborw_Customs_Kerker_2into1_install_dyna_6973_875x.jpg?v=1577998041)
Step 7: Tighten down the muffler to the mounting bracket using 1/2 wrench. Tighten down using down the muffler clamp using a 3/16 allen socket.
![Tighten the exhaust clamp firmly with a 3/16 allen socket. - Lowbrow Customs - 2 into 1 by Kerker How to Install on Dyna](https://cdn.shopify.com/s/files/1/0097/0506/2447/t/15/assets/description_image_Step_7_Lowborw_Customs_Kerker_2into1_install_dyna_6971_875x.jpg?v=1577998045)
Step 8: Once the muffler is secure onto the 2 into 1 pipe and the exhaust mounting bracket, tighten down the 4 nuts on the cylinder head. Tighten these evenly and do not over do them again the last thing you want is to break a stud off on your cylinder head.
![Make sure to go over each nut and tighten one last time if needed. - Lowbrow Customs - 2 into 1 by Kerker How to Install on Dyna](https://cdn.shopify.com/s/files/1/0097/0506/2447/t/15/assets/description_image_Step_8_Lowborw_Customs_Kerker_2into1_install_dyna_6952_875x.jpg?v=1577998048)
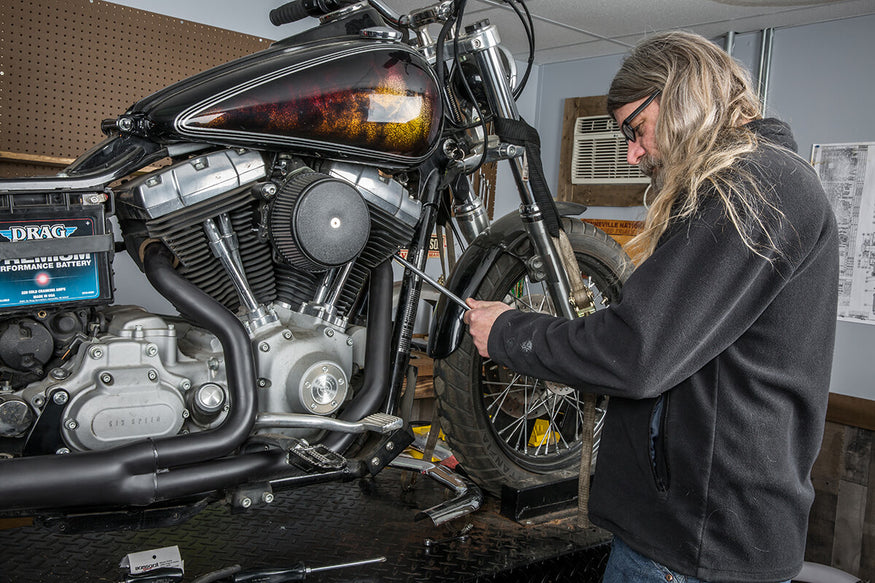
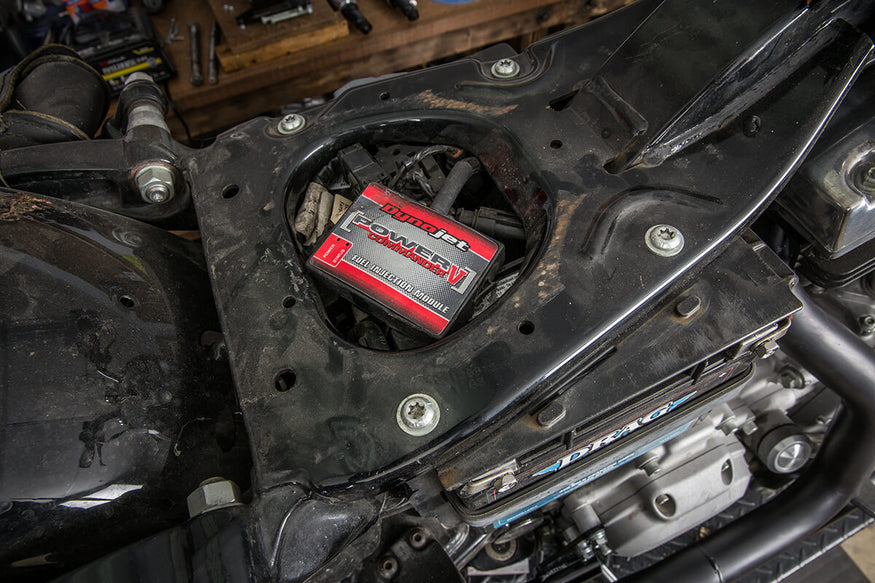
Step 9: Re-plug in your O2 sensors if you have them. Tune your bike accordingly and go for a ride!
Note* If you are in need of a tuner check out - Dyno Jet Power Commander V Tuner for 2006 - 2011 Harley Davidson Dyna.
![Dyno Jet Power Commander V Tuner gets the job done.](https://cdn.shopify.com/s/files/1/0097/0506/2447/t/15/assets/description_image_Tools_Lowborw_Customs_Kerker_2into1_install_dyna_6951_875x.jpg?v=1577998052)
THE END RESULT
Related Products
![Weld-On Hardtail Rear Frame Section 1982-2003 Harley Sportster](http://www.lowbrowcustoms.com/cdn/shop/products/010330-Lowbrow-Custosm-Weld-On-Hardtail-Rear-Frame-Section-1982-2003-Harley-Sportster-V2-1_{width}x.jpg?v=1622085958)
![Weld-On Hardtail Rear Frame Section 1982-2003 Harley Sportster](http://www.lowbrowcustoms.com/cdn/shop/products/010330-Lowbrow-Custosm-Weld-On-Hardtail-Rear-Frame-Section-1982-2003-Harley-Sportster-V2-4_{width}x.jpg?v=1622085955)
![Horseshoe Oil Tank for Lowbrow Customs Weld-On Sportster Hardtails and Gasbox Full Frames](http://www.lowbrowcustoms.com/cdn/shop/products/010404-Lowbrow-Customs-Horse-Shoe-Oil-Tank-for-Lowbrow-Customs-1982-03-Harley-Sportster-Hardtails-2-rev_6fdfdeb9-43e9-49cc-a496-bfdd24f33cd4_{width}x.jpg?v=1681408731)
![Horseshoe Oil Tank for Lowbrow Customs Weld-On Sportster Hardtails and Gasbox Full Frames](http://www.lowbrowcustoms.com/cdn/shop/products/010404-Lowbrow-Customs-Horse-Shoe-Oil-Tank-for-Lowbrow-Customs-1982-03-Harley-Sportster-Hardtails-1-rev_c973526e-f007-4bdc-b43b-92a2ef033f00_{width}x.jpg?v=1681408731)