This guide will show you how to install a hardtail frame on your Harley Davidson Sportster. Whether it’s a 1954 - 1972 vintage, classic 1973 - 1978 or 1982 - 2003 high-end, you can easily do it yourself with struggle.
Installing a David Bird Hardtail Frame for 1954 - 2003 Sportster
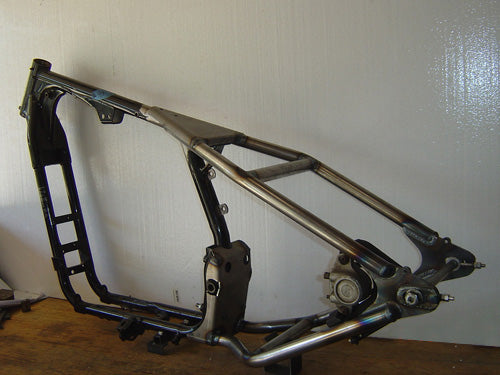
The following instructions show the installation of a David Bird hardtail on a 1954 - 2003 Harley-Davidson Sportster motorcycle frame. David's innovative design is a bolt-on hardtail that does not bolt to the stock shock mounts as others do, giving a much better looking final product.
David Bird hardtails and all provided hardware are made in the U.S.A. This hardtail frame in addition to Lowbrow Customs' curated selection of the best Sportster chopper parts will get you down the road in style in no time flat.
Hardtail Frame Build for Sportster 1954 - 1972

STEP 1: Start by stripping down the rear of the frame including swing arm.
STEP 2: The 1954 - 1972 Sportster frames have a 'forged style' seat post bracket area, including the shock mounts. This needs to be cut away as shown below using an air or electric grinder with cut off wheels, sawzall, or whatever you find most convenient. Flap discs or a die grinder with sandpaper discs make quick work of smoothing and blending your frame after cutting.
STEP 3: Grind the top of the seat post rails to approximately 165 degrees or so, so that the plate on the top of the hardtail sits flush when held in position.
STEP 4: Position the hardtail frame motorcycle on the frame and, using a rubber mallet, seat the top of the hardtail tight against the down tube and clamp as shown below.
STEP 5: Drill thru the existing two top holes into the frame rail below using a 3/8" drill bit.
STEP 6: Remove the hardtail and drill the two 3/8" holes out to 5/8" (IN THE TOP WALL OF FRAME TUBING ONLY)
STEP 7: Insert the supplied sleeves into the holes making sure they go all the way down to the bottom of the tube as shown and grind the top to be flush with the down tube.
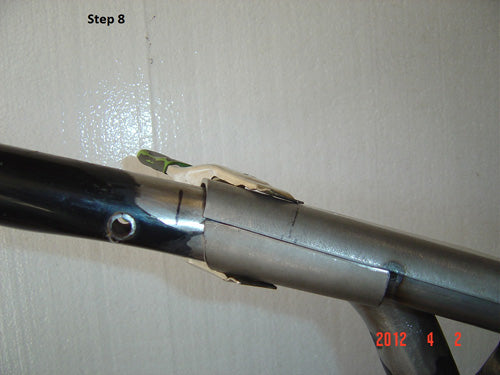
STEP 8: Reinstall the hardtail and hold in place with the two supplied 2-1/4" long bolts, washers, and nylock nuts (do not tighten yet). Install the supplied lock tabs and bolts into the bottom, 1-1/4" long in the front and 1-1/2" long in the rear on both sides as shown below.
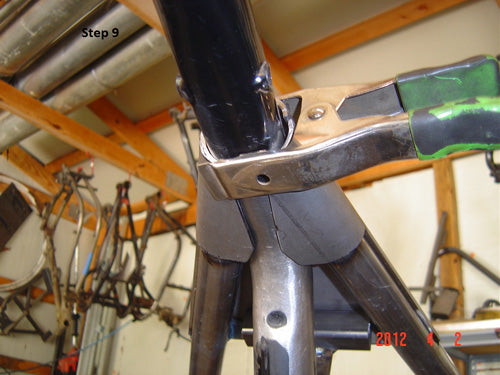
STEP 9: All bolts can now be torqued to 25 ft. lbs., then, using pliers bend up the lock tabs on all four bottom bolts as shown.
STEP 10: Wipe that grin off your face, finish up the rest of your bike and go RIDE!
Hardtail Frame into 1979 - 1981 Sportster

NOTE: The stock caliper bracket and caliper cannot be used. You need to use a caliper bracket and caliper from a 1987 - 1999 Sportster.
STEP 1: Start by stripping down the rear of the frame including swingarm. Using a reciprocating saw or cut off wheel, cut where shown in red.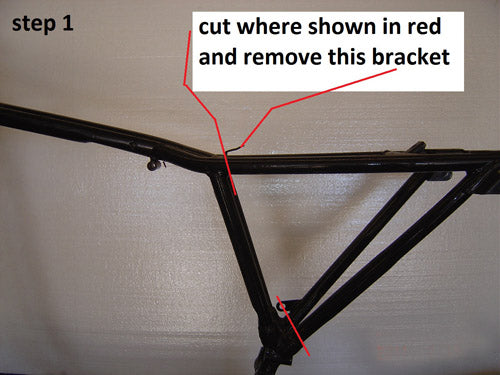
STEP 2: Grind and smooth as shown around seat area so that the upper hardtail tube ends clear.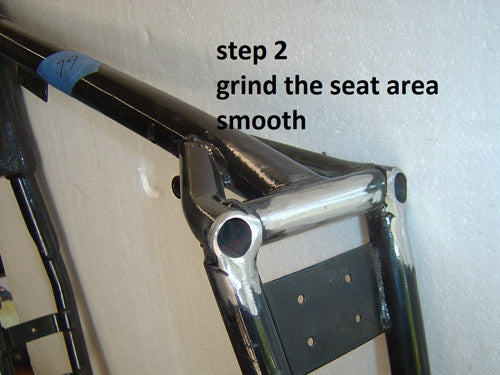
STEP 3:. The lower lugs can be capped off or cut where shown in red.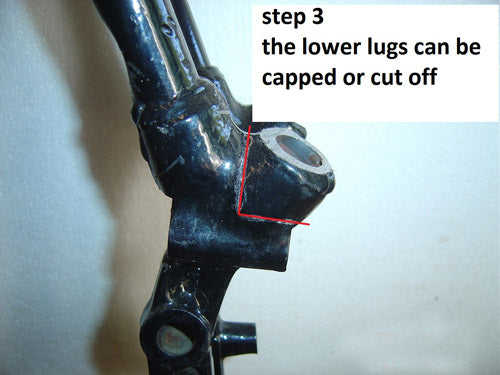
STEP 4:. If you have decided to cut the lower lugs. Grind and smooth as shown.
STEP 5: Position the hardtail on the frame and using C-clamp to keep downward pressure and a rubber mallet seat the top of the hardtail tight Against the back bone and as far forward as possible.This is a very tight fit.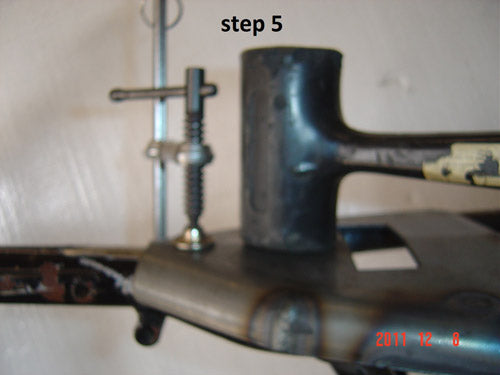
STEP 6: Temporarily install the bottom bolts.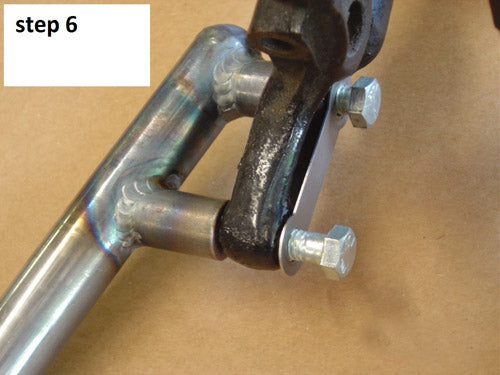
STEP 7: Match drill thru the two top holes using a 3/8" drill as shown.
STEP 8: Remove the hardtail and drill the two 3/8" holes out to 5/8" (IN THE TOP WALL ONLY) using a 5/8" drill or a 5/8" step bit drill so sleeves fit inside.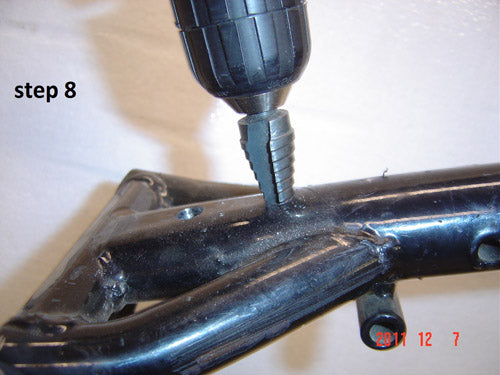
STEP 9: Insert the supplied sleeves into the holes making sure they go all the way down to the bottom of the tube, and grind the front tube to be flush with the back bone and grind the back tube so that it is above the back bone 1/8".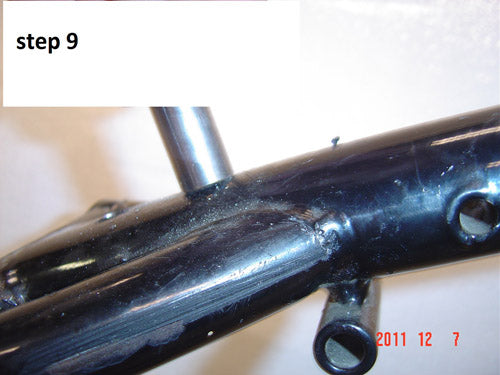
STEP 10: Reinstall the hardtail and hold in place with the two supplied 2 ¼" long bolts, washers, and lock nuts ( Do not tighten yet). Install the supplied lock tabs and bolts into the bottom. 1 ¼ " long in the front and 1 ½ " long in the rear on both sides. All bolts can now be torqued to 25ft. lbs. Using pliers, bend up the lock tabs on all four bottom bolts as shown.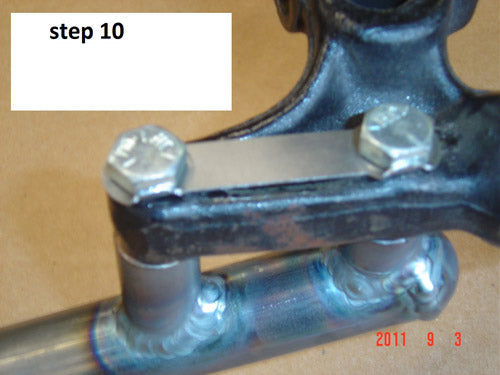
STEP 11: When reinstalling the rear wheel the stock caliper and caliper bracket cannot be used. A Stock H-D caliper and caliper bracket from 1987 to 1999 will be needed.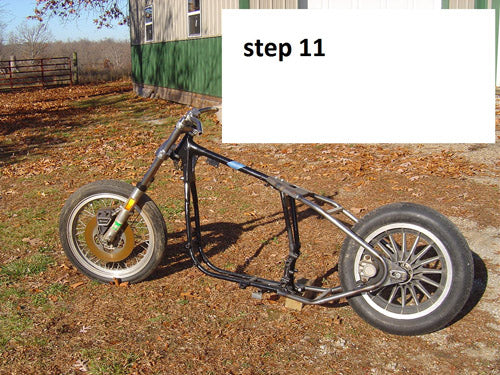
STEP 12: Wipe that grin off your face, finish up the rest of your bike and go RIDE!
Installing a 1982 - 2003 Sportster David Bird Hardtail

The following instructions demonstrate how to install a hardtail on a 1982–2003 Harley-Davidson Sportster motorcycle frame, a crucial step if you’re looking to build your own Harley Davidson from the ground up. David's innovative design is easy to install and looks great. David Bird hardtails and all provided hardware is made in the U.S.A. As always, all work should be completed by an experienced fabricator, and all welding should be done by a certified welder!
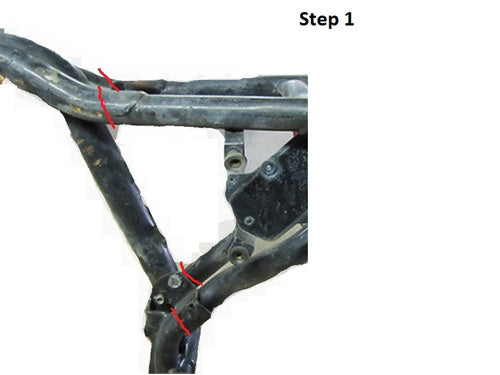
STEP 1: Start by striping down the rear of the frame including swing arm and the two bottom transmission bolts. Using a reciprocating saw or cut off wheel rough cut where shown in red.
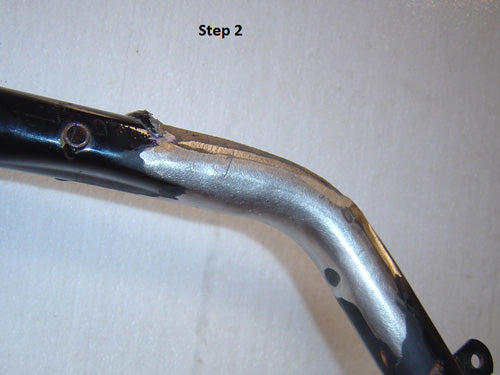
STEP 2: Grind and smooth around seat area to remove all of the old rear frame section.
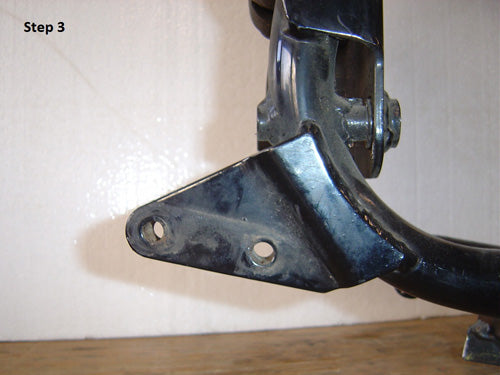
STEP 3: Remove the stock exhaust hanger.
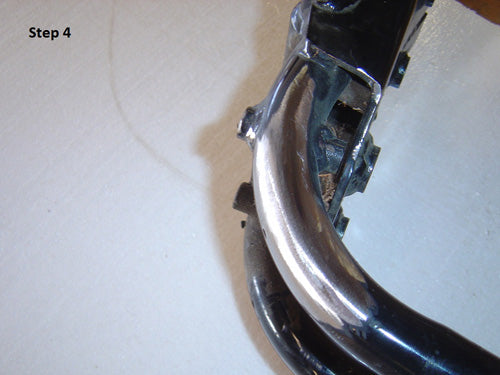
STEP 4: Grind and smooth as show here and where all welding is to be done.
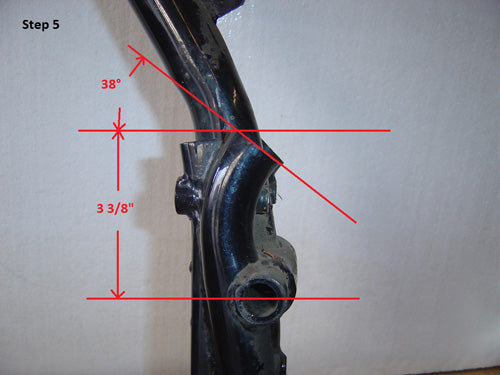
STEP 5:. With the bottom frame rails level measure up 3-3/8" from the center of the swing arm pivot to a level line. From where this line intersects the frame tubing mark a line and cut or grind at 38°
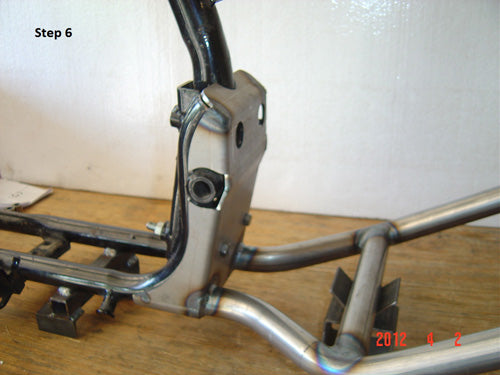
STEP 6: Position the hardtail and reinstall the bottom transmission bolts. This bracket is to be welded all around where it contacts the frame tubing. (DO NOT WELD UNTIL STEP 9)
STEP 7: Match drill thru the front top hole using a 3/8" drill and install the supplied bolt and nut. This is for locating only, and this hole and the rear hole must be plug welded after all other welding is complete.
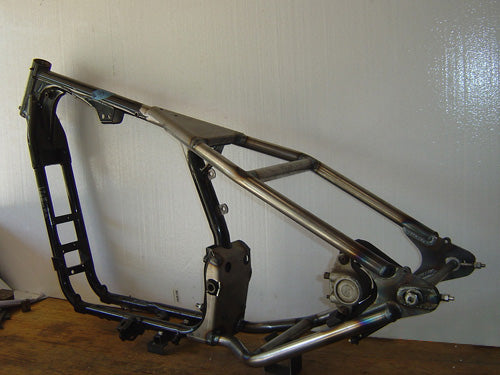
STEP 8: This hardtail is supplied with plates to close off and strengthen the top area where the hardtail connects to the frame, only install these plates after all welding underneath is complete.
STEP 9: All other welding can now be completed.
STEP 10: Wipe that grin off your face, finish up the rest of your bike and go RIDE!
Related Products


